Table of Contents
Advertisement
Advertisement
Table of Contents

Related Manuals for Crowcon Clip SGD


Summary of Contents for Crowcon Clip SGD
- Page 1 Clip SGD Portable single Gas Detector User manual M07716 Issue 1 October 2017...
- Page 2 • Do not attempt to replace the battery or sensor as the Clip SGD is designed to be maintenance free and disposable. Changing the battery or sensor may impair intrinsic safety, invalidate safety certification and will void the warranty.
- Page 3 (Normal Alarm Use: No more than 4 minutes alarm time per day) 2. Operating the detector user button frequently. 3. Connecting the detector with the Clip SGD IR Link frequently, except for regular bump testing. • View a serial number on the label at the back side of the device. (ex, 20170101) 1.
-
Page 5: Table Of Contents
6. Specification ............. 15 7. Self Test and Bump Test ........16 Self test........... 16 Bump Test ..........16 8. Certificates ............18 Appendix 1 Clip SGD Docking Station ....19 Appendix 2 IR Link User Guide ....... 26 Limited Warranty ............ 29... -
Page 6: Diagram And Lcd
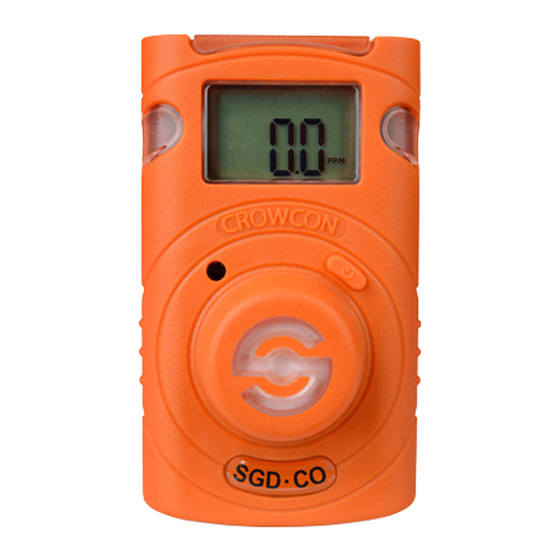
Clip SGD 1. Diagram and LCD IR Port LCD display Alarm LED Buzzer Button Gas sensor Gas Type ALARM LCD display symbols Alarm condition Months remaining ALARM Low alarm Days remaining High alarm Time remaining (hours) Test success Maximum peak value... -
Page 7: Activation
In the event that activation of the device fails, the icon will appear on the display and Gas Measurement mode will not be entered. In this case, perform calibration or contact authorized reseller or Crowcon Detection Instruments customer support at +44 (0) 1235 557711 for repair/return information. -
Page 8: Mode
Clip SGD 3. Mode 3.1 Gas Measurement Mode Following activation the device will operate in Gas Measurement Mode. The remaining sensor life (default setting) or gas concentration (configurable option) will be displayed on the screen. Oxygen concentration is displayed in percent by volume (%Vol) and toxic concentration is displayed in parts per million (PPM). - Page 9 Alarm set point concentration Vibration Remaining life Below 30 days icon Lifetime Past 24 months expiration Service life is over (Replace with a new Clip SGD) Test failure Failure of Display icon with sensor test / beeping calibration Battery test...
- Page 10 Clip SGD Default Alarm Set Point Gas Type Part CL-C-25 CL-C-30 CL-C-35 CL-H-2 CL-H-5 CL-H-10 CL-O-19 CL-O-19.5 Number Lower 25ppm 30ppm 35ppm 2ppm 5ppm 10ppm 19.5% Alarm Level Upper 50ppm 100ppm 50ppm 5ppm 10ppm 15ppm 23.5% 23.5% Alarm Level...
-
Page 11: Event Log
Clip SGD 4. Event Log The last 30 events are stored on a device. Once 30 events are stored, the log events are removed automatically in the order starting at Event 1. The stored log events can be downloaded using the IR Link or the Docking Station (refer to Appendix 1 and 2). Each alarm event records the following: •... -
Page 12: Calibration
Clip SGD 5. Calibration ⚠ CAUTION For O units only. Initial calibration is performed on all devices prior to shipment. Once received, calibration should be performed monthly (or quarterly) depending on frequency of use. Fresh Air Calibration Standard Gas Calibration 5.1 Fresh Air Calibration... -
Page 13: Standard Gas Calibration
The device will then return to Gas Measurement mode. If calibration fails, icon will appear on the display. If this continues, please contact the authorised reseller or the Crowcon customer support team. -
Page 14: Return To Gas Measurement Mode
Clip SGD 5.3 Return to Gas Measurement Mode To return to Gas Measurement Mode from Calibration Mode, press the button to cycle through the Fresh Air Calibration and Standard Calibration screens until ‘ESC’ is shown on the display. Whilst ‘ESC’ is shown on the display press and hold the button for 3 seconds, the device will return to the Gas Measurement screen. -
Page 15: Specification
Clip SGD 6. Specification Clip SGD Model Measure Gas 0-30%Vol 0-300ppm 0-100ppm Sensor range Electrochemical Sensor Type Diffusion type Measurement LCD display Display 90dB at 10cm Audible Red Flashing LEDs (Light-Emitting Diode) Warning Lamp Vibration Alarm Vibration Manufacture: Vitzrocell / P/N: SB-AA02(P) / System: Lithium Primary... -
Page 16: Self Test And Bump Test
7. Self Test and Bump Test 7.1 Self Test The Clip SGD provides a Self Test function. The default interval of the Self Test reminder is 20hrs. Use the IR Link or Docking Station to configure the interval between 1hr and 20hrs, or set to “off”. - Page 17 Clip SGD ALARM ALARM ALARM • Press and hold the button for 3 seconds, and the “tst” message will be displayed for 45 seconds (to cancel, press the button for one second). • Apply the gas using the calibration cap and gas tube within the 45 second period. If a Bump Test is not undertaken within this period the “bts”...
-
Page 18: Certificates
Clip SGD 8. Certificates The SGD Clip meets the following certifications and standards IECEx: Ex ia IIC T4 Ga 1: Explosion protected ➀ ➁ ➂ ➃ ➄ 2: Protection Concept 3: Gas Group 4: Temperature Classification 5: Equipment protection level... -
Page 19: Appendix 1 Clip Sgd Docking Station
Clip SGD Appendix 1 Clip SGD Docking Station User Manual Clip SGD Docking Station Configuration Users can change settings, upgrade firmware, and download log events through the Docking Station IR link (see Appendix 2). - Page 20 • Ensure the PC has the Clip SGD Dock PC Application installed and connect the Clip SGD IR Link to the PC. • Place the topside of the Clip SGD IR Link face down in detector bay labelled “Unit 1”. N.B.: The IR link only interacts with detector bay labelled “Unit 1”.
- Page 21 • Bump test: enables/disables Docking Station ‘Bump Test’ button. • Update SGD Configuration: enables/disables Clip SGD configuration updates during bump test or calibration. • Update SGD Firmware: enables/disables Clip SGD firmware update during bump test or calibration. Docking Firmware Upgrade •...
- Page 22 • Self Test Interval (0-24 hours): Set the interval of the self test reminder. • Low Alarm and High Alarm: Set the required low and high level gas alarms. • Display: Choose for Clip SGD to display either gas reading (“Sensor”) or instrument life remaining (“Life”) SGD Options Info Read/Write •...
- Page 23 • Choose gas concentration required for calibration, default settings are as follows: S: 25ppm, CO: 100ppm, O : 18%Vol SGD Firmware Upgrade • Allows the Clip SGD firmware upgrade file to be specified – click ‘Browse’ to navigate to file. • Click ‘Write’ to download file. IR / USB Disk Chose either IR Link or USB Stick to transfer configuration to and from Docking station •...
- Page 24 Clip SGD Figure 5 Logs • Refresh: View available log files from docking station • Select All: Select all log files available in the docking station • Local Store: Save selected log files to PC – the log file name will be saved based on the...
- Page 25 Clip SGD Figure 6 Docking Station Log Figure 7 Clip SGD Event Log...
-
Page 26: Appendix 2 Ir Link User Guide
Use IR Link to change settings, upgrade firmware, download log events, and perform calibration Getting started To interact with Clip SGD, the software must be installed on your computer. Plug in the IR Link cable. Then, place the topside of the SGD face down to the IR Link LCD. - Page 27 • FIRMWARE UPGRADE: Upgrade firmware. 3 IR Link Interface • In order to interact with the Clip SGD using the IR Link, click “OPEN”. When the Clip SGD settings have been successfully retrieved users will see “Read Complete”. 4 Clip SGD Interface •...
- Page 28 Clip SGD • Self Test (Hour): Set an interval of the Self Test alert. • Sensor Type: Display the sensor type of the device. • Low Alarm: Adjust the low alarm set point in compliance with international or local standards.
-
Page 29: Limited Warranty
Clip SGD products. This warranty is valid only if the personal monitor is activated by the ‘activate by’ date on the external packaging. This warranty extends only to the sale of new and unused products to the original buyer. - Page 30 This guarantee shall not affect a customer’s statutory rights. Crowcon reserves the right to apply a handling and carriage charge whereby units returned as faulty, are found to require only normal calibration or servicing, which the customer then declines to proceed with.
- Page 32 Contact/ www.crowcon.com / customersupport@crowcon.com / 44(0)1235-557711...
Need help?
Do you have a question about the Clip SGD and is the answer not in the manual?
Questions and answers