Guthrie Douglas TESS 140 Installation Manual
Hide thumbs
Also See for TESS 140:
- Installation manual (20 pages) ,
- Instruction manual (12 pages) ,
- Installation manual (19 pages)

Related Manuals for Guthrie Douglas TESS 140


Summary of Contents for Guthrie Douglas TESS 140
- Page 1 TESS™ 140/440 Installation Manual T440 T140 Please read these instructions in full prior to starting your installation. Tess 140/440 Manual. Issue 1 (DR1004. March 2018)
- Page 2 Important information about TESS Systems Guthrie Douglas TESS Systems are technical products that require installation, servicing and maintenance by professionals with the appropriate skills. If in doubt, please contact us for further advice and training. All products are designed, tested, and manufactured in line with relevant EU regulations.
-
Page 3: Table Of Contents
9. Barrel Installation ..............14 10. Hem Bar Fitting ..............15 11. Tension Cable Fitting ............16 12. System Pretensioning ............18 13. Fabric Tracking And Final Tension ........19 14. Estimated Fabric Sag Guidelines ......... 20 Tess 140/440 Manual. Issue 1 (DR1004. March 2018) -
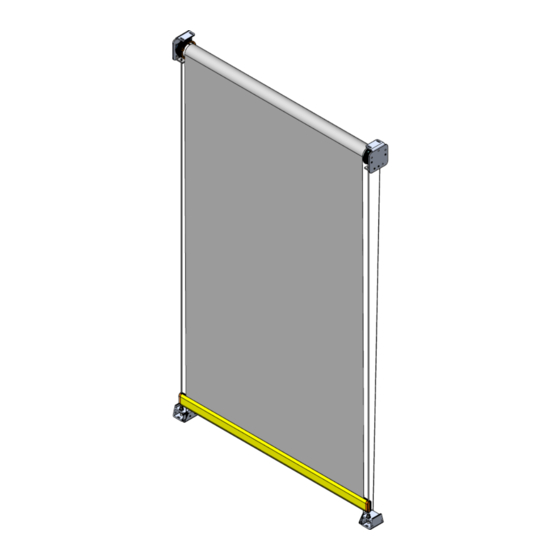
Page 4: Tess 140/440 System
T140 - Back/side Fix and Top Fix available T440 - Back/side Fix and Bottom Fix available 7) Guide Cable Kit and Cable Tensioner Fitting 8) Tension Cable Fitting Kit Tensioning Tool Limit Adjuster Installation Manual Tess 140/440 Manual. Issue 1 (DR1004. March 2018) -
Page 5: Fitting Kit
FIXING WHERE USED MOUNTING M6 x 10 BOLT PLATE M6 x 8 PAN MOUNTING HEAD BRACKET M6 SHAKE MOUNTING PROOF PLATE MOUNTING M6 WASHER PLATE M6 PLASTIC MOUNTING TOP HAT BRACKET WASHER Tess 140/440 Manual. Issue 1 (DR1004. March 2018) -
Page 6: Site Installation
Electric power supply Each system should be on a switched single spur, so as to isolate each system. Check with the site manager to ensure that electrics are set up correctly. Tess 140/440 Manual. Issue 1 (DR1004. March 2018) -
Page 7: Headbox/Guide Cable Installation
Fix head box in position using suitable fixings for the material being fixed to. Fixings should be M8 (fixings to be supplied by installer). Fit the guide cable through the Cable Retaining Bracket. Tess 140/440 Manual. Issue 1 (DR1004. March 2018) -
Page 8: Return Pulleys
For Side or Reveal Fix installations. Remove fixing screw. Remove face plate. After installation of return pulley body, refit face plate and fixing screw. Ensure fixing screw is refitted before continuing installation. Tess 140/440 Manual. Issue 1 (DR1004. March 2018) -
Page 9: Return Pulleys Additional Options
6. Return Pulley Additional Options Bottom Fix - T440 Top Fix - T140 Low Profile - T440 Low Profile - T140 6.1. Refer to installation drawing for return pulley fixing details. Tess 140/440 Manual. Issue 1 (DR1004. March 2018) -
Page 10: Squareness Checking
7. Squareness Checking 7.1. Inspect system diagonal measurements. If diagonal measurements are not found to be equal, adjust the system squareness. Tess 140/440 Manual. Issue 1 (DR1004. March 2018) -
Page 11: Gd Fitting
Pull guide cable taut against the top face of the return pulley and mark for cutting. Cut cable at marked spot (TEST CUT ADVISED, DO NOT CUT SHORT). 8.2. Slide fitting nut on to guide cable. Place split collets around guide cable. Tess 140/440 Manual. Issue 1 (DR1004. March 2018) - Page 12 Ensure that the guide cable does not cover the thro’ hole in the threaded stud. Lightly lubricate threads then screw threaded stud into fitting nut; tighten securely using a screwdriver to support the fitting stud. Apply min 50Nm. NOTE. Apply lubrication to THREADS only. Tess 140/440 Manual. Issue 1 (DR1004. March 2018)
- Page 13 GD fitting and prevent it from rotating). Use an appropriate tensiometer to measure tension in the guide cable. Tension guide cable up to a maximum of 100Kgs. Tess 140/440 Manual. Issue 1 (DR1004. March 2018)
-
Page 14: Barrel Installation
Fit the barrel assembly between the mounting brackets. Fix into place using fittings identified in Section 2 of this manual. Mounting plate must be fitted to the mounting bracket so that it is perpendicular to the fabric direction. Tess 140/440 Manual. Issue 1 (DR1004. March 2018) -
Page 15: Hem Bar Fitting
Centre guide cable to hem bar. Slide end cap onto hem bar pulley housing (ensure fabric spacer is fitted correctly) (1). Push assembly into hem bar. Retighten fixing screws. Tess 140/440 Manual. Issue 1 (DR1004. March 2018) -
Page 16: Tension Cable Fitting
11. Tension Cable Fitting 11.1. Feed the tension cable through the hem bar. Do not cut the cable at this point. 11.2. Pull the tension cable through both return pulleys. Tess 140/440 Manual. Issue 1 (DR1004. March 2018) - Page 17 Push the cable through and ensure it will not pull out. Cut excess cable from the rear of the spool, if required. Repeat process for spring cassette end. Apply very light tension to the system, and trim any excess tension cable. Tess 140/440 Manual. Issue 1 (DR1004. March 2018)
-
Page 18: System Pretensioning
Operate the system to ensure correct system function. Check: The tension cable is seated correctly on the return pulleys. The cable is wrapping onto the cable drums neatly. The fabric is tracking correctly. Tess 140/440 Manual. Issue 1 (DR1004. March 2018) -
Page 19: Fabric Tracking And Final Tension
The system is over tensioned if the spring cassette is locked. Simply check this by pulling onto the tension cable to check for free movement of the spring cassette cable spool. Tess 140/440 Manual. Issue 1 (DR1004. March 2018) -
Page 20: Estimated Fabric Sag Guidelines
14. Estimated Fabric Sag Guidelines Tess 140/440 Manual. Issue 1 (DR1004. March 2018) -
Page 21: Tess 140/440 Manual. Issue 1 (Dr1004. March
14. Estimated Fabric Sag Guidelines Cont… 13.1. Use tables to estimate fabric sag when the system is fully deployed. Ensure the correct fabric mass table is used. Tess 140/440 Manual. Issue 1 (DR1004. March 2018) - Page 22 Notes Tess 140/440 Manual. Issue 1 (DR1004. March 2018)
- Page 23 Notes Tess 140/440 Manual. Issue 1 (DR1004. March 2018)
- Page 24 Guthrie Douglas Group Limited 12 Heathcote Way, Heathcote Industrial Estate, Warwick, CV34 6TE E-mail: solar@guthriedouglas.com Web site: www.guthriedouglas.com Tel: +44 (0)1926 310 850 Tess 140/440 Manual. Issue 1 (DR1004. March 2018)
Need help?
Do you have a question about the TESS 140 and is the answer not in the manual?
Questions and answers