Subscribe to Our Youtube Channel
Summary of Contents for ProFlight Maverick PFBD95
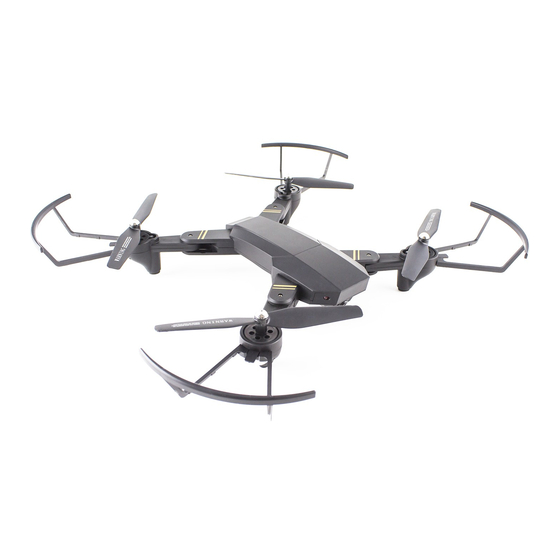
- Page 1 Maverick User Manual Model: PFBD95 Thank you for choosing ProFlight. Please read this user manual before using this drone and keep it safe for future reference.
-
Page 2: Table Of Contents
CONTENTS Safety…………………………………………………………………………………3 Battery Charging…………………………………………………………………4 Installing Controller Batteries……………………………………………..5 Transmitter Diagram…………………………………………………………..6 Folding the Arms..……………………………………………………………….6 Fitting Propeller Guards………………………………………………………7 Propeller Installation…………………………………………………………..7 Preparing for First Flight……………………………………………………..8 Binding of Radio Transmitter and Receiver…………………………8 Flight Instructions……………………………………………………………….9 Flight Adjustment………………………………………………………………10 Aircraft Functions & Features…………………………………………….11 Camera………………………………………………………………………………13 App…………………………………………………………………………………….14 Troubleshooting Guide………………………………………………………16 Support………………………………………………………………………………17 2 of 17... -
Page 3: Safety
SAFETY Read the entire instruction manual and familiarise yourself with the product and all its features before operating. Failure to operate the product correctly can result in damage to the product, surroundings or even serious injury. This product is not a toy and must be operated with caution and common sense. It requires some basic mechanical knowledge. -
Page 4: Battery Charging
Do not store battery or drone in a car or direct sunlight. If stored in a hot environment, the battery can be damaged or even catch fire. Never use any other type of battery charger other than the one supplied with the drone. -
Page 5: Installing Controller Batteries
Plug the charger into a USB socket before attaching the battery. When the charger is plugged into the USB slot and charging the LED will illuminate RED. When the battery is fully charged the LED will go out. Charging should take around 60-70 minutes. DO NOT leave the battery unattended whilst charging. -
Page 6: Transmitter Diagram
Transmitter Diagram Folding the Arms Please fold up the arms in the order 1 – 4 following the diagram below. The arms are unfolded by following the reverse of the above, until the arms click into place. 6 of 17... -
Page 7: Fitting Propeller Guards
Fitting Propeller Guards Carefully remove the blanking plate by levering it out using a fingernail or blunt screwdriver. Push the propeller guide into the slot, pressing down where indicated on the centre diagram to prevent damage to the guard. Propeller Installation Insert the propeller over the motor spindle and use a screwdriver to tighten the screw, then push the silver... -
Page 8: Preparing For First Flight
Preparing for First Flight 1. Make sure both the transmitter and aircraft batteries are sufficiently charged. 2. Find a suitable place to fly the aircraft, away from people, buildings and vehicles. 3. Make sure the throttle stick is centred before turning on the transmitter. Binding of Radio Transmitter &... -
Page 9: Flight Instructions
Flight Instructions Before your first flight make sure you are familiar with the controls of the aircraft. Left Joystick – Throttle & Rudder Right Joystick – Elevator & Aileron The aircraft can only take off and land by pressing the take off / land button (click once to take off and once to land). -
Page 10: Flight Adjustment
Flight Adjustment When you lift the Drone into the air, If the aircraft drifts in a particular direction you can trim the controls using the trim buttons. Select the trim key opposite the direction of drift. Trimming is always needed before your first flight. -
Page 11: Aircraft Functions & Features
Aircraft Functions and Features One Key Return The aircraft can be made to return in a fixed direction by pressing and holding the return button. When the aircraft is turned on it will remember the direction it is oriented and upon activation of the Smart Return feature it will fly back in that direction. - Page 12 360 Flip Before attempting a flip, please make sure the drone is at least 3 meters above the floor and 3 metres below a ceiling. Press the flip button on the controller, it will make a bleep, then press the right lever in the direction you want the drone to flip.
-
Page 13: Camera
Camera The built in camera of the drone records direct to your smart device. See the next page for smart device application instructions. When in flight, the two tail lights on the drone will flash once when a photo is taken, and will repeatedly flash when recording a video. -
Page 14: App
The camera App can be downloaded by scanning the below QR code or search for XSW UFO in your App Store: Android To connect the aircraft to your mobile device: turn on the aircraft and go to settings on your mobile device. Open the WiFi settings and search for a device starting with WiFiUFO-. - Page 15 Exit 11. Take Off Take photo 12. 360 Flip Start / Stop Recording Video 13. Left control stick Video / Photo Playback 14. Land Speed Settings 15. Right control stick Toggle take off / Landing 16. Pitch Trim controls Use phones gyroscope for 17.
-
Page 16: Troubleshooting Guide
Troubleshooting Problem Cause Solution 1 The lights on the aircraft are 1. The aircraft and transmitter 1. Repeat the connection flashing but it does not are not connected. procedure. respond to the control 2. Insufficient battery power. 2. Recharge the battery. 2 The aircraft blades turn but it 1. -
Page 17: Support
UK Support http://www.proflightuk.co.uk/support/ If you have been through the troubleshooting, and the unit is failing to operate, our service line can be contacted on: 0871 971 3141 Office hours: 9AM - 5PM Monday to Friday www.prolightuk.co.uk Unit 2, The Nursery Berristow Lane South Normanton Derbyshire, DE55 2FX...

Need help?
Do you have a question about the Maverick PFBD95 and is the answer not in the manual?
Questions and answers