Advertisement
Quick Links
Connecting Things That Matter
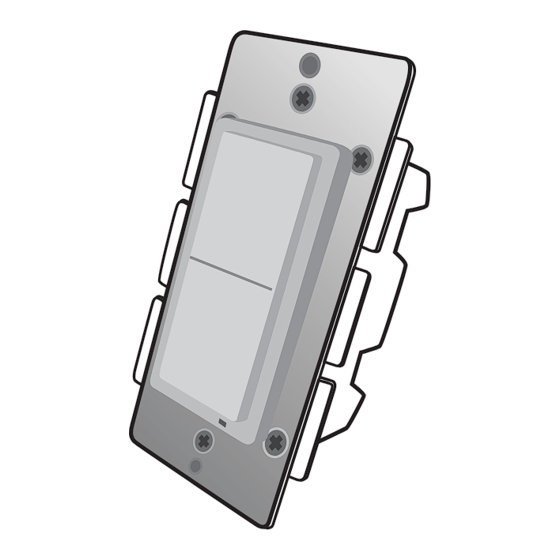
WS-100
This product speaks
with other Z-Wave
In Wall Switch
cer�fied devices
INTRODUCTION
ZLINK's WS-100 is a Z-Wave Plus cer�fied device with S2 security and SmartStart
features. You can now add this device securely and with ease using QR code on
the product with compa�ble gateways suppor�ng S2 and Smart Start. ZLINK
WS-100 replaces a standard in-wall light switch turning it into a Z-Wave controlled
network device with manual and remote ON/OFF control. ZLINK WS-100 supports
"Instant Feedback" of manual status to compa�ble gateways as well as Central
Scene to allow se�ng mul�ple scene control throughout the home, with gateways
suppor�ng Central Scene. Each Z-Wave device serves as a node to repeat the
signal in the network, thus, extending the overall Z-Wave mesh wireless network
range. For more informa�on on this and other quality ZLINK Products please visit
www.ZLINKProducts.com
FEATURES
• Power 120 VAC, 60Hz, up to 1800 wa�s
• Region US: 908.4, 916 MHz
• Works with incandescent, CFL & LED lights
• Remotely or manually turns ON or OFF lights
• Fits standard wall plates (wall plate not included)
• Works with any cer�fied gateway suppor�ng Z-Wave
• Please find the QR code label with DSK on the front metal yoke of the device
RISK OF FIRE, ELECTRICAL SHOCK & BURNS
DO NOT USE WITH MEDICAL AND LIFE SUPPORT INSTRUMENT
No user serviceable parts are in this module
The appliance connected to WS-100 must not exceed 900W incandescent,
200W CFL/LED, ½ horsepower motor and 15A, 1800W resis�ve load.
IMPORTANT: WS-100 requires LINE, NEUTRAL and LOAD wires for every installa�on
SETUP
Step 1
WARNING! RISK OF SHOCK! Make sure power is OFF in the circuit before wiring!
Step 2
Iden�fying the wiring terminals on the module
LINE (Hot) - Black (connected to power)
NEUTRAL - White (this wire is o�en �ed to other
neutral wires and may require the included jumper
cable to connect with WS-100)
LOAD - Black (usually �ed closely to Traveler wire )
TRAVELER — Red/Other (only used in 3-way circuits)
GROUND — Green or Bare
Step 3 Remove the wall plate and the exis�ng
switch (if mounted) at your preferred installa�on
loca�on. You should label the wires connected to
the screw terminals before disconnec�ng the
switch. Please check that the wiring configura�on
to the right is present in the wall switch box,
otherwise consult a qualified electrician.
Wiring Informa�on
Use copper wires only. UL specifica�on: the �ghtening
torque for the screws is 14 Kgf-cm (12 lbf-in)
Strip insula�on 5/8" (16mm)
Wire connec�on can be made either to Screw
terminal or Hole. A 14 gauge wire can use hole or
screw terminal, all other gauges must use screw
terminal.
Making Connec�ons
2-Way circuit
Ground
Neutral
Load
Load
Traveler
Line
Neutral
Hot
120VAC
60Hz
WD/WS-100
Neutral
2
(White)
Ground
Load
Line (HOT)
(Green/Bare)
(Black)
(Black)
3
5
1
1
The Traveler terminal is not
2
used in a 2-way circuit. Do
3
not remove the insula�on
5
tape on the Traveler
terminal in this applica�on.
www.ZLINKProducts.com
Traveler
Neutral
wire hole
(Red/Other)
(White)
Ground
Load
Line (HOT)
(Green/Bare)
(Black)
4 wires for 2-way circuit
5 wires for 3-way circuit
1
1. Line(Hot) - Black
2. Neutral - White
2
3. Ground – Green or bare
3
4. Traveler (for 3-way) –
4
Red or other
5
5. Load - Black
Screw terminal
3-Way circuit
WA-100 companion switch required
Ground
Ground
Load
Load
Traveler
Traveler
Line
Neutral
Neutral
Hot
120VAC
60Hz
WD/WS-100
WA-100
Traveler
Neutral
4
2
(Red/Other)
(White)
Ground
Load
Line (HOT)
(Green/Bare)
(Black)
(Black)
3
5
1
Please refer to WA-100 user manual for
wiring instruc�ons of the auxiliary switch.
The maximum length of Traveler wire may
not exceed 200�.
Gang Box
To install the WS-100 in a mul�-gang or J box, the tabs on the sides of the metal
yoke may need to be removed. For single gang switch, no changes should be
required. For dual or higher gang configura�on where switches are next to each
other, the tabs need to be removed. Simply take a pair of pliers, grab the tabs
and wiggle un�l the tabs break off.
Step 4 When proper wiring is completed, secure the device to the wall box. Restore power to
the circuit to test if the connected ligh�ng can be turned ON or OFF manually by the rocker on
the device before remoun�ng the wall plate. Also observe the status change of the LED
indicator to ensure the device is in normal opera�ng mode. If WA-100 Auxiliary Switch is used
for a 3-way connec�on, please also test if it can control the ligh�ng.
Step 5 Add(Include) the device into your network by a Z-Wave cer�fied controller. Please refer
to the controller's instruc�ons manual for details. Normally, this requires pu�ng your controller
so�ware in Add New Device (inclusion) mode. When this process is ini�ated in the controller
so�ware, single click and release the rocker switch. The controller so�ware should indicate that
the ac�on was successful. If the controller shows it was a fail, repeat the procedure.
Manual Reset
Note: If Inclusion s�ll fails a�er the 2nd a�empt, you need to
first reset the device before repea�ng the above steps. The
manual reset method is as follows:
1. Turn the connected ligh�ng ON with the rocker
2. Quickly tap the top paddle 3 �mes then the bo�om 3 �mes
If you see the ligh�ng turns OFF and then ON, it means that
the device has been reset successfully and you may retry
Step. 5 above to add the device into your network.
Otherwise, please repeat the manual reset procedures.
Use the manual reset procedure only in the event that the network primary controller
is lost or otherwise inoperable.
BASIC OPERATION
The connected ligh�ng can be controlled manually with a rocker
OR Wirelessly with a remote controller
A Z-Wave cer�fied controller is capable of se�ng up ZLINK products in your
desired network. Once the device is added, you may assign it to a Group.
Furthermore, it can be set in Associa�on with another Z-Wave device to
perform a specific triggered func�on such as turning lights on when mo�on
is detected. Please refer to the instruc�ons manual of your controller for
details and procedures on how these se�ngs can be done.
In the event of a power failure, the ZLINK device will return to the last se�ng
a�er the power is restored.
About the rocker switch:
(Black)
Turn the connected appliance ON/OFF by tapping the switch. Tapping and releasing
the upper part of the rocker turns the appliance ON. Tapping and releasing the lower
part of the rocker turns the appliance OFF.
You may also manually turn off LED with the rocker switch by the
following procedure.
Quickly press the top (ON) rocker switch 2x and the bo�om (OFF) of
the rocker 2x. If successful, the LED indicator will always be OFF
regardless of the load status. Repea�ng the procedures above
restores the factory default.
Hole
Neutral
www.ZLINKProducts.com
Advertisement

Subscribe to Our Youtube Channel
Related Manuals for ZLINK ZL-WS-100


Summary of Contents for ZLINK ZL-WS-100
- Page 1 WS-100) In the event of a power failure, the ZLINK device will return to the last se�ng LOAD - Black (usually �ed closely to Traveler wire ) a�er the power is restored.
- Page 2 4. For instruc�ons on how to “set lifeline associate”, please refer to your controller/ WARRANTY gateway instruc�ons. ZLINK warrants to the original purchaser of this product that for the warranty period, Scene and Central Scene this product will be free from material defects in materials and workmanship.
Need help?
Do you have a question about the ZL-WS-100 and is the answer not in the manual?
Questions and answers