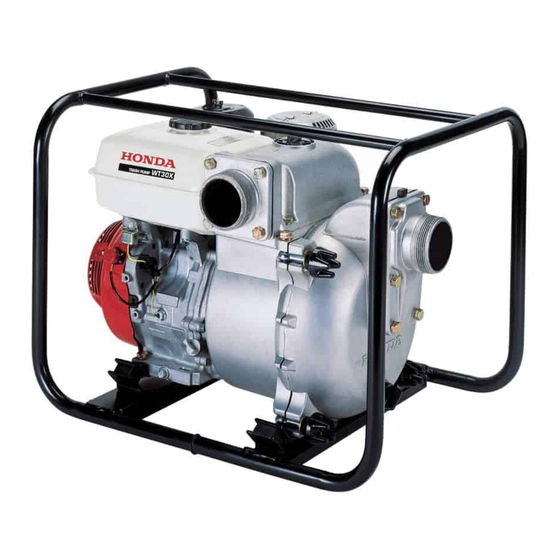
Honda WT30X Owner's Manual
Hide thumbs
Also See for WT30X:
- Owner's manual (194 pages) ,
- Owner's manual (68 pages) ,
- Owner's manual (44 pages)
Table of Contents
Advertisement
Advertisement
Table of Contents

Related Manuals for Honda WT30X


Summary of Contents for Honda WT30X
- Page 1 WATER PUMP WT20X ・ WT30X ・ WT40X OWNER'S MANUAL MANUEL DE L'UTILISATEUR K3 : WT40X K4 : WT20X ・ WT30X BEDIENUNGSANLEITUNG Honda Motor Co., Ltd. 2012 36YG0620 1000.2012.01 英 仏 独 西 MANUAL DE EXPLICACIONES 00X36-YG0-6200 Printed in Japan WT20-30-40X OM表紙_36YG0620...
- Page 2 12/01/20 10:07:21 32YG0620_001 Honda WT20X, WT30X, WT40X OWNER’S MANUAL Original instructions MANUEL DE L’UTILISATEUR Notice originale BEDIENUNGSANLEITUNG Originalbetriebsanleitung MANUAL DE EXPLICACIONES Manual original...
- Page 3 All information in this publication is based on the latest product information available at the time of approval for printing. Honda Motor Co., Ltd. reserves the right to make changes at any time without notice and without incurring any obligation.
- Page 4 12/01/20 10:07:37 32YG0620_003 Disposal To protect the environment, do not dispose of this product, battery, engine oil, etc. carelessly by leaving them in the waste. Observe the local laws and regulations or consult your authorized Honda dealer for disposal.
-
Page 5: Table Of Contents
7. OPERATION ..................8. STOPPING THE ENGINE ..............9. MAINTENANCE ................. 10. TRANSPORTING/STORAGE ............. 11. TROUBLESHOOTING ................ 12. SPECIFICATIONS ................MAJOR Honda DISTRIBUTOR ADDRESSES ....Inside back cover ‘‘ EC Declaration of Conformity ’’ CONTENT OUTLINE ..Inside back cover... -
Page 6: Safety Instruction
12/01/20 10:07:52 32YG0620_005 SAFETY INSTRUCTION To ensure safe operation − Honda water pump is designed to give safe and dependable service if operated according to in- structions. Read and understand the Owner’s Manual be- fore operating the water pump. Failure to do so could result in personal injury or equipment dam- age. -
Page 7: Yg0620
12/01/20 10:08:01 32YG0620_006 To ensure safe operation − Always make a pre-operation inspection (page ) before you start the engine. You may prevent an accident or equipment damage. For safety, never pump flammable or corrosive liquids such as gasoline or acid. Also, to avoid pump corrosion, never pump sea water, chemical solutions, or caustic liquids such as used oil, wine, or milk. -
Page 8: Safety Label Locations
These labels warn you of potential hazards that can cause serious injury. Read the labels and safety notes and precautions described in this manual carefully. If a label comes off or becomes hard to read, contact your Honda dealer for a replacement. [DE type] FUEL CAUTION READ OWNER’S MANUAL... - Page 9 12/01/20 10:08:37 32YG0620_008 [C and UD types] * * WT20X * WT30X · WT40X * French labels come with the water pump.
-
Page 10: Ce Mark And Noise Label Locations
12/01/20 10:08:45 32YG0620_009 CE mark and noise label locations [DE type] CE MARK Name and address of manufacturer Name and address of authorized representative Year of manufacture Machine mass (standard specification) Model NOISE LABEL [Example: WT20X]... -
Page 11: Component Identification
12/01/20 10:08:51 32YG0620_010 COMPONENT IDENTIFICATION 〈 Example: WT20X 〉 MUFFLER DISCHARGE PORT AIR CLEANER THROTTLE LEVER CHOKE LEVER FUEL VALVE LEVER STARTER GRIP WRENCH OIL FILLER CAP/DIPSTICK OIL DRAIN PLUG... - Page 12 12/01/20 10:08:54 32YG0620_011 〈 Example: WT20X 〉 PRIMING WATER FILLER CAP FUEL TANK CAP SUCTION PORT ENGINE SWITCH PUMP DRAIN PLUG PUMP COVER KNOB...
-
Page 13: Preparation
12/01/20 10:09:08 32YG0620_012 PREPARATION Connect the suction hose. Use commercially available hose, hose connector, and hose bands. The suction hose must be of reinforced, noncollapsible construction. Suction hose length should not be longer than necessary, as pump performance is best when the pump is not far above the water level. Self-priming time is also proportional to hose length. - Page 14 Priming water capacity: WT20X: 14.0 L (3.70 US gal, 3.08 lmp gal) WT30X, WT40X: 15.0 L (3.96 US gal, 3.30 lmp gal) Never attempt to operate the pump without priming water, or the pump will overheat. Extended dry operation will destroy the pump seal.
-
Page 15: Pre-Operation Check
12/01/20 10:09:29 32YG0620_014 PRE-OPERATION CHECK Check the engine oil level. Engine oil is a major factor affecting engine performance and service life. Nondetergent oils and 2-stroke oils are not recommended because they have inadequate lubricating characteristics. Check the oil level with the pump on a level surface and the engine stopped. - Page 16 12/01/20 10:09:36 32YG0620_015 Check the fuel level. Use automotive unleaded gasoline with a Research Octane Number of 91 or higher (a Pump Octane Number of 86 or higher). Never use stale or contaminated gasoline or an oil/gasoline mixture. Avoid getting dirt or water in the fuel tank. Gasoline is extremely flammable and is explosive under certain conditions.
- Page 17 After refueling, make sure the tank cap is closed properly and securely. WT20X: DE and UD types WT30X · WT40X: DE, C and UD types MAXIMUM FUEL LEVEL FUEL TANK CAP FUEL TANK TOP...
- Page 18 Gasolines containing alcohol If you decide to use a gasoline containing alcohol (gasohol), be sure its octane rating is at least as high as that recommended by Honda. There are two types of ‘‘gasohol’’: one containing ethanol, and the other containing methanol.
- Page 19 12/01/20 10:10:02 32YG0620_018 Check the air cleaner element. Remove the wing nut and air cleaner cover. Check the air cleaner elements to be sure they are clean and in good condition. Clean or replace the elements if necessary (see page AIR CLEANER COVER WING NUT ELEMENT...
-
Page 20: Starting The Engine
12/01/20 10:10:14 32YG0620_019 STARTING THE ENGINE Turn the fuel valve lever to the ON position. FUEL VALVE LEVER Close the choke lever. Do not use the choke if the engine is warm or the ambient temperature is high. CHOKE LEVER CLOSED Turn the engine switch to the ON position. - Page 21 12/01/20 10:10:22 32YG0620_020 Move the throttle lever slightly to the left. THROTTLE LEVER FAST SLOW SLOW Pull the starter grip lightly until you feel resistance, and then pull briskly in the direction of the arrow as shown below. Do not allow the starter grip to snap back against the engine. Return it gently to prevent damage to the starter.
- Page 22 12/01/20 10:10:26 32YG0620_021 Let the engine warm up for several minutes. If the choke lever has been moved to the CLOSED position, move it gradually to the OPEN position as the engine warm up. CHOKE LEVER OPEN CLOSED...
-
Page 23: Carburetor Modification For High Altitude Operation
High altitude performance can be improved by specific modifications to the carburetor. If you always operate your water pump at altitudes above 1,500 meters (5,000 feet), have your authorized Honda servicing dealer perform this carburetor modification. This engine, when operated at high altitude with the carburetor modifications for high altitude use, will meet each emission standard throughout its useful life. -
Page 24: Operation
12/01/20 10:10:44 32YG0620_023 OPERATION Start the engine according to the procedures described in page Set the throttle at the desired speed. After starting the engine, move the throttle lever to the FAST position for self-priming, and check pump output. Pump output is controlled by adjusting engine speed. Moving the throttle lever in the FAST direction will increase pump output, and moving the throttle lever in the SLOW direction will decrease pump output. -
Page 25: Stopping The Engine
12/01/20 10:10:52 32YG0620_024 STOPPING THE ENGINE To stop the engine in an emergency, turn the engine switch to the OFF position. To stop the engine in normal circumstances: Move the throttle lever fully to the right. THROTTLE LEVER SLOW SLOW Turn the engine switch to the OFF position. - Page 26 12/01/20 10:10:59 32YG0620_025 Turn the fuel valve lever to the OFF position. FUEL VALVE LEVER After use, remove the pump drain plug (see page ), and drain the pump chamber. Remove the priming water filler cap, and flush the pump chamber with clean, fresh water. Allow the water to drain from the pump chamber, then reinstall the filler cap and drain plug.
-
Page 27: Maintenance
Use genuine Honda parts or their equivalent for maintenance or repair. Replacement parts which are not of equivalent quality may damage the water pump. -
Page 28: Maintenance Schedule
12/01/20 10:11:21 32YG0620_027 Maintenance schedule REGULAR SERVICE PERIOD (3) First Every 3 Every 6 Every Perform at every indicated month Each After month months months year Refer or operating hour interval, whichever comes first. 20 hrs. 50 hrs. 100 hrs. 300 hrs. - Page 29 Refill with the recommended oil (see page ) to the specified level. OIL CAPACITY: WT20X… 0.58 L (0.61 US qt, 0.51 lmp qt) WT30X… 1.1 L (1.2 US qt, 1.0 lmp qt) WT40X… 1.1 L (1.2 US qt, 1.0 lmp qt) SEALING WASHER...
- Page 30 12/01/20 10:11:40 32YG0620_029 Air cleaner service A dirty air cleaner will restrict air flow to the carburetor. To prevent carburetor malfunction, service the air cleaner regularly. Service more frequently when operating the pump in extremely dusty areas. Never use gasoline or low flash point solvents for cleaning. They are flammable and explosive under certain conditions.
- Page 31 12/01/20 10:11:45 32YG0620_030 Foam element: Wash the element in a solution of household de- tergent and warm water, then rinse thoroughly, or wash in non- flammable or high flash point solvent. Allow the element to dry thoroughly. Soak the element in clean engine oil, and squeeze out the excess oil. The engine will smoke during initial start-up if too much oil is left in the foam.
- Page 32 12/01/20 10:11:54 32YG0620_031 Sediment cup cleaning Gasoline is extremely flammable and is explosive under certain conditions. Do not smoke or allow flames or sparks in the area. Move the fuel valve lever to the OFF position, then remove the fuel sediment cup, O-ring and filter.
- Page 33 12/01/20 10:12:04 32YG0620_032 Spark plug service Recommended spark plug: BPR6ES (NGK) W20EPR-U (DENSO) To ensure proper engine operation, the spark plug must be properly gapped and free of deposits. The muffler becomes very hot during operation and remains hot for a while after stopping the engine.
- Page 34 12/01/20 10:12:13 32YG0620_033 Measure the plug gap with a feeler gauge. Correct as necessary by bending the side electrode. The gap should be: 0.7 0.8 mm (0.028 0.031 in) − − SIDE ELECTRODE 0.7 0.8 mm − (0.028 0.031 in) −...
- Page 35 12/01/20 10:12:23 32YG0620_034 Servicing the pump casing After each use, clean the inside of the pump casing using the following procedure: Remove the pump drain plug from the pump cover using the wrench to drain the water inside. WRENCH PUMP DRAIN PLUG Loosen the pump cover knobs using the wrench.
- Page 36 12/01/20 10:12:30 32YG0620_035 Install the O-ring on the pump cover, taking care not to damage the O-ring. Install the pump cover on the pump casing, and tighten the knobs handtight. Then, set the wrench to the knobs and finish tightening the knob securely.
- Page 37 12/01/20 10:12:37 32YG0620_036 Spark arrester maintenance (optional part) In Europe and other countries where the machinery directive 2006/42/EC is enforced, this cleaning should be done by your servicing dealer. The muffler becomes very hot during operation and remains hot for a while after stopping the engine.
- Page 38 12/01/20 10:12:42 32YG0620_037 〈 WT30X·WT40X 〉 Remove the six 5 mm screws from the muffler protector, and remove the muffler protector. Remove the 4 mm screw from the spark arrester, and remove the spark arrester from the muffler. 5 mm SCREWS...
- Page 39 12/01/20 10:12:47 32YG0620_038 Use a brush to remove carbon deposits from the spark arrester screen. Be careful to avoid damaging the screen. SPARK ARRESTER SCREEN The spark arrester must be free of breaks and holes. Replace it if necessary. Install the spark arrester and the muffler protector in the reverse order of disassembly.
-
Page 40: Transporting/Storage
12/01/20 10:12:58 32YG0620_039 TRANSPORTING/STORAGE To avoid severe burns or fire hazards, let the engine cool before transporting the pump or storing it indoors. When transporting the pump, turn the fuel valve lever to the OFF position, and keep the pump level to prevent fuel spillage. Spilled fuel or fuel vapor may ignite. - Page 41 12/01/20 10:13:02 32YG0620_040 Change the engine oil. Remove the spark plug, and pour about a tablespoon of clean engine oil into the cylinder. Crank the engine several revolutions to distribute the oil, then reinstall the spark plug. Pull the starter grip until you feel resistance. Continue pulling until the notch on the starter pulley aligns with the hole on the recoil starter (see illustration below).
-
Page 42: Troubleshooting
Remove and inspect the spark plug. Clean, readjust gap and dry the spark plug. Replace it if necessary. If the engine still does not start, take the water pump to an authorized Honda dealer. When the pump cannot pump the water; Is the pump fully primed? -
Page 43: Specifications
12/01/20 10:13:30 32YG0620_042 SPECIFICATIONS Model WT20X Power products WAAJ description code Dimensions and Weight Length 620 mm (24.4 in) Width 460 mm (18.1 in) Height 465 mm (18.3 in) Dry mass [weight] 47 kg (104 lbs) Engine Model GX160T2 Engine type 4-stroke, over head valve,1cylinder Displacement 163 cm (9.9 cu-in) - Page 44 12/01/20 10:13:45 32YG0620_043 Model WT30X Power products WAWJ description code Dimensions and Weight Length 660 mm (26.0 in) Width 495 mm (19.5 in) Height 515 mm (20.3 in) Dry mass [weight] 61 kg (134 lbs) Engine Model GX270T2 Engine type...
- Page 45 12/01/20 10:13:59 32YG0620_044 Model WT40X Power products WAYJ description code Dimensions and Weight Length 735 mm (28.9 in) Width 535 mm (21.1 in) Height 565 mm (22.2 in) Dry mass [weight] 78 kg (172 lbs) Engine Model GX390T2 Engine type 4-stroke, over head valve,1cylinder Displacement 389 cm (23.7 cu-in)
- Page 46 12/01/20 10:14:12 32YG0620_045 Noise WT20X WT30X WT40X Model Sound pressure level at the 92 dB (A) 95 dB (A) 96 dB (A) workstation (EN809: 1998 AI: 2009/AC: 2010) + 3 dB (A) 2 dB (A) 2 dB (A) Uncertainty 103 dB (A) 108 dB (A) 110 dB (A)
- Page 47 12/01/20 12:35:49 32YG0620_046 MEMO...
-
Page 48: Major Honda Distributor Addresses
W e i t e r e I n f o r m a t i o n e n e r h a l t e n S i e g e r n e v o m H o n d a - Kundeninformationszentrum unter der folgenden Adresse oder Telefonnummer: DIRECCIONES DE LOS PRINCIPALES CONCESIONARIOS Honda Para obtener más información, póngase en contacto con el Centro de información para clientes Honda en la dirección o número de teléfono siguientes:... - Page 49 FRANCE (Estonia/Latvia/ Alexander Dimitriou & Sons Ltd. Honda Relations Clients Lithuania) 162, Yiannos Kranidiotis Avenue TSA 80627 Honda Motor Europe Ltd. 2235 Latsia, Nicosia 45146 St Jean de la Ruelle Cedex Estonian Branch Tel. : + 357 22 715 300 Tel.
- Page 50 @ berema berema.no @ hit_power honda.ro @ ITALY POLAND RUSSIA Honda Italia Industriale S.p.A. Aries Power Equipment Sp. z Honda Motor RUS LLC Via della Cecchignola, 5/7 o.o. 21. MKAD 47 km., Leninsky district. 00143 Roma ul. Wroclawska 25 Moscow region, 142784 Russia Tel.
- Page 51 CR honda.ua ventas aucasa.com @ taller aucasa.com @ SLOVAKIA REPUBLIC SWEDEN UNITED KINGDOM Honda Slovakia, spol. s r.o. Honda Nordic AB Honda (UK) Power Equipment Prievozská 6 821 09 Bratislava Box 31002 - Långhusgatan 4 470 London Road Tel. : +...
-
Page 52: Ec Declaration Of Conformity
7. Directive des émiss EG-ve Authorized representative l'environnement des m 1. Ond à l'extérieur des batim de gem Honda Motor Europe Ltd. Aalst Office a) Puissance accousti Manufacturer dat he b) Puissance accousti alle to Wijngaardveld 1 (Noord V), c) Paramétre du bruit Honda Motor Co., Ltd. - Page 53 Français. (French) Italiano (Italian) Deutsch (German) Déclaration CE de Conformité Dichiarazione CE di Conformità EG-Konformitätserklärung 1. Le sous signé, Piet Renneboog, de la part du 1. Il sottoscritto, Piet Renneboog, in qualità di 1. Der Unterzeichner, Piet Renneboog erklärt hiermit with représentant autorisé, déclare que la machine décrit rappresentante autorizzato, dichiara qui di seguito...
- Page 54 Português ( Portuguese ) Polski ( Polish ) Suomi / Suomen kieli (Finnish) Lietuv Português ( Portuguese ) Polski ( Polish ) Suomi / Suomen kieli (Finnish) Lietuvių Declaração CE de Conformidade Deklaracja zgodności WE EY-VAATIMUSTENMUKAISUUSVAKUUTUS EB atit Declaração CE de Conformidade Deklaracja zgodności WE EY-VAATIMUSTENMUKAISUUSVAKUUTUS EB atitikt...
- Page 55 Lietuvių kalba (Lithuanian) Български (Bulgarian) Norsk (Norwegian) Lietuvių kalba (Lithuanian) Български (Bulgarian) Norsk (Norwegian) EB atitikties deklaracija ЕО декларация за съответствие EF- Samsvarserklæring EB atitikties deklaracija ЕО декларация за съответствие EF- Samsvarserklæring 1. Įgaliotojo atstovo vardu pasirašęs Piet 1. Долуподписаният Пайът Ренебуг, от името на 1.Undertegnede Piet Renneboog på...
Need help?
Do you have a question about the WT30X and is the answer not in the manual?
Questions and answers