
Related Manuals for Vent-Axia 3 in 1

Summary of Contents for Vent-Axia 3 in 1
- Page 1 Portable Air Conditioner Owner's Manual Model: 3 in 1 12,000 Btu/h Series 3 Please read this owner’s manual carefully before operation and retain it for future reference. ...
-
Page 2: Table Of Contents
CONTENTS 1. SUMMARY ..................1 2. PORTABLE AIR CONDITIONER............2 3. OPERATING THE UNIT..............3-6 4. REMOTE CONTROLLER FUNCTIONS…………………… ....7-8 5. ACCESSORIES AND INSTALLATION OF HEAT EXHAUST HOSE ....................9-11 6. CARE AND MAINTENANCE .............12 -13 7. TROUBLESHOOTING..............14 ... -
Page 3: Summary
SUMMARY This portable air conditioner provides the following functions air conditioning, dehumidifying and fan only options. Perfect for domestic and light commercial use such as offices, shops and reception areas where permanently installed air conditioning systems may be too inflexible and expensive. Please read all these instructions carefully before operating the unit. -
Page 4: Portable Air Conditioner
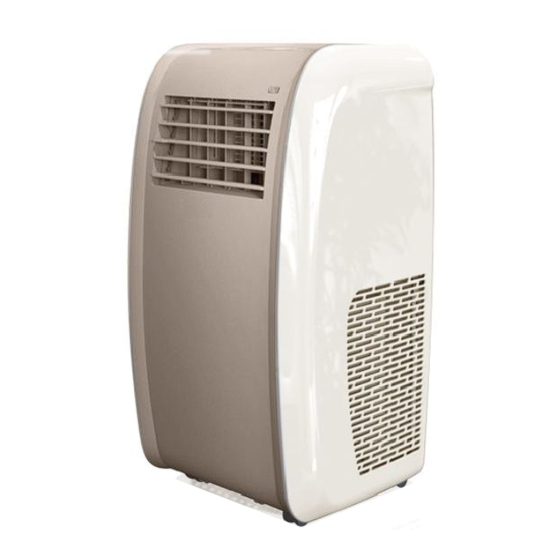
PORTABLE AIR CONDITIONER Front Display board Air outlet Remote control Sensor Rear Handle Upper air inlet grille Air exhaust vent (warm air) Lower air inlet grille Power cord ... -
Page 5: Operating The Unit
OPERATING ※. USAGE NOTICE The working range of COOL mode and DRY mode: 16℃(61°F)-35℃(95°F). The Max Cooling operation temperature for the air conditioner is: DB/WB 35℃(95°F)/24℃(75.2°F). Unpack the Air Conditioner WARNING Excessive Weight Hazard Use two or more people to move and install the air conditioner. Failure to do so can result in back or other injury. - Page 6 OPERATING ※. USAGE NOTICE Electrical Requirements WARNING Electrical Shock Hazard Plug into an earthed socket outlet. Do not use an extension cord. Do not use with an adapter. The unit must be earthed. Failure to follow these instructions can result in death, fire, or electric shock.
-
Page 7: Control Panel Functions
OPERATING Control panel functions 3 3 6 Control panel functions 1.Power: Press once to start and press once more to stop the unit. 2.Mode: Press this button to change the operation mode in order of: COOL→ DRY → FAN→ COOL "... - Page 8 OPERATING COOL mode 1). Select a place near a door and window, install the exhaust duct. 2). Press "MODE" key to select "COOL" mode. 3). Press" "or " " key to set the suitable temp.16℃( 61°F )~30℃(86°F) DRY mode Close all the doors and windows, in order to obtain the best dehumidifying effect: Press "MODE"...
-
Page 9: Remote Controller Functions
REMOTE CONTROLLER FUNCTIONS Remote Controller Description 1. ON/OFF Press it to start or stop operation. 2. MODE Press it to select operation mode (AUTO/COOL/DRY/FAN). 1 2 3 Press it to decrease temperature setting. 4 5 6 Press it to increase temperature setting. 7 ... -
Page 10: Remote Controller Functions
REMOTE CONTROLLER FUNCTIONS BLANK: Not used on this unit. 7. SLEEP: Press this button to go into the SLEEP operation mode. Press it again to cancel this function. This function is available in COOL or DRY mode to maintain the most comfortable temperature for you. 8. -
Page 11: Accessories And Installation Of Heat Exhaust Hose
ACCESSORIES AND INSTALLATION OF HEAT EXHAUST HOSE Length range of exhaust pipe should be 50~150cm. ● It is recommended that it is used at its shortest length. When installing, the exhaust pipe should be as flat as ● possible. Don't over extend the pipe or connect it to another exhaust pipe. - Page 12 ACCESSORIES AND INSTALLATION OF HEAT EXHAUST HOSE Please refer to the diagrams below for correct installation of the exhaust hose . Wrong installation of the exhaust hose is shown below. If the hose is to bent, the unit will not function correctly.
-
Page 13: Hose
ACCESSORIES AND INSTALLATION OF HEAT EXHAUST HOSE PARTS INCLUDED Unit exhaust hose Flexible Exhaust Hose Window Exhaust Adapter connector The portable air conditioner is also supplied with a holder for the remote control that slides neatly onto the side of the unit. The unit also comes with 2 cable tidy brackets that locate onto the rear of the product (as below), so that the lead can be neatly stowed away when storing the unit or moving from room to room. -
Page 14: Care And Maintenance
CARE AND MAINTENANCE Portable There are wheels located at the unit bottom of the unit, allowing the unit to be easily moved from room to room. WARNING Before any maintenance is carried out, Please pull out the power plug from the wall socket to ensure the unit is isolated from the power supply to avoid electric shock. - Page 15 CARE AND MAINTENANCE Ensure that the unit is isolated from the power supply before cleaning. Cleaning the unit Wipe the outside of the unit with a damp cloth and dry with a soft cloth. Ensure that the unit is isolated from the power supply before draining the tank If the unit fails to exhaust all of the condensation in extremely humid weather conditions, the excess water will be collected in the drain tank, when the drain Draining the tank ...
-
Page 16: Troubleshooting
TROUBLESHOOTING If a problem occurs, please check the following before maintenance: Troubles Possible Causes Solutions The power supply is not connected. The air conditioner doesn't 1.Insert the power plug correctly. The power plug is not inserted start. correctly. 2.Replace the power plug or socket. There is a fault with the power (carried out by qualified electrican) plug or socket. - Page 17 This product should not be disposed of with household waste. Please recycle where facilities exist. Check with your local authority for recycling advice.
- Page 18 449010A Supplied by APL UK 0212...
Need help?
Do you have a question about the 3 in 1 and is the answer not in the manual?
Questions and answers