Table of Contents
Advertisement
Quick Links
Advertisement
Table of Contents

Related Manuals for SATO TURN-O-MATIC

Summary of Contents for SATO TURN-O-MATIC
- Page 1 TURN-O-MATIC INSTALLATION GUIDE WIRELESS www.satoamerica.com...
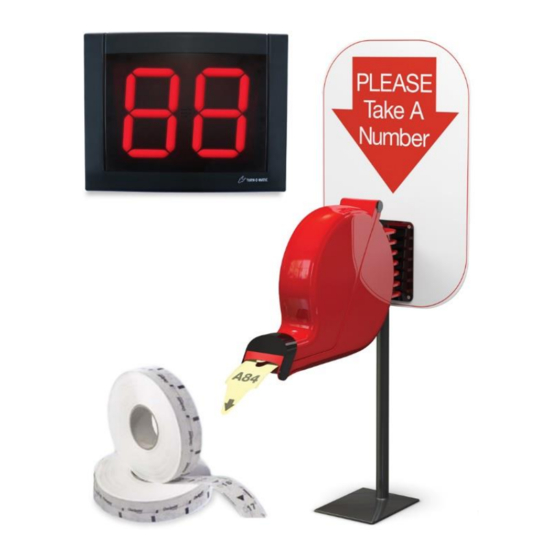
- Page 2 SYSTEM PARTS LIST WIRELESS SYSTEM PARTS LIST (3) Large Slotted (1) Display (1) Wireless (1) Dispenser (1) Dispenser (2) Wireless Screw Wall Mount Receiver Mounting Push Button (2) Large Slotted Bracket Bracket Bolt (2) Nut (1) 2 Digit Indicator (1) 3 Digit Indicator (1) TOM Sign (1) Label Sheet (2) Wall Anchor...
- Page 3 OPERATION & INSTALLATION DISPENSER PARTS LIST STAND MOUNTING OPERATION 1. Position the mounting stand in the desired 1. The customer takes a number from the dispenser; location on a countertop this number will indicate the customer’s spot in the 2. Align the holes in the sign and the mounting queue bracket with the holes in the post.
- Page 4 OPERATION & INSTALLATION DISPLAY PARTS LIST AC POWER SUPPLY MOUNTING CONT 2. Choose the appropriate country outlet adapter 1. Identify a suitable position for the indicator assuring and slide it into the AC power supply (Figure 9) the display is easily seen by the customers 2.
- Page 5 OPERATION & INSTALLATION DISPLAY CONT. OPTIONAL SET-UP DISPLAY SET-UP SOUND & TONE VOLUME • To enter setup options, make sure the Use a mini flathead screwdriver to change the tone and display is unplugged. volume switches on back of the display (Figure 12) •...
- Page 6 PROGRAMMING WIRELESS PUSH BUTTON PARTS LIST PROGRAMMING ADDITIONAL WIRELESS PUSH BUTTONS 1. Press #1 on the wireless receiver and hold for three seconds. The green LED light on the back of the wireless receiver will start blinking (Figure 15) 2. Release #1 on the wireless receiver. Then press the (+) button on the wireless push button.
Need help?
Do you have a question about the TURN-O-MATIC and is the answer not in the manual?
Questions and answers