Advertisement
Features of product ---
Frame: Aluminum body & aluminum material for the front bezel
Interface: Support SATA-I, II, III & SAS I, II
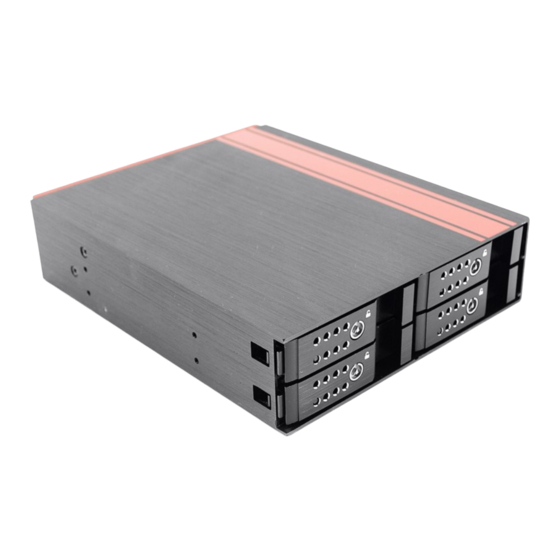
Form Factor: 1 x 5.25" Bay for 4 x 2.5" SAS or SATA Hard Drive(SSD)
High performance transfer rate up to SATA 6Gb/s & SAS 6Gb/s
Support RAID Function (Note: SAS or SATA RAID control card needed )
Plug & play, hot swappable and with 15pin power connector
Support 2.5" single hard drive up to 14.5mm thickness in height
Built-in 2 X 4cm(4020) cooling fan and the with mechanical lock on the front tray
LED for Power & HDD access and LED enable/disable Switch
---Solid HDD tray with strip-heat ventilating holder(picture A1) ---
HDD Installation:
For 2.5" SATA or SAS HDD (SSD):
Put HDD onto the tray as shown on Picture A-1 and use the provided screws to
mount & secure HDD on the tray for each of the four.
---Safety Lock---
The mechanical lock design keeps each HDD staying inside of the unit and prevents
HDDs being taken out while they are in operation (See Picture B1 & B2.)
Picture B-1
BPU-124DE-SS
User's Manual
Picture B-2
Picture A-1
Advertisement
Table of Contents

Related Manuals for iStarUSA BPU-124DE-SS


Summary of Contents for iStarUSA BPU-124DE-SS
- Page 1 BPU-124DE-SS User’s Manual Features of product --- Frame: Aluminum body & aluminum material for the front bezel Interface: Support SATA-I, II, III & SAS I, II Form Factor: 1 x 5.25” Bay for 4 x 2.5” SAS or SATA Hard Drive(SSD) ...
- Page 2 a) OPEN the HDD Tray: Firstly, unlock the HDD tray and pull out the handle to take out HDD tray(Picture B-1.) b) LOCK the HDD Tray: After HDD is installed on the HDD tray, then, slide in the HDD tray and press the front handle forward and use the key to lock the HDD tray onto the unit (Picture B-2.) ---Front Panel &...
Need help?
Do you have a question about the BPU-124DE-SS and is the answer not in the manual?
Questions and answers