Table of Contents
Advertisement
Quick Links
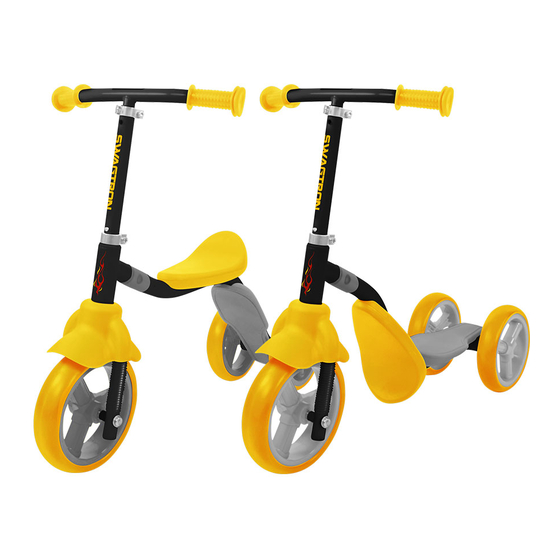
2-in-1 Child Walker, Balance
Bike, and Scooter
Quick Start Guide
Before operating this vehicle, please read all instructions. This guide will walk you through
the functions, usage, and proper care of your SWAGTRON
any questions or cannot find the information you need in the guide, please contact your
place of purchase or our customer service at 1-844-299-0625.
1
Box Contents
Rear Assembly x 1
Front Assembly x 1
Axle Parts Pack x 1
2
Product Overview
Bike Mode
1
2
3
4
6
5
Axle Parts Pack
7
8
1
Handle
Upper Clamp
Deck
2
5
Stem
Turning Point
3
6
4
Seat
7
Socket Spanner (2x sets)
3
Before Riding Your Scooter
Assembling the Rear Wheels
• Remove the Nuts and Spacers from the Rear Axle if needed.
• Slide the Rear Axle through the Center Tube in the Rear Assembly holes so that it
extends from either side (Figure 1).
• Slide the 1x Spacer and 1x Rear Wheel onto one end of the Rear Axle.
2
• At the other side of the Rear Wheel, attach 1x Nut to the end of the Rear Axle.
• Slide the 1x Spacer and 1x Rear Wheel onto the other end of the Rear Axle.
• At the other side of that Rear Wheel, attach 1x Nut to the end of the Rear Axle.
• Tighten the nuts with the Socket Spanner provided (Figure 2).
®
K2 Kid's scooter. If you have
• Push each Cover over each Nut and into the Wheels.
Cover
Rear Wheel x 2
To use the Socket Spacers, slide each pin into each tube making sure the
flattened end faces up. Fit each spanner over each Nut. Use one spanner
to hold 1x Nut in place and turn other spanner tighten.
Quick Start Guide x1
Scooter Mode
Assembling the Whole Scooter
• At the Turning Point, push the two metal pegs in
on both sides and attach the Front Assembly to
the Rear Assembly.
Ensure the metal pegs pops into the
designated holes.
6
Adjusting the Stem
• Open the Upper Clamp (Figure 4).
• Press the metal pegs on the Stem and push
up or down the handlebar to adjust the
height.
• Close the Upper Clamp to secure the
handlebar.
• The metal peg MUST pop into one
9
of the two designated holes in order
for the scooter to be safe to ride.
Covers (for rear wheels)
8
• The Stem may need to be adjusted
after switching modes.
Rear Axle (with 2x Spacers
9
& 2x Nuts)
Rear Wheel
Cover
Spacers
Nut
Rear Wheel
Center Tube Rear Axle
Nut
Figure 1
Figure 2
Metal Pegs Hole
Figure 3
Figure 4
1
Switching Modes (Bike Mode &
Scooter Mode)
• At the Turning Point, push the two metal
pegs on both sides.
• Turn the Rear Assembly 180° according
to preference. The deck should face up
for Scooter Mode while the seat should
face up for Bike Mode.
4
Usage Instructions
How to Use Your Scooter
■ Age-appropriate protective gear including a helmet and elbow
and knee-pads must be worn at all times.
■ The scooter supports up to 44 lbs (20kg).
Assuming you have equipped suitable protective gear and that the scooter has
been placed on a level surface, follow the steps below.
Bike Mode
• Hold both handles firmly.
• Sit down on the seat.
• With your both feet, push off the ground to propell the scooter forward.
• Both feet can leave the ground when desired speed has been reached.
• To stop, step on the ground with both feet.
Scooter Mode
• Hold both handles firmly.
• Put your one foot towards the front of the deck.
• With your other foot, push off the ground to propell the scooter forward.
• Both feet can fit on the deck when desired speed has been reached.
• To stop, step on the ground with one foot.
Practicing Guidelines
• Wear casual clothing and flat shoes to maintain your flexibility and stability.
• Practice until you can easily get on, move forward, turn, stop, and dismount
with ease.
• Make sure the pavement is even. Do not ride on a slope until you are
experienced.
• The Scooter is designed for relatively smooth, flat terrain. When driving on
Upper Clamp
uneven terrain, the user should slow down.
• Until you are comfortable using the scooter, avoid riding in places with
Metal Pegs
pedestrians or obstacles.
Protective Cover
Metal Pegs
Figure 5
Advertisement
Table of Contents

Subscribe to Our Youtube Channel
Related Manuals for SWAGTRON K2


Summary of Contents for SWAGTRON K2
-
Page 1: Box Contents
Before operating this vehicle, please read all instructions. This guide will walk you through • Tighten the nuts with the Socket Spanner provided (Figure 2). the functions, usage, and proper care of your SWAGTRON ® K2 Kid’s scooter. If you have •... -
Page 2: Safety Information
Specifications Safety Information Warranty Information ® The SWAGTRON K2 2-in-1 Child Walker, Balance Bike, and Scooter is a Your SWAGTRON K2 Kid’s Convertible Scooter (“Product”) includes a One ® Item Parameters personal scooter designed for children ages 2 and up. By operating the scooter, Year Limited Hardware Warranty (“Warranty”).
Need help?
Do you have a question about the K2 and is the answer not in the manual?
Questions and answers