beautyrest SMARTMOTION BASE 3.0 Owner's Manual
Hide thumbs
Also See for SMARTMOTION BASE 3.0:
- Quick installation manual (2 pages) ,
- Owner's manual (13 pages)

Related Manuals for beautyrest SMARTMOTION BASE 3.0


Summary of Contents for beautyrest SMARTMOTION BASE 3.0
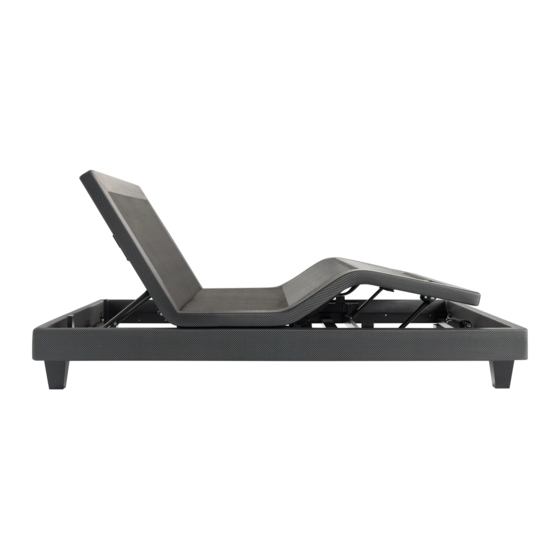
- Page 1 Owner’s Manual Actual product appearance and functionality may vary from photographs, illustrations and descriptions included in this manual.
-
Page 2: Table Of Contents
table of contents Disclaimers ................1-2 Parts List . -
Page 3: Disclaimers
disclaimers Important Safety Information Read all instructions before using your adjustable base. Save these instructions. WARNING WARNING For optimal safety and operation, plug bed base into a surge protector Always unplug the base from the electrical outlet before servicing any (not included). - Page 4 disclaimers DON’T the mattress support platform shall be ± 3°, which translates to a tolerance of up to 1 ½”. The angle (designated “B” in figure 1) between the flat section and foot section for • Sit on corners/edges of base, this may warp the frame, struts or foam. various configurations of the mattress support platform shall be ±...
-
Page 5: Parts List
parts list Before discarding the packing materials, ensure all the parts are accounted for. All electronics and components that need to be installed are located in boxes under the base or attached to the frame. Wireless Remote Control and (3) INCLUDED AAA batteries Legs (4) -
Page 6: Base Overview
base overview Head Massage USB Ports USB Ports Control Box Foot Motor Power Down Head Motor Foot Massage Actual product appearance and functionality may vary from photographs, illustrations and descriptions included in this manual. -
Page 7: Quick Reference Guide
quick reference guide Not to scale. For illustration purposes only. Read all instructions before beginning installation. Control Power Supply Connection ports to head and foot motors (massage and lift). Installed under the base. Power Cord Input Power Cord USB Charger Splitter Cable Power Down USB Charging Ports... -
Page 8: Installation Guide
installation guide Always use two people when setting up the base STEP 1 STEP 4 Place the bed base box in a desired location with the top To sync two bases with the SmartSync™ of the box facing up. cord: see detailed instructions on page 14 Remove the binding straps and packing materials, making sure not to puncture the box with any sharp objects. - Page 9 installation guide Always use two people when setting up the base STEP 6 STEP 9 Uncoil the Power Cord and connect to the Power Supply. Ensure batteries are correctly installed in the back of Place Power Supply on the ground and extend from the remote.
-
Page 10: Remote Control
remote control 10, 20, 30 Minute Massage Timer Lights Foot Massage Up Head Massage Up (6 intensities) (6 intensities) Turn on Head and Foot Massage Timer Foot Massage Down (6 intensities) Head Massage Down (6 intensities) Turn on Head and Foot Massage Zero-G Preset Position Lifts and Lowers Foot... - Page 11 remote control MASSAGE FEATURE The MASSAGE button turns head and foot massage on and off. Press to cycle through 3 levels and off. The HEAD +/- buttons adjust the head massage intensities. Levels 1-6. The FOOT +/- buttons adjust the head massage intensities. Levels 1-6.
-
Page 12: Headboard Bracket Installation Guide
headboard bracket installation guide (optional) A 9/16” (14 mm) & 1/2” (13 mm) socket and crescent wrench are necessary to complete installation. HEADBOARD BRACKET COMPONENTS Headboard Bracket (2) T-Bracket (2) Spacer (2) Long Bolt (8) Short Bolt (10) Nut (18) STEP 1 STEP 2 a.) Align the hole in the bracket to the brass sleeve into... -
Page 13: Magnet And Usb
usb and remote station USB CHARGERS USB charging connections are located on each side of the base, on the underside of the head section of the platform. Charge two smart devices at the same time. Voltage: 5V DC Current: 2.5A (max 13 Watts) MAGNETIC REMOTE HOLDER Read and remove warning sticker located on top of the magnet before attaching the remote to the base. -
Page 14: Emergency Power Down Box
emergency power down box Store the power down box in a convenient location for emergency use. (2) 9 Volt batteries are required to operate the power down feature and are NOT included. FOR EMERGENCY USE ONLY. In the event that the base is stuck in an articulated position during a power outage- the Power Down Box will return the base to a flat position. -
Page 15: Pair Remote
pair remote The original remote that comes in the box is already paired to the bed base. No further action is required. In the event that the remote is not paired with the base, follow the steps below. STEP 1 STEP 3 Remove back cover from remote Press and hold button on the back... -
Page 16: Setting Up Two Bases
setting up two bases Connecting straps are secured to the base frame upon delivery. If a split setup is being installed, plastic connecting straps are provided (one per base) to secure the bases together. Use both straps to secure the head and foot portions together. STEP 1 With the bases in their desired location, slightly loosen both legs to allow the strap to fit on the leg bolt, between the leg washer... -
Page 17: Syncing Two Bases
syncing two bases If simultaneous operation of two bases is desired, use the SmartSync™ Cord to connect the electronics of both bases together. STEP 1 STEP 4 Unplug base from power source. Connect each power-down box male connection to the sync cord female connection (Refer to the illustration below). -
Page 18: Troubleshooting
troubleshooting If one or more functions on the bed base have stopped operating: • Check under the bed base to verify that the wired connections are secure and that there are no cords or bedding obstructing the movement of the base. •... -
Page 19: Notes
notes ________________________________________________________________________________ ________________________________________________________________________________ ________________________________________________________________________________ ________________________________________________________________________________ ________________________________________________________________________________ ________________________________________________________________________________ ________________________________________________________________________________ ________________________________________________________________________________ ________________________________________________________________________________ ________________________________________________________________________________ ________________________________________________________________________________ ________________________________________________________________________________ ________________________________________________________________________________ ________________________________________________________________________________ ________________________________________________________________________________ ________________________________________________________________________________ ________________________________________________________________________________ ________________________________________________________________________________ ________________________________________________________________________________ ________________________________________________________________________________ ________________________________________________________________________________ ________________________________________________________________________________ ________________________________________________________________________________ ________________________________________________________________________________ ________________________________________________________________________________ ________________________________________________________________________________ ________________________________________________________________________________... -
Page 20: Español
español PG 1-2 Sobre las precauciones y el uso: Atención: Restricciones importantes USO EN EL HOGAR Y NORMAS DE HOSPITAL: sobre la seguridad Lea todas las instrucciones antes de usar su base ajustable. Las bases ajustables de Ergomotion están diseñadas exclusivamente para el Guarde estas instrucciones. - Page 21 español Procedimientos de prueba requieren pruebas de ciclo de vida útil de hasta IMPORTANTE LO QUE SE DEBE HACER Y NO HACER 120kg de carga distribuida. El ángulo (designado “a” en la figura 1) entre la HACER: parte trasera y la sección plana para diversas configuraciones de la plataforma •...
- Page 22 español Misceláneos (no incluidos): Protector de sobrecargas Importante: Cualquier cambio o modificación no aprobados expresamente por Pilas de 9 voltios (2) Serta Simmons Bedding, LLC (“ SSB “) podría anular el cumplimiento EMC y negar su derecho para utilizar este equipo. * Estos componentes están adheridos a la base sólo para el envío.
- Page 23 español Pg. 6-7 - Guía de instalación Las flechas del botón HEAD levantan y bajan de la base la sección de la cabecera. PASO 5: Desenrosque el cable de entrada (conectado al puerto de energía de la caja de control) y conéctelo a la fuente de energía. Las flechas del botón FOOT levantan y bajan de la base la sección de los pies.
-
Page 24: Español
español Lea y quite la pegatina de advertencia ubicada en el imán del sujetador del PASO 1: Desconecte la base de la electricidad. control remoto antes de sujetar éste a la base. PASO 2: Desconecte el generador auxiliar de corriente de cada caja de control. NOTA: Este producto contiene IMANES de neodimio que pueden interferir Recuerde dónde estaba conectado el cable. -
Page 25: Français
français Pg. 1-2 - Précautions de sécurité et déclarations d’utilisation domicile. Ce sommier n’a pas été conçu comme lit d’hôpital et n’est pas conçu pour satisfaire les normes hospitalières. N’employez pas ce sommier avec de AVERTISSEMENT l’équipement de thérapie d’oxygène TENT TYPE ou près de gaz explosifs. CARACTÉRISTIQUES DE SÉCURITÉ... - Page 26 français équitablement. L’angle (désignée par « a » dans la figure 1) entre la section cette restriction de poids pourrait endommager le lit ou blesser l’utilisateur et arrière et la section plate pour les diverses configurations du matelas/du pourrait rendre nulle la garantie. support devraient être à...
- Page 27 français • Consulter le revendeur ou un technicien radio expérimenté. B) Mattress Retainer bar = Barre de soutiens du matelas (1) C) Legs = Pieds (4) D) Power Cord = Cordon d’alimentation (1) E) Power supply = Alimentation électrique (1) Important: Tous changements ou modifications non expressément approuvés F) Power Down Box = Boîte pour s’éteindre (1)* par Serta Simmons Bedding, LLC («SSB») pourraient annuler la conformité...
- Page 28 Étape 10:Placez le matelas sur la base. Pour restaurer les boutons de présélection à leurs réglages d’usine: Sélectionnez matelas Beautyrest® sont compatibles avec le panneau de fixation matelas de retenue installé sur le SmartMotion 3.0 . Tenez FLAT et ZERO-G simultanément pendant au moins 5 secondes. Les lumières DEL de la telecommande clignotent successivement 3 fois.
-
Page 29: Français
français boulons longs dans les deux trous avec la tête des boulons vers l’extérieur. Si la boîte pour s’éteindre n’est pas disponible – Poussez le bouton RESET (de Positionnez les boulons diagonalement sur la cale d’espacement. Utilisez le remise à zéro) sur la boîte de contrôle. La lumière LED sur la boîte de contrôle 9/16’’... - Page 30 ©2017 Ergomotion Inc US/Canada Customer Service Phone 1-888-550-3746 805-979-9399 Email info@ergomotion.com www.ergomotion.com V008_R02...
Need help?
Do you have a question about the SMARTMOTION BASE 3.0 and is the answer not in the manual?
Questions and answers
Who can I talk to about setting up a service call ?
To set up a service call for the Beautyrest SmartMotion Base 3.0, you can contact customer service by calling 1-888-550-3746.
This answer is automatically generated