Advertisement
Signal Connections
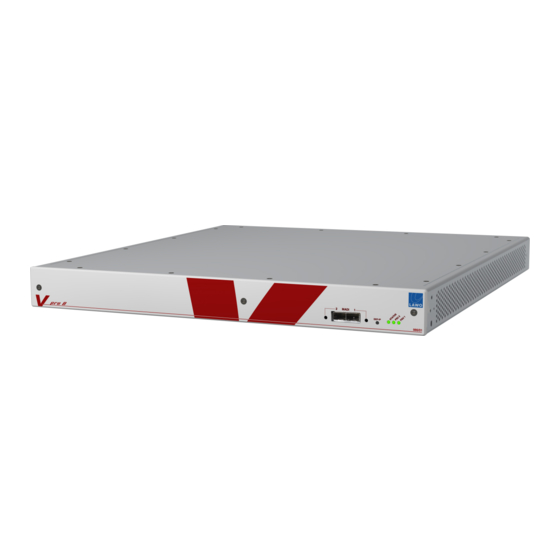
The remaining connections are for video, audio and external reference signals:
8 x SDI IN and 8 x SDI OUT (BNC): each carries 1 video + 16 embedded audio channels.
MV Out (BNC or Display Port): connect an external display for local Quad Split monitoring.
2 x MADI in/out (SFP modules): front and rear ports operate in parallel. Each carries 64 input
+ 64 output audio channels. A green LED indicates a valid MADI connection.
REF IN/OUT (BNC): the REF IN accepts Tri-Level Sync or Black Burst; terminate the input by
fitting a 75-ohm terminator to the LOOP out (if unused), or the LOOP THRU of the last
"looped" device. For details, please refer to the "V_pro8 Installation & Operation" manual.
Operational Tips
The user interface is divided into two; the upper area displays information about the main menu
selection (e.g. SDI Out 1), while the lower area provides access to its parameters:
If you have signals connected, then you will see audio levels on meters, and live video thumbnail
streaming. Click on the green button beside PPM to choose a different metering/monitoring option.
Use each of the main menus as follows:
Status: check the running status of the SDI inputs, MADI ports or pro8 frame.
SDI In, MADI In, SDI Out, MADI Out: adjust routing and video/audio processing parameters.
MV: configure local quad-split monitoring, of 4 SDI in or out, via an external display (MV Out).
Timing: adjust the timing position of the pro8, and its Reference Settings. For low latency
operation, you should time your sources to the video reference signal. First, adjust the pro8
timing position so that all input signals are ~ ½ line advanced (Timing -> Timing Position).
Then switch on the auto Phaser for each SDI output (SDI Out -> Timing).
Settings: adjust the IP settings of the Network ports, perform a Software Update, load or
save settings, etc.
V_pro8 Quick Start Guide V2.0/2
V_pro8 Quick Start Guide
This guide will help you setup, connect and control the V_pro8 from your computer's web browser
interface. To download further information, including the full "Installation and Operation" manual,
please register at www.lawo.de.
Setup
1.
Unpack the unit from its shipping box and place on a flat, horizontal surface.
2.
Using the IEC power cables provided, connect the AC
POWER IN (on the rear panel) to your mains supply.
Only one connection is required for operation; the other
provides redundancy.
The power connectors include an IEC locking mechanism. To disconnect the power
cables, please use the unlocking tool supplied with the system.
The pro8 has no on/off switch, and starts once power is applied; boot-up takes around 7 seconds.
3.
To confirm that the unit is operating correctly, check the STATUS LED (on the front panel):
Blue = unit is booting
Flashing GREEN = ready for operation
Flashing Yellow = network activity
Flashing Blue and Red = system error. Try a power off/on; then contact
Settings are saved at power off, and recalled at the next boot-up. This ensures that the
pro8 always comes back as it was last used.
Connecting Your Computer
Multiple units can be networked by installing an Ethernet Hub or Switch. However, to get started,
this guide describes a direct connection:
1.
Check that your computer meets the minimum system requirements (100 Base-TX LAN port),
and use/install a suitable web browser (HTML5 capable).
2.
Using a standard Ethernet cable, connect your
computer to one of the LAN ports (on the rear panel):
Cable Type: straight (1:1) or crossed Ethernet
Connector Type: RJ45
V_pro8 Quick Start Guide V2.0/2
service@Lawo.de
Advertisement
Table of Contents

Subscribe to Our Youtube Channel
Related Manuals for LAWO V_PRO8

Summary of Contents for LAWO V_PRO8
-
Page 1: Signal Connections
8 x SDI IN and 8 x SDI OUT (BNC): each carries 1 video + 16 embedded audio channels. This guide will help you setup, connect and control the V_pro8 from your computer’s web browser MV Out (BNC or Display Port): connect an external display for local Quad Split monitoring. - Page 2 Once you have established communication, use the Settings -> Software Update menu You can find further information at www.microsoft.com or www.apple.com. to check the software revision and, if necessary, perform an update. V_pro8 Quick Start Guide V2.0/2 V_pro8 Quick Start Guide V2.0/2...
Need help?
Do you have a question about the V_PRO8 and is the answer not in the manual?
Questions and answers