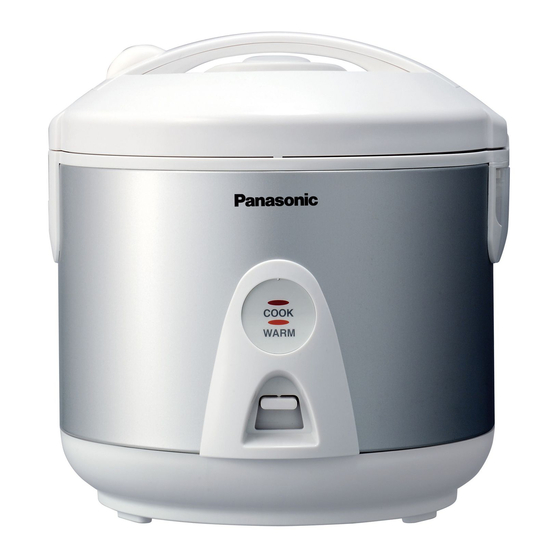
Panasonic SR-TEG10 Service Manual
Electric rice cooker
Hide thumbs
Also See for SR-TEG10:
- Service manual (13 pages) ,
- Operating instructions manual (47 pages) ,
- Operating instructions manual (12 pages)
Table of Contents
Advertisement
Service Manual
The service information is designed for experienced repair technicians only and is not designed for use by the general
public. It does not contain warnings or cautions to advise non-technical individuals of potential dangers in attempting
to service a product. Products powered by electricity should be serviced or repaired only by experienced professional
technicians. Any attempt to service or repair the product or products dealt within this service information by anyone
else could result in serious injury or death.
There are special components used in this equipment which are important for safety. These parts are marked by
in the Schematic Diagrams, Circuit Board Diagrams, Exploded Views and Replacement Parts List. It is essential that
these critical parts should be replaced with manufacturer's specified parts to prevent shock, fire or other hazards. Do
not modify the original design without permission of manufacturer.
WARNING
IMPORTANT SAFETY NOTICE
Order No. PHAT060512C3
(REVISION : NOV. 2013)
Electric Rice Cooker
© Panasonic Appliances (Thailand) Co., Ltd. 2013.
All rights reserved. Unauthorized copying and
distribution is a violation of law.
SR-TEG10
SR-TEG18
Product Colour
Soft Pink (SP)
Harmony Orchid (HO)
Platinum Silver (PS)
Champagne Gold (CN)
Destination
Malaysia
Advertisement
Table of Contents

Subscribe to Our Youtube Channel
Related Manuals for Panasonic SR-TEG10


Summary of Contents for Panasonic SR-TEG10
- Page 1 Do not modify the original design without permission of manufacturer. © Panasonic Appliances (Thailand) Co., Ltd. 2013. All rights reserved. Unauthorized copying and...
-
Page 2: Table Of Contents
6.2 Inner enclosure and Upper frame removal 7. Parts Exploded View and Replacement Parts List 7.1 Parts Exploded View : Body 7.2 Parts Exploded View : Packing 7.3 Replacement Parts List : SR-TEG10 / SR-TEG18 13 - 14 Detail Change Notice - 2 -... -
Page 3: Specification
SR-TEG10 / SR-TEG18 1. SPECIFICATION MODEL SR-TEG10 SR-TEG18 Destination Malaysia Plug Power Supply 240V / 50Hz Power Consumption Keeping Warm Cooking 450W 630W Cooking Capacity White Rice 1 ~ 5 cups 3 ~ 10 cups Product Dimension Width 248 mm... -
Page 4: Parts Identification
SR-TEG10 / SR-TEG18 2. PARTS IDENTIFICATION Cook lamp Warm lamp Switch Accessories Measuring cup Rice scoop Steaming basket (Approx 180 ml) - 4 -... -
Page 5: Schematic Diagram
SR-TEG10 / SR-TEG18 3. SCHEMATIC DIAGRAM 3.1 Circuit Diagram Cast Thermal Thermal Heater Fuse Fuse Black Black Black Rice Cook Lamp Power Side Heater Keep Warm Lamp (White : 18/Yellow : 10) Micro Switch Orange Green 3.2 Wiring Diagram Body Earth Lead Wire (Green) -
Page 6: Troubleshooting Guide
SR-TEG10 / SR-TEG18 4. TROUBLESHOOTING GUIDE When receiving a rice boiler to be repaired, be sure to check that the main body is completely provide with the inner pan and the inner lid, ask the condition (phenmenon) of the trouble in detail. Before troubleshooting single parts, be sure to disconnect the power supply plug from the receptacle. - Page 7 SR-TEG10 / SR-TEG18 Condition Troubleshooting Remedy • Earlier cut off. Is the pan bottom properly contacted with • Poor boiling up. • Replace the inner pan or the the cast heater? cast heater. (Check with the bubbling test). • Too hard •...
-
Page 8: Testing Procedure
SR-TEG10 / SR-TEG18 5. TESTING PROCEDURE 5.1 Bubbling test Input the pan in the main body, lightly rotate the pan clockwise and counter clockwise to settle the pan on the heating plate properly. 1. Fill water until center area of the pan bottom is dipped and close the lid. Then turn on the boiling switch. -
Page 9: Heat Reserving Test
SR-TEG10 / SR-TEG18 The above conditions are proper. Top view of pan Pan flange Holes on the tissue paper Tissue paper If it is improper, check the contact between the pan bottom, the heating plate and the center thermostat. Repair or replace if necessary. -
Page 10: Disassembly
SR-TEG10 / SR-TEG18 6. DISASSEMBLY 6.1 Hinge cover removal 1. Remove the dew collector. 2. Remove the hinge cover mounting screws. 3. As show in the figure, insert a narrow flat head screwdriver from just below and pry off the hinge cover. -
Page 11: Parts Exploded View And Replacement Parts List
SR-TEG10 / SR-TEG18 7. PARTS EXPLODED VIEW AND REPLACEMENT PARTS LIST 7.1 Parts Exploded View : Body - 11 -... -
Page 12: Parts Exploded View : Packing
SR-TEG10 / SR-TEG18 7.2 Parts Exploded View : Packing - 12 -... -
Page 13: Replacement Parts List : Sr-Teg10 / Sr-Teg18
SR-TEG10 / SR-TEG18 Important safety notice : Components identified by mark have special characteristics important for safety. When replacing any of these components, use only manufacturer’s specified part. 7.3 Replacement Parts List : SR-TEG10 / SR-TEG18 Parts List MODEL / Q’TY REF. - Page 14 SR-TEG10 / SR-TEG18 Parts List MODEL / Q’TY REF. PART NAME PART NO. SAFETY REMARK TEG10 TEG18 NAME PLATE ARY30M9213SP SOFT PINK ARY30M9203HO HARMONY ORCHID ARY30M9203SP SOFT PINK ARY30M921-PS PLATINUM SILVER ARY30M920-PS PLATINUM SILVER ARY30M920-CN CHAMPAGNE GOLD HINGE COVER ARE40H6161W9...
-
Page 15: Detail Change Notice
SR-TEG10 / SR-TEG18 DETAIL CHANGE NOTICE REVISION ITEM NO. PAGE DETAIL REMARK NOV. 2013 ADD NEW COLOUR ADD PLATINUM SILVER (PS), CHAMPAGNE GOLD (CN) ADD PAGE NO. 2~3 ADD CONTENT AND SPECIFICATION 2~14 REVISE TO NEW PATTERN USE PATTERN SAME OTHER PRODUCTS...
Need help?
Do you have a question about the SR-TEG10 and is the answer not in the manual?
Questions and answers