Advertisement
Advertisement

Related Manuals for PST PST-VD972C

Summary of Contents for PST PST-VD972C
-
Page 2: Table Of Contents
Contents 1. Introduction ..........4 2. Camera Front &Rear illustration....5 3. Indoor Unit ..........6 4. Basic Operation ......... 7 5. Wiring Diagram .......... 9 6. Intercom System Installation ....11 7. Camera Rear Installation ......12 8. Monitor Setup........... 14 9. -
Page 3: Introduction
1. Introduction This Intercom system is a flexible and user-friendly system that allows a number of monitors to be used with a number of door units with cameras. The monitors allow visibility of the callers via the camera in the door units and, when used with the optional electronic lock, enable the resident to electronically open the door for the caller. -
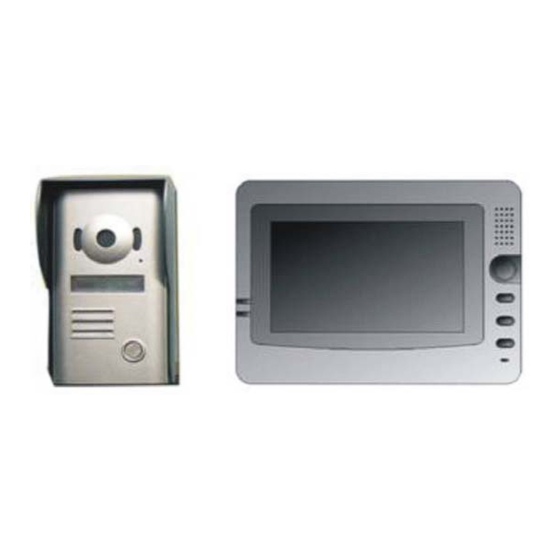
Page 4: Camera Front &Rear Illustration
2. Camera Front & Rear illustration: 14. Technical Support Please use and install in strict accordance with the user's manual. If you meet any problems in the installation process, please call us for technical support and consulting services. 【Notes】 (1) Our Company is committed to reform and innovation, and reserves the right to make changes and improvements without further notice. -
Page 5: Indoor Unit
9. In the case of electrical storms, unplug power supply from AC 3. Indoor Unit outlet. It can cause fire, electrical shock, or power surge. 10. Do not install components in any of the following locations, as it may cause the system to malfunction: - High or extreme cold temperature area: under direct sunlight, near equipment that varies in temperature, in front of air conditioner. -
Page 6: Basic Operation
(6)Speaker: 11. Maintenance (7)Microphone: (8) Activity indicator LED ① Use a soft, dry cloth to wipe and dry the machine (9) Power indicator LED ② Switch off power to the indoor unit before cleaning (10)Volume adjustment ③ Difficult to remove dirt can be cleaned using a neutral detergent with (11)Contrast adjustment a soft towel before drying with a soft dry cloth (12)Brightness adjustment... - Page 7 Monitor . 9. Specifications >Install all indoor phones , connect the outdoor phone and indoor phone , Outdoor camera Indoor monitor power on . DC14V (Receive Input:AC 100-240V >Press”key 3” , system will go into the monitor function .Display screen is Power power from Power...
- Page 8 System will be automatically off when the talking between indoor and 8.Monitor Setup outdoor no stop after 60s . 1 .Drill three holes on the wall according to the monitor's wall Select the kinds of ring . mounting bracket. Move cables through the monitor's wall mounting bracket then secure >...
-
Page 9: Wiring Diagram
7.Camera Rear Installation 5.Wiring Diagram 1.tak of the metal outcase .Turn 1. One camera to one monitor down the screw(as picture show ) and Connect the 4-wire cable on the back of camera (1-1, 2-2, 3-3, 4-4). 2-wire cable for lock is optional to connect. 2. -
Page 10: Specifications
4.:Cable Specifications 6. Intercom System Installation A: Maximum length of cable from camera to monitor B: Maximum length of cable from monitor to monitor C: Maximum length of cable Lock to camera cables Mounting Position, Door Station The standard height for the door station installation is 1450mm. - Page 11 ¿COMO BAJAR EL VOLUMEN DEL TONO DEL MONITOR? Para poder bajar el volumen del tono tiene que presionar el botón 2 durante 10 segundos, una vez que entra en estado de configuración, presione el botón 3 para bajar el volumen, tiene 4 configuraciones, cuando haya seleccionado el que más le acomode, presione nuevamente el botón 2 para confirmar.
- Page 12 QUE PRECAUCION DEBO TOMAR CON LOS PINES DEL CABLE UTP, AL REALIZAR LA CONEXIÓN? Los pines de la conexión del equipo exterior, con el monitor (Cable UTP), por ningún motivo se debe producir un cortocircuito, tiene que tener la precaución de que los cables tengan un buena aislación y verificar que no estén en contacto uno con el otro , si se llegara a producir dicho corto circuito entre los pines de conexión, esta podría averiar el circuito electrónico del monitor, y por consecuencia inhabilitando algunas de sus funcionalidades, como por ejemplo...
Need help?
Do you have a question about the PST-VD972C and is the answer not in the manual?
Questions and answers