
Related Manuals for ALC AWS3377


Summary of Contents for ALC AWS3377
-
Page 1: User Guide
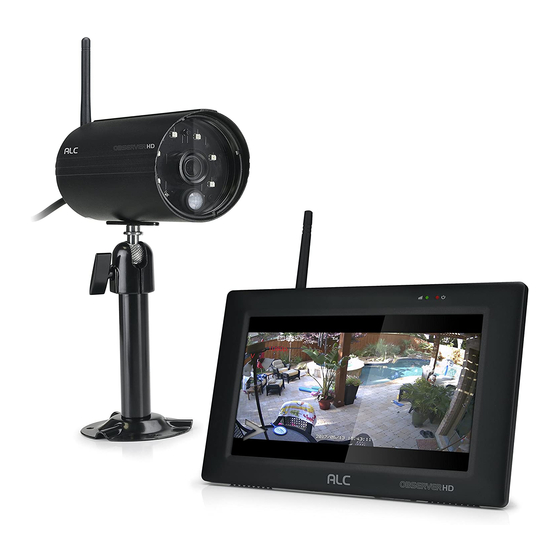
7” Touch Screen Wireless Surveillance System AWS3377: 2 Camera System AWS337: 1 Camera System Model AWS3377/AWS337 User Guide Please read these instructions completely Wireless Made Simple. before operating this product. -
Page 3: Table Of Contents
TABLE OF CONTENTS IMPORTANT SAFETY INSTRUCTIONS ................3 INTRODUCTION........................6 System Contents .......................6 Getting to Know Your LCD Touch Screen Monitor .............7 Getting to Know Your Camera ...................8 INSTALLATION ........................9 Installation Tips ......................... 9 Night Vision ........................9 Setting Up the Monitor .....................10 Installing the Camera(s) ....................12 SYSTEM INTRODUCTION ....................14 Live Screen and Menu .....................14... - Page 4 TABLE OF CONTENTS Android-WDVR Main Screen and Icons ................48 Android-Recording ......................49 Android-Event List ......................51 Android-Camera Pairing ....................54 Android-Turning a Camera On of Off ................55 Android-Setting HD Option ....................56 Android-Setting the Image Quality..................57 Android-Schedule Recording ...................58 Android-Motion and Motion Area Options ................60 Android-Detection Options ....................61 Android-Setting the Date/Time ..................62 Android-Setting the Language ..................63...
-
Page 5: Important Safety Instructions
IMPORTANT SAFETY INSTRUCTIONS PRODUCT SAFETY: When used in the directed manner, this unit has been designed and manufactured to ensure your personal safety. Improper use of this product can result in potential electrical shock or fire hazards. Please read all safety and operating instructions carefully before installation and use, and keep these instructions handy for future reference. - Page 6 IMPORTANT SAFETY INSTRUCTIONS Recycling and Disposal Information: • Do not dispose of electronic devices or any of their components (especially batteries and LCD displays) in your municipal trash collection. • Consult your local waste management authority or a recycling organization like Earth911.com to find an electronics recycling facility in your area.
- Page 7 IMPORTANT SAFETY INSTRUCTIONS Uninterruptible Power Supplies (UPS) - Because this product is designed for continuous, 24/7 operation, it is recommended that you connect the product to an uninterruptible power supply. An uninterruptible power supply has an internal battery that will keep the product running in the event of a power outage.
-
Page 8: Introduction
INTRODUCTION System Contents After unpacking, you will have the following items: Monitor x 1 Camera x 2 (AWS3377) Camera x 1 (AWS337) MONITOR SETUP MONITOR SETUP Interne Included Ethernet Cable AC power cable Connect the AC/DC adapter to the power input on the side of The CAMERA(s) installed and plugged in will AU the Monitor and plug into an electrical outlet. -
Page 9: Getting To Know Your Lcd Touch Screen Monitor
INTRODUCTION Getting to Know Your LCD Touch Screen Monitor Wireless Signal Indicator Power Indicator Monitor Touch Screen Power Button Antenna Jack Reset Button USB Jack Network Jack SD Card Slot Stand Power Jack — 7 —... -
Page 10: Getting To Know Your Camera
INTRODUCTION Getting to Know Your Camera FRONT Power Status Link Status Passive Infrared Mounting Sensor Socket REAR Antenna Connector Pairing Button Microphone Power Pigtail — 8 —... -
Page 11: Installation
INSTALLATION Installation Tips WARNING: Weatherproof, IP66 rated cameras are suitable for outdoor installation. However, if possible, it is recommended to install in a location that provides some shelter from the elements, such as beneath roof eaves. • Before you install the camera, plan where and how it will be positioned, and where you will route the cable that connects the camera to the power adapter. -
Page 12: Setting Up The Monitor
INSTALLATION Setting Up the Monitor Flip out the stand on the back of the monitor. Connect the AC adapter to the Power Jack on the side of the monitor. Connect the internet cable from the rear of the unit to your router. Internet Router (not included) Screw Antenna (white antenna) clockwise into rear of camera and put into the... - Page 13 INSTALLATION Setting Up the Monitor Insert an SD Card (up to 128GB) into the SD Card Slot. You can also connect an HDD drive or Flash drive into the USB jack. This will allow you to record videos. NOTES • It is recommended to use a 2TB HDD drive for long term use.
-
Page 14: Installing The Camera(S)
INSTALLATION Installing the Camera(s) If not mounting, but just using on a flat surface (desk, table, etc.), skip to step 4. Secure the multi-position Camera Bracket to a stable surface, ceiling or wall using the three supplied screws. If needed, three anchors are also included. - Page 15 INSTALLATION Installing the Camera(s) Screw antenna clockwise into rear of the camera. Connect one end of an AC adapter to the camera’s power pigtail and plug the other end of the adapter to a 120 volt AC (standard indoor) power outlet. Make sure the Power status LED turns red and the Link Status LED turns green.
-
Page 16: System Introduction
SYSTEM INTRODUCTION Live Screen and Menu Your monitor’s system software operates through a series of screens that let you choose groups of operations. For example, when you tap on the camera icon in the Pop-up menu, you can set how you want the main viewing screen (“Live screen”) to display images from the paired cameras. -
Page 17: Description Of Icons
SYSTEM INTRODUCTION Description of Icons Icon Icon Description Open Tap to open the Settings menu. Options Tap to enter the Main Menu, see page 18. Quad Display Tap to select Quad Display. Smart Quad Display Tap to select Smart Quad Display. Record One Camera Tap to start recording the selected camera;... - Page 18 SYSTEM INTRODUCTION Description of Icons Icon Record All Cameras Icon Description Tap to start recording from all cameras; the Record icon will appear. Tap again to stop recording. Volume Tap to mute or change volume setting. Close Tap to close the Settings menu. —...
-
Page 19: Live Screen Displays
SYSTEM INTRODUCTION Live Screen Displays The Live screen displays in three views - Quad View, Smart Quad view or Full View. Quad View divides the screen’s image area into four quadrants and displays camera video in each quadrant. If less than four cameras are connected and on, only those cameras’ videos will display on the Live screen. -
Page 20: Camera Views
SYSTEM INTRODUCTION Camera Views To change camera views, perform the following: Tap on the Open/Close icon to open the Menu options. 1080p 2017/07/05 09 : 34 : 18 2017/07/05 09 : 34 : 18 Tap the Quad or Smart Quad icon. -
Page 21: Adjusting The Volume
SYSTEM INTRODUCTION Adjusting the Volume Adjust the camera’s audio on the monitor as follows: Tap on the Open/Close icon to open the Menu options. 1080p 2017/07/05 09 : 34 : 18 2017/07/05 09 : 34 : 18 Tap the Speaker icon repeatedly to set the sound from mute to one of three 1080p... -
Page 22: Recording Live Video
SYSTEM INTRODUCTION Recording Live Video Make sure a Micro SD card, HDD or Flash Drive is installed, 1080p see page 11. Tap on the Open/Close icon to open the Menu options. 2017/07/05 09 : 34 : 18 2017/07/05 09 : 34 : 18 Tap the Record icon to start recording the selected camera/ screen (REC appears on the... -
Page 23: Main Menu
MAIN MENU Main Menu Tap on the Open/Close icon to 1080p open the Menu options. 2017/07/05 09 : 34 : 18 2017/07/05 09 : 34 : 18 Tap the Options icon to enter the Main Menu. 1080p 1080p TIP: Entering the Main Menu while 2017/07/05 09 : 34 : 18 recording will stop the recording process. -
Page 24: Camera Pairing
MAIN MENU Camera Pairing Your cameras are paired to the monitor at the factory to channels 1 and 2 (only camera 1 for AWS337). When you add a new camera to your system, you have to “introduce” the camera and monitor to each other so they can communicate. Follow steps 1 through 3 on the previous page to access the Main Menu . -
Page 25: Turning A Camera On Or Off
MAIN MENU Turning a Camera On or Off Follow steps 1 through 3 on page 21 to access the Main Menu. Tap Camera Setup icon to access the Camera Setup screen. Main Menu Camera Setup Tap the desired camera that you want to turn on or off. -
Page 26: Setting Hd Option
MAIN MENU Setting HD Option Follow steps 1 through 3 on page 21 to access the Main Menu. Tap Camera Setup icon to access the Camera Setup screen. Main Menu Camera Setup Tap the HD icon repeatedly to change it from 1080 to 720. 1080 will look better but 720 will provide a better frame rate which is optimal when viewing on a... -
Page 27: Setting The Image Quality
MAIN MENU Setting the Image Quality Follow steps 1 through 3 on page 21 to access the Main Menu. Tap Camera Setup icon to access the Camera Setup screen. Main Menu Camera Setup Tap the Image Quality icon repeatedly to change it from High to Low. -
Page 28: Schedule Recording
MAIN MENU Schedule Recording Follow steps 1 through 3 on page 21 to access the Main Menu. Tap Recorder Setup icon to access the Record Setup screen. Main Menu Camera Setup Tap the Record Schedule icon. AM11 PM02 AM11 PM02 AM11 PM02 AM11... - Page 29 MAIN MENU Schedule Recording Tap the first column and then tap the + or – icon to select the following: AM11 PM02 AM11 PM02 AM11 PM02 : Select this for continuos AM11 PM02 recorgings using a specific time and day. SUN-SUN AM11 PM02...
-
Page 30: Motion And Mask Options
MAIN MENU Motion and Mask Options Follow steps 1 through 3 on page 21 to access the Main Menu. Tap Recorder Setup icon to access the Record Setup screen. Main Menu Camera Setup Tap the Motion icon. Tap the desired camera to select it and again to set the desired motion setting to PIR (Uses Advance Motion settings), Low, Mid or... -
Page 31: Detection Options
MAIN MENU Detection Options Follow steps 1 through 3 on page 21 to access the Main Menu. Tap Recorder Setup icon to access the Record Setup screen. Main Menu Camera Setup Tap the Detection Setup icon. Detection Setup Additional setup options Tap the options as follows: Motion Record Time: Repeatedly tap to set the time the... -
Page 32: Event List
MAIN MENU Event List Follow steps 1 through 3 on page 21 to access the Main Menu. Tap Event List icon to access the Event List screen. Main Menu Camera Setup 2016 NOV Tap on the day containing the recording you want to view or on a specific camera to view only that camera’s recordings. - Page 33 MAIN MENU Event List Tap on the Open/Close icon to open the playback options. The bottom control buttons will control the following: Tap to rapidly rewind the 2017/07/05 09 : 34 : 18 playback. 2017/07/05 09 : 34 : 18 Tap to play back the recording.
-
Page 34: To Delete A Recording
MAIN MENU To Delete a Recording Follow steps 1 through 3 on page 21 to access the Main Menu. Tap Event List icon to access the Event List screen. Main Menu Camera Setup Tap on the day containing the recording(s) you want to delete. Tap on the box next to the recordings you want to delete, a check-mark will appear. -
Page 35: To Copy A Recording
MAIN MENU To Copy a Recording Follow steps 1 through 3 on page 21 to access the Main Menu. Tap Event List icon to access the Event List screen. Main Menu Camera Setup Tap on the day containing the recording(s) you want to copy. Tap on the box next to the recordings you want to copy, a check-mark will appear. -
Page 36: Setting The Date/Time
MAIN MENU Setting the Date/Time Follow steps 1 through 3 on page 21 to access the Main Menu. Tap System Setup icon to access the System screen. Main Menu Camera Setup Tap the Day and Time icon. Tap the Up icon to increase or the Down button to decrease Detection Setup the Year, Month, Day, Hours and... -
Page 37: Setting The Language
MAIN MENU Setting the Language Follow steps 1 through 3 on page 21 to access the Main Menu. Tap System Setup icon to access the System screen. Main Menu Camera Setup Tap the Language icon. Tap the desired system language. Detection Setup Additional setup options When done setting, tap the... -
Page 38: Setting The Image Appearance
MAIN MENU Setting the Image Appearance Follow steps 1 through 3 on page 21 to access the Main Menu. Tap System Setup icon to access the System screen. Main Menu Camera Setup Tap the Display Setup icon. Tap the Signal Strength Indicator icon once to select it Detection Setup and repeatedly to turn on (icon... -
Page 39: Setting The Idle Display
MAIN MENU Setting the Idle Display Follow steps 1 through 3 on page 21 to access the Main Menu. Tap System Setup icon to access the System screen. Main Menu Camera Setup Tap the Idle Display Setup icon. This setting allows you to decide how the cameras will display Detection Setup Additional setup options... -
Page 40: Setting The Power Savings
MAIN MENU Setting the Power Savings Follow steps 1 through 3 on page 21 to access the Main Menu. Tap System Setup icon to access the System screen. Main Menu Camera Setup Tap the Power Saving Setup icon. Tap the desired time for which the display will remain on when idle, 5 Detection Setup Additional setup options... -
Page 41: Setting The Storage
MAIN MENU Setting the Storage Follow steps 1 through 3 on page 21 to access the Main Menu. Tap Storage Setup icon. Main Menu Camera Setup Tap the Storage Setup icon. PLEASE SEND CORRECT DISPLAY Storage Status Select Storage Device for Recording Select the desired drive to record onto: microSD Card (in PLEASE SEND... -
Page 42: Formatting A Drive
MAIN MENU Formatting a Drive Follow steps 1 through 3 on page 21 to access the Main Menu. Tap Storage Setup icon. Main Menu Camera Setup Tap the Storage Format icon. PLEASE SEND CORRECT DISPLAY Storage Status Select Storage Device for Recording Tap the desired drive to format once to select it and again to PLEASE SEND... -
Page 43: Setting The Security Code And Internet Info
MAIN MENU Setting the Security Code and Internet Info YOU MUST CHANGE THE SECURITY CODE BEFORE SETTING UP REMOTE ACCESS. Follow steps 1 through 3 on page 21 to access the Main Menu. Tap Storage Setup icon. Main Menu Camera Setup Tap the Security Code icon. -
Page 44: System Info And Upgrading
MAIN MENU System info and Upgrading Follow steps 1 through 3 on page 21 to access the Main Menu. Tap Storage Setup icon. Main Menu Camera Setup Tap the System Info icon. PLEASE SEND CORRECT DISPLAY Storage Status Select Storage Device for Recording The info on the system will appear. -
Page 45: Remote Access
REMOTE ACCESS Overview This camera system allows you view live video from an iPhone , iPad , iPod Touch ® ® ® Android smartphone or tablet. Free apps are available through the Apple App Store or the Android Market/Google Play. Up to three remote users can access live video at the same time as long as they have the User ID (DID) Code and Security Code. -
Page 46: Wdvr Android Setup Wizard
REMOTE ACCESS WDVR Android Setup Wizard Launch the WDVR App and the Devices screen will appear. Tap New to start the setup. Tap Scan QR and scan in the QR code located on the rear of the monitor. The device ID will automatically be entered. - Page 47 REMOTE ACCESS WDVR Android Setup Wizard Enter a device name. Also enter the password, but it is VERY important that 1) the password was changed from the default 123456 on the monitor and 2) the password is entered exactly as it on the monitor. Tap Add New.
-
Page 48: Wdvr Apple Setup Wizard
REMOTE ACCESS WDVR Apple Setup Wizard Launch the WDVR App and the Devices screen will appear. Tap “+” to start the setup. Tap QR code and scan in the QR code located on the rear of the monitor. The device ID will automatically be entered. - Page 49 REMOTE ACCESS WDVR Apple Setup Wizard Enter a device name. Also enter the password, but it is VERY important that 1) the password was changed from the default 123456 on the monitor and 2) the password is entered exactly as it is on the monitor. Tap Save.
-
Page 50: Android-Wdvr Main Screen And Icons
REMOTE ACCESS WDVR Main Screen and Icons Tap the camera in the Devices menu followed by the button to view the camera(s). Click anywhere on the screen to bring up the App icons. See below for icon descriptions Tap to view the recorded videos, see page xx for details Tap to ????? Push Noti cation when xx is set. -
Page 51: Android-Recording
REMOTE ACCESS Recording Tap the icon, then tap Record ON/OFF. Tap one or more cameras/channels to record, the switches will show ON when activated. — 49 —... - Page 52 REMOTE ACCESS Recording Tap OK. The unit will record the selected cameras/channels. To stop recording, repeat steps 1 and 2 to turn the respective switches off. Tap OK. — 50 —...
-
Page 53: Android-Event List
REMOTE ACCESS Event List Tap the icon, then tap Playback. Tap Storage and then the desired drive to view, i.e. SD Card. — 51 —... - Page 54 REMOTE ACCESS Event List Tap Channel and then the desired camera/channels to view its recordings. Tap View. Then tap a date and then tap the time and the video will start playing back. — 52 —...
- Page 55 REMOTE ACCESS Recording Event List The bottom control icons will control the following: Tap to rapidly rewind the playback. Tap to play back the recording. Tap to pause the playback. Tap to rapidly advance the playback. — 53 —...
-
Page 56: Android-Camera Pairing
REMOTE ACCESS Camera Pairing Your cameras are paired to the monitor at the factory to channels 1 and 2 (only camera 1 for AWS327). When you add a new camera to your system, you have to “introduce” the camera and monitor to each other so they can communicate. Tap the icon, then tap Remote Setting to access the System Setup screen. -
Page 57: Android-Turning A Camera On Of Off
REMOTE ACCESS Turning a Camera On or Off Tap the icon, then tap Remote Setting to access the System Setup screen. Tap the desired camera that you want to turn on or off. Tap the Activation switch to turn the selected camera on or off. —... -
Page 58: Android-Setting Hd Option
REMOTE ACCESS Setting HD Option Tap the icon, then tap Remote Setting to access the System Setup screen. Tap the desired camera that you want to set. Tap to set the Resolution to HIGH or LOW as desired. HIGH will look better but LOW will provide a better frame rate which is optimal when viewing on a mobile device. -
Page 59: Android-Setting The Image Quality
REMOTE ACCESS Setting the Image Quality Tap the icon, then tap Remote Setting to access the System Setup screen. Tap the desired camera that you want to set. Tap to set the Quality to HIGH or LOW as desired. High quality will produce a better video display quality, but the system will lower the display frame rate as... -
Page 60: Android-Schedule Recording
REMOTE ACCESS Schedule Recording Tap the icon, then tap Remote Setting to access the System Setup screen. Tap Schedule. Tap the desired camera to set, or ALL cameras then tap on a program. — 58 —... - Page 61 REMOTE ACCESS Schedule Recording Tap Recording Mode and then: Tap None to not set a schedule. Tap Schedule to set recording times using specific days or everyday. Tap Motion to set recording times that will record when motion is detected. Tap Date to select the weekly cycle the recording will take place.
-
Page 62: Android-Motion And Motion Area Options
REMOTE ACCESS Motion and Motion Area Options Tap the icon, then tap Remote Setting to access the System Setup screen. Tap Motion Sensitivity. Tap the desired camera and then set the desired motion setting to PIR (Uses Advance Motion settings), PIR Low, PIR Mid or PIR High. -
Page 63: Android-Detection Options
REMOTE ACCESS Detection Options Tap the icon, then tap Remote Setting to access the System Setup screen. Tap Recording Options. Tap the options as follows: Motion Length: Set the time the unit will record when motion is detected (30, 60 or 120 seconds). Record time may be longer is motion continues. -
Page 64: Android-Setting The Date/Time
REMOTE ACCESS Setting the Date/Time Tap the icon, then tap Remote Setting to access the System Setup screen. Tap Date. Set the time the date and time. Tap Update when done. — 62 —... -
Page 65: Android-Setting The Language
REMOTE ACCESS Setting the Language Tap the icon, then tap Remote Setting to access the System Setup screen. Tap Language. Set the time the date and time. Tap the desired language. — 63 —... -
Page 66: Android-Setting The Image Appearance
REMOTE ACCESS Setting the Image Appearance Tap the icon, then tap Remote Setting to access the System Setup screen. Tap Display. Tap Signal Indicator to turn it on (icon will turn green) which will show the signal strength on the videos. -
Page 67: Android-Setting The Idle Display
REMOTE ACCESS Setting the Idle Display Tap the icon, then tap Remote Setting to access the System Setup screen. Tap Idle Display. This setting allows you to decide if the cameras will display in quad mode or if they will cycle individually in 5 or 10 second intervals. -
Page 68: Android-Setting The Power Savings
REMOTE ACCESS Setting the Power Savings Tap the icon, then tap Remote Setting to access the System Setup screen. Tap Power Saving. Tap the desired time for which the display will remain on when idle, 5 minutes, 10 minutes or Always On. —... -
Page 69: Android-Setting The Security Code And Internet Info
REMOTE ACCESS Setting the Security Code and Internet Info YOU MUST CHANGE THE SECURITY CODE BEFORE SETTING UP REMOTE ACCESS. Tap the camera in the Devices menu followed by the button to view the cam. Tap the System Menu icon to access the System Setup screen. -
Page 70: Android-Setting The Storage
REMOTE ACCESS Setting the Storage Tap the icon, then tap Remote Setting to access the System Setup screen. Tap Storage Status. Select the desired MAIN drive to record onto: microSD Card (in the microSD slot) or the drive connected to the USB jack; a check mark will appear in the box. -
Page 71: Android-Formatting A Drive
REMOTE ACCESS Formatting a Drive Tap the icon, then tap Remote Setting to access the System Setup screen. Tap Storage Format. Tap the desired drive to format which will erase the drive and format it to be used with this system. -
Page 72: Android-System Info
REMOTE ACCESS System Info Tap the icon, then tap Remote Setting to access the System Setup screen. Tap System Info. The info on the system will appear. On this page you can also turn on the RF Power Advance option. —... -
Page 73: Android-Setting The Push Setting
REMOTE ACCESS Setting the Push Setting Tap the icon, then tap Remote Setting to access the System Setup screen. Tap Push Notification Setting. Tap the Push Interval and Push Time period. Setting the Push setting will xxxxxx? Please advise??? —... -
Page 74: Apple-Wdvr Main Screen And Icons
REMOTE ACCESS WDVR Main Screen and Icons Tap the camera in the Devices menu followed by the button to view the camera(s). Click anywhere on the screen to bring up the App icons. See below for icon descriptions Tap to take a snapshot/picture of the screen Tap to view camera(s) Tap to stop live view Tap to record or stop recording, see page 73 for details... -
Page 75: Apple-Recording
REMOTE ACCESS Recording Tap the Record icon. Tap one or more cameras/channels to record, the switches will turn green when selected. — 73 —... - Page 76 REMOTE ACCESS Recording Tap Done. The unit will record the selected cameras/channels. To stop recording, repeat steps 1 and 2 to turn the respective switches off . Tap Done. — 74 —...
-
Page 77: Apple-Event List
REMOTE ACCESS Event List Tap the Event icon. Tap the selected drive to view, i.e. SD Card. — 75 —... - Page 78 REMOTE ACCESS Event List Tap a camera/channels to view its recordings. Then, tap on the desired recording date. Tap the desired time and the video will start playing back. — 76 —...
- Page 79 REMOTE ACCESS Recording Event List The bottom control icons will control the following: Tap to rapidly rewind the playback. Tap to play back the recording. Tap to pause the playback. When paused or stopped you can tap the date in the top left corner to go to the previous screen.
-
Page 80: Apple-Camera Pairing
REMOTE ACCESS Camera Pairing Your cameras are paired to the monitor at the factory to channels 1 and 2 (only camera 1 for AWS337). When you add a new camera to your system, you have to “introduce” the camera and monitor to each other so they can communicate. Tap the camera in the Devices menu followed by the button... -
Page 81: Apple-Turning A Camera On Of Off
REMOTE ACCESS Turning a Camera On or Off Tap the camera in the Devices menu followed by the button to view the cam. Tap the System Menu icon to access the System Setup screen. Tap the desired camera that you want to turn on or off. -
Page 82: Apple-Setting Hd Option
REMOTE ACCESS Setting HD Option Tap the camera in the Devices menu followed by the button to view the cam. Tap the System Menu icon to access the System Setup screen. Tap the desired camera that you want to set. Tap to set the Resolution to HIGH or LOW as desired. -
Page 83: Apple-Setting The Image Quality
REMOTE ACCESS Setting the Image Quality Tap the camera in the Devices menu followed by the button to view the cam. Tap the System Menu icon to access the System Setup screen. Tap the desired camera that you want to set. Tap to set the Quality to HIGH or LOW as desired. -
Page 84: Apple-Schedule Recording
REMOTE ACCESS Schedule Recording Tap the camera in the Devices menu followed by the button to view the cam. Tap the System Menu icon to access the System Setup screen. Tap Record Schedule. Tap the desired camera to set, or all cameras. - Page 85 REMOTE ACCESS Schedule Recording Tap Off to not set a schedule. Tap Schedule to set recording times using specific days or everyday. Tap Motion to set recording times that will record when motion is detected. Tap Date to select the weekly cycle the recording will take place.
-
Page 86: Apple-Motion And Motion Area Options
REMOTE ACCESS Motion and Motion Area Options Tap the camera in the Devices menu followed by the button to view the cam. Tap the System Menu icon to access the System Setup screen. Tap Motion Sensitivity. Tap the desired camera and then set the desired motion setting to PIR (Uses Advance Motion settings), PIR Low, PIR Mid or PIR High. -
Page 87: Apple-Detection Options
REMOTE ACCESS Detection Options Tap the camera in the Devices menu followed by the button to view the cam. Tap the System Menu icon to access the System Setup screen. Tap Detection Setup. Tap the options as follows: Motion Record Time: Set the time the unit will record when motion is detected (30, 60 or 120 seconds). -
Page 88: Apple-Setting The Date/Time
REMOTE ACCESS Setting the Date/Time Tap the camera in the Devices menu followed by the button to view the cam. Tap the System Menu icon to access the System Setup screen. Tap Date and Time. Set the time the date and time. Tap Set to Now to set the time as per the apple device. -
Page 89: Apple-Setting The Image Appearance
REMOTE ACCESS Setting the Image Appearance Tap the camera in the Devices menu followed by the button to view the cam. Tap the System Menu icon to access the System Setup screen. Tap Display Setup. Tap RSSI to turn it on (icon will turn green) which will show the signal strength on the videos. -
Page 90: Apple-Setting The Idle Display
REMOTE ACCESS Setting the Idle Display Tap the camera in the Devices menu followed by the button to view the cam. Tap the System Menu icon to access the System Setup screen. Tap Idle Display. This setting allows you to decide if the cameras will display in quad mode or if they will cycle individually in 5 or 10 second... -
Page 91: Apple-Setting The Power Savings
REMOTE ACCESS Setting the Power Savings Tap the camera in the Devices menu followed by the button to view the cam. Tap the System Menu icon to access the System Setup screen. Tap Power Saving. Tap the desired time for which the display will remain on when idle, 5 minutes, 10 minutes or Always On. -
Page 92: Apple-Setting The Push Setting
REMOTE ACCESS Setting the Push Setting Tap the camera in the Devices menu followed by the button to view the cam. Tap the System Menu icon to access the System Setup screen. Tap Push Setting. Tap the Push Interval and Push Time period. -
Page 93: Apple-Setting The Storage
REMOTE ACCESS Setting the Storage Tap the camera in the Devices menu followed by the button to view the cam. Tap the System Menu icon to access the System Setup screen. Tap Storage Status. Select the desired drive to record onto: microSD Card (in the microSD slot) or the drive connected to the USB jack. -
Page 94: Apple-Formatting A Drive
REMOTE ACCESS Formatting a Drive Tap the camera in the Devices menu followed by the button to view the cam. Tap the System Menu icon to access the System Setup screen. Tap Storage Format. Tap the desired drive to format which will erase the drive and format it to be used with this system. -
Page 95: Apple-Setting The Security Code And Internet Info
REMOTE ACCESS Setting the Security Code and Internet Info YOU MUST CHANGE THE SECURITY CODE BEFORE SETTING UP REMOTE ACCESS. Tap the camera in the Devices menu followed by the button to view the cam. Tap the System Menu icon to access the System Setup screen. -
Page 96: Apple-System Info
REMOTE ACCESS System Info Tap the camera in the Devices menu followed by the button to view the cam. Tap the System Menu icon to access the System Setup screen. Tap System Information. The info on the system will appear. —... -
Page 97: Maintenance
MAINTENANCE Monitor As you use your touch-screen monitor, fingerprints, etc. will appear on the screen. Keep the screen clean by wiping it with a microfiber cloth. It is not recommended to use any chemicals or harsh detergents on the touch screen. Cameras When dust and grime builds up on the camera lens and glass, it will affect the night vision capability. -
Page 98: Troubleshooting
TROUBLESHOOTING If you have any trouble with your system, try these simple steps which should handle most common issues. Problem Possible Solution Make sure the camera’s power is on. Connect it to the included adapter. Move the camera closer to the monitor; it might be out of range or flip the antenna of the monitor and/or camera to No Image. - Page 99 TROUBLESHOOTING Problem Possible Solution Turn off the monitor and restart. If power button does not System has locked up. respond, use a pin to press the Reset button located on the side of the monitor. Make sure the camera is plugged in and the red LED is on;...
-
Page 100: Product Specifications
PRODUCT SPECIFICATIONS Camera Transmission Distance ..............300 Meters in open space Image Resolution ................... 1920 x 1080 (Full HD) Housing ..................IP66 weather resistance metal Viewing Angle ....................H: 90°, V: 45°±3° Low Light Solution ..............6 IR LEDs w/ IR CUT switcher Night Visibility ...................... -
Page 101: Warranty
ALC service center for a defect or malfunction covered by this warranty, (E) used in any conjunction with equipment or parts or as part of any system not manufactured by ALC, or (F) installed or programmed by anyone other than as detailed by the owner’s manual for this product. - Page 102 PROCEDURE FOR OBTAINING PERFORMANCE OF WARRANTY: If, after following the instructions return it to you without charge for parts, service, or any other cost. ALC, at its option, may replace the unit with a new or in the owner’s manual you are certain that the Product is defective, pack the Product carefully refurbished unit.
- Page 103 Wireless Made Simple. ALCWireless.com 062217_v1.0...
- Page 104 Wireless Made Simple. ALCWireless.com...
Need help?
Do you have a question about the AWS3377 and is the answer not in the manual?
Questions and answers