Advertisement
Available languages
Available languages
Quick Links
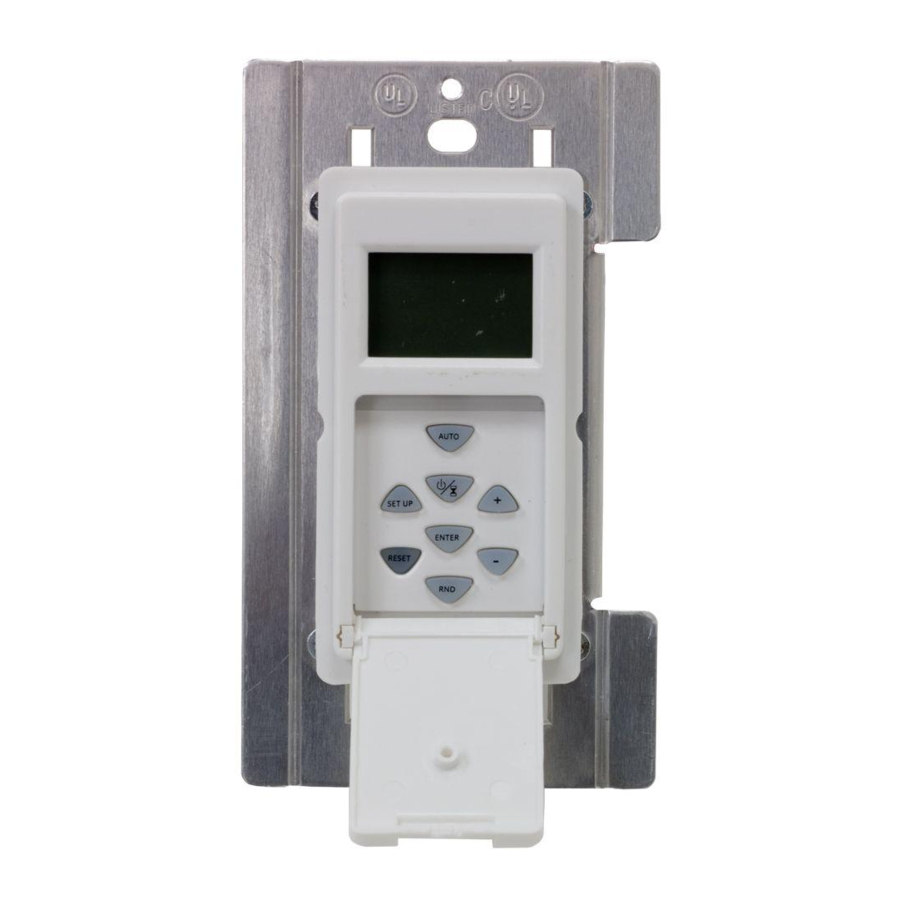
SunSmart
Changing the color of the timer
This device includes a light almond faceplate. To switch faceplates, proceed as follows:
1. Gently remove the white faceplate using a flat head screwdriver. Starting at the top left corner, gently
pry the faceplate loose. Work around the faceplate until it pops off.
2. Find the light almond faceplate in the package. Place the new faceplate into position and carefully
push until it snaps into position.
Multi-Switch Installations
When combining controls in a wall box, remove all inner side sections
prior to wiring. Use pliers to bend side section up and down until it
breaks off. Repeat for each side section to be removed.
Typical wiring schematic for single pole installation
= Wiring nut
Black
Green
Line
Ground
White
White
BLACK
WHITE
BLUE
GREEN
If you are unsure or unclear about this installation or if the wires in
your box do not match the manual (not all switch boxes have neutral
wires), contact a qualified licensed electrician.
Installation instructions (single pole)
1. Turn OFF the main power at the circuit breaker or fuse box.
2. Remove the existing switch.
3. Connect the wires of the timer to the wall box as shown in Figure 1 and Figure 2 using the
wire nuts provided.
a) Connect the hot/live wire of line to the black wire from timer.
b) Connect the hot/live wire of load to the blue wire from timer.
c) Connect the ground wire to the green wire from timer.
d) Connect the neutral wire to the white wire from the timer. Often the neutral (white) wire can be
found in the back of the wire box connected with a wire nut. There may be several neutral wires
bound together. Add the neutral to all neutral wires bound together making sure wire nut is tight.
e) For single pole installation, attach wire nut to red (traveler) wire from the back of the timer. This wire
is not needed in the single pole installation.
Note: Be sure that all wire nuts are secure.
4. Tuck the wires into the wall box leaving room for the timer. Using the screws provided, mount the
timer to the wall box being careful not to crush any wires.
5. Turn main power ON at the circuit breaker.
Typical 3-Way Wiring: In a typical 3-way application there are two 3-way switches. The switch on the
Typical Wiring Schematic for 3-Way Installation
Line Side
Line
H
H
C
"HOT" side has the common terminal tied to 120VAC. The switch on the "LOAD" side has the common tied
to the lamp/load the switches turn OFF and ON.
Common = Screw terminals found on the back single pole or 3-way
toggle switch.
Existing 3-way installation line side
(The maximum distance between timer and 3-way switch is 100ft.)
Timer on line side
1. Remove power from the circuit by turning off the circuit breaker or removing fuse.
2. Remove the line side 3-way switch and remove wires, label the wire removed from the
common terminal.
3. Connect the line from the common terminal of the original switch wire (1) to the black wire of the
timer using the supplied wire nuts
4. Connect the white wire of the timer to the neutral wire (white). The neutral wires may be bundled
together in the back of the box. There may be several neutral wires bound together. Add the neutral to
all neutral wires bound together making sure wire nut is tight.
5. Connect the two remaining wires left to the red wire (5) and blue wires (4) of the timer. If the wires are
colored or marked you can tell them apart and record their markings for use later.
6. Connect the green wire (3) to the ground wire (green or bare wire in box).
7. Carefully tuck the wires into the switch box leaving room for the timer.
8. Use the screws provided to install the timer in the box being careful not to crush any wires.
15312 Installation Version 4.indd 1
Digital Timer
™
Blue
Black
Timer
Load
White
Figure 1
Figure 2
RED
Load Side
H
BLACK
WHITE
RED
BLUE
GREEN
Typical wiring diagram for 3-way
installation with timer on hot/line side
Switch on load side
1. Remove the Load side 3-way switch and remove and label the common wire (4).
2. Connect the jumper wire from the switch to both the load wire and wire (4). You should have three
wires connected with one wire nut.
3. Connect the jumper back to the common input of the 3-way switch.
4. The other wire (5) should stay connected to one of the other connections of the 3-way switch.
5. Carefully tuck the wires into the switch box leaving room for the switch.
6. Using the screws provided install the switch back in the box being careful not to crush or
pinch any wires.
7. Restore power at the circuit breaker or fuse box.
8. Verify that the load turns ON and OFF when you manually turn the timer ON and OFF. Perform this
test with the remote switch in both positions.
9. If the load does not operate properly you need to swap wire (4) and wire (5). This can be done at the
timer or remote switch, after removing power from the circuit at the circuit breaker or fuse box.
10. Verify that the load turns ON and OFF when you manually turn the timer ON and OFF. Perform this
test with the remote switch in both positions. You should hear the timer relay click ON/OFF. If you hear
the relay click but the load does not turn ON/OFF properly, check your wiring.
Existing 3-way installation load side
(The maximum distance between timer and 3-way switch is 100ft)
GROUND
3
C
5
1 = Line
2 = Neutral
3 = Ground
4 = Load
5 = Traveler
C = Common
Switch on line side
1. Remove power from the circuit by turning off the circuit breaker or removing fuse.
2. Remove the 3-way switch from the hot/line side. Remove and label the common wire and remove one
of the other wires.
3. Using the supplied wire nuts, connect the wire removed from the common, the supplied jumper and
the other removed wire (1) together.
4. Connect the jumper back to the common connection of the switch.
5. If the two wires wire (1) and wire (5) on the switch are colored or marked so you can tell them apart
record their markings for use later.
6. Tuck the wires into box leaving room for switch.
7. Install switch into the box.
Timer on Load Side
1. Remove the load side 3-way switch and remove the 3 wires, labeling the common wire.
2. Connect the removed common wire to the timer blue wire.
3. Connect wire (1) to the timer black (line) wire.
4. Connect wire (5) to the timer red (traveler) wire.
5. Connect the white wire (1) of the timer to the white wire in the switch box (neutral). The neutral wires
may be bundled in the back of the switch box with a wire nut. There may be several neutral wires
bound together. Add the neutral to all neutral wires bound together making sure the wire nut is tight.
6. Connect the green wire (3) of the timer to ground in the switch box.
7. Tuck the wires into the switch box leaving room for the timer.
8. Use the supplied screws to install timer being careful not to crush or pinch the wires.
9. Restore power at the circuit breaker or fuse box.
10. If the timer display does not turn on, you may need to swap wire (1) and wire (5). This can be done at
the timer or toggle switch, after removing power from the circuit at the fuse box or circuit breaker.
11. Verify that the load turns ON and OFF when you manually turn the timer ON and OFF. Perform this
test with the remote switch in both positions. You should hear the timer relay click ON/OFF. If you hear
the relay click but the load does not turn ON/OFF properly, check your wiring.
This device complies with part 15 of the FCC rules. Operation is subject to the following two conditions: (1) this device may not
cause harmful interference, and (2) this device must accept any interference received, including interference that may cause
Neutral
undesired operation.
FCC NOTE: The manufacturer is not responsible for any radio or TV interference caused by unauthorized modifications to this
equipment. Such modifications could void the user's authority to operate the equipment.
NOTE: This equipment has been tested and found to comply with the limits for a Class B digital device, pursuant to Part 15 of the
H
FCC Rules. These limits are designed to provide reasonable protection against harmful interference in a residential installation.
This equipment generates, uses and can radiate radio frequency energy and, if not installed and used in accordance with the
instructions may cause harmful interference to radio communications. However, there is no guarantee that interference will not
occur in a particular installation. If this equipment does cause harmful interference to radio or television reception, which can be
C
determined by turning the equipment off and on, the user is encourage to try to correct the interference by one or more of the
following measures:
• Reorient or relocate the receiving antenna.
• Increase the separation between the equipment and receiver.
• Connect the equipment into an outlet on a circuit different from that to which the receiver is connected.
• Consult the dealer or an experienced radio/TV technician for help.
MADE IN CHINA
GE is a trademark of General Electric Company and is under
license by Jasco Products Company LLC, 10 E. Memorial Rd.,
Oklahoma City, OK 73114.
This Jasco product comes with a 1-year limited warranty.
Visit www.jascoproducts.com for warranty details and
product registration.
Questions? Contact us at 1-800-654-8483 between
7:30AM—5:00PM CST.
Step-by-Step
Instructional Video
Instructions
Line
GROUND
3
1
2
5
C
JUMPER
4
5
3
Line
BLACK
WHITE
2
RED
BLUE
1
GREEN
Typical wiring diagram for 3-way installation
with timer on load side
WARNING
RISK OF ELECTRIC SHOCK
• SHUT OFF POWER AT FUSE BOX OR CIRCUIT
BREAKER BEFORE INSTALLATION
• DO NOT USE IN WET LOCATIONS
• USE INDOORS ONLY
RISK OF FIRE
• DO NOT USE TO CONTROL APPLIANCES THAT
CONTAIN HEATING ELEMENTS (COOKING
APPLIANCES, HEATERS, IRONS, ETC.)
• DO NOT EXCEED ELECTRICAL RATINGS
• USE COPPER WIRE ONLY WITH THIS DEVICE
• DO NOT USE TO CONTROL RECEPTACLES
www.jascoproducts.com
Installation
Load
2
4
1 = Line
2 = Neutral
3 = Ground
4 = Load
5 = Traveler
C = Common
Load
1
2
5
4
3
15312
Manual Version 2
07-10-2013
8/1/13 2:05 PM
Advertisement

Related Manuals for GE SunSmart 15312


Summary of Contents for GE SunSmart 15312
- Page 1 2. Remove the line side 3-way switch and remove wires, label the wire removed from the • DO NOT USE IN WET LOCATIONS GE is a trademark of General Electric Company and is under common terminal. • USE INDOORS ONLY license by Jasco Products Company LLC, 10 E.
- Page 2 HECHO EN CHINA • USE SOLAMENTE EN INTERIORES ROJO GE es una marca registrada de la companía General Electric RIESGO DE INCENDIO Company y es utilizada bajo licencia a la companía Jasco Prodcucts Company LLC, 10 E. Memorial Rd., Oklahoma City, •...
Need help?
Do you have a question about the SunSmart 15312 and is the answer not in the manual?
Questions and answers
The timer is set. I went through all the steps and put in the correct Times for desk and Dawn. Still, it doesn’t turn on and off by itself. I did push save, and the screen is indicating that the auto function is on.
The GE SunSmart 15312 timer may not be turning on and off automatically despite being set correctly due to the following possible issues:
1. Incorrect Wiring – The wiring may not be properly connected. Ensure that the neutral wire is correctly added to the neutral bundle and that all connections are secure.
2. Wire Swap Needed – If the timer display does not turn on, swapping wire (1) and wire (5) may be necessary. This adjustment should be done after turning off power at the circuit breaker or fuse box.
3. Programming Not Saved – The timer settings may not have been properly saved. Ensure that after setting the DUSK time and other parameters, you press "ENTER" when the screen says "SAVE" to store the data.
4. Timer Not in AUTO Mode – The timer must be set to "AUTO" mode to function automatically. If it is in manual mode, it will not turn on and off based on the programmed schedule.
5. Power Issue – If the timer does not display any information, check if the circuit breaker or fuse box is supplying power to the timer.
6. Relay Clicks but No Load Response – If you hear the relay clicking but the connected load (such as lights) does not turn on or off, verify the wiring and ensure the load is functioning properly.
Checking these factors should help resolve the issue.
This answer is automatically generated