Table of Contents

Related Manuals for Mothers choice journey

Summary of Contents for Mothers choice journey
- Page 1 6 months to 8 years IMPORTANT: KEEP THIS BOOKLET IN THE PLACE PROVIDED ON THE CHILD RESTRAINT. Illustrations and designs may vary. follow us on the only choice motherschoice.com.au...
-
Page 2: Quick Start Guide
quick start guide SASH-SIDE LAP-SIDE HOLD TOGETHER SLIDE BETWEEN... - Page 3 SLIDE TO BOTTOM OVER BEHIND CARSEAT UNDER TURN ACROSS...
- Page 4 SLIDE TO BOTTOM CLICK!
- Page 5 PULL TIGHT PULL TIGHT (SASH-SIDE) TIGHT...
- Page 6 belt path check front view rear view PULL TO TIGHTEN PRESS BUTTON...
-
Page 7: Introduction
before you start... thank you for purchasing this mother’s choice child restraint. Please read and follow all of the instructions outlined in this manual for maximum protection. If you have any questions regarding the installation or use of this child restraint in Australia or New Zealand, please contact our customer service numbers provided. -
Page 8: Table Of Contents
Quick start guide ......2 - 6 Introduction ........7 Warnings ..........9 preparing seat to fit child contents Shoulder heights ......10 Next seat for your child ....11 Components list ......12 - 13 Shoulder strap height ....... 14 Using lowest harness position .. -
Page 9: Warnings
WARNINGS • Fit the restraint firmly to the car seat. • Fit the harness firmly to the child. • A loose restraint or harness is dangerous. • Supervision of children is needed because they may be able to undo the buckles and adjusters. • Use the restraint exactly as shown in the instructions. • DO NOT LEAVE CHILDREN UNATTENDED IN THE CAR. -
Page 10: Preparing Seat To Fit Child Shoulder Heights
Marker B Marker A IMPORTANT: FOLLOW THIS ADVICE MARKER A: YOUNG TODDLER Lower Shoulder Height Marker The child’s shoulders must be in-line or above this marker. If the child’s shoulders are below then the child should remain in their previous child restraint. -
Page 11: Next Seat For Your Child
When your child has outgrown the seat, you can either use: A booster seat suitable for children up to 8-10 years of age until their shoulders reach the upper height marker of the booster seat. -
Page 12: Components List
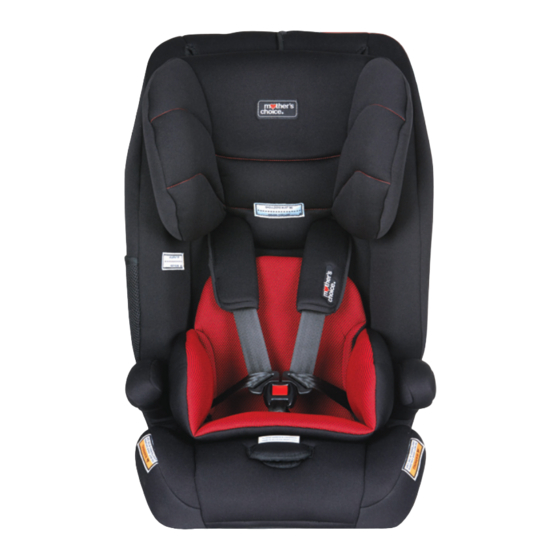
Adjustable Headrest Shoulder Height Markers Harness Slots (6 positions) Belt Mates Arm Rest Buckle (2 Position crotch buckle length) Padded Insert Harness Release Lever Harness Adjuster Strap FORWARD-FACING BELT PATH... - Page 13 Headrest Height Adjuster Knob (6 positions) Top Tether Storage Pocket Top Tether Strap Top Tether Strap Adjuster Storage Pocket (for instruction manual) Top Tether Hook Anchor Fitting Splitter Plate...
-
Page 14: Shoulder Strap Height
You MUST make these adjustments to your child restraint before you install the seat in the vehicle. Please adjust harness according to the toddler shoulder height marker prior to installation. to adjust shoulder strap height: Lift the harness release lever at the front of the seat (between trim cover opening). -
Page 15: Using Lowest Harness Position
Important: The harness is supplied on the lowest position. using lowest harness position: • Remove the harness completely (see page 14) and undo the cover. • Thread the harness through the lowest slot in the cover, through the lowest slot in the shell, then back through the second slot above. -
Page 16: Headrest Adjustment
The headrest is adjustable to six different heights. To adjust the headrest, the seat is fitted with RED headrest height adjuster knob. to loosen Rotate the knob anti-clockwise to loosen and adjust headrest to the desired position to suit child. -
Page 17: Adjusting Crotch Buckle Length
(2 position) PULL harness Important: Your restraint is set at the shortest adjuster strap length when supplied. Turn seat upside on back, and pull plastic cover to access crotch adjustment. -
Page 18: Fasten Buckle Assembly
1. To RELEASE the buckle, press the red button. PRESS 2. Insert one buckle tongue as shown above (you will not hear a click). 3. Insert the second buckle tongue as illustrated above. -
Page 19: Installing The Seat In Your Vehicle Loosening Tether Strap
1: loosen top tether strap Important: Remove padded insert from seat prior to attempting installation. PULL TO LOOSEN 1. To adjust strap, press grey button and pull back on top tether to loosen (Figure 1). Always stow excess PRESS tether in the pocket provided. - Page 20 3. Holding both sides together, start by threading the belt under the armrest (Figure 2b). 4. Loop the belt over the armrest (Figure 2c), and slide the belt down SLIDE BETWEEN firmly between the armrest and the backrest. SLIDE TO BOTTOM 5. Ensure belt is pushed down between the armrest and backrest as deep as possible.
- Page 21 TURN Move the seat sideways to gain access to belt (Figure 2f). 8. Pull the belt across the back of the seat (Figure 2g). ACROSS 9. Slide the belt down between the arm-rest and backrest. Push the belt down as deep as possible SLIDE TO (Figure 2h).
-
Page 22: Removing Slack To Tighten Belt
10. Wrap belt under armrest. 11. Connect the belt to your vehicle’s safety buckle (Figure 2j). You will CLICK! hear a “CLICK!” when the buckle is secure. STEP 3: REMOVING SLACK TO TIGHTEN BELT 12. Pull tight to ensure all slack is removed (Figure 3). - Page 23 13. Push down on the seat and grab the sash-side. Pull the sash upwards until remaining slack is removed. (Figure 3a). PULL TIGHT (SASH-SIDE) 14. Once all slack is removed, your installation should look like Figure Important: Check for firm fitment by holding arm rests and sliding the TIGHT seat side to side.
-
Page 24: Belt Path Check
STEP 4: BELT PATH CHECK REAR VIEW FRONT VIEW Important: Before continuing, double check that the belt path is installed correctly. -
Page 25: Attaching Top Anchorage Strap
STEP 5: ATTACH TOP ANCHORAGE STRAP 15. Attach the top tether to vehicle anchor point (Figure 5). Ensure there are not twists in the belt, and adjust until all slack is removed from top tether. Important: See page 30 for help finding your vehicle’s anchor point... -
Page 26: Care And Maintenance
CLEANING INSTRUCTIONS FOR BUCKLE Follow the manufacturer’s instructions at all times. Before removal, ensure you have carefully noted the way which the various parts are attached to the seat so as to facilitate reassembly. Your child car seat is equipped with a buckle designed to give your child maximum protection during proper use (Figure 1). -
Page 27: Cleaning The Buckle
CLEANING BUCKLE: • Place the buckle unit under running water (40 degrees Celsius), (Figure 2). Let the water flow through the mouth of the buckle for one minute. • Simultaneously latch and unlatch the tongues into the buckle several times until a strong audible click is heard (Figure 2a). -
Page 28: Removing The Cover
VERY IMPORTANT: Only replace the cover with a Safety 1 supplied replacement cover with identical shoulder height markers or a replacement cover meeting AS/NZS 8005. The insert is to be used from 6 months to approximately 1 year. - Page 29 • All covers are machine washable on a delicate cycle, in cold water. • Don’t forget to remove the instruction manual. • Tumble dry 10-15 minutes on low heat. • Do not dry clean. • All other surfaces should be cleaned with a mild soap PADDED INSERT and water.
-
Page 30: Accessories
• The anchor point can be found in different locations in different cars. The illustration above shows possible locations of anchor points. Sometimes it is on the parcel shelf in sedans, and on the floor area in station wagons, vans and hatchbacks. Make sure that you do not confuse the luggage hook in the back of a station wagon with anchor points. -
Page 31: Upper Anchorage Fitting
FOR CARS FITTED WITH A CHILD RESTRAINT Front of vehicle UPPER ANCHORAGE POINT Locate the upper anchorage point behind the rear Attachment bolt seating position (consult the car owner’s handbook for the location of the upper anchorage point). - Page 32 WARNING CHILD RESTRAINTS MUST NOT BE ATTACHED TO UNSOUND METAL OR TO WOOD OR SYNTHETIC STRUCTURES. WHEN DRILLING THE 9mm HOLE DO NOT DRILL THROUGH FUEL LINES, FUEL TANKS, ELECTRICAL WIRING, OR RADIO SPEAKERS. WEBBING STRAPS MUST BE PROTECTED FROM SHARP CORNERS AND EDGES.
-
Page 33: Notes
notes... -
Page 34: Notes
notes... -
Page 35: Warranty
Dorel Australia Pty Ltd warrants your new product to be free from defects in materials and workmanship for 6 years on the seat & 2 years on the trim, from the date of purchase, provided that the product is used in accordance with accompanying recommendations or instructions where provided. The benefit of... - Page 36 motherschoice.com.au DOREL AUSTRALIA PTY LTD 655-685 Somerville Road Sunshine West Victoria 3020 Email: customerservice@dorel.com.au Phone: 1300 809 526 Hours: 8:30 am - 5:00 pm Monday to Friday IGC DOREL NEW ZEALAND LTD 14 Sir William Avenue East Tamaki Auckland 2013 Email: customerservice@igc.co.nz Phone: 0800 628 000 (toll free) Hours: 8:00 am - 5:00 pm Monday to Friday...
Need help?
Do you have a question about the journey and is the answer not in the manual?
Questions and answers