Table of Contents
Advertisement
Available languages
Available languages
Quick Links
HD1
SHORT INSTRUCTION MANUAL
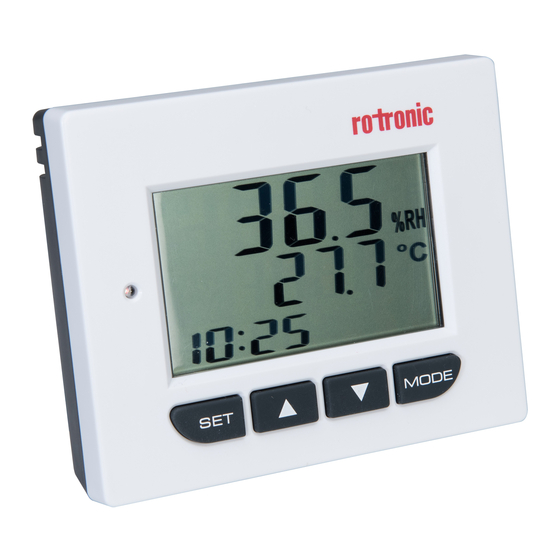
HD1 – Thermo Hygrometer Display
General Description
Congratulations on your purchase of the
new ROTRONIC HD1 display. Read this short
instruction manual carefully before using
the device. The document is restricted to
a description of the main functions and
installation of the device.
The HD1 is a precise display that can show
the relative humidity, temperature and dew
point, has MIN/MAX/AVG functions and can
emit alarm signals.
40
120
Dimensions
50
Dimension for wall
mounting
Mechanical Installation / Position
There are two ways to mount the device: it can be hung on a wall using the two fastening points
at the back of the device or placed on a flat surface using the stand that can be moved in and out
at the bottom of the HD1.
Function Keys
MODE
- Press the key briefly to switch between MIN/MAX/AVG value.
- Press the key for a longer time to show the dew point value (Td).
Switch Between Dew Point & Humidity
When the device is on, press the MODE key for a longer time to switch between low dew point
(Td) and relative humidity (%RH).
Up/Down
- Press the keys to move between the different functions in the device settings or to define a range
for the alarm settings.
SET
- Press the key for 5 seconds to open the device settings.
- Press the key again for 5 seconds to see the current measured values again.
Display
Top LCD line
Humidity / Dew point display
Middle LCD line
Temperature display
Bottom LCD line
Time & date display
Td
Dew point
H
High alarm
L
Low alarm
MIN
Minimum measurement
MAX
Maximum measurement
AVG
Average measurement of the last 7 days
%RH
Unit of relative humidity
°C/°F
Unit of temperature (Celsius/Fahrenheit)
Battery almost empty
Alarm function on
Use
POWER ON/OFF
When you place 4 AA batteries in the back of the device, the display is switched on automatically.
Booting takes about 2 seconds. The measured values are then refreshed every 10 seconds.
Thereafter you are then in normal mode. To switch off the device, remove the batteries again.
A
Caution
The device does not have a backup battery. All functions such as AVG, date and time
are reset after every power on/off.
☞
Note
The following settings can only be made when the device is on.
MIN/MAX/AVG
This device enables you to check the minimum, maximum and average values. Press the MODE
key briefly to switch between minimum values (MIN), maximum values (MAX) and average values
(AVG). The AVG function always calculates the average of the last 7 days. The value must then be
reset and the calculation begins anew for the next 7 days.
A
Caution
The AVG function can only calculate the value of the last 7 days; after these 7 days,
only - - - is shown in the display when the AVG value is called up. Calculation of AVG
has stopped.
When the measured values MIN/MAX/AVG are shown in the display, the clock always shows the
current time. It does not show the times when the measurement was too high or too low (MIN/MAX).
To reset the measured values MIN/MAX/AVG, press the SET key for 2 seconds while on the required
value. Every measured value can be reset separately. To do so, simply switch between the measured
values with the MODE key and press the SET key for 2 seconds.
Programming
Various functions can be programmed in the HD1 device. To program the temperature unit,
alarm parameters and high/low alarm threshold, press the SET key for 5 seconds to call up the
programmable settings. Move between the individual settings with the two arrow keys (UP/
DOWN). Press the SET key to adjust a parameter. To leave the programming menu, press the SET
key again for 5 seconds.
Alarm Parameters
The device has an audible alarm and an alarm light to warn you when the set alarm parameter
has been exceeded.
To select the required alarm parameter, press the SET key when in the menu P1.0 (PA). You can
then switch between the alarm parameters (P1.1) Temperature, Humidity and Low Dew Point with
the UP / DOWN key. You can then select the parameter you require with the SET key.
The alarm settings can be made in the menu P2.0 (ALA). You can switch the alarm on and off in P2.1.
You can enter the high alarm threshold in the menu P2.2 (Hi). You can enter the low alarm threshold
in the menu P2.3 (Lo).
When one of these alarm parameters has been selected and switched on in menu P2.1, a bell
symbol is shown in the normal standard operating display and the selected parameter (Tempera-
ture, Humidity, Dew Point) flashes every 3 seconds.
If the measured value is above or below the set threshold, the symbol H or L appears in the display
and flashes every second. The audible alarm (beeper) is also emitted every second for 1 minute,
and then every 10 seconds. The alarm functions do not stop on their own; they must be reset
manually. To stop the alarm functions manually, press the SET key for 2 seconds.
Temperature Unit Settings
This device allows you to select between two different temperature displays. When you are in menu
P3.0, press SET. You can then change the temperature unit from °C to °F in the menu P3.1; confirm
by pressing SET again. The temperature is then always shown in the standard display in the unit set.
Date/Time Settings
When the device is on, press the SET key for 5 seconds to open the device settings. Then press
UP/DOWN until you reach the menu P4.0 and confirm with the SET key. In the menu P4.1 you can
select between the format 24h or 12h. Confirm with the SET key and then move to the next menu
P4.2 with the arrow keys to select the date format.
The date is entered in the menu P4.3. The time is entered in the menu P4.4.
General
The standard display is refreshed every 10 seconds. This applies to the parameters that are to
be measured. The time and date are refreshed in the following order: time 10 s - date 10 s - time
10 s - date 10 s.
If the battery voltage is too low or the batteries have become discharged, the symbol LOW appears
at the bottom right in the display to inform you that the batteries need replacement.
Overview Menu Items
P1.0 Alarm Parameters (PA)
Alarm parameter settings
P1.1 Parameters (tA/RH/td)
Select alarm parameter: Temperature (tA) / Humidity
(RH) / Dew Point (Td) and confirm with SET
P2.0 Alarm Value (ALA)
Alarm settings
P2.1 Alarm ON/OFF
Switch alarm on/off
P2.2 High Alarm (Hi)
Define high alarm threshold
P2.3 Low Alarm (Lo)
Define low alarm threshold
P3.0 Temperature Unit (unt)
Unit settings
P3.1 Select Temperature Unit
Change temperature unit °C / °F
P4.0 Time Settings (rtC)
Settings for the time and date format
P4.1 Time Format
24h or 12h
P4.2 Date Format
DD-MM or MM-DD
P4.3 Date
Enter date
P4.4 Time
Enter time
Trouble shooting and Error message
Note: When any error message is shown, make sure the batteries are correctly inserted or needs
replacing and try again.
Problem
Cause
Solution and remark
Power on, but
1) The batteries are not connectly
1) Check the batteries are in place and
no display
inserted
make sure that there good contact and
2) Batteries are empty
correct polarity
3) The device needs to be reset
2) Replace batteries and try again
3) Remove the batteries for one minute
and put back again
No Display
1) Low batteries or empty
1) Replace batteries
Error
Messages
Solution
T air
E02
Measured air temperature is lower
Place device in specified conditions for 30 min
than specified range
E03
Measured air temperature is higher
Place device in specified conditions for 30 min
than specified range
E31
Circuit AD defect
Return for repair
RH
E04
Temperature error
Refer temperature error code to fix
E11
RH calibration error
Re-calibration correctly
E33
RH circuit error
Return for repair
DP
E04
Temperature or RH error
Refer temperature and RH error code to fix
Technical Data
General
Type
Wall or bench-top display
Parameters
Relative humidity and temperature
Range of application
0...50 °C / 0...95 %RH, non-condensing
Power supply
4 x AA batteries
Battery lifetime
About 1 year
Dimensions
98 x 120 x 40 mm (H x W x D)
Housing
ABS
Weight
270 g
Delivery package
Factory certificate
4 AA batteries
Short Instruction Manual
Technical Information / Functions
Resolution
0.1 °C / °F / %RH
Measurement interval
10 s
Humidity measurement
Humidity sensor
ROTRONIC HYGROMER
®
IN-1
Measurement range
0...100 %RH
Accuracy
±3 %RH (@ 25 °C, 10-90 %RH
Remaining range ±5 %RH
Temperature measurement
Sensor
NTC
Measurement range
0...50 °C / 32...+122 °F
Accuracy
±0.5 K
Dew point calculation
-20...50 °C / -4...122 °F
MIN/MAX/AVG
MIN: Minimum measurement, shows the minimum
value since the last reset
MAX: Maximum measurement, shows the maximum
value since the last reset
AVG: Average value over the last 7 days
LED
Flashing red: When alarm values have been reached
(Hi/Lo)
Beeper
When alarm values have been reached (Hi/Lo)
ROTRONIC AG, CH-8303 Bassersdorf
Tel. +41 44 838 11 44, www.rotronic.com
ROTRONIC Messgeräte GmbH, D-76275 Ettlingen
Tel. +49 7243 383 250, www.rotronic.de
ROTRONIC SARL, 56, F - 77183 Croissy Beaubourg
Tél. +33 1 60 95 07 10, www.rotronic.fr
ROTRONIC Italia srl, I- 20157 Milano
Tel. +39 2 39 00 71 90, www.rotronic.it
ROTRONIC Instruments (UK) Ltd, West Sussex RH10 9EE
Phone +44 1293 571000, www.rotronic.co.uk
ROTRONIC Instrument Corp, NY 11788, USA
Phone +1 631 427-3898, www.rotronic-usa.com
ROTRONIC Canada Inc.,Canada L8W 3P7
Phone + 1 416-848-7524, www.rotronic.ca
ROTRONIC Instruments Pte. Ltd., Singapore 159836
Phone +65 6376 2107, www.rotronic.sg
ROTRONIC Shanghai Rep. Office, Shanghai 200233, China
Phone +86 40 08162018, www.rotronic.cn
Advertisement
Table of Contents

Subscribe to Our Youtube Channel
Related Manuals for Rotronic HD1

Summary of Contents for Rotronic HD1
- Page 1 Place device in specified conditions for 30 min Tel. +49 7243 383 250, www.rotronic.de Various functions can be programmed in the HD1 device. To program the temperature unit, When the device is on, press the MODE key for a longer time to switch between low dew point than specified range (Td) and relative humidity (%RH).
- Page 2 Rückseite an eine Wand gehängt werden oder mit Hilfe des Stützsteges, welcher im Boden Berechnung beginnt von neuen für die nächsten 7 Tage. Warnton (Buzzer) Wenn Alarmwerte erreicht wurden (Hi/Low) vom HD1 ein-und ausgefahren werden kann, auf den Tisch gestellt werden. P4.2 Datum Format DD-MM oder MM-DD Achtung P4.3 Datum...
- Page 3 à deux points de fixation au dos de l’instrument, ou installé sur un bureau, à l’aide de sa barrette d’appui rétractile, dans la base de l’HD1. La fonction AVG peut uniquement calculer la valeur moyenne des 7 derniers jours, après P4.1 format de l’heure...
- Page 4 Soluzione e nota Programmazioni ROTRONIC Italia srl, I- 20157 Milano Su/Giù Lo strumento di misura HD1 consente diverse programmazioni. Per programmare l'unità di misura Tel. +39 2 39 00 71 90, www.rotronic.it Acceso, ma senza 1) Le batterie non sono inserite...
Need help?
Do you have a question about the HD1 and is the answer not in the manual?
Questions and answers