
Subscribe to Our Youtube Channel
Related Manuals for ERA E2000


Summary of Contents for ERA E2000
- Page 1 SMART HOME SECURITY Wireless Digital Telephone & Intercom Instruction Manual MENU/R Customer Helpline 0345 257 2500...
-
Page 2: Table Of Contents
Contents Part One: Telephone Handset Prior To Use Basic Functions Important Information Safety Precautions Making a call Unpacking Receiving a call Phone Layout & Key Functions Muting the Microphone Key Descriptions Adjusting Audio Volume LCD Window Icons Description Setting the Ringtone Battery Installation Last Number Redial Installation Instructions... - Page 3 Contents Advanced Functions Technical Specifications Menu Navigation Troubleshooting Menu Map Phone Book Additional Accessories Base Station (BS) Settings Handset (HS) Settings Notes Registration Using more than one Handset Product Guarantee Caller ID on call waiting Disposal and Recycling Part Two: Outdoor Station Feature List DSL Service (Noise Filter)
-
Page 4: Prior To Use
PLEASE READ THIS MANUAL CAREFULLY BEFORE OPERATING THE SYSTEM AND RETAIN FOR FUTURE REFERENCE. Any repairs must be carried out by an ERA Authorised Repair Centre. Misuse or attempted repairs to any component part of this product will invalidate the warranty. -
Page 5: Safety Precautions
4. Do not place objects on the power supply line cord that may cause damage. 5. In the event of the product developing a fault refer servicing to an ERA Approved Repair Centre only. 6. Pay attention to the polarity of the batteries, insert batteries in accordance with polarity symbols (this instruction is found in the ‘installing batteries’... -
Page 6: Unpacking
MENU/R Telephone Telephone Outdoor Mounting Base Handset Station bracket SMART HOME SECURITY Wireless Digital Telephone & Intercom E2000 Instruction Manual MENU/R Customer Helpline 0345 257 2500 2 C cell Telephone 2 AAA Ni-MH Line cord* Instruction manual batteries Base PSU batteries *The shape of the plugs can vary according to each country’s specification. -
Page 7: Phone Layout & Key Functions
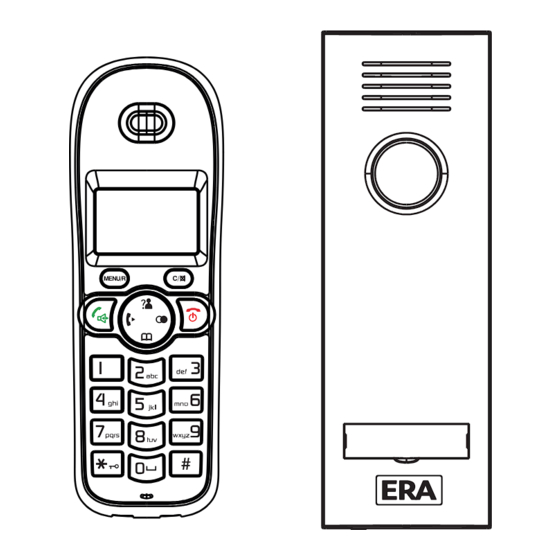
n Phone Layout & Key Functions Telephone Handset Earpiece Display Menu/OK key Speaker Cancel/Mute key Up/CID key MENU/R End key Dial/Speaker key Redial key Battery Int key Down compartment /Phonebook key Alphanumeric cover keys Back View Front View Microphone Charging contacts... - Page 8 n Phone Layout & Key Functions (continued) Telephone Base Back and Underneath Views Charge pins DC 7.5V Phone Power Jack Line Jack Front View Page button...
- Page 9 n Phone Layout & Key Functions (continued) Outdoor Station Back View Call button 1. 12V DC Positive input 2. 12V DC Negative input 3. Lock control positive terminal 4. Lock control negative terminal Front View 5. Silica gel plug...
-
Page 10: Key Descriptions
n Key Descriptions Dial/Speaker key Make/Answer a call. Activates the speakerphone if pressed during a call. End/Power key End a call. Long press to activate power on/off, as described on page 15. Navigation key: Up/CID key Scroll up through lists and option menu. Increase the earpiece/speakerphone volume during a call. - Page 11 n Key Descriptions (continued) Redial key Enter the redial book, as described on page 20. Insert a pause when pre-dialing a number. Menu/OK key (left) MENU/R Enter the menu functions in standby mode. Confirm selections & actions. Performs "Flash" function. Cancel/Mute key (right) Return to the previous menu.
-
Page 12: Lcd Window Icons Description
n LCD Window Icons Description New Call Signal Icon Indicates you have missed one or Indicates whether the current signal more calls. exists or not. If the handset is too far from the base, this icon will blink on Off Hook the LCD. -
Page 13: Battery Installation
n Battery Installation Telephone Handset The rechargeable Ni-MH batteries (AAA size, 1.2V, 600mAh) are included with this phone. Install the batteries before use. Slide the battery cover in the direction of the arrow and pull it out. Insert new batteries as indicated, matching correct Notes: polarity (+,-). - Page 14 n Battery Installation (continued) Outdoor Station Install the two C size batteries supplied into the battery compartment before fixing the Outdoor Station in position. Slide the battery cover downwards in the direction of the arrow and remove. Insert batteries as indicated, matching correct polarity (+,-). Notes: Reversing the orientation may damage the 3.
-
Page 15: Installation Instructions
n Installation Instructions Telephone Base Station Connect one end of the phone line cord to the phone line jack DC 7.5V on the base, and the other end to a standard phone wall outlet. Connect the modular end of the AC power adapter to the power jack on the base, then plug the AC adapter into a standard AC wall outlet. - Page 16 110.0 Note: The silica gel plug on the rear of the outdoor station is used to prevent the screws from rusting. Remove the silica gel plug to expose the screws for connecting an optional PSU and/or optional Unlock Module. Replace the plug once the wires are connected.
-
Page 17: Telephone Handset Charging
Unlock module (optional) Connect the wire between the outdoor station and the unlock module, please see the figure on the right. Wall n Telephone Handset Charging Important Note: MENU/R Before initial operation, FULLY CHARGE THE HANDSET for approx. 15 hours. To charge the handset, place it on the charging dock. -
Page 18: Turning Telephone Handset On/Off
n Turning Telephone Handset On/Off If the handset is successful in finding a base, the When the handset is in ‘power off’ mode and you place handset will enter standby mode, the display will show it on the base, it automatically turns on. To turn the the handset number or the handset name (if you have handset on or off in standby mode, follow these steps: one saved as described on page 25), signal icon, battery... -
Page 19: Part One: Telephone Handset
Part One: Telephone Handset Basic Functions All descriptions in this manual assume that the handset is in standby mode. To set the telephone to standby mode press key. n Making a Call You can enter the desired phone number in standby 1. -
Page 20: Receiving A Call
n Receiving a Call When a new call is received, the call information Result: After you hang up, the LCD displays the call will appear on the LCD screen. duration. If the caller can be identified, the caller's phone Notes: number is displayed. -
Page 21: Muting The Microphone
n Muting the Microphone During a conversation, you can temporarily switch your To mute your microphone, press the key during the phone’s microphone off, so that the other party cannot conversation. The "CALL MUTED" appears on the LCD. hear you. To unmute the microphone, press the key again. -
Page 22: Setting The Ringtone
n Setting the Ringtone You can select your own external (from the telephone Result: You can select the ringtone from Melody 1 to 10 or Network) or internal (from other handsets registered adjust the volume from Volume 1 to 5, or off. to the same base) ring tone and adjust the volume. -
Page 23: Last Number Redial
n Last Number Redial 1. Press the key in standby mode. Notes: If no numbers are found, "EMPTY" is displayed. Result: The LCD displays the last number you dialed. When the redial book is full, each time you dial a new number, the oldest number stored in the redial 2. - Page 24 ADD TO PB: allows you to add the number to the phone book. To complete storing the entry go to step 4 "Adding the Phone Book Entries" (page 31). DELETE: allows you to delete the selected number. DELETE ALL: allows you to delete the whole redial book. 4.
-
Page 25: Caller Id (Cid) Book
n Caller ID (CID) Book When you receive a call, if the caller's information is View and dial any of the CID numbers transmitted from the network on which the call was 1. Press the key. made (and the caller doesn't hide it), the caller's MENU/R phone number is displayed. - Page 26 4. Press the key, you are prompted to enter the 5. Use key to choose DELETE, press the MENU/R name. key. The display will show "CONFIRM ?". Press MENU/R key to confirm, you will hear a beep and the MENU/R 5.
-
Page 27: Key Lock
n Key Lock If you turn on this feature, all keys will be locked. You can To unlock the keys, keep the key pressed again till the answer calls by using the key. But when you hang up, key lock icon disappears from the display. -
Page 28: Handset Name
n Handset Name "HS N" is the default name of the handset after 3. Use to choose HS LABEL, then press the registration of handset. The handset number N= 1 to 5 key. MENU/R reflects the handset is the Nth handset, which is registered to the base. -
Page 29: Paging
n Paging To stop paging, press the key on the base again or any You can page the handset from the base station making key on the handset. them ring with a special tone. Useful if trying to locate a lost handset. Note: On a long key press, more than or equal to 5... -
Page 30: Handsfree
n Handsfree During a call, you may turn on the speakerphone To turn the feature off, and keep on talking in normal built into the handset. In this mode you can simply mode, press the key again. The icon will put your handset on a surface (e.g. -
Page 31: Advanced Functions
Advanced Functions n Menu Navigation To access a menu option: To return to standby mode: 1. To display menu items, press the key. If you press the key from any menu (not in the MENU/R number or text input mode), the phone returns to the 2. -
Page 32: Menu Map
Menu Map 4. HS SETTING 1. CID BOOK (see page 22) ALARM (see page 35) 2. PHONE BOOK AUDIO SETUP (see page 36) ADD ENTRY (see page 31) RING SETUP (see page 19) CHANGE ENTRY (see page 32) TONE SETUP (see page 36) DELETE ENTRY (see page 32) LANGUAGE (see page 24) DELETE ALL (see page 32) -
Page 33: Phone Book
n Phone Book The phonebook built in your cordless phone allows you to store frequently used numbers so that you can easily make a call without having to remember or enter the phone number. Character Map To enter a specific alphanumeric character, press the relevant key one or more times for the required character according to the following table: once for the first character, twice for the second and so on. - Page 34 Adding Phone book Entries Note: If you make a mistake while entering a name or a 1. Press the key. MENU/R number, use the key to correct it. Each time you press the key, the last character or digit is 2.
- Page 35 Dialing a Phone book Number Deleting Phone book Entries 1. Press the key. Find out the number you want to dial. Refer to "Viewing MENU/R the Phone book Entries". Then press the key to dial 2. Press the to choose PHONE BOOK , press the out the number.
-
Page 36: Base Station (Bs) Settings
n Base Station (BS) Settings Terminate Handset (HS) Flash Time This function allows you to delete a handset registration You can select to change the Flash time by the following from the base station. steps: 1. Press the key. 1. Press the key. - Page 37 Modify the PIN Number Base Station Reset This function allows you to change the PIN number of the This function allows you to reset the base station currently active Base Station. The default PIN is 0000. setting to the factory default. 1.
-
Page 38: Handset (Hs) Settings
n Handset (HS) Settings 6. Press the key, a beep sounds and the display Setting an Alarm Notification MENU/R shows SNOOZE ON/OFF, you can press You are able to set the alarm on the handset and adjust key to enable or disable the snooze function the alarm settings. - Page 39 Audio Setup Key Tone You can also use the menu to adjust the audio volume. Every time you press a key, your handset acknowledges it with a key tone. You can disable the key tone for silent 1. Press the key.
- Page 40 Setting Date & Time 1. Date Format 4. Press key to choose SET DATE or SET TIME menu, press the key. MENU/R 1. Press the key. MENU/R 5. Enter the current date or time by numeric keypad and 2. Press key repeatedly to choose HS press the key to save and exit.
- Page 41 Selecting a Base Station Handset Reset This function allows you to select a base station from This function allows you to reset the handset settings to those already registered to the handset. You can access the factory default. the options by scrolling the menu. 1.
-
Page 42: Registration
n Registration The supplied handset is already registered with the base 4. If the base is found, you will be prompted to enter the station and named number 1. You can register up to 5 PIN code (the default one is 0000). Enter it then press handsets (including the outdoor station) to the same key. -
Page 43: Using More Than One Handset
n Calling with more than one Handset If you have more than one handset registered to the Note: same base station, you can make internal calls and During the internal call, if an external call comes in, the LCD will show the caller's number. You should transfer an external call between the registered handsets. - Page 44 Setting up a 3-way conference call When you have both an external call and an intercom call in progress, you can set up a three-way conference call, like this: 1. During an external call, press the key and then input the number of the handset you want to join the 3-way call.
-
Page 45: Caller Id On Call Waiting
n Caller ID on call waiting When you subscribe to Call Waiting service from Note: your local telephone company, the telephone will If you have transferred an external call to another display the name and number of the second caller handset, you cannot use the call waiting function via while you are having a conversation. -
Page 46: Part Two: Outdoor Station
Part Two: Outdoor Station 1. To register Your Outdoor Station is already registered to the Base Station and is named number 2. If you need to re-register the Outdoor Station to the Base Station follow the below instructions: Hold the key on the bottom of the Baste Station for 5 seconds or longer, and then release. - Page 47 2. To call When the visitor presses the Call button on the Outdoor Station, the handset will sound the tone set. If the called handset is on an external line, the handset user will hear prompt tones, which allows them to hang up and wait for the doorbell tone to sound again.
-
Page 48: Feature List
Feature List Indoor phone Call duration display 1.88 GHz DECT technology with GAP Real time clock (set time) The system can be extended by a further 3 Keypad lock Handsets 13 languages selectable Phonebook with up to 50 entries Auto answer ON/OFF selectable 9 VIP ring tones setting for phonebook entries Alarm clock include snooze option Handset Name setting... -
Page 49: Dsl Service (Noise Filter)
If you subscribe to a DSL service Please attach a noise filter (contact your DSL provider) to the telephone line between the base unit and the telephone line jack in the event of the following: - Noise is heard during conversations. - Caller ID features do not function properly. -
Page 50: Technical Specifications
Technical Specifications Frequency Range 1.881~1.897GHz Channels 120 Duplex channels <250mW Carrier Power Modulation GFSK Frequency Stability < - 50 KHz Charging time 15 hours Ambient temperature Normal: 15 °C ~ 35 °C , Extreme: 0 °C ~ 40 °C Humidity 0%~90% Indoor phone: (Base): 110 x 100 x 58;... -
Page 51: Troubleshooting
Troubleshooting Symptom Check & Remedy Check that the power adapter is properly connected. No operation Check that the telephone line cord is properly connected. Check that the handset batteries in full power. Check that the handset batteries are installed properly. Check that the telephone line cord is properly connected. -
Page 52: Additional Accessories
Additional Accessories Additional Accessories are available for the E2000 Digital Telephone & Intercom system. Including: Additional Handset and Charger E2000HSC Outdoor Station Rain Cover CLOSRC Outdoor Station Power Supply CLOSPSU Unlock Module CL3660UM Notes... -
Page 53: Notes
Notes... -
Page 54: Product Guarantee
1. Periodic maintenance, repair and replacement of parts due to fair wear and tear. 2. Abuse or misuse, including but not solely limited to the failure to use this product for its normal purposes or in accordance with ERA's instructions on usage and maintenance. -
Page 55: Disposal And Recycling
PRODUCT GUARANTEE Cont. 10. Neglect. 11. The loss of any stored data on your product. This guarantee is in addition to your contractual and statutory rights and does not affect your statutory rights To make a claim intercoms@eraeverywhere.com Please contact Customer Support either by telephone on 0345 257 2500 or email with full details of your claim.
Need help?
Do you have a question about the E2000 and is the answer not in the manual?
Questions and answers