Table of Contents
Advertisement
Quick Links
Advertisement
Chapters
Table of Contents
Troubleshooting

Summary of Contents for Cedex HiRes
- Page 1 October 2017 Cedex HiRes Analyzer Operator’s Manual Software Version 2.4...
- Page 2 Provides a short set of instructions for use in the laboratory, describing the basic handling steps. This shorter form of information is for routine use after you are familiar with the details of the Cedex HiRes Analyzer described in the User Training Guide.
- Page 3 October 2017 Cedex HiRes Analyzer User Training Guide Software Version 2.4...
-
Page 5: Table Of Contents
Conventions Used in this Guide ..........................7 Warnings and Precautions ............................8 Startup Turning on the Cedex HiRes Analyzer, Control Unit, and Software ..........11 Preparing the Cedex HiRes Analyzer for Measurements ................12 Working with the Multi Sampler ..........................12 Installing a Reagent Kit ..............................13 Perform a Prime ..................................14... - Page 6 2.2.3 Reprocess the Measurement Using the New Cell Type ..................48 Shutting Down the Cedex HiRes Analyzer Perform an LM Shutdown............................50 Log Out ....................................50 Shut Down the Cedex Control Center ........................51 Index Cedex HiRes Analyzer Software Version 2.4 - Training Guide...
-
Page 7: Prologue
Software update, SW version 2.4 Edition Notice The Cedex HiRes Analyzer User Training Guide, Software version 2.4, is for users of the Cedex HiRes Analyzer together with the Cedex HiRes Analyzer Operator’s Guide for Software Version 2.4. Every effort has been made to ensure that all the information contained in the Cedex HiRes Analyzer User Training Guide is correct at the time of printing. -
Page 8: Contact Addresses
It was neither developed nor validated by the manufacturer for any kind of in vitro diagnostic application. Preamble Before setting up operation of the Cedex HiRes Analyzer, it is important to read this User Training Guide and the Cedex HiRes Analyzer Operator’s Guide thoroughly and completely. Non-observance of the instructions contained herein or performing an operation not stated in this Training Guide could cause safety hazards. -
Page 9: Conventions Used In This Guide
Used for operating instructions for the Cedex HiRes Software. In addition, important notes and information notes are shown in italic type. Blue italic type Refers to a different section in this Training Guide or the Cedex HiRes Analyzer Operator’s Guide, which should be consulted. Symbols... -
Page 10: Warnings And Precautions
Any leaks in the Liquid Management system must be repaired immediately. Contact your distributor or authorized Roche Service representative. Always ensure that there is a Cedex Sample Cup attached to the single sample port or placed in the DefaultCup position on the Multi Sample Tray. - Page 11 Check that the Cedex Sample Cup is free of contamination before use. Only clean Cedex Sample Cups can guarantee optimal functioning of the Cedex HiRes Analyzer.
-
Page 12: A Startup
Startup Before starting the Cedex HiRes Analyzer, ensure that the system is installed properly. Information about the in- stallation of the Cedex HiRes Analyzer is provided in Section B, System Description, in the Cedex HiRes Analyzer Operator’s Guide. Cedex HiRes Analyzer hardware components must be turned on before starting the analysis Software. -
Page 13: Turning On The Cedex Hires Analyzer, Control Unit, And Software
Click on the OK button to log in or press <Return>. The Cedex Control Center opens. The first time a Cedex HiRes Analyzer is set up or when the Cedex HiRes Analyzer is moved to a new location, a focus adjustment must be performed. See... -
Page 14: Preparing The Cedex Hires Analyzer For Measurements
Never use the Cedex HiRes Analyzer without the protective cover in place for the Multi Sampler. The Multi Sampler is part of the Cedex HiRes Analyzer, and automatically conveys up to 20 cell suspension samples in sequence to the Cedex HiRes Analyzer for analysis. -
Page 15: Installing A Reagent Kit
Remove the old Reagent Kit with the tray, and dispose of the old reagent bottles. Open the new Cedex HiRes Reagent Kit, and remove the covers from the individual containers. Place the Reagent Kit containers into the appropriate positions in the Reagent Tray:... -
Page 16: Perform A Prime
Preparing the Cedex HiRes Analyzer for Measurements Perform a HW Startup and Prime Place a clean Cedex Sample Cup in the DefaultCup position on the Multi Sample Tray or attach it to the single sample port, for a system with a single sample port. -
Page 17: B Main Application: Counting Cells And Determining Viability
Check the number of runs left. This is listed in the right-hand corner of the Control Center next to a green or red circle. Check whether there is an empty Cedex Sample Cup in the DefaultCup position on the Multi Sample Tray or attached to the sample port, for a single sample port. -
Page 18: Setting Up A Single Measurement In The Measurement Dialog Box
Open the Measurement Dialog Box and Define the Sample Parameters In the Cedex Control Center shortcuts area, click on the MEASURE button. The Measurement dialog box opens: In the Sample Parameters group of the Measurement dialog box, enter a Reactor ID by either selecting a name from the drop-down list or entering a new Reactor ID. -
Page 19: Define The Measurement And Analysis Parameters
System Name Process Time Prepare the sample and place the Cedex Sample Cup containing the sample in the appropriate position on the Multi Sample Tray or attach it to the single sample port. The Sample Port area indicates which type of sample port is used for the measurement, based on the instrument configuration (see the Cedex HiRes Analyzer Operator’s Guide for more information about the... -
Page 20: Starting The Measurement
Starting the Measurement Starting the Measurement Ensure that the Cedex Sample Cup is correctly placed in the Multi Sample Tray or attached to the single sample port. Ensure that the reagent containers are sufficiently filled and in their correct positions. -
Page 21: End Of Measurement
Options, in the Cedex HiRes Analyzer Operator’s Guide, for more information). Ensure that Cedex Sample Cup from the last measurement remains in the Multi Sample Tray in the DefaultCup position during the complete cleaning procedure, or attached to the single sample port. Only remove the cup when a new Cedex Sample Cup is placed in the Multi Sample Tray. -
Page 22: Viewing The Results In The Measurement Dialog Box
When a line is selected in the list of results from single images, the corresponding image is displayed in the Image area (see Viewing the Images). Cedex HiRes Analyzer Software Version 2.4 - Training Guide... - Page 23 However, concentrations may be expressed in × 10 cells/mL, depending on the setting in the System Options. Refer to the Cedex HiRes Analyzer Operator’s Guide for more information. In the individual result data table, the following three columns precede the above: Image No.: Number of the image.
-
Page 24: Viewing The Results In The Histograms
Result Data area to see a different image in this area. For a more detailed description of how to view the images, see the Cedex HiRes Analyzer Operator’s Guide. Cedex HiRes Analyzer Software Version 2.4 - Training Guide... -
Page 25: Setting Up Multiple Measurements Using The Multi Run Dialog Box
Schedule the samples via the Status column and start the measurement. Open the Multi Run Dialog Box and Prepare Samples for Analysis Click on the MULTI RUN button in the Shortcuts area of the Cedex Control Center or select Multi Run in the Measurements menu. -
Page 26: Define The Sample Parameters And The Measurement And Analysis Parameters In The Multi Run Dialog Box
The Status column displays the state of the sample before, during, and at the end of a measurement. The Multi Run dialog box automatically displays all 20 possible sample cup positions. Click anywhere in the row of the Multi Run preparation area that corresponds to the location of a Cedex Sample Cup containing a sample. -
Page 27: Schedule Samples And Start The Measurement
Setting up Multiple Measurements Using the Multi Run Dialog Box Schedule Samples and Start the Measurement Schedule Samples and Start the Measurement After all sample information has been entered into the Multi Run preparation area, activate the samples to add them to the process queue. -
Page 28: Interrupting A Multi Run
See Chapter 8, The Measurement List. In addition, some results for the measurements are displayed in the Analyzed Measurements field at the bottom of the Multi Run dialog box. Cedex HiRes Analyzer Software Version 2.4 - Training Guide... -
Page 29: The Multi Run Result List
(today). Measurement results can be printed out via the PRINT REPORT button located just above the Analyzed Measurements field (see Printing Reports in the Cedex HiRes Analyzer Operator’s Guide). Main Application: Counting Cells and Determining Viability... -
Page 30: Measurement List
Measurement List dialog box. To open the Measurement List dialog box and access previous measurements, click on the LIST button in the shortcuts area of the Cedex Control Center, or select Measurement List in the Measurements menu of the Cedex Control Center: The following actions can be carried out in the Measurement List dialog box: Search for measurements using a variety of filters for the search. -
Page 31: C Additional Applications
Performing Measurements for Growth Curve Analysis Immediately after subculturing the cell culture of interest, remove a sample and perform a full analysis with regard to cell concentration and viability using the Cedex HiRes Analyzer as described in Section B Main Application: Counting Cells and Determining Viability. -
Page 32: Create A Ctc View
To create a View Click on the CTC button in the Shortcuts area of the Cedex Control Center or select the Cultivation Time Chart option in the Measurements menu to open the CTC Views dialog box. -
Page 33: Add One Or More Series Of Measurements To The Ctc View
(see Data Exchange in the Cedex HiRes Analyzer Operator’s Guide). Choose the desired Workarea (base directory in which measurement data are stored). Select the Reactor ID used for the growth curve measurements from the Reactor ID list. - Page 34 Click on the empty column to the left of the measurements to select a measurement. Multiple measurements can be selected by holding down the <Shift> or <Ctrl> key on the keyboard. Cedex HiRes Analyzer Software Version 2.4 - Training Guide...
- Page 35 Monitoring Growth of Cells Over Time Result Analysis When you have selected all desired measurements, click on the ADD SELECTED MEASUREMENTS button. The selected measurements are displayed in the Measurements belonging to series table in the lower part of the dialog box. Click on SAVE.
-
Page 36: Create A Ctc Chart Associated With The View To Analyze Pattern Of Growth Over Time
Only measurements already added to the View will be displayed in the Cultivation Time Chart dialog box diagram. Use the ‘Selection of Data Series’ dialog box to add additional measurements. Cedex HiRes Analyzer Software Version 2.4 - Training Guide... - Page 37 The information displayed includes the date and time of the measurement as well as the result. Enlarge the graphic representation or scale it down again using the mouse. For more information on enlarging graphs and diagrams, see Enlarging the Histograms in the Cedex HiRes Analyzer Operator’s Guide. Additional Applications...
-
Page 38: Exponential Regression Function To Determine The Specific Growth Rate And Doubling Time Of The Cell Culture
In the CTC Views dialog box, select the appropriate View in the top part of the dialog box, then highlight the relevant series of measurements in the bottom part. Cedex HiRes Analyzer Software Version 2.4 - Training Guide... - Page 39 Monitoring Growth of Cells Over Time Result Analysis Click on EDIT in the bottom part of the dialog box to edit the list of measurements included in the chart. The Selection of Data Series dialog box is displayed, showing all measurements used for the chart in the bottom of the dialog box.
- Page 40 The Cultivation Time Chart – Exponential Regression dialog box is displayed: The Cedex HiRes Software performs an automatic calculation of the specific growth rate and doubling time based on the viable cell concentration results from the measurements actively included in the chart.
-
Page 41: Checking Regression Curve Fitting
Monitoring Growth of Cells Over Time Result Analysis 1.2.5 Checking Regression Curve Fitting If the regression curve does not fit well to the measurement results for viable cell concentration, the specific growth rate and doubling time may not be as expected for the culture. The measurement results for viable cell concentration should fit relatively closely to the regression curve determined for the measurements in the Exponential Regression chart. -
Page 42: Editing Measurements In A View
Measurement results from a Cultivation Time Chart can be printed and exported to various formats. You can also export a View or Series list and delete Views and Series. For more information about the available CTC functions, see the Cedex HiRes Analyzer Operator’s Guide. Cedex HiRes Analyzer Software Version 2.4 - Training Guide... -
Page 43: Analyzing Unusual Cells
Analyzing Unusual Cells Overview Analyzing Unusual Cells Overview The image analysis Operator is the part of the software that takes care of the image evaluation. For various application scenarios, three pre-settings for the Operator are available that have been adapted to a wide cell size spectrum: Min. -
Page 44: Example Of Cells Not Recognized By The Cell Type Std. Size
Modify the Parameters for the New Cell Type via the Live Operator dialog box c Reprocess the Measurement Using the New Cell Type as the Basis for the Image Analysis Cedex HiRes Analyzer Software Version 2.4 - Training Guide... -
Page 45: Create A New Cell Type
Analyzing Unusual Cells Example of Cells Not Recognized by the Cell Type Std. Size 2.2.1 Create a New Cell Type To create and save a new Cell Type: Open the Cell Type List dialog box by selecting the Cell Type List option in the Master Data menu. Several options are available in this dialog box: NEW: Create new Cell Types EDIT: Modify existing Cell Types... - Page 46 Click on SAVE. The Cell Type dialog box will automatically close. The Cell Type List dialog box will be active again and include the newly created Cell Type in the list. Cedex HiRes Analyzer Software Version 2.4 - Training Guide...
-
Page 47: Modify The Parameters For The New Cell Type Via The Live Operator Dialog Box
Analyzing Unusual Cells Example of Cells Not Recognized by the Cell Type Std. Size 2.2.2 Modify the Parameters for the New Cell Type via the Live Operator Dialog Box Highlight the row of the new Cell Type in the Cell Type List dialog box. Click on the LIVE OPERATOR button. - Page 48 For this particular cell culture, the following changes were made to the Cell Type New Cell Type (for more detailed information about available parameters, see the Cedex HiRes Analyzer Operator’s Guide): CMinSize set to: 4...
- Page 49 Eleven parameters are available for adjusting the Cell Type. For parameter details and the effects of changing them, see the Cedex HiRes Analyzer Operator’s Guide. Existing Cell Types can be edited and deleted. For more information about these actions, see the Cedex HiRes Analyzer Operator’s Guide.
-
Page 50: Reprocess The Measurement Using The New Cell Type
To reprocess existing data sets using the new Cell Type (e.g., New Cell Type): Click on the LIST button in the Cedex Control Center to open the Measurement List dialog box. Select the row of the measurement to be reprocessed and click on the REPROCESS button in the bottom right-hand corner. - Page 51 Analyzing Unusual Cells Example of Cells Not Recognized by the Cell Type Std. Size Effective Data Sets When measurements are reprocessed, it is possible to label one of the resulting data sets as Effective. The Effective Data Set is the version of the measurement (original or reprocessed) that has the correct parameters. Once a data set has been selected as Effective, it will be labeled as such in the Measurement List dialog box.
-
Page 52: D Shutting Down The Cedex Hires Analyzer
Perform an LM Shutdown every evening after measurements are finished for the day: Click on the HWM button in the Shortcuts area of the Cedex Control Center to open the Hardware Management dialog box. Alternatively, select Hardware Management in the Functions menu at the top of the Cedex Control Center. -
Page 53: Shut Down The Cedex Control Center
Shut down the Software by selecting Exit under the System menu or by clicking on to close the dialog box. The security query, “Do you really want to exit the Cedex Control Center?” appears. Select YES to shut down the program. - Page 54 Dilution Factor ..............16 Multi Sample Tray Eject ..........12 Distilled or Deionized Water.........13 Multi Sample Tray Insert ..........12 Doubling Time ..............36 Effective Data Sets ............49 Eject button ................12 Exporting to File ..............28 Cedex HiRes Analyzer Software Version 2.4 - Training Guide...
- Page 55 Selection of Data Series ..........32 Shut Down ................51 Single Sample Port ............14 Specific Growth Rate ............36 Start Button ................26 Starting Cedex HiRes Analyzer ........11 Starting Control Unit ............11 Start Measurement ............18 Status Field .................25 Stop Button .................26 Trypan Blue .................13 Typical Growth Pattern ...........34...
- Page 58 Published by Roche Diagnostics GmbH Sandhofer Straße 116 68305 Mannheim Germany © 2017 Roche Diagnostics. All rights reserved. custombiotech.roche.com 08385521001 3 102017...
- Page 59 (the Cedex Server should already be automatically started. It must be first started cell suspension has been added to 2 parts dilution medium. The dilution factor will be before the Cedex Software can be started). The Log In dialog box of the Cedex HiRes automatically taken into account in the results.
- Page 60 Click on LM Shutdown to shut down the Liquid Management system. Normal: 6 images are used for the analysis. Click on the LOGOUT button on the Cedex Control Center to log out of the Cedex Control Superior: 8 images are used for the analysis.
- Page 61 Never use the Cedex HiRes Analyzer without the protective cover in place for the Multi Sampler. Click on the MULTI RUN button on the Cedex Control Center to open the Multi Run dialog box. Fill 300 µL +/- 10% of the samples to be measured into individual Cedex Sample Cups The Multi Sampler DefaultCup (maximum 20) and place them in the Multi Sample Tray according to the desired sequence.
- Page 62 “Adjusting Result Display in the Measurement List and Multi Run dialog Adding Measurements to the List While Measurements are Running boxes” in the Cedex HiRes Analyzer Operator’s Guide). Double-click on a measurement to view all results. If the result list has been cleared, previously carried out measurements can...
- Page 63 Cedex Control Center will turn from red to green and indicate the number of runs left. Attach a clean Cedex Sample Cup to the single sample port or place a sample cup in the DefaultCup position on the Multi Sample Tray, and perform a Prime via the Hardware Management dialog box (HWM button on the Cedex Control Center).
- Page 64 Standard Clean or Chamber Clean 2 before performing a new measurement. To perform a cleaning routine, click on the CLEAN button in the Cedex Control Center to open the Cleaning dialog box. Click on Standard Clean and/or Chamber Clean 2.
- Page 65 October 2017 Cedex HiRes Analyzer Operator’s Guide Software Version 2.4...
- Page 67 Connecting Hardware Components ...........................26 Connecting or Disconnecting the Device......................27 Starting the Cedex HiRes Analyzer ........................28 Accessing the Control Unit and Cedex HiRes Software ................29 Access Control at the Windows Operating System Level ...................29 Access Control at the Cedex HiRes Software Level .....................30...
- Page 68 Table of Contents Software Overview of the Cedex Control Center .......................31 Menu Bar ....................................31 System Menu ..................................31 Measurements Menu ...............................32 Functions Menu ..................................32 Reports Menu ..................................33 Master Data Menu ................................33 Setup Menu ..................................33 Help Menu ....................................34 Shortcut Area ..................................34 1.10 Tracking of Status of Events Carried Out by the Analyzer..................34...
- Page 69 Table of Contents Software The Cultivation Time Chart Dialog Box ........................64 8.2.1. The Data Selection Area ..............................64 8.2.2. Fitting to the Lowest Common Value .........................65 8.2.3. Measurement Series Offset ............................65 8.2.4. Variable Axis Calibration ..............................66 8.2.5. The Cultivation Time Chart – Exponential Regression Dialog box ..............66 General Functions of the System ..........................
- Page 70 Removing the Syringe ..............................120 Assembling and Installing the Syringe ........................121 Maintenance of the Syringe Guide and Spindle ....................122 Exchanging the Fuse in Cedex HiRes Analyzers from Serial Number G037DA101 ....123 Maintenance of the Flow Chamber, 8-Way Valve and the Remaining Hardware Components ......................124 Operational Data ................................124...
-
Page 71: Prologue
Completely revised version due to Software update, SW version 2.4. Edition Notice The Cedex HiRes Analyzer Operator’s Guide, Software version 2.4, is for users of the Cedex HiRes Analyzer (running Software Version 2.4) together with the Cedex HiRes Analyzer User Training Guide for Software Version 2.4. -
Page 72: Contact Addresses
The warranty conditions are specified in the sales contract. Contact your Roche representative for further information. Any unauthorized modification of the Cedex HiRes Analyzer and/or the Cedex HiRes Software will result in invalidity of the guarantee and service contract. Intended Use The Cedex HiRes Analyzer automatically determines the cell concentration and viability of cell suspensions. -
Page 73: Software Disclaimer
Software Disclaimer Software Disclaimer Portions of the CEDEX SOFTWARE might include one or more Open Source or Commercial Software programs. For copyright and other notices and licensing information regarding such Software programs included with CEDEX SOFTWARE, please see the CD/ DVD provided with the product. - Page 74 MENT OR THE SOFTWARE, AND REGARDLESS OF THE FORM OF ACTION, SHALL BE LIMITED TO, AT SUPPLIER’S OPTION, REPLACEMENT OF THE SOFTWARE OR REFUND OF THE FEES RECEIVED BY SUPPLIER OR A SUPPLIER’S AFFILIATE FROM LICENSEE WITH RESPECT TO THE SOFTWARE. Cedex HiRes Analyzer Operator’s Guide...
- Page 75 Software License Agreement 6. General Information Licensee may not sublicense, assign or transfer the license or the Software, in whole or in part, except as expressly provided in this Agreement. Any attempt otherwise to sublicense, assign or transfer any of the rights, duties or obligations hereunder is void.
-
Page 76: Viii. Preamble
Preamble VIII. Preamble Before setting up operation of the Cedex HiRes Analyzer, it is important to read this Operator’s Guide and the Cedex HiRes Analyzer User Training Guide thoroughly and completely. Non-observance of the instructions contained herein or performing an operation not stated in this Operator’s Guide could involve safety hazards. -
Page 77: Conventions Used In This Guide
Italic type: important notes and information notes are shown in italic type. Blue italic type: Refers to a different section in this Operator’s Guide or in the Cedex HiRes Analyzer User Training Guide, which should be consulted. Symbols In this Operator’s Guide, the following symbols are used as visual signals:... -
Page 78: Warnings And Precautions
Any leaks in the Liquid Management system must be repaired immediately. Contact your distributor or authorized Roche Service representative. Always ensure that there is a Cedex Sample Cup attached to the single sample port or placed in the DefaultCup position on the Multi Sample Tray. - Page 79 Check that the Cedex Sample Cup is free of contamination before use. Only clean Cedex Sample Cups can guarantee optimal functioning of the Cedex HiRes Analyzer.
- Page 80 Electrical Safety The Cedex HiRes Analyzer is designed in accordance with Protection Class I (IEC). The chassis/ housing of the instrument is grounded to protection earth (PE) by means of a cord. For protection against electrical shock hazards, the instrument must be directly connected to an approved power source such as a three-wire grounded receptacle for the 110 V or 230 V line.
- Page 81 Correct operation of the Analyzer and Software can only be guaranteed if no other Software has been installed on the computer. The Cedex HiRes Software should only be installed on the Control Unit and Windows Image version provided by Roche specifically for the Cedex HiRes Analyzer. Installations on other hardware will not be supported.
-
Page 82: Disposal Of The Analyzer
Constraint: It is left to the responsible laboratory organization to determine whether control unit components are contaminated or not. If contaminated, treat them in the same way as the system. Cedex HiRes Analyzer Operator’s Guide... -
Page 83: A Overview
The evaluation of the samples is based on automatically obtained digital images that are analyzed using analysis Software on a separate computer (Cedex HiRes Control Unit). All the necessary steps – from the staining of the samples to the recording and evaluation of the image data – are automatically performed by the Analyzer. -
Page 84: Description Of The Cedex Hires Analyzer
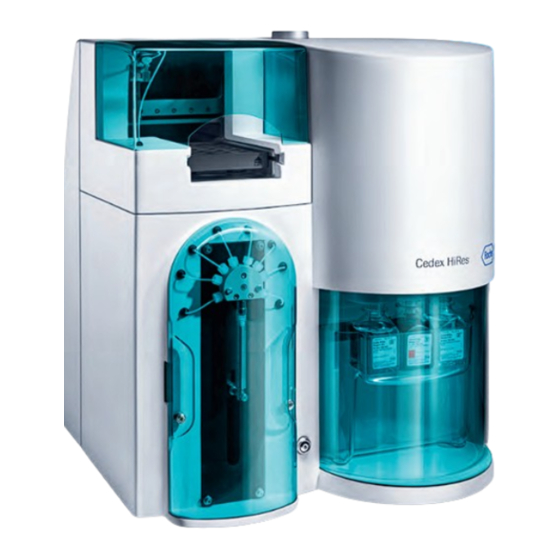
Description of the Cedex HiRes Analyzer Description of the Cedex HiRes Analyzer The Cedex HiRes Analyzer consists of two functional units, the Analyzer (see Figure 1) and the Control Unit (computer equipped with Cedex HiRes Software). Preparation and processing of the samples takes place in the Analyzer. The analysis Software is installed on a Control Unit and controls the Analyzer, as well as the analysis and evaluation of the images obtained. -
Page 85: The Measurement Procedure
Trypan Blue Exclusion Method. A defined volume of Trypan Blue is added by the syringe to the Cedex Sample Cup containing the cell suspension. The cell suspension and dye are optimally mixed between the syringe and Cedex Sample Cup by controlled pump actions and then incubated for exactly the same amount of time for each measurement. -
Page 86: Data Analysis
Trypan Blue staining. The image processing is integrated in the Cedex Control Center in such a way that the user or Administrator can check on its function in the system. The analysis process cannot be altered during data recording in order to allow for consistent and objective measurement results. -
Page 87: Technical Specifications Of The Analyzer
Technical Specifications of the Analyzer Technical Specifications of the Analyzer Cedex HiRes Analyzer Digital image and pattern recognition Method of measurement Viable/dead cell differentiation Trypan Blue Exclusion Method 5 × 10 to 1 × 10 cells per mL Detectable cell concentration range Detectable cell diameter range 2 µm to 40 µm... - Page 88 Technical Specifications of the Analyzer Technical Specifications of the Cedex HiRes Control Unit The following table describes the current technical specifications of Cedex HiRes Control Units. Both types of Control Units are operational with Cedex SW 2.4 and with the Analyzer.
-
Page 89: B System Description
Roche provides a secured remote service for the Cedex HiRes Control Unit that can be activated by a Roche Service representative. Contact your local Roche representative for more information. -
Page 90: Choosing A Suitable Location
Injury from heavy loads The Cedex HiRes Analyzer weighs 29 kg. (63.8 lbs). No attempt should be made by the user to remove or set up the instrument alone. You may injure your hands, fingers, or back when putting the Analyzer in place. -
Page 91: Connecting Or Disconnecting The Device
When turned to ON, it is illuminated indicating that the power supply is live. A blue power switch is located on the front panel of the Cedex HiRes Analyzer. When the switch is turned to ON, it illuminates, indicating that the device is live. -
Page 92: Starting The Cedex Hires Analyzer
Starting the Cedex HiRes Analyzer Starting the Cedex HiRes Analyzer The hardware components of the Cedex HiRes Analyzer must be turned on before the analysis Software can be started, otherwise the Software will not be properly initialized. After the initial installation, turn on the individual devices in the order given below: Turn on the Cedex HiRes Analyzer. -
Page 93: Accessing The Control Unit And Cedex Hires Software
Accessing the Control Unit and Cedex HiRes Software Access Control at the Windows Operating System Level Accessing the Control Unit and Cedex HiRes Software Access Control at the Windows Operating System Level Choose your local IT specialist as the system administrator for the general administration of the Windows operations. -
Page 94: Access Control At The Cedex Hires Software Level
Administrator (password apass) ■ For the Cedex HiRes Software, there should generally be at least three levels of users. In addition to normal Cedex HiRes Analyzer users, who will only use the Cedex HiRes Analyzer for carrying out measurements, both a Cedex HiRes Analyzer Superuser and an Administrator should be appointed. -
Page 95: C Software
Event window detailing status of events carried out by the Analyzer A description of the individual areas is provided below: Figure 5: The Cedex Control Center Menu Bar The menu bar at the top of the Cedex Control Center has 7 menu items: System menu Measurements menu Functions menu... -
Page 96: Measurements Menu
Cultivation Time Chart: Opens a new dialog box in which measurement results can be analyzed in a graph form. Consult the Cedex HiRes Analyzer User Training Guide for more information about these functions. Functions Menu The menu items have the following functions: Reagent Kit Status: Confirm changes in reagents and check the amount available for each reagent. -
Page 97: Reports Menu
Overview of the Cedex Control Center Reports Menu Reports Menu Generate reports for the following types of information: Operational Data Measurement Data System Configuration Parameters Audit Trail Automatic Adjustment and Alignment Verification Master Data Menu The menu items have the following functions: Reagent Container Configuration: Allows the user to set the minimum and maximum volumes for the reagents, as well as to set the volumes for the warning and lock levels. -
Page 98: Help Menu
SST: Opens the System Suitability Test List dialog box for setting up and performing SSTs. Clean: Opens the Cleaning dialog box. HWM: Opens the Hardware Management dialog box. Log Out: Logs the user out of the Cedex Control Center. 1.10 Tracking of Status of Events Carried Out by the Analyzer In the Event window below the Shortcuts area, the status of events that have been carried out by the Analyzer is tracked. -
Page 99: The Measurement Dialog Box
■ Setting up a Single Measurement in the Measurement Dialog Box Once samples are prepared, set up a measurement in the Measurement dialog box of the Cedex Control Center as follows: In the Cedex Control Center Shortcuts area, click on the MEASURE button to open the Measurement dialog box. -
Page 100: Interrupting A Measurement
The dilution ratio chosen from the list only relates to the manual dilution of the sample prior to placing the sample on the system. Dilutions that are an automatic part of the measurement process in the Analyzer are already taken into account by the Cedex HiRes Software; those calculations are automatically performed and are not related to entered dilutions. -
Page 101: End Of Measurement
Sample ID is desired, type in the new Reactor ID or Sample ID manually. In the case of single measurements run via the Measurement dialog box on a Cedex HiRes Analyzer with a Multi Sampler attached, the Software will automatically and incrementally increase the sample cup position number with each new measurement. -
Page 102: The Multi Run Dialog Box
Multi Sampler. The Multi Sampler is part of the Cedex HiRes Analyzer and can convey up to 20 cell suspension samples in sequence to the Cedex HiRes Analyzer for analysis. Once the samples have been loaded into the Multi Sample Tray and the analysis parameters for each sample have been set, the samples are automatically delivered to the Cedex HiRes Analyzer and analyzed. -
Page 103: The Status Column
The Multi Run Dialog Box The Status Column The Status Column The Status column in the Multi Run dialog box displays the following information: Edit: Indicates that sample data is actively open for editing and is in the process of being edited. Sample data in edit mode has not yet been added to the process queue, and samples placed in positions in edit mode will not be analyzed when the Multi Run is started. -
Page 104: Disruption Of Measurements
Disruption of Measurements Error messages may appear if a sample cannot be run. For example: The No Cup message appears when a Cedex Sample Cup is not available in its position on the Multi Sample Tray during measurement. The Tray not inserted message appears when the Multi Sample Tray is not inserted or not inserted correctly. -
Page 105: Using The Load Data From Xml Option
Select the XML file, and then click on Open to confirm selection and close the dialog box. Choose Copy From to copy the adapted XML file into the temporary transfer XML file (default path C:\Import\CEDEX-XMLExample.xml). The path can be adjusted via Setup > System Options > External XML > ExternalXMLImportPath &... - Page 106 Table 4 provides the information required by a person experienced in working with XML files to adapt the XML example to individual needs. Customized XML files created for older versions of the Cedex HiRes Software will not work with Software 2.4. Older files will need to be customized again based on the information provided in Table 4 .
-
Page 107: Results Displayed In The Measurement Dialog Box
In addition, measurement results can be viewed via the Measurement List dialog box (see Figure 10). To access this dialog box, click on the LIST button in the Shortcuts area of the Cedex Control Center or select Measurement List in the Measurements menu. The Measurement List dialog box will open, showing all of the measurements stored in the database. -
Page 108: Result Data Area
Excluded column. Depending on the set- tings for user rights, users can also manually exclude individual images from the calculations or include images that were automatically excluded by the Software by clicking on the checkbox in this column. Cedex HiRes Analyzer Operator’s Guide... -
Page 109: Sample Parameters And Processing Parameters Areas
Results Displayed in the Measurement Dialog Box Sample Parameters and Processing Parameters Areas Sample Parameters and Processing Parameters Areas The Sample Parameters area of the Measurement dialog box shows the parameters entered by the user before running the measurement. If any measurements have been reprocessed, the original or reprocessed data can be selected in the drop-down menu of the Data Set section. -
Page 110: Image Area
Viewing Individual Cell Images The Cedex HiRes Software enables a close view of a single image or an enlarged display for evaluation. Individual images can be viewed in the Image area of the Measurement dialog box. The results from the individual images are listed at the bottom of the Measurement dialog box in the Result Data area. -
Page 111: Viewing An Image Using The Image View Dialog Box
It is possible to see which cells were marked viable or dead by the analysis Software via the Image View dialog box. The user can thus get a sense of how cell shapes and clusters have been evaluated by the Software. The Cedex HiRes Software offers various options for optimizing measurement results by adjusting the Operator used for the image analysis. -
Page 112: Excluding Images From The Evaluation Process/Including Excluded Images
Software (i.e., no check will be placed in the Valid checkbox). A new focus adjustment needs to be run as poor image quality can affect the results of the measurement (see “Automatic Adjustment and Alignment Verification”). Cedex HiRes Analyzer Operator’s Guide... -
Page 113: Viewing The Prescan Image
Results Displayed in the Measurement Dialog Box Image Area 4.3.4. Viewing the Prescan Image During a measurement, a so-called Prescan is carried out before the cells are scanned. The entire flow chamber is scanned to identify impurities and bubbles that may influence the measurement. The Prescan image is stored together with the measurement and can be viewed when the Measurement dialog box with results has been opened for that measurement. -
Page 114: Using The Measurement List
Shortcuts area of the Cedex Control Center or by selecting Measurement List in the Measurements menu at the top of the Cedex Control Center. Measurements are stored in the order in which they were performed, with the most recent measurement placed at the top of the list. -
Page 115: Viewing Analysis Results
Using the Measurement List Viewing Analysis Results A number of actions can be carried out in the Measurements List dialog box including searching for measurements using a variety of filters, viewing measurement sample and process parameters, viewing measurement results, printing reports, exporting measurements to a file, and reprocessing measurements. Viewing Analysis Results View existing measurement results by double-clicking on the measurement or by highlighting the row containing the desired measurement and then clicking on the VIEW button in the bottom right-hand corner... -
Page 116: Editing Existing Analysis Results/Data Sets
Change the Cell Type. To reprocess a measurement: Open the Measurement List dialog box by clicking on the LIST button in the Shortcuts area of the Cedex Control Center. Highlight the row of the measurement to be reprocessed and click on the REPROCESS button in the lower right-hand corner. -
Page 117: Effective Data Sets
Editing Existing Analysis Results/Data Sets Effective Data Sets Effective Data Sets When measurements are reprocessed, it is possible to label one of the resultant data sets as Effective. The Effective data set is the version of the measurement (original or reprocessed) that has the correct parameters. Once a data set has been selected as Effective, it will be labeled as such in the Measurement List dialog box. -
Page 118: Graphical Display Of The Analysis Results
Graphical Display of the Analysis Results In addition to displaying the overall analysis values, the Cedex HiRes Software can also display graphic diagrams of the results. These diagrams can be viewed after the analysis is finished by clicking on the HISTOGRAMS button in the Result Data area of the Measurement dialog box. -
Page 119: Aggregate Histogram
Graphical Display of the Analysis Results Aggregate Histogram Aggregate Histogram Click on the AGGREGATE HISTOGRAM button in the Histograms dialog box to open the corresponding histogram. The Aggregate Histogram shows the number of cells in the cell culture found in aggregates, as well as how many cells each aggregate is composed of. - Page 120 TOTAL button. Figure 19 shows, for example, that 1706 cells of the measurement are found in aggregates of two cells. Figure 19: The Aggregate Histogram, total view (sum of living and dead cells), here: number of cells Cedex HiRes Analyzer Operator’s Guide...
-
Page 121: Cell Diameter Histogram
Graphical Display of the Analysis Results Cell Diameter Histogram The percentage of cells found in aggregates, in relation to the total cell count, can be displayed using the PERCENT button as is shown in Figure 20. Figure 20: The Aggregate Histogram, total view (sum of living and dead cells), Here: percentage Cell Diameter Histogram Clicking on the CELL DIAMETER HISTOGRAM button opens up the Cell Diameter Histogram. -
Page 122: Object Diameter Histogram
[× 10 objects/mL], are listed in a table under the Object Diameter Histogram for each of the individual intervals. The intervals set in the Cell Diameter or Object Diameter histograms can be saved for future reference. Cedex HiRes Analyzer Operator’s Guide... -
Page 123: Compactness Histogram
Graphical Display of the Analysis Results Compactness Histogram Compactness Histogram Click on the COMPACTNESS HISTOGRAM button to display a diagram that compares viable cell shapes to that of an ideal sphere. The ratio between the cell circumference and the cell area is based on an ideal sphere (4p), which is equivalent to the value >1<... -
Page 124: Measurement Statistics Histogram
Conspicuous bars can thus be immediately identified, and the user can then view and assess the relevant images (see “Image Area”). The results of each individual image can be seen again by clicking on the SINGLE button. If an image has been excluded, the corresponding position in the diagram will be empty. Cedex HiRes Analyzer Operator’s Guide... -
Page 125: Cultivation Time Chart
The CTC Views dialog box required for creating a Cultivation Time Chart is opened by clicking on the CTC button in the Shortcuts area of the Cedex Control Center or by selecting the Cultivation Time Chart option in the Measurements menu. In the CTC Views dialog box, charts can be created, viewed, edited, exported, and deleted. -
Page 126: The View Area
This area is used for creating, editing, viewing, and deleting a measurement series for a particular View. In order to add or modify a specific measurement series for a particular View, that View must be highlighted in the View area. Figure 26: Selection of Data Series dialog box Cedex HiRes Analyzer Operator’s Guide... -
Page 127: Editing Measurements In A View
“Monitoring Growth of Cells Over Time” in the Cedex HiRes Analyzer User Training Guide. Measurements added to a View cannot be deleted from the database. Before deleting archived measurements from the database, confirm that they are not assigned to a View. -
Page 128: The Cultivation Time Chart Dialog Box
Dead Cell Count: The total number of dead cells counted Total Object Count: The total number of objects counted Click on the appropriate checkboxes to select the desired values. Figure 28: Cultivation Time Chart dialog box Cedex HiRes Analyzer Operator’s Guide... -
Page 129: Fitting To The Lowest Common Value
Cultivation Time Chart The Cultivation Time Chart Dialog Box The measurement series, including information about which measurements have been used to create the chart, are listed in the Data Series area in the bottom left-hand corner of the Cultivation Time Chart dialog box. A legend indicating the symbol (form and color) used for each parameter is at the top of the graph. -
Page 130: Variable Axis Calibration
Section C, Chapter 1, “Monitoring Growth of Cells Over Time” of the Cedex HiRes Analyzer User Training Guide. As with the Cultivation Time Chart dialog box, the Cultivation Time Chart - Exponential Regression dialog box also offers the possibility to shift the measurement series offset using the button in the Chart area and the options lin and log in the Regression area to define the y-axis scaling. -
Page 131: General Functions Of The System
Data Management General Functions of the System The Cedex Control Center offers users with the appropriate rights access to a set of functions in addition to the basic functions of analyzing, modifying, and reprocessing samples and measurement results. These functions... -
Page 132: Export To File
Exporting measurement results is done via the Export to file area of the Measurement List dialog box or via the Export to file option in the Functions menu of the Cedex Control Center. Four different formats can be chosen including CSV, XML, XLS, and Flat file. In addition, a sub-set of parameters to be included in the file can be selected. -
Page 133: Data Exchange
Cedex Software 2.4 databases (DB). The user can export selected measurements from one Cedex Software 2.4 DB and import them into another Cedex Software 2.4 DB. This enables the user to view a measurement performed on one system within the context of the Cedex Software 2.4 on a completely different system and Control Unit. - Page 134 .sig file Both files are required for importing the measurement package into a different Cedex HiRes Analyzer DB. Ensure that the two files are always stored in the same location to enable importing of measurement packages in the future.
-
Page 135: Import
Once the measurement package has been exported from one system to external storage, the data can then be imported into another DB. To import the measurement package into a different Cedex Software 2.4 database: Ensure that the two files generated when the measurement package was exported are placed in the same folder (see “Export”):... -
Page 136: Viewing And Evaluating The Audit Trail
Viewing and Evaluating the Audit Trail The Cedex Software automatically creates an Audit Trail (log) for each sample and records all relevant hardware information relating to the sample. The Audit Trail data can never be overwritten. This ensures that all recorded, analyzed, and modified measurement data is documented (see “The System Audit... -
Page 137: User Preferences
General Functions of the System User Preferences User Preferences The User Preferences dialog box is located under the Master Data drop-down menu in the Cedex Control Center. Figure 31: User Preferences dialog box with the tab Measurement selected A logged-in user with specific access rights to the User Preferences option can set preferences for a number of elements, including the result parameters to be displayed in the Multi Run result list and Measurement List dialog box, and default measurement parameters for carrying out measurements. -
Page 138: Specifying Default Measurement Parameters
The default parameter settings are only valid for this user. Follow the instructions below to change the default values for certain measurement parameters: Select User Preferences in the Master Data menu of the Cedex Control Center. The User Preferences dialog box opens. -
Page 139: Changing Own Password
Changing Own Password Users may change their own passwords. Follow the instructions below: Click on the System menu on the Cedex Control Center. Click on Change my Password; the Change password area appears. Enter your present password in the first field. -
Page 140: Administrator Functions
All administration of user accounts and rights management is done in the User Rights Management dialog box. To open the User Rights Management dialog box, click on the Setup menu in the Cedex Control Center and select User and Rights Management. -
Page 141: Creating And Editing User Roles With Specific Access Rights
By default, the Superuser has all functions assigned to the role with the exception of “User rights”. Support: Support of the Cedex HiRes Analyzer by a Roche Service representative requires access to all operational functions similar to the Superuser role. By default, no functions are assigned to this role. - Page 142 Access various options for printing reports. Schedule Access to the Schedule dialog box; define cleaning functions to be automatically performed at certain intervals. SST Edit Create and edit SST checkpoints. SST Run Run SST checkpoints and view SST trending charts. Cedex HiRes Analyzer Operator’s Guide...
- Page 143 Administrator Functions Administration of User Accounts Function that can be added Access rights granted by the function to a User Role Syringe Maintenance Access the Syringe Maintenance dialog box in order to exchange the syringe. System Options Access to the System Options dialog box. User Preferences Access the User Preferences dialog box to change the preferences of the logged-in user.
-
Page 144: Assigning A User Role To A User
Rights”. To assign rights to a user account: Click on the Setup menu in the Cedex Control Center. Click on User and Rights Management. The User Rights Management dialog box appears. In the All Users main menu, open the user account menu that is to be modified. A User Role sub-menu will appear. -
Page 145: Creating User Groups
Administrator Functions Administration of User Accounts 10.1.4. Creating User Groups It is possible to generalize one or more user accounts in user groups. Instead of assigning rights to a single user, a user role or a set of user roles can be assigned to a user group. The whole user group, therefore, receives all access rights that have been assigned to the user roles. -
Page 146: Password Management
Administrator Functions Password Management 10.2 Password Management The Cedex HiRes Software has been equipped with a detailed password management that is compliant with CFR 21 Part 11 guidelines. 10.2.1. Specifying Password Characteristics Password settings can be specified and changed in the User Rights Management dialog box. The following... -
Page 147: Assigning Workareas
Administrator Functions Assigning Workareas 10.3 Assigning Workareas The analysis results from measurements are organized in workareas. At least one workarea must be assigned to a user in order for the user to run measurements, otherwise an error message will appear. All measurement data is saved in the workarea selected during a measurement run. -
Page 148: The System Options
Preferences” in the Appendix for a detailed description of all of the System Options. The Cedex HiRes Software may need to be restarted in order for changes in the System Options to take effect. All elements in the System Options that have not been explicitly described in this Operator’s Guide must not be changed without prior arrangement with Roche Diagnostics. -
Page 149: Turning Off Automatic Incrementation Of Sample Cup Position
Turning off Automatic Incrementation of Sample Cup Position In the case of single measurements run via the Measurement dialog box on a HiRes system with a Multi Sampler attached, the Software will automatically incrementally increase the sample cup position number with each new measurement. -
Page 150: Error Level Displayed To Users
In the Reagent Container Configuration area, the minimum and maximum liquid levels for reagent and waste containers can be set. To open the Reagent Container Configuration dialog box: Click on the Master Data menu on the Cedex Control Center. Click on Reagent Container Configuration and the dialog box appears. -
Page 151: Adjustment Of The Image Analysis Using The Live Operator
The parameters for this Cell Type should not be changed. Individual adjustments of the operator can be helpful or necessary for cell cultures that, for instance, have an unusual optical appearance or for a counting strategy that deviates from the standard Cedex HiRes Software analysis (e.g., counting aggregates differently). -
Page 152: Accessing The Cell Type List And Live Operator
The Live Operator dialog box, in which Cell Types can be created and modified, is accessed in two ways: Via the Measurement dialog box in the View mode. Via the Cell Type List option in the Master Data menu on the Cedex Control Center. 10.5.2. -
Page 153: Creating A New Cell Type
Cell Type. Click on CANCEL to close the Live Operator dialog box without saving the changes. ■ Detailed step-by-step instructions for creating new Cell Types is provided in the Cedex HiRes Analyzer User Training Guide in Section C, “Analyzing Unusual Cells”. -
Page 154: Editing An Existing Cell Type
If this occurs, a message “Warning: sedimentation time was exceeded” will appear in the main Cedex Control Center. However, there will be no effect on the measurement procedure other than a slightly longer sedimentation time. The sedimentation time can be increased for the Std. Size and Max. -
Page 155: Viewing An Existing Cell Type
Administrator Functions Adjustment of the Image Analysis using the Live Operator 10.5.5. Viewing an Existing Cell Type Select the Cell Type to be viewed from the list of Cell Types at the top of the Cell Type List dialog box and then click on the VIEW button. - Page 156 Live Operator dialog box. Each single cell detected by the Cedex HiRes Analyzer is marked as dead (red circle) or living (green circle). Figure 34: Setting parameters for Cell Type Standard Cells In the Process Data area, the values for new and previous results are displayed for viable cells (the number of living cells of the current image), dead cells (the number of dead cells of the current image), and % viability.
-
Page 157: Description Of The Individual Operator Parameters
Administrator Functions Adjustment of the Image Analysis using the Live Operator 10.5.8. Description of the Individual Operator Parameters ClassificationBias Range: [-20, 20], Default: 0, Unit: [absolute value]. This parameter influences the classification behavior of viable and dead cells. Since dying cells of different cell lines absorb Trypan Blue differently, dead cells can be variably stained. - Page 158 This parameter determines when an image will not be analyzed (i.e., the size [diameter in micrometer]), that an object (e.g., dirt or bubbles) must have for an image to no longer be analyzed. The use of the sliders, especially in combination, can lead to unexpected results. Cedex HiRes Analyzer Operator’s Guide...
-
Page 159: Archiving Data
Measurement data must be secured at regular intervals and thereafter deleted from the Measurement List in order to ensure enough storage capacity on the Cedex HiRes Control Unit. All data from a single or a set of measurements, or optionally only the images, can be deleted from the database (DB) once the measurement or measurements have been archived. -
Page 160: Archive
Archive To archive measurement data: In the Cedex Control Center, choose Functions>Archiving>Archive. A Measurement List dialog box appears with an ARCHIVE button at the bottom of the dialog box: Select a single measurement from the list by clicking on the field on the left of the appropriate line, or choose a set of measurements by holding down the <Ctrl>... - Page 161 ■ Figure 35 Both files are required for restoring the measurement package back into the Cedex HiRes Software DB. Ensure that the two files are always stored in the same location to enable restoring of measurement packages in the future.
-
Page 162: Restore
(see “Archive”): .cx2 file .sig file In the Cedex Control Center, choose Functions>Archiving>Restore. The Restore dialog box appears, with ADD and REMOVE buttons located on the right-hand side of the dialog box: Click on ADD; an Open archive files(s)… dialog box opens in which measurements to be imported are selected. -
Page 163: Deleting Archived Data
10.6.3. Deleting Archived Data Only data that has been archived can be deleted from the Cedex HiRes Analyzer database. Archived data still located in the database can be searched for and displayed in the upper right-hand corner of the Measurement List dialog box. -
Page 164: Database Management
10.7.1. Database Backup To create a backup of the Cedex Software database: In the Cedex Control Center, choose Setup>Database Maintenance>Database Backup. The Database Backup dialog box appears: Enter the path under which the database backup should be stored in the Backup Location area. -
Page 165: Database Restore
Database Restore Once a database backup has been created, it is possible to restore the backup to the Cedex SW 2.4. Before restoring a backup, be sure to create a backup of the current database, as the restore function will overwrite all existing data. -
Page 166: Instrument Configuration
In addition, the Instrument Configuration dialog box provides information about the system, including serial number, sampler configuration, and scanner configuration. The values in the System Information area are entered during installation of the software and are not editable. Cedex HiRes Analyzer Operator’s Guide... -
Page 167: Instrument Configuration - Remote Control Area
10.8.1. Instrument Configuration – Remote Control Area The Remote Control function enables the user to control the Cedex HiRes Analyzer via separate, onsite auto- mation application software, which allows for integration of the Cedex HiRes Analyzer in automated environ- ments and/or remote cabinets. The connection is set up via TCP/IP. Measurements and liquid management are controlled by remote interface. -
Page 168: Instrument Configuration - Liquid Management System Area
Once a sample port type has been selected, the appropriate FlowFactor must be entered. The FlowFactor is system-specific and part of the conversion factor that relates the number of objects detected in the Cedex HiRes Analyzer to the actual density in the analyzed sample. -
Page 169: D Maintenance And Care
Maintenance and Care The Analyzer should be regularly serviced to guarantee optimal performance and maximize the life span of the Cedex HiRes Analyzer. This includes the following maintenance procedures: Recurrent manual maintenance and cleaning routines when necessary. Cleaning routines with the Liquid Management. -
Page 170: Cleaning And Maintenance Checklist
In order to ensure that the Cedex HiRes Analyzer is fully operational, an Intensive Clean must be carried out once per week even if the system is not being used for measurements. Cedex HiRes Analyzer Operator’s Guide... -
Page 171: The Multi Sampler Defaultcup
The position does not influence measurements; all 20 positions on the Multi Sample Tray can be used for measurements. However, if a sample is present in a Cedex Sample Cup placed in the DefaultCup position during a Prime, LM Shutdown, focus adjustment, or any cleaning routines, it can no longer be used for a measurement. -
Page 172: The Hardware Management Dialog Box
“Installing or Changing the Reagent Kit”) and a clean, empty Cedex Sample Cup is correctly positioned on the Multi Sample Tray in the DefaultCup position or attached to the single sample port. Click the PRIME button in the Hardware Management dialog box. The duration of a Prime procedure is displayed in the Estimated total time area. - Page 173 The Hardware Management dialog box opens. Ensure that a Reagent Kit is installed and a clean, empty Cedex Sample Cup is correctly positioned on the Multi Sample Tray in the DefaultCup position or attached to the single sample port.
-
Page 174: Installing Or Changing The Reagent Kit
“The Hardware Management Dialog Box”). Open the Reagent Kit chamber in the Cedex HiRes Analyzer by pushing the front upwards until it clicks into place. Remove the old Reagent Kit with the tray, and dispose of the old reagent bottles. -
Page 175: Refilling Containers Individually
Installing or Changing the Reagent Kit Refilling Containers Individually Place a clean Cedex Sample Cup in the DefaultCup position on the Multi Sample Tray or attach it to the sample port, for a system with a single sample port. Perform a Prime (see “The Hardware Management Dialog... - Page 176 8-way valve. Regular checks of the liquid level are done via the Reagent Kit Status dialog box. For safety reasons, the liquid level of the individual reagent containers, as well as the capillary positions, should also be manually checked before each measurement and, if necessary, replaced or refilled. Cedex HiRes Analyzer Operator’s Guide...
-
Page 177: Scheduling Automatic Cleaning Routines
Note that measurement information placed in the Multi Run preparation area that has the status of edit is not added to the queue. Therefore, if a Cedex Sample Cup containing a sample is added to the Multi Sample Tray in the DefaultCup position, and the row for that sample is left in edit mode, the cup will be used for a cleaning routine should one be scheduled to be carried out at that time. -
Page 178: Daily Maintenance And Cleaning Routines
Daily Maintenance and Cleaning Routines The Liquid Management plays a key role in the Cedex HiRes Analyzer. It is necessary to Prime the system at the beginning of the day, and to carry out an LM Shutdown prior to shut down of the system in the evening (see “The Hardware Management Dialog... - Page 179 Daily Maintenance and Cleaning Routines Cleaning Options Standard Clean (with cleaning solution, detergent, and distilled water for approximately 90 seconds) The entire Liquid Management system is rinsed with distilled water, cleaning solution, detergent, and finally with distilled water again. This routine removes dirt particles and is used after measuring a set of samples or before a longer pause.
-
Page 180: Performing A Cleaning Routine
The different cleaning routines always have the same starting procedure. Ensure that there is always a Cedex Sample Cup attached to the single sample port or a Cedex Sample Cup placed in the DefaultCup position of the Multi Sample Tray. -
Page 181: Scanning The Chamber To Verify The Effectiveness Of Cleaning Routines
Proceed as follows: Click on the CLEAN button on the Cedex Control Center to open the Cleaning dialog box. Click on the SCAN button in the lower right-hand corner of the Cleaning dialog box. The flow chamber will be scanned (i.e., an image of the entire chamber will be created). -
Page 182: Automatic Adjustment And Alignment Verification
Pipet 1 mL of a well-mixed bead solution (Cedex Calibration Beads) into a Cedex Sample Cup. Attach the Cedex Sample Cup to the single sample port or place the Cedex Sample Cup in the DefaultCup position on the Multi Sample Tray (see “The Multi Sampler... - Page 183 The automatic adjustment and verification of alignment is carried out in several steps. First, water is pumped into the flow chamber and a white balance is carried out. The Cedex Calibration Beads are then injected into the flow chamber. Focus finding occurs after sedimentation. An automatic cleaning of the flow chamber and the capillaries, as well as a new white balance, is done after focus adjustment.
-
Page 184: Syringe Maintenance
Removing the Syringe Syringe Maintenance Moving parts of the Syringe Module may cause hand injuries. Never run a measurement on the Cedex HiRes Analyzer without the protective cover for the Syringe Module in place. When performing a syringe maintenance, be aware of the risks from moving parts. -
Page 185: Assembling And Installing The Syringe
Instructions for Use for the Density Reference Standard Beads, available for download via the CustomBiotech home page: www.custombiotech.roche.com Never use the Cedex HiRes Analyzer without the protective cover on the Multi Sampler and Syringe Module. Maintenance and Care... -
Page 186: Maintenance Of The Syringe Guide And Spindle
Follow the instructions below: Remove the syringe (see “Removing the Syringe”). Turn off the Cedex HiRes Analyzer. Lubricate the top part of the syringe guide and spindle. Turn on the Cedex HiRes Analyzer. Click on INSTALL in the Syringe Maintenance dialog box. -
Page 187: Exchanging The Fuse In Cedex Hires Analyzers From Serial Number G037Da101
Exchanging the Fuse in Cedex HiRes Analyzers from Serial Number G037DA101 Cedex HiRes Analyzers from serial number G037DA101 contain a fuse that must be exchanged when the fuse is blown. The Cedex HiRes Analyzer delivery package includes a set of 10 replacement fuses. -
Page 188: Maintenance Of The Flow Chamber, 8-Way Valve And The Remaining Hardware Components
Roche representative is recommended. During maintenance, worn out and defective components are replaced and the functioning of the Cedex HiRes Analyzer is checked. Only an authorized Roche Service representative is permitted to carry out maintenance when the Cedex HiRes Analyzer needs to be opened. -
Page 189: The System Suitability Test (Sst)
Cedex HiRes Analyzer mainly focuses on the liquid management process (such as flow chamber, capillaries, etc.). The System Suitability Test (SST) is a feature of the Cedex HiRes Software that is designed to help monitor the state of the system for quality supervision/assurance purposes. A routine checkup procedure that meets the system owner’s specific needs can be created using the SST Software feature. -
Page 190: Creating Sst Checkpoints With And Without Measurements
Sample Initial Dilution Target Value The Target Value serves as benchmark for the acceptance criteria. It can be based, for example, on the average result of a set of measurements carried out with Cedex HiRes Control Beads. Valid Range??% The Valid Range??% determines the acceptance range applicable to the results of SST measurements carried out for this checkpoint based on the target value entered. -
Page 191: Running A Water Blank
The reaction of the system to an SST failure depends on the configuration in the System Options. The System Options can be accessed under the Setup menu on the Cedex Control Center: Open the System Options and click on the General tab. -
Page 192: Performing An Sst
All procedures related to the System Suitability Test can be controlled via the System Suitability Test List. To access the list, open the Functions menu in the Cedex Control Center and click on SST or directly click on the SST button in the Cedex Control Center. -
Page 193: Performing An Sst Without Measurements
The System Suitability Test (SST) Performing an SST 12.2.2. Performing an SST Without Measurements For SST procedures that don’t require any measurements, clicking on the RUN SST button will open the System Suitability Test Run dialog box. The SST Name and/or Description should provide information regarding the nature of the manual check or the maintenance step that needs to be taken. -
Page 194: Tracking Trends In Sst Results Over Time
Trending Chart, but excluded measurements will be circled in red and not used for curve calculations. Click on the TRENDING CHART button to create a Trending Chart. ■ Figure 44: Trending List for SST with Measurement dialog box Cedex HiRes Analyzer Operator’s Guide... - Page 195 The System Suitability Test (SST) Tracking Trends in SST Results Over Time Clicking on the TRENDING CHART button will open a Trending Chart dialog box showing all of the SST measurements (marked u on the chart, see Figure 45). If multiple measurements are required for a particular checkpoint, the average of the measurements is marked by u, while the results from the individual measurements for that checkpoint are marked with an ×.
-
Page 196: Tracking Sst Checkpoints Without Measurements
The list can be printed out via the PRINT button or exported in either a CSV or XLS format via the EXPORT button. Figure 46: Trending List for SST without Measurement dialog box Cedex HiRes Analyzer Operator’s Guide... -
Page 197: Locking - Unlocking The System
The current state of the system can be viewed in the Change System Status dialog box, which is accessed by selecting the Lock – Unlock System option in the System menu of the Cedex Control Center (see Figure 47). The state of the system is set automatically depending on the validity of all SST checkpoints, and the configuration of the SSTFailureReaction parameter in the System Options. - Page 198 Cedex HiRes Analyzer Operator’s Guide...
-
Page 199: E Troubleshooting
Exchange”) that show the issue. Diagnosis For technical support purposes, the user is able to run a diagnosis of the Cedex HiRes Analyzer at the request of an authorized Roche Service representative. The diagnosis of the System provides a file containing information about the System Software and hardware. -
Page 200: The System Audit Trail
The System Audit Trail All user-initiated activities, as well as important actions performed by the Cedex HiRes Software, are recorded in the Audit Trail. The system also logs all errors in the audit trail, including information about the error message. -
Page 201: Troubleshooting
Select YES to shut down the program. Open the Cedex Server Console window and press <Ctrl> + C to exit the Cedex Server console window. Wait until the Cedex Server console window closed, then shut down the Control Unit and monitor. - Page 202 Cedex HiRes Analyzer Operator’s Guide...
-
Page 203: F Appendix
System Options and User Preferences The following list provides a description of all of the System Options that can be found in the Cedex HiRes Software via the System Options dialog box found under the Setup menu of the Cedex Control Center. - Page 204 The number of cleanings to be used for the estimation of HistoryRecord the average time the cleaning will take. Count CriticalDiskSpace Critical disk space for the hard disk where a Cedex DB is located [Gigabyte]. DataBaseDrive The drive on which the database is located (this will, for MapName example, be used for checking the free disk space, see “CriticalDiskSpace”).
- Page 205 SamplePortName Auto Sampler System default sample port: Auto Sampler/Single Port/Remote Port. SampleTraySize Number of Cedex Sample Cups that the Multi Sample Tray can hold. SchedulerTimer Time interval (in seconds) in which the Scheduler should Period check its task list.
- Page 206 Increase in cup position after every measurement, for CupPosition example, when running new measurements in the Measurement dialog box. Possible values: 0=don’t increase, 1= automatically increase. Workarea Standard Default Workarea for a new measurement. × Cedex HiRes Analyzer Operator’s Manual...
- Page 207 System Options and User Preferences Settings in the “Measurement List Default Filter” tab: Option Value Description Save last value CellType Measurement List Default Filter for CellType. × DataSet Measurement List Default Filter for DataSet. × DataSetType Effective Measurement List Default Filter for DataSet: ×...
- Page 208 {3} measurement ID {4} workarea {5} reactorID {6} sampleID {7} userName (i.e., who processed the original data set!) {8} name of the Cedex System (i.e., the Cedex Serial Number) {9} description of the Cedex System ArchivePath C:\Cedex2\ Default Archive/Restore file path.
- Page 209 System Options and User Preferences Settings in the “Series Default Filter” tab: Option Value Description Save last value DataSet Effective CTC Series New Default Filter for DataSet × Measurement CTC Series List Default Filter for Measurement Date DateFrom From × Measurement CTC Series List Default Filter for Measurement Date To DateTo...
- Page 210 (not adjustable) Fine focus step for automatic FineStepZ adjustment. FocusFinderMaxZ 1250 (not adjustable) Maximum focus position for automatic adjustment. FocusFinderMinZ (not adjustable) Minimum focus position for automatic adjustment. SaveAutomatic Store automatic alignment images in database AlignmentImages (0-False/1-True). Cedex HiRes Analyzer Operator’s Manual...
- Page 211 System Options and User Preferences Settings in the “Report Settings” tab: Option Value Description Save last value Audit Trail Report standard The name of the report template for report type Template "Audit Trail". Automatic Align- standard The name of the report template for report type ment Adjustment "Automatic Alignment Adjustment".
- Page 212 1 × 10 mL Batch B 06 422 667 001 Cedex Calibration Beads 20 mL 05 650 470 001 Cedex Sample Cups 05 650 623 001 Cedex HiRes Reagent Kit 1 set 05 650 798 001 Cedex HiRes Analyzer Operator’s Manual...
- Page 213 Cedex Control Center ..........22 Default Measurement Parameters ...... 73 Cedex Detergent ............111 Default Parameters ........... 74 Cedex HiRes Control Beads ...... 125, 126 Default Settings ............86 Cell Area ............... 59 Defining Diameter Intervals ........58 Cell Concentration ............ 50 Density Reference Standard Beads ....125...
- Page 214 Import Measurement ..........70 Overall Results ............44 Impurities..........111, 112, 116 Overall Type ...............126 Including Excluded Images ........48 Intensive Clean ..........28, 115 Intensive Clean with HCl ........115 Interrupting .............., 36 IR Operator ............89, 90 Cedex HiRes Analyzer Operator’s Manual...
- Page 215 Index Index Password Administrator .......... 30 Sample Port ...............111 Password Change ............. 30 Sample Volume ...........23, 35 Password Management .......... 82 Save Last ..............74 Password Settings ............. 82 Scheduled Status ............39 Password Superuser ..........30 Scheduling ............32, 113 Password Windows ...........
- Page 216 Valid Measurement ........... 49 View Mode ..............88 Warning ...............133 Warn Level ..............86 Waste ................110 Win-Admin User ............29 Workarea ............... 74, 76 XML Format ..............68 Y-Axis ................66 For use in quality control/manufacturing process only. Cedex HiRes Analyzer Operator’s Manual...
- Page 218 Published by Roche Diagnostics GmbH Sandhofer Straße 116 68305 Mannheim Germany © 2017 Roche Diagnostics. All rights reserved. custombiotech.roche.com 08385815001 4 102017...
Need help?
Do you have a question about the HiRes and is the answer not in the manual?
Questions and answers