Table of Contents
Advertisement
Advertisement
Table of Contents

Related Manuals for AML Base X2


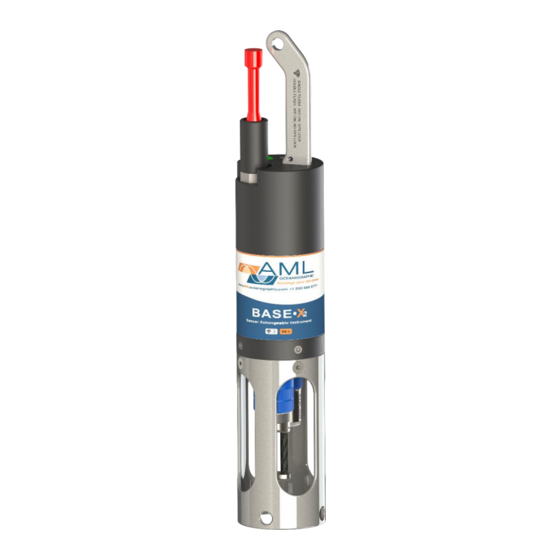
Summary of Contents for AML Base X2
- Page 1 BaseX User Manual Version 1.05 13 April 2017...
-
Page 2: Revision History
User Manual for AML Oceanographic BaseX Revision History Revision Revision Date Changes Name Version 1.00 2016-03-19 Manual created Mark Smith Version 1.01 2016-05-18 Regulatory Information updated Chris Perrier Version 1.02 2016-05-20 Formatting updates Jehan Zouak Version 1.03 2016-06-09 Updated technical specifications Jehan Zouak Version 1.04... -
Page 3: Table Of Contents
User Manual for AML Oceanographic BaseX Table of Contents General Description of the Instrument ..................2 Where Do I Start? ........................3 Shipping & Receiving ........................4 Receiving an Instrument ......................4 Returning an Instrument to the Factory ...................4 Using the Instrument ........................5 Pressure Ratings ........................5 Pre-Deployment Procedures ....................5... -
Page 4: General Description Of The Instrument
Calibration data for all sensors is available from the instrument, and calibration certificates can be printed from AML Oceanographic SeaCast software when the instrument is connected. • Logged data is stamped with sensor traceability and instrument configuration data. • Only Xchange sensors are sent for calibration, leaving the instrument working in the field. -
Page 5: Where Do I Start
User Manual for AML Oceanographic BaseX Where Do I Start? AML Oceanographic X•Series instruments ship with several manuals on the USB: • An instrument manual (this Base•X manual) providing an overview on how to use and maintain the instrument; • A SeaCast manual providing instructions on how to use the software to configure the instrument and review instrument data;... -
Page 6: Shipping & Receiving
User Manual for AML Oceanographic BaseX Shipping & Receiving Receiving an Instrument When receiving an instrument, perform the following steps to ensure the instrument will be ready for deployment when required: • Inspect the shipping container, looking for signs of damage. Damage to the shipping container could indicate damage to the instrument inside. -
Page 7: Using The Instrument
User Manual for AML Oceanographic BaseX Using the Instrument Pressure Ratings Pressure ratings are given for Xchange™ sensors and the entire instrument. Deployments should never exceed the lower of these two pressure ratings. For example, a 500m instrument equipped with a 6000 dBar (0-6000m) P•Xchange™ sensor is limited to deployments of 500m depth or less. -
Page 8: Supported Sensor Configurations
User Manual for AML Oceanographic BaseX Primary Xchange™ mount blanking plug Secondary Xchange™ mount blanking plug T•Xchange, C•Xchange, P•Xchange & CT•Xchange & Tu•Xchange blanking SV•Xchange plug (Secondary Port) blanking plug (Primary Port) Supported Sensor Configurations Swappable sensors allow you to configure the instrument in a number of different ways. Base•X... -
Page 9: Usb Wireless Adaptor
The drivers for the wireless adaptor are included with every installation of SeaCast 4 and on the AML USB stick. The wireless drivers should install automatically when first inserted into a PC. Alternatively, the drivers may be installed manually. The following instructions explain how to install them on a computer running Windows 7. -
Page 10: Led Indicators
User Manual for AML Oceanographic BaseX LED Indicators The large LED indicator located next to the data/power connector on the instrument’s top endcap is used to communicate the instrument’s status. In general, the LED: • will be on whenever the data/power cable is plugged into the instrument. -
Page 11: Configuring Sampling Parameters Using Seacast
Configuring Sampling Parameters Using SeaCast SeaCast is free software provided for use with AML Oceanographic instruments. It can be used to set up an instrument for profiling or monitoring data, as well as downloading, graphing, and exporting the collected data. -
Page 12: Accounting For Atmospheric Pressure Variations At The Surface
Climate and altitude changes can create fluctuations in atmospheric (barometric) pressure. AML's pressure sensors are sensitive enough to detect these variations. When this happens, the instrument's pressure channel may not read exactly zero when data is taken prior to submersion in the water. -
Page 13: Monitoring Real Time Data
User Manual for AML Oceanographic BaseX 1. Ensure the pre-deployment procedures have been completed. 2. With the instrument out of water, plug the red shorting plug into the connector and wait for the instrument status indicator to turn solid green. The red shorting plug must remain installed while the instrument is in use. -
Page 14: Post-Deployment Procedures
User Manual for AML Oceanographic BaseX To begin, ensure the instrument is out of water. Connect to the instrument via SeaCast (either via serial cable or WiFI) and navigate to the View Data tab. Press the Monitor button at the bottom of the panel to begin live streaming of sensor data. - Page 15 User Manual for AML Oceanographic BaseX Slot1Sensor1=SV-C.Xchange SV.X SN 131197 01/22/10 Slot2Sensor1=P-T.Xchange P.X SN 145721 08/21/09 T.X SN 400048 11/17/09 [Data] 02/24/10 14:45:10.66 1474.313 0000.015 17.447 008.18 02/24/10 14:45:10.69 1474.334 0000.015 17.449 008.20 02/24/10 14:45:11.19 1474.332 0000.027 17.451 008.20 02/24/10 14:45:11.69 1474.326 0000.027 17.451 008.20 02/24/10 14:45:12.19 1474.319 0000.027 17.457 008.20...
-
Page 16: Maintaining The Instrument
User Manual for AML Oceanographic BaseX Maintaining the Instrument Periodic Maintenance Periodic preventative maintenance will prolong the life of the instrument. The following steps are recommended: • If the instrument is very dirty or oily, allow it to soak in warm, soapy water before cleaning with a rag or soft brush. -
Page 17: Charging The Lithium-Ion Batteries
User Manual for AML Oceanographic BaseX Charging the Lithium-Ion Batteries • Ensure the instrument is dry. • Plug the data/power cable into the instrument. • Plug one of the power adapters (flying leads, wall wart, 12V cigarette lighter) into the data/power cable. -
Page 18: Communications
User Manual for AML Oceanographic BaseX Communications PC Settings / WiFi Base•X communicates via the wireless connection established using the SeaCast software. All instrument operations can be set / controlled via this method. PC Settings / Serial Base•X will communicate with both RS-232 and RS-485 serial connections. The computer to which the instrument is connected must be set up as follows: •... -
Page 19: Default Example Outputs
User Manual for AML Oceanographic BaseX The default data channel outputs with all calculated parameters turned on are: SV,P sensors Date Time Sound velocity Pressure Battery Density Salinity mm/dd/yy hh:mm:ss.ss dbar volts kg/m SV, Turbidity sensors Date Time Sound velocity... -
Page 20: Support
User Manual for AML Oceanographic BaseX LoggingBreakMode=no DetectionMode=A3 BatteryACoefficient=+3.500000E-01 BatteryBCoefficient=+2.500000E-02 ShutDownVoltage=6.5 WarningVoltage=6.9 PressureOffset=0.00 UsePressureOffset=no SoundVelocityThreshold=1375.00 DelimterMode=Space SensorDetectionMode=Once Traceability=yes SkipPowerOff=no AnalogChannels=2 Latitude=48.6570 Longitude=-123.4137 AutoMonitorSeconds=0 FixedPressure=0.0000 UseFixedPressure=no BiofoulingPwrAlways=no LedTimeoutSecs=300 DisplayIncrement=no [Slot 1] SensorName=SV-C-CT.Xchange SV.X SN 204907 09/22/15 BoardSN=03511 [Slot 3] SensorName=P-T-TU-DO-UV.Xchange P.X SN 304977 10/23/15 BoardSN=02640 >dir... - Page 21 Is the data/power cable connected to the instrument and computer? o Are there any cuts in the cable? o If using a cable other than an AML cable, it should be configured as a null modem cable. o If using multiple cable lengths, the extensions should not be configured as null modem cables.
- Page 22 User Manual for AML Oceanographic BaseX Instrument fails to log: • Verify the LED indicator status: o With the instrument in air (NOT submerged), insert the red shorting plug. The LED indicator should show solid green indicating the instrument is charged and ready.
-
Page 23: Contact Aml Oceanographic
To access the Customer Portal, please navigate to the Support button - located on the top right of the AML Oceanographic home page - select Customer Centre from the options on the drop down menu and follow the instructions provided. -
Page 24: Ip Address
Commands sent to the instrument are received and interpreted by the installed WiFi board, rather than a typical AML logging board. This means that the standard AML command set may not be directly applicable. To bypass the installed WiFi board and access the underlying logging boards, use the “---“... - Page 25 User Manual for AML Oceanographic BaseX SET FORCE AUTO Sets for auto-detection of RS-232 or RS-485 comms. Note that if instrument is not connected to a com port on power up, it assumes RS-485 operation and will remain in that mode until powered down.
- Page 26 User Manual for AML Oceanographic BaseX Output Format Commands (must be in instrument mode) Command Description Requires DISPLAY SCAN Displays current scan options. SET SCAN NOBAT Turns the battery channel off. SET SCAN BAT Turns the battery channel on. SET SCAN NODENSITY Turns the calculated density channel off.
- Page 27 User Manual for AML Oceanographic BaseX Puts unit into logging mode from real-time mode. It will remain in logging mode until power is turned off. SET LOG tttttttt.ttt Sets new log file name. tttttttt.ttt = log file name. Name can have up to 8 characters in length and 3 characters for file extension.
-
Page 28: Technical Specifications
User Manual for AML Oceanographic BaseX Technical Specifications Electrical • WiFi Board • Mother Board o Flash, non-volatile data memory (Minimum 1 GB) o Two dedicated slots ▪ Primary Xchange™ sensor slot ▪ Secondary Xchange™ sensor slot • Sensor Boards ▪... - Page 29 User Manual for AML Oceanographic BaseX Housing Type Depth Rating Diameter Length Weight (in water) Weight (in air) Delrin 100 m Delrin (with 2.7” 15.3” 1.1 lb 2.6 lb internal [69 mm] [390 mm] [0.5 kg] [1.2 kg] 500 m...
-
Page 30: Ordering Codes
User Manual for AML Oceanographic BaseX Ordering Codes PDC-BSX2-P1S1-01 Base•X , 100 dBar, Delrin pressure housing PDC-BSX2-P1S1-05 Base•X , 500 dBar, Delrin pressure housing Ordering codes for sensors and accessories can be found at http://www.amloceanographic.com/... -
Page 31: Regulatory Information
003WWA110920, July 7, 2011 Warranty AML warrants the instrument for a period of two years from the date of delivery. AML will repair or replace, at its option and at no charge, components which prove to be defective. The warranty applies only to the original purchaser of the instruments and only to instruments and sensors manufactured by AML Oceanographic. -
Page 32: Technical Overview Drawings
User Manual for AML Oceanographic BaseX Technical Overview Drawings... - Page 33 THE INFORMATION CONTAINED IN THIS DRAWING IS THE SOLE PROPERTY OF AML OCEANOGRAPHIC LTD. ANY REPRODUCTION IN PART OR WHOLE WITHOUT THE WRITTEN PERMISSION OF AML OCEANOGRAPHIC LTD IS PROHIBITED REVISION TABLE DATE DESCRIPTION INSTRUMENT CONNECTION POINT SHORTING PLUG LANYARD...
- Page 34 THE INFORMATION CONTAINED IN THIS DRAWING IS THE SOLE PROPERTY OF AML OCEANOGRAPHIC LTD. ANY REPRODUCTION IN PART OR WHOLE WITHOUT THE WRITTEN PERMISSION OF AML OCEANOGRAPHIC LTD IS PROHIBITED REVISION TABLE DATE DESCRIPTION SHORTING PLUG LOCKING SLEEVE AML NO: CON-H0020...
- Page 35 THE INFORMATION CONTAINED IN THIS DRAWING IS THE SOLE PROPERTY OF AML OCEANOGRAPHIC LTD. ANY REPRODUCTION IN PART OR WHOLE WITHOUT THE WRITTEN PERMISSION OF AML OCEANOGRAPHIC LTD IS PROHIBITED REVISION TABLE DATE DESCRIPTION OPTIONAL INSTRUMENT ACCESSORIES 4-POINT DEPLOYMENT CAGE...
Need help?
Do you have a question about the Base X2 and is the answer not in the manual?
Questions and answers