Advertisement
Quick Links
Download this manual
See also:
Operator's Manual
Your new tool has been engineered and manufactured to WEN's highest standards for dependability,
ease of operation, and operator safety. When properly cared for, this product will supply you years
of rugged, trouble-free performance. Pay close attention to the rules for safe operation, warnings,
and cautions. If you use your tool properly and for intended purpose, you will enjoy years of safe,
reliable service.
NARROW CROWN
IMPORTANT:
NEED HELP? CONTACT US!
Have product questions? Need technical support?
Please feel free to contact us at:
800-232-1195
techsupport@wenproducts.com
WENPRODUCTS.COM
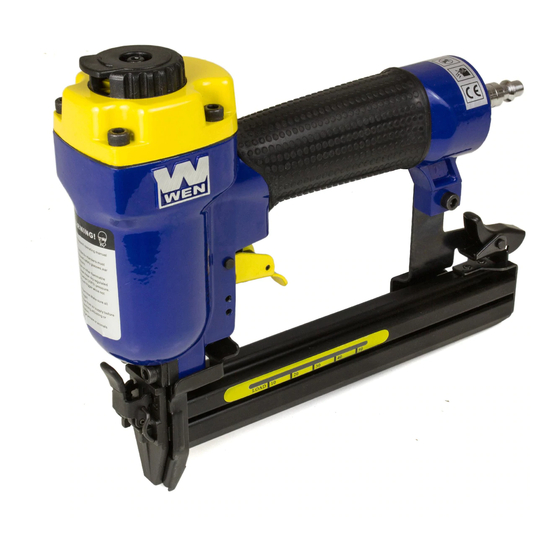
18-GAUGE
STAPLER
Model # 61710
(M-F 8AM-5PM CST)
bit.ly/wenvideo
Advertisement

Related Manuals for Wen 61710

Summary of Contents for Wen 61710
- Page 1 IMPORTANT: Your new tool has been engineered and manufactured to WEN’s highest standards for dependability, ease of operation, and operator safety. When properly cared for, this product will supply you years of rugged, trouble-free performance. Pay close attention to the rules for safe operation, warnings, and cautions.
-
Page 2: Table Of Contents
Know Your Nailer Operation Maintenance Troubleshooting Exploded View Parts List Warranty TECHNICAL DATA Model Number: 61710 Operating Pressure Range: 60 psi - 100 psi Air Inlet: 1/4˝ NPT Nail Size Range: 3/8 to 1 inch Nail Diameter: 18-Gauge Magazine Capacity: Weight: 2.8 lbs... -
Page 3: General Safety Rules
Hello! The purpose of the following safety symbols is to attract your attention to possible dangers. We don’t want any of our beloved WEN customers accidentally injuring themselves. The safety symbols and the explanations with them deserve your careful attention and understanding. The safety warnings do not by themselves eliminate any danger. - Page 4 SAFETY RULES Safety is a combination of common sense, staying alert and knowing how your item works. SAVE THESE SAFETY INSTRUCTIONS. WARNING: To avoid mistakes and serious injury, do not use your tool until the following steps have been read and understood 1.
- Page 5 SAFETY RULES 12. DISCONNECT tool from air supply when not in use. Remove fasteners from magazine before leaving the area or passing the tool to another operator. Do not climb ladders, stairs, scaffoldings, etc. without disconnecting the tool. Do not carry a connected tool to another work area. Do not make adjustments, remove magazine, perform maintenance or clear jammed fasteners while connected to the air supply.
- Page 6 SAFETY RULES of an angle. Personal injury from strong recoil, jammed fasteners, or richocheted nails may result. 25. BE AWARE of material thickness when using the nailer. A protruding nail may cause injury. 26. KNOW that when the tool is being utilized at pressures on the high end of its oeprating range, nails can be driven completely through thin or very soft work material.
-
Page 7: Know Your Nailer
KNOW YOUR NAILER 1- Jam-Clearing Latch 2- Contact Trip 3- Magazine 4- Air Inlet 5- Trigger 6- Exhaust OPERATION WARNING - if any parts are missing, do not operate this tool until the missing parts are replaced. Failure to do so could result in a possibly serious personal injury. LUBRICATION This tool requires lubrication before each use (especially the first use). - Page 8 OPERATION LOADING THE FASTENERS CAUTION: Always disconnect the tool from the air supply before loading fasteners. 1. Press the lock to release the movable magazine and pull the magazine out fully. 2. Place a full clip of the specified type and size fasteners on the fixed magazine, up to 100 fasteners may be loaded in the magazine.
-
Page 9: Maintenance
8. Make sure the trigger and contact trip move freely without sticking or binding. 9. Load the magazine. 10. Reattach nailer to air supply. NOTE: If nails continue to jam in the nosepiece, have your tool serviced by an authorized WEN service center. MAINTENANCE CLEAN AND INSPECT DAILY CAUTION - Disconnect tool ferom air supply before cleaning and inspection. -
Page 10: Troubleshooting
TROUBLESHOOTING CAUTION: Stop using the tool immediately if any of the following problems occur or risk serious personal injury. Repairs and replacements should only be performed by authorized personnel at a certified WEN service center. Problem Common Causes Solution Air leaking at Trigger area 1. -
Page 11: Exploded View
EXPLODED VIEW... -
Page 12: Parts List
PARTS LIST Item Stock # Description Item Stock # Description 61710-001 SCREW 61710-035 TRIGGER VALVE GUIDE 61710-002 BUSHING 61710-036 TRIGGER SPRING 61710-003 EXHAUST COVER 61710-037 61710-004 SEAL 61710-038 PLATE 61710-005 SCREW 61710-039 61710-006 SPRING WASHER 61710-040 TRIGGER 61710-007 CYLINDER CAP... -
Page 13: Warranty
LIMITED ONE YEAR WARRANTY WEN Products is committed to building tools that are dependable for years. Our warranties are consistent with this commitment and our dedication to quality. LIMITED WARRANTY OF WEN CONSUMER POWER TOOLS PRODUCTS FOR HOME USE GREAT LAKES TECHNOLOGIES, LLC (“Seller”) warrants to the original purchaser only, that all WEN con- sumer power tools will be free from defects in material or workmanship for a period of one (1) year from date of purchase.
Need help?
Do you have a question about the 61710 and is the answer not in the manual?
Questions and answers