Table of Contents
Advertisement
Advertisement
Table of Contents

Related Manuals for Logik L20DBIG10

Summary of Contents for Logik L20DBIG10
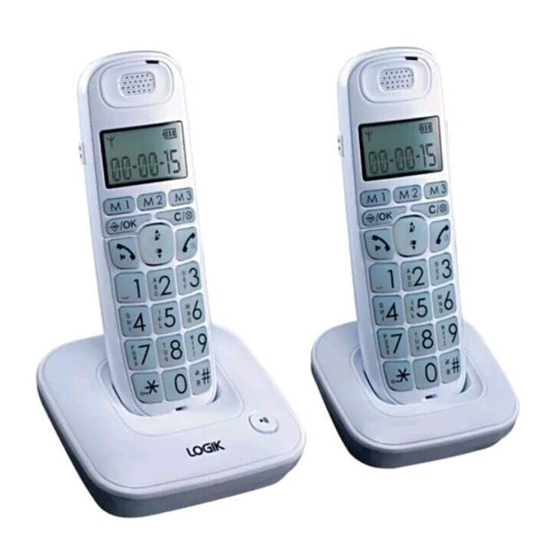
- Page 1 Instruction Manual Cordless Big Button Telephone L20DBIG10...
-
Page 2: Table Of Contents
Contents Safety First ....................4 Unpacking ..................... 6 Installing Your Phone ................... 7 Connecting the Base Unit ................... 7 Installing and Charging the Batteries ..............7 Handling the Batteries ....................8 Getting to Know Your Phone ............... 9 Handset Overview ......................9 Base Unit Overview .....................10 Display Icons and Symbols ..................11 Menu Structure ......................12... - Page 3 Delete the Entire Private Phonebook ..............20 Check the Phonebook Usage ..................20 Set the Fast Dial Numbers ..................21 Caller Display (Network Dependent) ............. 22 View the Call List ......................22 Store a Call List Number into the Phonebook ...........22 Delete an Entry in the Call Log ................23 Delete the Entire List of the Call Log ..............23 View the Details of the Call List Entry ..............23 Voice Mail (Network Dependent) ..............24...
-
Page 4: Safety First
Safety First For your continued safety and to reduce the risk of injury or electric shock, please follow all the safety precautions listed below. • Read all instructions carefully before using the telephone and keep them for future reference. • Retain the manual. - Page 5 • Battery - To reduce the disk of injury to persons, read and follow these instructions. • Use only the battery(ies) specified. Do not dispose the battery(ies) in a fire. They may explode. Check with local council office for special disposal instructions not open or mutilate the battery(ies).
-
Page 6: Unpacking
M a n u a l Telephone Linecord x 1 AAA Batteries x 2 Instruction manual x 1 for L20DBIG10 only Handset x 1 Charging Cradle x 1 AAA Batteries x 2 If items are missing, or damaged please contact Partmaster... -
Page 7: Installing Your Phone
Installing Your Phone Connecting the Base Unit 1. Plug the mains adaptor & telephone line cable into the base unit. 2. Plug the mains adaptor & telephone line cord into the wall socket. 3. Always use the cables provided in the box. Installing and Charging the Batteries 1. -
Page 8: Handling The Batteries
• Do not dispose of the used batteries as domestic waste. Dispose of them in accordance with local regulations. for L20DBIG10 only Place the charging cradle within reach of a mains power wall socket. 1. Plug the mains power adaptor into the mains power wall socket. -
Page 9: Getting To Know Your Phone
Getting to Know Your Phone Handset Overview 1. AMPLIFY During a call: Press to turn on or off the audio boost. 2. DIRECT MEMORY BUTTONS In idle mode: Press and hold to dial the stored number. 3. MENU/OK In idle mode: Press to access the main menu. In sub-menu mode: Press to confirm the selection. -
Page 10: Base Unit Overview
8. LED Illuminates when audio boost is turned on. Flashes when receiving an incoming call. 9. EARPIECE 10. SLIDE UP/DOWN During a call: Press to increase or decrease the earpiece volume. 11. CLEAR/BACK/MUTE/INTERCOM In main menu mode: Press to go back to idle screen. -
Page 11: Display Icons And Symbols
Display Icons and Symbols Illuminates when the handset is within range of the base unit. Flashes when the handset is in marginal range of the base unit. Off when out of range or cannot communicate with the base unit. Illuminates when a call is in progress. Flashes when there is an incoming call. -
Page 12: Menu Structure
Menu Structure In idle mode, press the button to access the call log menu. Refer to the following for the menu structure. Menu Map Press or to scroll through the menu items. CONTACTS CALL LOG BS SET HS SET CLOCK STORE DEL HS RINGER... -
Page 13: Using Your Phone
Using Your Phone To Make a Call Preparatory Dialing Enter the phone number and press the button to dial the number, press it again to turn on the speakerphone. Press the button to clear the entry. Direct Dialing Press the button to take the line and enter the phone number. -
Page 14: To Make A Call From Direct Access Memory
To Make a Call from Direct Access Memory 1. In idle, press and hold the button to dial the number you have stored already. Or press the button, and then press and hold the button to dial the number you have stored. 2. -
Page 15: Adjust Earpiece And Handsfree Volume
Adjust Earpiece and Handsfree Volume There are 5 levels (VOLUME 1 to VOLUME 5) to choose from for both handset and handsfree speakerphone use. During a call: 1. Press the button to select volume 1-5. The current setting is displayed on the screen. 2. - Page 16 Redial a Number from the Redial List 1. In idle mode, press the button to access the redial list. 2. Press the or button to browse the redial list. 3. Press the button to dial to the selected redial number. If there are no numbers in the redial list, the display shows “EMPTY”.
-
Page 17: Find The Handset
Find the Handset You can locate the handset by pressing the button on the base unit. All the handsets registered to the base unit will produce the paging tone and “PAGING” is displayed on the screen. You can stop the paging by pressing the button / button /... - Page 18 Transfer an External Call to another handset During an external call: button and the or button to select INTERCOM. 1. Press the 2. Press the button to select the desired handset to intercom with. 3. The external call is put on hold automatically and the called handset rings.
-
Page 19: Private Phonebook
Private Phonebook Your phone can store up to 20 private phonebook entries with names and numbers. Each phonebook entry can have a maximum of 20 digits for the phone number and 12 characters for the name. You can also select different ringtones for your phonebook entries. Phonebook entries are stored alphabetically by name. -
Page 20: Edit A Phonebook Entry
Edit a Phonebook Entry In idle: button to select CONTACTS main menu item and 1. Press the then press the button to access the contacts list. 2. Press the or button to select the desired phonebook entry. button and the or button to select EDIT. 3. -
Page 21: Set The Fast Dial Numbers
Set the Fast Dial Numbers After setting the fast dial numbers, you can dial to the pre-set numbers by pressing and holding the respective digit buttons from idle mode. Add or Edit the Fast Dial Number button to select CONTACTS main menu item and 1. -
Page 22: Caller Display (Network Dependent)
Caller Display (Network Dependent) This feature is available if you have subscribed the Caller Line Identification Service with your network service provider. Your phone can store up to 10 received calls with date/time information in the call log. The number will be shown on the screen when the phone is ringing. -
Page 23: Delete An Entry In The Call Log
6. Edit the number if necessary. 7. Press the button and the or button to select the melody. 8. Press the button to confirm. Delete an Entry in the Call Log button to select CONTACTS main menu item and 1. Press the then press the button to access the contacts list. -
Page 24: Voice Mail (Network Dependent)
Voice Mail (Network Dependent) Voice Mail Waiting Indication (VMWI) indicates that a new voice mail message is waiting for you on the network service provider. This feature is available if you have subscribed to the voicemail service from you network service provider. You can press and hold the button to dial out to the voice mail number directly to listen to your voice mail messages. -
Page 25: Delete All Vmwi Entries
Delete All VMWI Entries To delete all VMWI entries from the call list: To delete a single VMWI entry from the call log: button and the or button to select CALL LOG. Or 1. Press the press the button in idle to access the call log. 2. -
Page 26: Phone Settings
Phone Settings Your phone comes with a selection of settings that you can change to personalize your phone the way you like it to work. Clock Settings You will need to set the correct time and date so that you know when you have received call list entries. -
Page 27: Set The Date
Set the Date button and the or button to select CLOCK. 1. Press the button and the or button to select SET DATE. 2. Press the button and the or button to select DATE FMT. 3. Press the 4. Press the button to confirm. -
Page 28: Handset Settings
Turn on/off the Alarm button and the or button to select ALARM. 1. Press the button and the or button to select ON / OFF. 2. Press the 3. Press the button to confirm. If ON is selected, you will be asked to set the alarm time. Set the Alarm Time (if the Alarm is set to be ON) button and the or button to select ALARM. -
Page 29: Set The Equalizer
Set the Ringer Melody for External Calls button and the or button to select HS SETT. 1. Press the button and the or button to select RINGER. 2. Press the button and the or button to select EXT RING. 3. Press the 4. -
Page 30: Select Base
Select Base If you have registered the handset to more than one base, you can select any one of them to use with your handset. button and the or button to select HS SET. 1. Press the button and the or button to select SEL BASE. 2. -
Page 31: Set The Auto Answer
Set the Auto Answer If you turn on the Auto Answer, you can pick up the call from the charging cradle without pressing any button. button and the or button to select HS SET. 1. Press the button and the or button to select AUTO ANS. 2. -
Page 32: Base Settings
Base Settings The current settings are marked with an asterisk which is displayed at the rightside of the menu item. De-register a Handset You are requested to enter the 4-digit PIN in order to de-register a handset from the base unit (Default PIN: 0000). The antenna icon on the de-registered handset will be off. -
Page 33: Registration
Change the System PIN Code A 4-digit system PIN code is used for changing the system settings of the base unit. It is used to protect your phone against unauthorized use. The default system PIN code is 0000. button and the or button to select BS SET. 1. -
Page 34: Reset Your Phone
Reset Your Phone You can reset your phone to the default settings. After reset, all you personal settings and call log entries will be deleted, but your phonebook remains unchanged. button and the or button to select DEFAULT. 1. Press the 2. -
Page 35: Text And Digit Entry Table
Text and Digit Entry Table The following tables show you where each letter and punctuation character can be found. Respective character table will be used when corresponding menu language is selected. This will be helpful when storing a name in the contacts and renaming your handset. In editing mode, a cursor is displayed to indicate the current text entry position. - Page 36 Polish Character Set Number Editing Alphanumeric Editing Button (For phone (For contacts name editing and renaming handset) number editing, date/ time editing) Button 10th Press Ł 0, P (Pause) Norwegian Character Set Number Editing Alphanumeric Editing Button (For phone (For contacts name editing and renaming handset) number editing, date/ time editing)
- Page 37 Greek Character Set Number Editing Alphanumeric Editing Button (For phone (For contacts name editing and renaming handset) number editing, date/ time editing) Button 10th Press Α Β Γ Δ Ε Ζ Η Θ Ι Κ Λ Μ Ν Ξ Ο Π...
-
Page 38: Hints And Tips
Hints and Tips If you have difficulty with your phone, please try the suggestions listed below. Problem Cause Solutions No dialing tone • The telephone line • Check the connections. when pressing cord is not plugged Unplug and plug back button into the base unit. -
Page 39: Specification
Specification Model L20DBIG10 Frequency range 1.88 to 1.9 GHz (bandwidth = 20 MHz) Channel bandwidth 1.728 MHz Operating range Up to 300m outdoors; up to 50m indoors Operating time Standby: 100 hours Talking: 10 hours Battery charge time: 15 hours Temperature range Operating Operating: 0 ºC to 40 ºC... - Page 40 Ecodesign Information Information Power ≤ 0.5 W (Adapter connected to on Power Consumption charger unit) Consumption of Standby ≤ 1.0 W (Adapter connected to Mode charger unit and a handet unit with information display and fully charged rechargeable batteries) Network ≤...
- Page 41 The trigger that is used to reactivate the equipment The communication protocol Analog (PSTN), Digital (DECT) used by the equipment How to connect to the network? Telephone cable Note: If no information is provided, the equipment is considered not to be networked equipment unless it provides the functionalities of a router, network switch, wireless network access point (not being a terminal), hub, modem, VoIP telephone, video phone.
- Page 44 All trademarks are the property of their respective owners and all rights are acknowledged. DSG Retail Ltd. (co. no. 504877) 1 Portal Way, London, W3 6RS, UK IB-L20DBIG10-160607V5...
Need help?
Do you have a question about the L20DBIG10 and is the answer not in the manual?
Questions and answers