Table of Contents
Advertisement
Advertisement
Table of Contents

Related Manuals for Alaris S2050


Summary of Contents for Alaris S2050
- Page 1 S2000 Series Scanners S2000w Series Scanners User’s Guide A-61870...
- Page 2 The SuperSpeed USB Trident Logo is a registered trademark of USB Implementers Forum, Inc. 3rd Party Licenses This software is based in part on the work of the Independent JPEG Group Copyright (C)2009-2013 D. R. Commander. All Rights Reserved. Redistribution and use in source and binary forms, with or without modification, are permitted provided that the following conditions are met: Redistributions of source code must retain the above copyright notice, this list of conditions and the following disclaimer.
-
Page 3: Table Of Contents
2 Installation ..............9 Install the S2050 or S2070 ......................9 Install the S2060w or S2080w ....................9... - Page 4 Scanner display and buttons: S2050/S2070 scanners ............21 Ready ..........................21 Scanning ..........................21 Waiting ..........................22 Pause ..........................22 Document handling ......................22 Scanner settings ........................23 Scanner display and buttons: S2060w/S2080w scanners ............23 Conventions in the S2000w display screens ...............23 Ready ..........................24 Scanning ..........................25 Waiting ..........................25 Pause ..........................25...
- Page 5 Replacing the feed roller .....................47 Supplies and consumables ......................49 Customer Replaceable Parts ....................49 Updates ............................50 5 Troubleshooting ............51 Scanner error indicators ......................51 Problem solving ........................51 Scanner exception handling ....................51...
- Page 6 A-61870 July 2017...
-
Page 7: Safety
Remove the power cord from the wall outlet before moving the scanner. • Follow the Kodak Alaris recommended cleaning procedures. Do not use air, liquid or gas spray cleaners. These cleaners displace dust, dirt and debris to another location within the scanner, which may cause the scanner to malfunction. - Page 8 Safety A-61870 July 2017...
-
Page 9: Overview
Scanner models This User’s Guide provides information and procedures for using and maintaining the Alaris S2050, S2060w, S2070, and S2080w Scanners. The Alaris S2000/S2000w Series Scanners are compact, duplex color document scanners perfect for personal and workgroup use. They scan 50-80 A4/letter size pages per minute (200/300 dpi black and white, grayscale, and color). -
Page 10: Alaris S2050/S2070 Scanners
They offer a 1.5 inch display screen and buttons so you can monitor and direct the scanner from the scanner itself. The S2050 model scans at 50 pages per minute and the S2070 at 70 pages per minute (duplex scanning of portrait oriented pages, 200/300 dpi, in black and white, grayscale, or color). -
Page 11: Supporting Documentation
1 Overview Supporting documentation In addition to this User’s Guide, the following documentation is also available: • Installation Guide — quick visual steps for installing your scanner. • Reference Guide — easy visual steps for cleaning your scanner. Download this guide and keep it close to the scanner. •... -
Page 12: Scanner Components
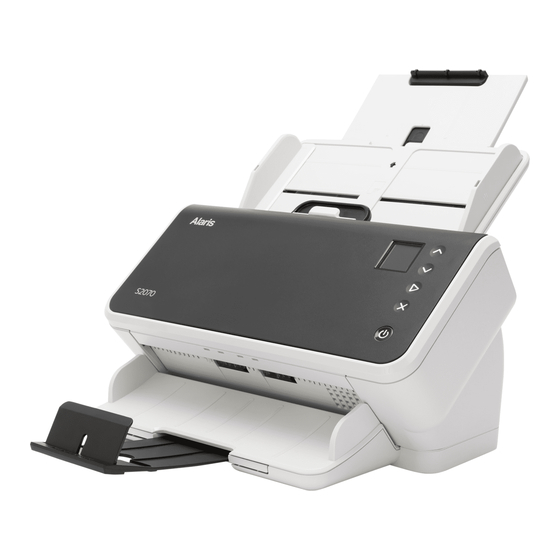
1 Overview Scanner components Front view This illustration shows the S2050/S2070 model scanners.The scanner screen and buttons differ in the S2060w/S2080w models, as illustrated below. Input tray — the input tray holds up to 80 pages of A4 paper and can be extended to accommodate pages up to legal size (14 inches/355.6 mm). - Page 13 X button — this multi-function button can End or Pause a scanning job, Cancel out of a menu, or (on the S2050/S2070 scanners) display a Menu. Its function varies at different times during scanner operation.
-
Page 14: Back View
USB 3.1 Super Speed port — connects the scanner to the PC. Ethernet port — (not available in 2050/2070 models) connects the scanner to the network. USB 2.0 High Speed port — connects the scanner to an Alaris integrated flatbed. A-61870 July 2017... -
Page 15: Underside View
1 Overview Underside view Tilt stand leg — recessed into scanner base. Tilt stand leg — fully extended to lift front edge of scanner — assists output of long pages. NOTE: In operation, either recess or fully extend both legs. Transport rollers —... -
Page 16: Inside View
1 Overview Inside view Paper present sensor — detects the presence of paper in the input tray. Transport rollers — (three pairs) these six rollers, plus the two visible on the “Underside view” on page 7, help move paper smoothly through the scanner. Multifeed and intelligent document protection sensor —... -
Page 17: Installation
- If your PC does not have internet access, put the CD from the scanner box into the CD drive of your PC. 6. Follow steps of the “Alaris S2000 Scanners” driver installation. The installer will tell you when to connect the USB cable. -
Page 18: Choose How To Set Up Network Connection
2 Installation Choose how to set up network connection The network setup connection options are: • “Setup Wizard” — a good choice for a small company or small group installation. • “EasySetup” — more suited to a large installation where a system administrator can set up the parameters for uniform use across the company or multiple sites. -
Page 19: Advanced
- If the PC does not have internet access, put the CD from the scanner box into the CD drive of your PC. 2. Run the “Alaris S2000 Scanners” driver installation, following its steps. Install ferrite core (for Ethernet only) 1. -
Page 20: Turning The Scanner Off
NOTE: The Power Off energy saver feature will also turn the scanner off after an extended period of time in power saver mode. The default is 15 minutes. For the S2050/S2070 scanners you can configure this period of time using your scanning application. -
Page 21: Included Scanning Software
(available for Info Input Express LE). • On the S2060w/S2080w scanners, touch the scanner screen. • Access the scanner over USB for the S2050/S2070, or on wireless network, USB, or Ethernet for S2060w/S2080w. NOTE: PC wake-up will not wake up the scanner from either Energy Star or power off. - Page 22 2 Installation A-61870 July 2017...
-
Page 23: Scanning
3 Scanning Basic scanning Scanner controls S2050/S2070 Scanner The cover of the S2050/S2070 Scanner contains a screen with 1.5” diagonal color display, and five buttons. The power button is always active and is used to turn the scanner on and off. -
Page 24: Getting Your Scanner Ready To Scan
3 Scanning Getting your scanner ready to scan 1. Be sure the scanner is on and ready to scan (power button on and not blinking). 2. Move the side guides in or out to fit the size of pages you are scanning. -
Page 25: Scanning Applications
PDF file as output. 2. Put paper in the scanner input tray, face down and head first. 3. On the S2050/S2070 scanner, press the Play / Select button. On the S2060w/S2080w scanner, press License on the scanner screen to begin scanning. -
Page 26: Sharing The S2060W/S2080W Scanner Among Multiple Pcs
3 Scanning Sharing the S2060w/S2080w scanner among multiple PCs NOTE: This section is relevant only for scanning with button enabled applications — such as Info Input Express LE — which allow scanning to be initiated at the scanner. By default the S2000w scanners — the network scanners — will allow any PC or mobile device to connect over an enabled wired or wireless connection. - Page 27 7. A user needs to scan from the ScanMate+ mobile app or from an application that uses the Kodak Alaris Web API. - The user launches their scanning application and selects the S2000w scanner.
-
Page 28: Restricting Use Of The S2060W/S2080W Scanner To One Pc
Other scanning applications In addition to Info Input Express LE, Kodak Alaris offers other scanning options, such as Capture Pro Software, Info Input Solution, and more featured versions of Info Input Express. These applications have other capabilities that can improve your data capture, processing, and retrieval. -
Page 29: Scanner Display And Buttons: S2050/S2070 Scanners
3 Scanning Scanner display and buttons: S2050/S2070 scanners The scanner screen display is used in different ways during the different scanner states: • Ready • Scanning • Pause • Settings • Waiting When the scanner has gone into Energy Star sleep, the scanner screen is dark. -
Page 30: Waiting
3 Scanning If you have set up special settings for your pages, the display during scanning will have an indicator of the special handling: for instance scanning with multifeed detection disabled. Waiting Sometimes the scanner will wait for you to take some action: •... -
Page 31: Scanner Settings
• Calibrations lets you calibrate the multifeed detection system. NOTE: Multifeed calibration is needed rarely and should be done only if an Alaris Technical Support person instructs you to calibrate, or if the scanner has been moved to a location at a high elevation. -
Page 32: Ready
3 Scanning A check mark means the option is selected: When more options are available than the screen can display, a scroll bar is provided: Ready Several displays are possible when the scanner is ready to start scanning: • Choose yourself from the list of possible users. •... -
Page 33: Scanning
3 Scanning Scanning When you are scanning, the display shows the page count for this scan session and whether any special settings are enabled. It also allows you to pause scanning or end the job. Waiting Sometimes the scanner will wait for you to take some action: •... -
Page 34: Document Handling
3 Scanning If you pause the scanner, options are available from the menu. For instance, if you know an envelope will enter the scanner and you don’t want a multifeed reported, you can pause scanning, choose the menu icon , and disable multifeed detection during the pause. Document handling Document handling options and when to use them are explained in “Document handling”... -
Page 35: Paper Handling Challenges And Solutions
3 Scanning Paper handling challenges and solutions Input tray capacity Paper weight and size determine how much paper can feed smoothly from the input tray. The input tray will accommodate 80 pages of 20 lb (75 g/m ) paper. Even if you use thinner paper, do not load more than 80 sheets: Paper weight —... - Page 36 3 Scanning 6. Slide the side guides so they touch the sides of your input stack. If your paper is standard letter or A4 size, the input tray has a button to lock the side guides in place, as shown. 7.
-
Page 37: Settings For Reliable Feeding
3 Scanning Settings for reliable feeding Active Feeding Active Feeding can help to align and prepare the leading edges of small stacks (30 or fewer sheets) prior to feeding. If the document set for a job typically is smooth paper of mixed sizes, Active Feeding can help it feed reliably. -
Page 38: Enhanced Stacking, To Maintain Order In Output Stack
3 Scanning Enhanced stacking, to maintain order in output stack Using the tilt stand may be especially helpful with enhanced stacking. To set up enhanced stacking, in the TWAIN setup for your job: • Settings • Device • Transport tab: set Handling to Improved Stacking for most mixed batches of paper or Best Stacking if the batch contains pages that have greatly varying sizes. -
Page 39: Long Paper
3 Scanning Long paper 1. Provide support to the input stack. For long paper, extend the input tray as far as possible. Give additional support to very long paper by hand, if needed. 2. Set the output tray length at the maximum. Do not raise the end stop. -
Page 40: Fragile Or Oversize Paper
3 Scanning Fragile or oversize paper Handle with care If you are concerned that delicate pages might crumple as they pass through the scanner, you can enable Intelligent Document Protection. This setting will stop the scanner if it detects a page at risk. In the TWAIN setup for your job: •... -
Page 41: Handle With Extra Care
3 Scanning Handle with extra care For fragile paper that you can’t risk damaging, put each page into a document sleeve (see “Alaris Carrier Sleeves (5 pack)” on page 49). In the TWAIN setup for your job: • Settings • Image •... -
Page 42: Multifeeds
• For the S2050/S2070 scanners, press and hold the Play button while the document is transporting through the scanner. -
Page 43: If You Still Have Trouble
3 Scanning If you still have trouble If you have tried the other suggestions in this section and still have trouble, then check the scanner: • See “Cleaning procedures” on page 38 for how to clean the scanner. Roller cleanliness and wear affect how well pages feed. •... -
Page 44: Improving Image Quality
3 Scanning Improving image quality Your scanner is able to produce images optimized for your purpose. Here are some of the commonly used enhancements. These and more features are described in the Help system for your driver (TWAIN or ISIS). These features are set up through the driver, so your scanning application (such as Info Input Express LE) may be able to use them in programmed scanning profiles or settings. -
Page 45: Maintenance
4 Maintenance Scanner meters Your scanner has several meters with information about when to clean and replace various scanner parts. Using the meters will help to maintain image quality and scanning performance. To see the meters display, choose Maintenance at the scanner screen. The meters display will show the tools symbol in either teal (cleaning or replacement limit not reached) or yellow (time to clean or replace): No cleaning or... -
Page 46: Opening The Scanner Cover
• pages exiting the scanner have roller/tire marks Transport cleaning sheets, roller cleaning pads, and Staticide and Brillianize wipes are all available for purchase from Kodak Alaris. See “Supplies and consumables” on page 49 for supplies required to clean your scanner. -
Page 47: Clean In This Order
4 Maintenance Clean in this order 1. Before cleaning, disconnect the electrical power. 2. Use a transport cleaning sheet several times to remove residue from the rollers. This cleaning technique is simpler for you and helps preserve the rollers. See “Running a transport cleaning sheet”. 3. -
Page 48: Cleaning The Separation Roller
4 Maintenance Cleaning the separation roller The separation roller should be removed from the scanner for best cleaning results. 1. Open the scanner cover. 2. Remove the pre-separation pad by grasping it and pulling it straight out. 3. Grasp the separation roller and pull it straight out. 4. - Page 49 4 Maintenance 5. Inspect the separation roller. If the separation roller tires show signs of wear or damage, replace the separation roller assembly. See “Replacement procedures” on page 44 for more information. 6. Reinstall the separation roller by aligning the tab with the slot and snapping it into position.
-
Page 50: Cleaning The Feed Rollers
4 Maintenance Cleaning the feed rollers 1. Open the scanner cover. 2. Grasp the top edge of the feed roller cover and lift it out of position. NOTE: Be careful not to damage the paper present sensor when removing the feed roller cover or cleaning around the feed roller. -
Page 51: Cleaning The Transport Rollers
4 Maintenance 7. Look at the cavity in which the feed rollers are housed. If it seems to contain excessive dust, wipe out the dust with a folded roller cleaning pad. You may also use a vacuum to clean this area. 8. -
Page 52: Cleaning The Imaging Area
(Step 2) or an almost dry Staticide wipe to remove any streaks. 3. When finished, close the scanner cover. Replacement procedures Alaris Scanners use replaceable feed roller modules that can feed a wide range of document types, sizes and thicknesses. The nominal feed roller module life is approximately 200,000 pages. Operating... -
Page 53: Replacing The Separation Roller
4 Maintenance Replacing the separation roller 1. Open the scanner cover. 2. Remove the pre-separation pad by grasping it and pulling it straight out. 3. Grasp the separation roller and pull it straight out. Discard it. 4. Install the new separation roller by aligning the tab with the slot and snapping it into position. -
Page 54: Replacing The Pre-Separation Pad
4 Maintenance 5. Re-install the pre-separation pad by aligning the slots with the holes on the pre-separation pad and snapping it into place. 6. Close the scanner cover. 7. Go to Maintenance on your scanner screen display and choose Tires > Reset. See “Scanner meters” on page 37. Replacing the pre-separation pad 1. -
Page 55: Replacing The Feed Roller
4 Maintenance Replacing the feed roller An animation of this process is available at our on-line support for your scanner model, for instance: www.kodakalaris.com/go/s2070support www.kodakalaris.com/go/s2080wsupport 1. Open the scanner cover. 2. Pull on the edge of the feed roller cover and lift it out of position. NOTE: Be careful not to damage the paper present sensor when removing or cleaning around the feed roller. - Page 56 4 Maintenance 5. Rotate the feed roller so the pin is aligned with the open slot. The roller rotates in only one direction. Use the white bracket at the end to rotate the roller. When the pin is aligned properly, lift the roller out of position.
-
Page 57: Supplies And Consumables
Feed Roller Kit 200,000 sheets Pre-Separation Pad 200,000 sheets Contact your scanner supplier to order supplies. Description CAT No. Alaris S2000 Series Feed Roller Kit 101 5866 Kodak Roller Cleaning Pads (qty 24) 100 2716 Kodak Transport Cleaning Sheets (qty 50) -
Page 58: Updates
4 Maintenance Updates The drivers and internal firmware for your scanner can be updated by you. Find the latest driver and scanner firmware downloads here: www.kodakalaris.com/go/s2000support www.kodakalaris.com/go/s2000wsupport On your scanner screen, use the scanner Settings > Information display to see your scanner firmware version. Go to the About screen in the TWAIN or ISIS driver to find the driver version installed on your computer. -
Page 59: Troubleshooting
5 Troubleshooting Scanner error indicators A blinking power button indicates a scanner error or alert condition, which will be displayed on the scanner screen. A yellow alert needs your attention, e.g. if the scanner cover is open. A red alert is a critical error. -
Page 60: Self-Help For Problems
5 Troubleshooting Self-help for problems Use the chart below as a guide to help resolve the situation, before calling Alaris Technical Support. The self-help page for your scanner is also a good resource: www.kodakalaris.com/go/S2070support www.kodakalaris.com/go/S2080wsupport Problem Possible Solution Scanner will not scan/feed pages Check that: •... -
Page 61: Calibrations
Scanner multifeed calibration should be done only when Alaris Technical Support personnel tell you to calibrate. The touch screen of the S2060w/S2080w scanners can be calibrated. Again, this calibration should be performed only if Alaris Technical Support personnel advise it and tell you how. Contacting Technical Support 1. - Page 62 5 Troubleshooting A-61870 July 2017...
-
Page 63: Appendix A Regulatory Information
• The product packaging is recyclable. • Parts are designed for reuse and recycling. • The Alaris S2000 and S2000w Series Scanners are Energy Star compliant and are shipped from the factory with the default time set to 15 minutes. - Page 64 Appendix A Regulatory Information Product Disclosure Table - Alaris S2050/S2060w/S2070/S2080w Scanners 有毒有害物质或元素名称及含量标识表 Table of hazardous substances’ name and concentration 有毒有害物质或元素 hazardous substances’ name 部件名称 铅 汞 镉 六价铬 多溴联苯 多溴二苯醚 Component name (Pb) (Hg) (Cd) (Cr6+) (PBB) (PBDE) 适配器 (AC Adapter) 电路板...
-
Page 65: Emc Statements For S2000 Series Scanners
Appendix A Regulatory Information 設備名稱:掃描器 ,型號(型式) Alaris Scanner S2050, Equipment name Type designation (Type) Alaris Scanner S2060w, Alaris Scanner S2070, Alaris Scanner S2080w 限用物質及其化學符號 Restricted substances and their chemical symbols 單元 Unit 鉛 汞 鎘 六價鉻 多溴聯苯 多溴二苯醚 Lead Mercury Cadmium... -
Page 66: Emc And Wireless Regulatory Statements For S2000W Series Scanners
Appendix A Regulatory Information EMC and Wireless Regulatory Statements for S2000w Series Scanners: This device contains a preinstalled 2.4 GHz Wireless LAN module (Model: WN4615L) For Indoor Use: This device is intended for indoor use only. Radio Frequency Exposure CAUTION: When using this product, it should be installed and operated with a minimum distance of 7.9 in. (20 cm) for 2.4 GHz operations between the radiator and your body. - Page 67 Appendix A Regulatory Information Notice to users in EU/EFTA: We, Kodak Alaris Inc. hereby declare that this equipment type (document scanner) is in compliance with Directive 2014/53/EU. The full text of the EU declaration of conformity is available at the following internet address: www.kodakalaris.com/go/ehs.
- Page 68 Appendix A Regulatory Information • Use in the following circumstances may prevent communication or slow down communication speeds. When this product and the wireless access point/router are separated by extreme distance. When used in close proximity to devices that cause radio wave interference (microwave ovens, etc.). When multiple wireless LAN access points are located close by, and using the same channel.
- Page 69 Appendix A Regulatory Information If this equipment does cause harmful interference to radio or television reception, which can be determined by turning the equipment off and on, the user is encouraged to try to correct the interference by one or more of the following measures: 1) reorient or relocate the receiving antenna;...
- Page 70 Appendix A Regulatory Information A-61870 July 2017...
-
Page 71: Appendix B Warranty - Us And Canada Only
Kodak Alaris or through Kodak Alaris’ authorized distribution channels: Kodak Alaris Inc. warrants that an Alaris Scanner, from the time of sale through the Limited Warranty period applicable to the Product, will be free of defects in materials or workmanship and will conform to the performance specifications applicable for the particular Alaris Scanner. -
Page 72: Return Procedure
Warranty Service descriptions Kodak Alaris offers a range of service programs to support its Limited Warranty and to assist with the use and care of the Alaris Scanner (“Service Methods”). An Alaris Scanner represents an important investment. Alaris Scanners provide the productivity needed to stay competitive. -
Page 73: Important Restrictions
Scanners must obtain a Return Material Authorization number (“RMA”) by calling (800) 822-1414, and within ten (10) business days from the date of issuance of the RMA must return the Alaris Scanner to the address designated in the RMA at the end user’s own expense and risk. - Page 74 For U.S. contact Technical Support by telephone: Telephone technical support is available Monday-Friday between the hours of 5 a.m. to 5 p.m. excluding Kodak Alaris holidays. Phone: (800) 822-1414 For technical documentation and FAQs available 24 hours a day: Website: www.kodakalaris.com/go/IM...
- Page 76 All trademarks and trade names used are the property of their respective holders. The Kodak trademark and trade dress are used under license from Eastman Kodak Company. © 2017 Kodak Alaris Inc. TM/MC/MR: Alaris...
Need help?
Do you have a question about the S2050 and is the answer not in the manual?
Questions and answers