Table of Contents
Advertisement
Advertisement
Table of Contents

Related Manuals for LONCIN LC3500i


Summary of Contents for LONCIN LC3500i
-
Page 1: Maintenance Manual
LC3500i Maintenance Manual LONCIN MOTOR CO., LTD. - Page 2 Safety Precautions Please carefully read the Manual before operating Electrostatic sparks caused by the fuel oil flowing the generator unit. Safe operation and optimum through the nozzles of oil pumps of gasoline performance will only be achieved when the the stations may ignite the gasoline.
- Page 3 Safety Precautions It is not allowed to repair the generator unit with reduce electric arcs generated from loose clothes or jewelry as they may be caught disconnecting or reconnecting cables of batteries, into moving parts. The jewelry may cause short negative (-) electrodes of batteries must be circuit of electric terminals, sparks, flame and disconnected in advance and connected at last for...
-
Page 4: Table Of Contents
Contents Chapter I Introduction 1-1 Structure of electric generator ........................1 1-2 Technical specifications ..........................2 Chapter II Repair standards 2-1 Standards for engine repair ..........................3 2-2 Standards for electric generator repair ......................4 2-3 Torque parameters of fasteners ........................4 2-4 Torque parameters of standard parts ...................... - Page 5 Contents 4-4-1 Crankshaft/piston ..........................20 4-4-2 Cylinder head/valve ..........................28 4-4-3 Flywheel/ignition coil/igniter/hand starter .................... 34 4-4-4 Carburetor ............................. 37 4-5 Generator ..............................40 4-5-1 Fuel tank ..............................40 4-5-2 Silencer ..............................41 4-5-3 Rack baseplates ............................. 42 4-5-4 Motor parts ............................43 4-5-5 Inverter parts ............................
-
Page 6: Chapter I Introduction
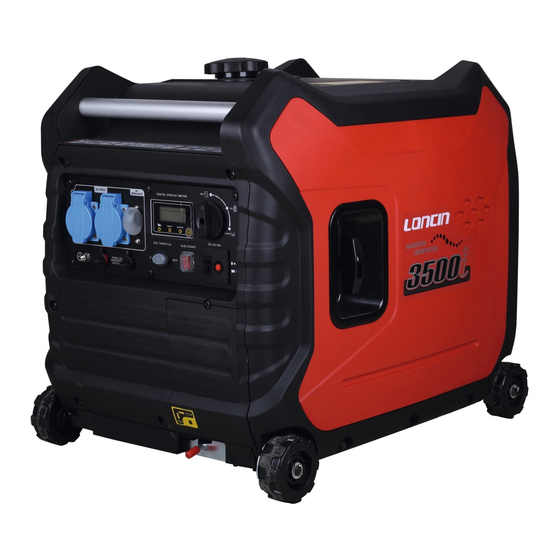
Chapter I Introduction 1-1 Structure of electric generator Gum cover of oil inlet Fuel tank cap Top cover of rack Hand tube combination Right shell of electric generator Control panel parts Right Inverter appearance parts cover plate Maintenance cover batteries Supporting Batteries wheel parts... -
Page 7: Technical Specifications
Chapter I Introduction 1-2 Technical specifications Unit Model LC3500i Type Variable frequency Frequency/Hz 50/60 Nominal voltage/V 100/120/230 Maximum power output/kVA Rated power output/kVA Power factor Electric Generator Quality of AC output ISO8528 G2 Waveform deviation factor/% ≤ 5 Noise acoustical power (3/4 87.5... -
Page 8: Chapter Ii Repair Standards
Chapter II Repair Standards 2-1 Standards for engine repair Unspecified unit: mm Part Item Standard Service limit Maximum no-load speed 5,000 rpm 6,000 rpm Engine Cylinder pressure ≧ 1.17 Mpa (1,400 rpm) Cylinder Inner diameter of cylinder 70.165 69.985 69.845 Skirt O.D. -
Page 9: Standards For Electric Generator Repair
Chapter II Repair Standards 2-2 Standards for electric generator repair The resistance among windings of 230 V 2 KW is as follows: Color of Guide Line Resistance Main winding Brown 2.0-2.4 Ω Power supply Orange 0.50-0.55 Ω winding DC winding Blue 0.19-0.21 Ω... -
Page 10: Torque Parameters Of Standard Parts
Chapter II Repair Standards 2-4 Torque parameters of standard parts Fastening Parts Fastening Torque (N.m) 5 mm Bolt and nut Standard Torque Value 6 mm Bolt and nut 8-12 8 mm Bolt and nut 20-28 10 mm Bolt and nut 35-40 12 mm Bolt and nut 50-60... -
Page 11: Chapter Iii Maintenance
(1) Maintenance intervals shall be shortened when it is used in a place full of dusts. (2) These maintenance items shall be conducted with supports from LONCIN franchised dealers. (3) Under circumstances of frequent use, long-term use can only be guaranteed through maintenance with correct intervals specified above. -
Page 12: Change Engine Oil
Chapter III Maintenance Place the oil basin below the baseplate of machine, 3-2 Change engine oil remove the oil drain plug ⑥ and the the engine oil will be discharged from the fuel tank. Note: the engine oil shall be discharged under the Check the oil level gauge ④, seal ring ⑤, drain circumstance of heat engine, so that the discharge plug ⑥... -
Page 13: Air Filter
Chapter III Maintenance Remove the air filter cover and foam filter cartridge ① Wash the foam filter cartridge with solvent and dry Drop clean engine oil into the foam filter cartridge and knead it till even, edge out redundant engine oil and make it be distributed evenly in the filter cartridge. -
Page 14: Cleaning Of The Fuel Filter
Chapter III Maintenance will be caused. The gasoline is extremely inflammable 6) Install the filter cover to its original position. and explosive. Smoking, open fire and sparks are strictly prohibited in the operation area. 3-4 Cleaning of the fuel filter The fuel filter cup is to prevent the dust or water After the re-installation is completed, from entering into the carburetor. -
Page 15: Spark Plug
Chapter III Maintenance 3-6 Spark plug Measure the clearance of spark plug with thickness gauge. Adjust the clearance through bending the The use of spark plug with incorrect models or side electrodes carefully. The clearance between heat values may reduce the engine performance or electrodes shall be 0.60-0.70 mm. -
Page 16: Adjustment Of Valve Clearance
Chapter III Maintenance Re-check the valve clearance after fastening 3-7 Adjustment of valve clearance the lock nut. The check and adjustment of valve clearance must be conducted when the engine is cold. Take apart the cylinder-head cover, pull the FEELER GAUGE starting handle until you feel the obvious resistance to make the piston reach nearby upper dean center of compression stroke. -
Page 17: Fault Diagnosis
Chapter IV Disassembly & Repair Excess fuel oil flowing into the engine 4-1 Fault diagnosis (Re-start after stopping for several minutes) 4-1-1 Difficulty in starting Fuel oil level too low Fuel system (Add fuel oil into the fuel tank) Fuel filter blocked (Refer to Section 3-4) Improper adjustment of carburetor (Refer to Section 4-4-4) -
Page 18: Low Power
Chapter IV Disassembly & Repair 4-1-2 Low power Poor quality of fuel oil (Use new fuel oil of specified quality) Fuel filter blocked (Refer to Section 3-4) Fuel system Improper adjustment of carburetor (Refer to Section 4-4-4) Choke-valve handle not opened completely (Under the “operation”... -
Page 19: Unstable Speed
Chapter IV Disassembly & Repair 4-1-3 Unstable speed Fuel level/of poor quality/polluted (Use new fuel oil of specified quality) Fuel system Fuel filter blocked (Refer to Section 3-4) Carburetor blocked (Refer to Section 4-4-4) Improper adjustment of valve clearance Unstable (Refer to Section 3-7) speed Compression... -
Page 20: Low Speed/Voltage
Chapter IV Disassembly & Repair 4-1-4 Low speed/voltage Air filter dirty (Refer to Section 3-3) Fuel oil is of poor quality/polluted (Use new fuel oil of specified quality) Fuel system Water inside the carburetor (Refer to Section 4-4-4) Choke-valve handle not opened completely (Under the “operation”... -
Page 21: Abnormal Exhaust Colors
Chapter IV Disassembly & Repair 4-1-5 Abnormal exhaust colors Air filter excessively dirty (Refer to Section 3-3) Black Fault of carburetor (Refer to Section 4-4-4) Overloaded (Disconnect surplus load) Low temperature of engine (Normal starting) Abnormal White exhaust color Fuel oil is of poor quality/polluted (Use new fuel oil of specified quality) Fuel oil is of poor quality/ polluted (Use new fuel oil of specified quality) -
Page 22: No Alternating Current Output Voltage
Chapter IV Disassembly & Repair 4-1-6 No alternating current output voltage Fault of output socket (Check if the socket is burned; if yes, replace it with a new one) Abnormal engine speed (Check and adjust) lternating current output voltage Fault of stator winding coil (Refer to Section 4-5-4) Fault of converter (Refer to Section 4-5-5) -
Page 23: Prepare For Repairs
Chapter IV Disassembly & Repair Table 4-1 Danger and Danger Sources 4-2 Prepare for repairs Fuel leakage or spill 4-2-1 Safety Precautions Hydrogen emitted from batteries There will be dangers during repairing the generator unit. Fire Inappropriate storage of cloth pieces explosion Read safety precautions carefully and be familiar with with oil... -
Page 24: Diagram For Disassembly
Chapter IV Disassembly & Repair 4-3 Diagram for disassembly Left/right appearance cover plate Left/right generator Control panel casing Shutter at tail Fuel tank Panel seat Fuel tank bracket Inverter Vertical framework Combination of rack baseplate Rack baseplate Rack baseplate Cushion seat of main engine Brake and wheel Support plate of... -
Page 25: Engine
Chapter IV Disassembly & Repair 4-4 Engine 4-4-1 Crankshaft/piston Camshaft a. Disassembly/assembly Assembly: Check if the spring is worn Bolt: M8 × 32 and out of elasticity to ensure Torque: (26 ~ 32) N•m the decompression hammer Crankcase cover Crankshaft parts can operate flexibly, then align to the timing mark for Assembly:... - Page 26 Chapter IV Disassembly & Repair b. Piston/piston ring Piston ring Assembly: 1) Put upward the manufacturer’s mark during assembly. 2) Do not misplace the gas rings 1 (chromed) and 2. 3) Check if the piston ring can rotate flexibly after installation. 4) Avoid the direction of piston ring for each opening of piston ring by staggering for 150°...
- Page 27 Chapter IV Disassembly & Repair Crankshaft c. Camshaft/crankshaft Camshaft Reference sign When assembling camshaft, align the camshaft gear wheel to the Reference sign of timing gear (pinion of crankshaft) for assembly. d. Check Check of piston Check the contact between piston and cylinder, defects of ring groove, erosion at the top, crack, etc.
- Page 28 Chapter IV Disassembly & Repair freely, neither loose nor inflexible. Then insert feeler gauge into the clearance between the ring and the slot to measure the clearance. Standard Maintenance Limit 0.15 mm 0.015-0.045 mm 4) Thickness of piston ring Standard Maintenance Limit Ring 1/2 1.0 mm...
- Page 29 Chapter IV Disassembly & Repair 8) Clearance between piston pin hole and piston pin Measure the inner diameter of piston pin hole and the outer diameter of piston pin with inside micrometer and outside micrometer. Then calculate the clearance value based on the measured result. Replace the piston or piston pin if it exceeds the use limit.
- Page 30 Chapter IV Disassembly & Repair 3) Outer diameter of crankshaft journal Standard Maintenance Limit 29.98 mm 29.92 mm 4) Side clearance of the big end of connecting rod Standard Maintenance Limit 0. 1-0.7mm 1.1mm 5) Oil-film clearance of big end of connecting rod (radial direction) 12 N.m a) Wipe away the engine on the surface of crankshaft journal.
- Page 31 Chapter IV Disassembly & Repair Detection of camshaft The camshaft is the main engine drive element of valve mechanism of gasoline engine, controlling inlet or exhaust valve to open or close in a regular manner. For appearance, check whether the cam surface and the height is damaged, whether the camshaft and bearing is loose and worn.
- Page 32 Chapter IV Disassembly & Repair Check of bearing Backlash Clean and dry the bearing. Rotate the bearing with hands and check the backlash. Replace Backlash it in case of abnormal noise or movement. Axial Radial Oil-level sensor Measure the conductivity of senor with ohmmeter. When the engine oil in tank is insufficient or empty, the black wire of sensor is conductive with the earth wire;...
- Page 33 Chapter IV Disassembly & Repair 4-4-2 Cylinder head/valve a. Disassembly/assembly Bolt M6 × 14 (4) Assembly/disassembly: Unscrew and screw bolt in the manner of cross. Torque value: 8-12 N· m Spark plug Assembly: Air guide sleeve Clean and adjust the spark Filter plug prior to assembly.
- Page 34 Chapter IV Disassembly & Repair b. Disassembly/assembly Inlet valve Exhaust valve Assembly: Assembly: Don’t confuse these valves. Confirm if the conical part is defected Be careful during installation and or there is excessive carbon deposition don’t damage the valve stem. prior to installation.
- Page 35 Chapter IV Disassembly & Repair c. Check 1) Outer diameter of valve stem Check outer diameter of valve stem with micrometer. Replace a new valve when the diameter is less or more than maintenance limit or there are the visible ablation or crack on valve surface with naked eyes.
- Page 36 Chapter IV Disassembly & Repair cover is fixed. b) Remove the carbon deposition in valve guide with valve guide rimer before measuring the inner diameter of valve guide. Valve Replace the guide if the inner diameter is less or more guide reamer than the maintenance limit.
- Page 37 Chapter IV Disassembly & Repair guide completely. Continue to unscrew clockwise the Retaining valve reamer from valve guide. ring of valve Valve guide Tool: valve guide reamer guide remover b) Remove the dirt and scraps on cylinder head thoroughly. c) Check the valve guide hole. The hole shall be at the central of valve guide and straight and unobstructed.
- Page 38 Chapter IV Disassembly & Repair make it contact with the central part of the conical surface of valve. Valve seat cutter Grind the top edge of valve seat with a 32° grinder (the contact is too high). Contact Grind the top edge of valve seat with a 45° grinder (the too high contact is too low).
- Page 39 Chapter IV Disassembly & Repair 4-4-3 Flywheel/ignition coil/igniter/hand starter a. Disassembly/assembly Ignition coil Assembly/disassembly: Check if the insulated cost is Motor stator cracked or damaged prior to assembly to avoid electric leakage. Bolt M6 × 65 (4) Toque: (7 ~ 13) N•m Cooling fan Note: do not damage the blade during maintenance.
- Page 40 Chapter IV Disassembly & Repair c. Disassembly/assembly (starter assembly) The maintenance of hand-starting parts may cause personal injury accident, so please wear protective glasses and do not make the starting return spring popup. hexagonal-head shaft shoulder bolt Assembly: Pull rope Coat thread Drive cam...
- Page 41 Chapter IV Disassembly & Repair Assembly of hand starting parts Wear gloves and goggles to protect your hands Cover of starter and eyes. Return spring Do not make the starting return spring popup. 1) Put the return spring in the seat cover, hang the hook outside the return spring at the gap of seat cover fixedly and make it align to the slot of pull rope disk, then assemble to seat cover unit to pull rope disk.
- Page 42 Chapter IV Disassembly & Repair 4-4-4 Carburetor a. Disassembly/assembly Speed-regulating stepper motor Screw M3 × 5 (2) Torque: (1~1.5) N•m Installing support of speed-regulating stepper motor Sealing gasket of Screw M4 × 12 (2) inlet pipe Torque: (5~7) N•m Insulation gasket of carburetor Sealing gasket of carburetor...
- Page 43 Chapter IV Disassembly & Repair b. Disassembly/assembly The gasoline is flammable and explosive. The fuel valve must be closed before repairing carburetor and drain fuel in the carburetor. And no open flames. Choke valves Throttle valves Carburetor body Assembly: Blow in some compressed air to remove the dirt in Primary nozzle internal...
- Page 44 Chapter IV Disassembly & Repair c. Check Speed-regulating stepper motor Check the resistance of the 2 diagonals in the socket of stepper motor. The resistance shall be 50±1 Ω. Replace the stepper motor in case of exceeding limit. Rotate the center shaft of motor in case of stepper motor.
-
Page 45: Generator
Chapter IV Disassembly & Repair 4-5 Generator 4-5-1 Fuel tank Disassembly/assembly The Gasoline is inflammable and explosive. The oil in fuel tank and pipe shall be drained prior to disassembly. The fuel oil spilled shall be wiped clean immediately. Fuel tank cover Assembly: Make sure the venthole is clean and not blocked. -
Page 46: Silencer
Chapter IV Disassembly & Repair 4-5-2 Silencer Disassembly/assembly Shutter Air director Nut M8 (2) Torque: (27 ~ 30) N•m Sealing gasket of exhaust port Shield of silencer (front shield) Motive power Tapping screw ST4 × 15 (6) Shield of silencer (back shield) Silencer Installation support of silencer... -
Page 47: Rack Baseplates
Chapter IV Disassembly & Repair 4-5-3 Rack baseplates Disassembly/assembly Vertical framework (2) Support of handle of pull rope Vertical framework (2) Cushion seat of main engine (2) Cushion seat of Cushion rubber main engine (2) Assembly: Ensure the rubber is not cracked, Square nut M6 (6) hardened or worn. -
Page 48: Motor Parts
Chapter IV Disassembly & Repair 4-5-4 Motor parts a. Disassembly/assembly Ignition coil Assembly/disassembly: Check whether the insulated part is cracked damaged prior assembly to avoid electric leakage. Bolt M6 × 65 (4) Torque: (7~13) N•m Fan of motor Starting board Engine Assembly: Flange bolt M8 ×... - Page 49 Chapter IV Disassembly & Repair b. Check The resistance among windings of 230 V 2 KW is as follows: Color of Guide Resistance Line Main winding Brown 2.0-2.4 Ω Power-supply Orange 0.50-0.55 Ω winding DC winding Blue 0.19-0.21 Ω The resistance among windings of 120 V 2 KW is as follows: Color of Guide Resistance...
-
Page 50: Inverter Parts
Chapter IV Disassembly & Repair 4-5-5 Inverter parts a. Disassembly/assembly Installing support of inverter Cushion rubber (2) Inverter parts Cushion rubber (2) - 45 -... -
Page 51: Inverter Parts
Chapter IV Disassembly & Repair Inverter parts (detection) Check if the color of the wire of inverter changes, if the resin filled in inverter has bullate bulge, and if all electrical apparatus elements, connectors and wiring on inverter have visible color or damage. Output shorted: when the green light is off while the red light is on resistance grade detects the output end. - Page 52 Chapter IV Disassembly & Repair Rectifier bridge The internal circuit of rectifier bridge is shown as above. Detect the switching of each terminal of rectifier bridge with multimeter. When the switching of rectifier bridge is shown as below, the rectifier bridge is under the normal status: Blue Black Blue...
-
Page 53: Control Panel Parts
Chapter IV Disassembly & Repair 4-5-6 Control panel parts Control panel Multimeter AC socket Waterproof endcap (2) Parallel receptacle (2) Rectifier Idle switch bridge Waterproof endcap Electrical starting switch Waterproof endcap Frequency-changeover switch DC socket circuit is under the off status, that is to say, the two a. - Page 54 Chapter IV Disassembly & Repair Wire harness Remove the wire harness from panel, rectifier bridge and converter. Check if there is obvious damage on the insulating layer of guide line.If yes, replace the Normal operation: wire harness. Under normal operation, the operational key ③ is Check the switching of each guide line with used to switch the display content circularly: ohmmeter and confirm each guide line is of conductivity.
- Page 55 Chapter IV Disassembly & Repair Oil-warning indicator light (red) electrical equipment has been overload, which will cause inverter overheating or AC voltage increase. At this time, AC protector operates, to stop the generation of the generator so as to protect the generator and its electrical equipment.
- Page 56 Chapter IV Disassembly & Repair When the engine starts and operate normally, the AC ② “OFF” indicator light will be on. If it is required to switch the output frequency of Check the indicator light with ohmmeter and generator, please stop the generator first, then use flat confirm its conductivity.
- Page 57 Chapter IV Disassembly & Repair Parallel terminal The parallel terminal ① is used to connect the two special LC3500i cables under parallel operation. Parallel operation requires two LC3500i equipment and special cable. (The rated output power of parallel operation is 6 KVA, the rated current of 100 V generator is 60 A, the rated current of 120V generator is 50A and the rated current of 230 V generator is 26 A.)
-
Page 58: Appearance Assembly
Chapter IV Disassembly & Repair 4-5-7 Appearance assembly a. Disassembly/assembly Gum cover of oil inlet Waterproof endcap (4) Left appearance Top cover of rack cover plate Hand tubes (2) Inspection window for engine oil Shuttle Left shell of electric generator Right shell of electric generator Panel seat... -
Page 59: Chapter V Circuit Diagram
Chapter III Maintenance 5-1 LC3500i Circuit diagram 100V - 54 -... - Page 60 Chapter III Maintenance 120 V - 55 -...
- Page 61 Chapter III Maintenance 50 Hz, 230 V with parallel receptacle - 56 -...
Need help?
Do you have a question about the LC3500i and is the answer not in the manual?
Questions and answers