Advertisement
Table of Contents
- 1 Important Safety Instructions
- 2 Specifications
- 3 Before You Call for Service
- 4 Radio Interference
- 5 Warning! this Appliance Must be Earthed
- 6 Safety Instructions for General Use
- 7 Microwave Oven
- 8 Feature Diagram
- 9 Display Window
- 10 Important Safety Instructions Read Carefully and Keep for Future Reference
- 11 Schematic Diagram
- 12 Installation Method
- Download this manual
Advertisement
Table of Contents

Subscribe to Our Youtube Channel
Related Manuals for iLive IV600FBI


Summary of Contents for iLive IV600FBI
- Page 1 30 Litre Electronic Microwave Owner s Instruction Manual IV600FBI Read the Instructions carefully and Keep for Future Reference...
-
Page 2: Important Safety Instructions
Important safety instructions When using electrical appliance basic safety precautions should be followed, including the following: warning: to reduce the risk of burns, electric shock, fire, injury to persons or exposure to excessive microwave energy: 1.Read all instructions before using the appliance. 2.Use this appliance only for its intended use as described in this manual. - Page 3 a.When heating food in plastic or paper container, keep an eye on the oven due to the possibility of ignition. b.Remove wire twist-ties from paper or plastic bags before placing bag in oven. c.If smoke is observed, switch off or unplug the appliance and keep the door closed in order to stifle any flames.
- Page 4 15.Utensils should be checked to ensure that they are suitable for use in microwave oven. 16.Warning: it is hazardous for anyone other than a trained person to carry out any service or repair operation which involves the removal of any cover which gives protection against exposure to microwave energy.
- Page 5 damaged and the warranty would be avoid . 22.The accessible surface may be hot during operation. 23.The microwave oven shall not be placed in a cabinet. 24.The door or the outer surface may get hot when the appliance is operating. 25.The temperature of accessible surfaces may be high when the appliance is operating.
- Page 6 appliance by no other than a specialist because under these circumstances the cover have to be removed which assures protection against microwave radiation. This applies to changing the power cord or the lighting as well. Send the appliance in these cases to our service central. 35.The microwave oven is intended for defrosting, cooking and steaming of food only.
-
Page 7: Specifications
SPECIFICATIONS Power consumption: 240V~50Hz,1450W Output: 900W Grill Heater: 1 00W Operating Frequency: 2,450MHz Outside Dimensions: 592mm(W) X 430mm(D) X 390mm(H) Oven Cavity Dimensions: 350mm(W) X 372mm(D) X 232mm(H) Oven Capacity: 30 litres Uncrated Weight: Approx. 17.5kg BEFORE YOU CALL FOR SERVICE 1. -
Page 8: Warning! This Appliance Must Be Earthed
INSTALLATION 1. Make sure all the packing materials are removed from 3. This Microwave Oven weighs 1 .5 kg and must be the inside of the door. placed on a horizontal surface strong enough to support this weight. 2. Inspect the oven after unpacking for any visual 4. -
Page 9: Safety Instructions For General Use
IMPORTANT SAFETY INSTRUCTIONS -WARNING: When the appliance is operated in the combination mode, children should only use the oven under adult supervision due to the temperatures generated; (Only for the model with grill function) -WARNING: If the door or door seals are damaged, the oven must not be operated until it has been repaired by a competent person;... -
Page 10: Microwave Oven
6. Do not insert any object into the openings on the outer removed from the oven, please remember that case. the food/liquid inside will be releasing the same 7. Do not at any time remove parts from the oven such as amount of steam and/or spitting when the lid is the feet, coupling, screws, etc. -
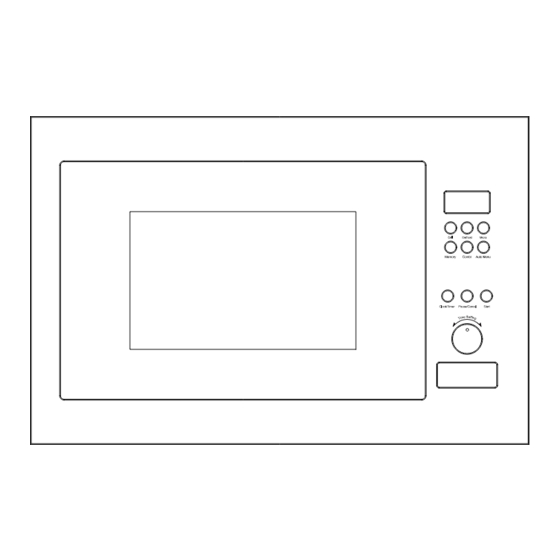
Page 11: Display Window
(1) DISPLAY WINDOW (3) Defrost (4) Micro (2) Grill Grill Defrost Micro (6) Combi (5) Memory (7) Auto Menu Memory Combi Auto Menu (9) Pause/Cancel ) Start (8) Clock/Timer Clock/Timer Pause/Cancel Start (11) Time Setting... - Page 12 P100 P100 P100 The longest microwave heating time is 60 minutes. Microwave power have 5 settings,and it’s P100 、 P70、 P50、 P30 and P10 from high to low power. 3 .Auto weight defrost a) Press the button "Defrost" , "dEF" will be displayed . b) Rotate the knob "Time setting"...
- Page 13 Menu Weight Rice Vegetable Meat Fish Bread N oodle Touching Times 1000 1000 Remark: For A-4, 1= 100-150g noodle,2=200-300g noodle 5. Memory cooking function: This function can memorize some useful cooking programes to avoid reseting time and power operation. a) If no memory has been set press "memory" "1" will be displayed, input cooking power and time, press "memory"...
-
Page 14: Important Safety Instructions Read Carefully And Keep For Future Reference
7. Combination Cooking This appliance offers you a choice of two methods of combination cooking. Combi power have 2 settings, C-1 and C-2 from high to low grill power. Example : Cooking food using C-2 for 30 minutes. a) Press "Combi" button to select "C-2" b) Set cooking time for 30 minutes c) Press "Start "... -
Page 15: Schematic Diagram
SCHEMATIC DIAGRAM ( DOOR OPENED,COOK OFF CONDITION) TRANSFORMER NOISE FILTER MAGNETRON N E L P( OUT) H( OUT) R4-2 T( IN) R4-1 D_ SW CONTROLLER L: LAMP SWA: PRIMARY INTERLOCK SWITCH SWB: SECONDARY INTERLOCK SWITCH FM: FAN MOTOR TM: TURNTABLE MOTOR SWC: THE MONITOR INTERLOCK SWITCH H: HEATER *CIRCUIT SUBJECT TO CHANGE WITHOUT NOTICE... -
Page 16: Installation Method
INSTALLATION Assemble Indicator Figure 1. The Indicator Chart Paper 2. Orientation 3. Bolts M4 × 10mm 4. Screw Cover 5. Bolts M4 × 35mm INSTALLATION METHOD 1: Make sure the cabinet dimenision are as follows: 550 (depth) 56 5mm (width) x 36 5mm (height) 2: Put the indicator chart paper into the cabinet, and assemble the orientation in the position with three screw, this position has marked in the indicator chart paper... - Page 17 3. Put the microwave oven into the cabinet. make sure both sides of microwave walls are equally arranged and installed to the cabinet and the orientation must securely hold the back of the microwave oven 4. After the position fixed ,then open the door of the microwave oven and locate the screw hole infront of the cavity.
Need help?
Do you have a question about the IV600FBI and is the answer not in the manual?
Questions and answers