Advertisement
Quick Links
092524 RevC
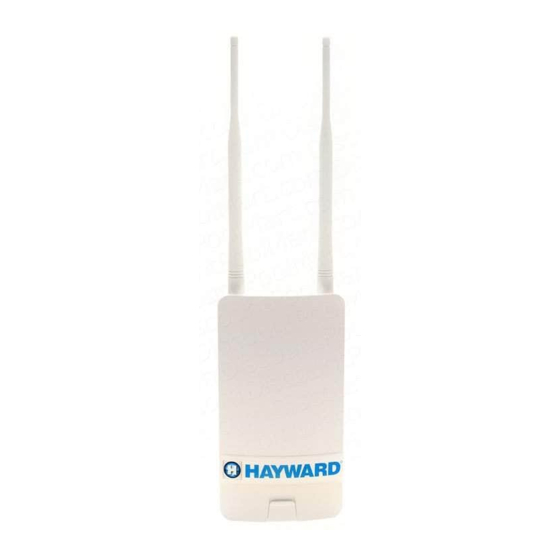
HLWLAN 802.11b/g/n
Transceiver Kit
Wireless Communications for OmniLogic
Owner's Manual
Contents
Introduction.......................1
Installation........................2
Configuration....................6
Operation..........................8
Troubleshooting.................9
HLWLAN
Hayward Pool Products
620 Division Street, Elizabeth NJ 07207
www.hayward.com
USE ONLY HAYWARD GENUINE REPLACEMENT PARTS
Advertisement

Subscribe to Our Youtube Channel
Summary of Contents for Hayward HLWLAN
-
Page 1: Table Of Contents
092524 RevC HLWLAN 802.11b/g/n Transceiver Kit Wireless Communications for OmniLogic Owner’s Manual Contents Introduction.......1 Installation......2 Configuration....6 Operation......8 Troubleshooting....9 HLWLAN Hayward Pool Products 620 Division Street, Elizabeth NJ 07207 www.hayward.com USE ONLY HAYWARD GENUINE REPLACEMENT PARTS... -
Page 2: Fcc Statement
(1) This device may not cause harmful interference, and (2) this device must accept any interference received, including interference that may cause undesired operation. Changes or modifications not expressly approved by Hayward could void the user’s authority to operate this equipment. -
Page 3: Introduction
15ft ethernet cable that connects to the OmniLogic. When determining the best mounting location for the HLWLAN, note that it can be mounted on the two provided screws or strapped to an object using the two included zip ties. To help determine if the mounting location is in range of the router/access point, test the connection of other devices (phone, tablet, laptop, etc.) at that same location. -
Page 4: Installation
Router/Access Point Information The HLWLAN cannot be configured without the following information. Before going any further with the installation, fill in the information below. Router or Access Point’s SSID ____________________ (wireless network name - case sensitive) To find the SSID: Ask the homeowner. - Page 5 Be sure that there are no major obstacles between the HLWLAN and the home’s router/access point. Loosely mount the HLWLAN so that you have visible access to the LED indicators on the bottom back of the unit. You will need to refer to these indicators before permanently fastening the HLWLAN.
- Page 6 Connect 2ft ethernet cable here 3) Connect one end of the 2ft ethernet cable to the OmniLogic as shown. USE ONLY HAYWARD GENUINE REPLACEMENT PARTS...
-
Page 7: Lan Port
Connect one end of the 15ft outdoor ethernet cable to the Power Injector’s PoE port and the other end to the port on the HLWLAN marked “LAN PoE”. To access this port, remove the HLW- LAN’s bottom cover. Be sure to replace the cover when done. -
Page 8: Configuration
With the HLWLAN now connected, power up the OmniLogic. Wait about 3-4 minutes for the Om- niLogic to fully start. Verify that the HLWLAN is being powered and is connected to the OmniLogic by looking at the PWR and LAN LED indicators on the backside near the ethernet connection. Both LEDs should be lit. - Page 9 Wireless Bridge Configuration The HLWLAN will now scan for available access points. Once it has finished, the SSID of all available access points will be displayed on the screen as shown below. Touching the desired SSID will begin the connection process. Depending on the security used by the router or access point, you may be prompted for a password.
-
Page 10: Operation
When connected to the home network, the WLAN LED indicator will be lit and one of the Signal Strength LED indicators will be illuminated on the back of the HLWLAN. There are 3 LEDs indicating increasing signal strength from left to right. Be sure that at least the left most LED is on steady. If it is intermittently blinking, or not on at all, consider re-locating the HLWLAN or router/access point to acquire a better connection. -
Page 11: Troubleshooting
This is an indication that the HLWLAN is not connected to the OmniLogic. Perform the following: • Make sure that both ends of the ethernet cable are firmly connected; one side in the HLWLAN and the other in the PoE Injector (see Installation Steps 3 and 4). - Page 12 Hayward is a registered trademark and OmniLogic is a trademark of Hayward Industries, Inc. © 2013 Hayward Industries, Inc. All other trademarks not owned by Hayward are the property of their respective owners. Hayward is not in any way affiliated with or endorsed by those third parties.

Need help?
Do you have a question about the HLWLAN and is the answer not in the manual?
Questions and answers