
Related Manuals for Kikusui PLZ150U


Summary of Contents for Kikusui PLZ150U
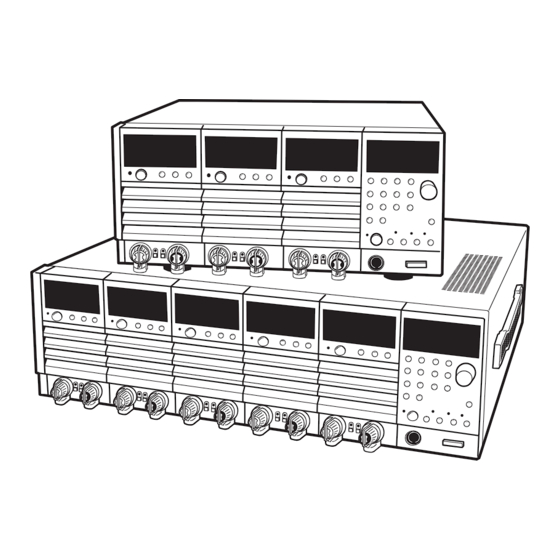
- Page 1 Part No. Z1-002-982, IB00485B Mar. 2018 OPERATION MANUAL ELECTRONIC LOAD PLZ-U Series PLZ 70UA PLZ 150U PLZ - 30F PLZ - 50 F...
- Page 2 If you find any incorrectly arranged or missing pages in this manual, they will be replaced. If the manual gets lost or soiled, a new copy can be provided for a fee. In either case, please contact Kikusui distributor/ agent, and provide the “Kikusui Part No.” given on the cover.
- Page 3 Safety Symbols For the safe use and safe maintenance of this product, the following symbols are used throughout this manual and on the product. Under- stand the meanings of the symbols and observe the instructions they indicate (the choice of symbols used depends on the products). Indicates that a high voltage (over 1000 V) is used here.
-
Page 4: Safety Precautions
Safety Precautions The following safety precautions must be observed to avoid fire hazard, electrical shock, accidents, and other failures. Keep them in mind and make sure that all of them are observed properly. Users • This product must be used only by qualified personnel who understand the con- tents of this operation manual. - Page 5 • To maintain performance and safe operation of the product, it is recommended that periodic maintenance, checking, cleaning, and calibration be performed. Service • Internal service is to be done by Kikusui service engineers. If the product must be adjusted or repaired, contact Kikusui distributor/agent. PLZ-U...
-
Page 6: Table Of Contents
Contents Safety Symbols ____________________________________________ I Safety Precautions ________________________________________ II Chapter 1 General Description About This Manual - - - - - - - - - - - - - - - - - - - - - - - - - - - - - - - - - - - - - 1-2 Product Overview - - - - - - - - - - - - - - - - - - - - - - - - - - - - - - - - - - - - - - 1-2 Features - - - - - - - - - - - - - - - - - - - - - - - - - - - - - - - - - - - - - - - - - - - - - 1-3... - Page 7 Setting the Slew Rate - - - - - - - - - - - - - - - - - - - - - - - - - - - - - - - - - - - - 5-7 Elapsed Time Display and Auto Load Off Timer - - - - - - - - - - - - - - - - - 5-8 Sequence Function...
- Page 8 - - - - - - - - - - - - - - - - - - - - - - - - - - - -A-13 A.3.1 Operating Area of the PLZ150U - - - - - - - - - - - - - - - - - - - - - - A-13 A.3.2 Operating Area of the PLZ70UA - - - - - - - - - - - - - - - - - - - - - -A-14...
-
Page 9: Chapter 1 General Description
Chapter 1 General Description This chapter gives an overview and describes the features of the PLZ-U. PLZ-U General Description 1-1... -
Page 10: About This Manual
This operation manual covers the following PLZ-U Series Electronic Load Units. Frame • PLZ-50F • PLZ-30F Load unit • PLZ150U • PLZ70UA Product version covered This operation manual covers products with frame ROM version 1.0X and load unit ROM version 2.0X. -
Page 11: Features
5 channels, respectively. ■ High-speed response In constant current mode, a current rise and fall slew rate of 2.4 A/μs (PLZ150U) is possible (converts to a rise and fall time of 10 μs). Simulations that closely resemble a real load are possible by using the PLZ-U as a load for DC power transient response tests and as a dummy load ■... - Page 12 ■ ABC preset memories Three presets that are most frequently used can be stored for each operation mode and range. This allows quick switching of settings even when the load is turned on. ■ Load simulations In constant current and constant resistance modes, a sequence program can be cre- ated with up to 255 steps at a minimum interval of 1 ms.
-
Page 13: Options
Options Rack mounting option The following rack mounting options are available. For details, contact your Kikusui agent or distributor. Table 1-1 Rack mounting options Name Model Applicable Model Note KRB3-PLZ-50F Inch rack EIA standard Rack mount bracket PLZ-50F (Fig. 1-1) - Page 14 KRB3-PLZ-30F Unit: mm (inch) KRB150-PLZ-30F Unit: mm Fig. 1-2 Rack mount bracket (PLZ-30F) Control flat cables Control cables that connect frames for inter-frame control. The following two types of cables are available. Cord Length Model Application PC01-PLZ-4W 84540 300 mm Connection between frames PC02-PLZ-4W 84550...
-
Page 15: Chapter 2 Installation And Preparation
Chapter 2 Installation and Preparation This chapter describes the procedures of unpacking and preparation before using the PLZ-U. PLZ-U Installation and Preparation 2-1... -
Page 16: Checking The Package Contents
When you receive the product, check that all accessories indicated below are included and that the accessories have not been damaged during transportation. If any of the accessories are damaged or missing, contact your Kikusui agent or dis- tributor. NOTE •... -
Page 17: Load Unit
2.1.2 Load Unit The following accessories are included with each load unit. [M1-100-006] [M5-101-006] [M4-100-006] [M3-112-026] [Q1-500-077] Rear load input terminal cover Set of screws for the load input terminal (2 pcs. each) [M3-112-014] [M3-112-012] Rear sensing terminal screws (M3-6: 2 pcs.) Load unit attachment screws (M3-10, 2 pcs.) [Attached to the load unit.] [Attached to the load unit.]... -
Page 18: Precautions Concerning Installation Location
Precautions Concerning Installation Location This section describes the precautions to be taken when installing the product. Make sure to observe them. ■ Do not use the PLZ-U in a flammable atmosphere. To prevent the possibility of explosion or fire, do not use the PLZ-U near alcohol, thinner or other combustible materials, or in an atmosphere containing such vapors. -
Page 19: Precautions When Moving The Plz-U
■ Secure adequate space around the power switch. Do not place the PLZ-U in a location that would result in poor accessibility to the switch. And, do not place objects near the switch that would result in poor accessi- bility. ■... -
Page 20: Installing Load Units
Installing Load Units Install the load units into the empty slots of the frame. Channel numbers are auto- matically assigned to the load units. The left most load units is CH1. WARNING • Turn off the POWER switch. Installing a load unit while the power is turned on can cause electric shock or damage to the PLZ-U. - Page 21 Carry the load unit with both hands and slowly insert it into the desired slot. Check that the panel surface of the load unit is nearly flat with the frame panel surface. Fix the load unit in place using the unit attachment screws (M3-10) pro- vided.
-
Page 22: Connecting The Power Cord
3 m or less in length. If obtaining a power cord is difficult, contact your Kikusui agent or distrib- utor. -
Page 23: Power Up
Power Up Operation check Turn off ( ) the POWER switch. Check that the power cord is correctly connected. See sections 2.5, “Connecting the Power Cord.” Check that nothing is connected to the DC INPUT (load input terminal) on the front and rear panels. Load unit model Frame model Channel number of... - Page 24 If the PLZ-U does not operate as described in the procedure If the condition does not change even after taking the countermeasure indicated below, contact your Kikusui agent. ■ Nothing is displayed. Turn off the POWER switch and check the power cord connection.
-
Page 25: Load Wiring
Refer to Table 2-1 and select as thick wires as possible. Table2-1 Nominal cross-sectional area of wires and allowable currents Nominal (Reference Allowable Current(*) Kikusui- Cross-Sectional Area Cross-Sectional Area) Recommended Current (Ta = 30 °C) (2.08) (3.31) (5.26) - Page 26 ■ Load wire inductance The load wiring has an inductance (L). When the current (I) varies in short time period, it generates a large voltage at both ends of the wiring cable. This voltage applies to all of the load input terminals of the PLZ-U when the impedance of the EUT is relatively small.
- Page 27 When the value of instantaneous voltage drops under the minimum operating voltage depends on the generated voltage at the load input terminal, the response of recovery will be extensively delayed. In such event, the electronic load (PLZ-U) may generate unstable In such condition, the input voltage oscillation or becomes into the hunting operation.
- Page 28 ■ Overvoltage CAUTION • Do not apply voltage exceeding the maximum voltage of 150 VDC to the load input terminal, as it may cause damage. The maximum voltage that can be applied to the load input terminal is 150 VDC. Voltage exceeding the maximum cannot be used.
-
Page 29: Connection To The Load Input Terminal On The Rear Panel
2.7.2 Connection to the Load Input Terminal on the Rear Panel WARNING • Do not touch the load input terminal while the PLZ-U is turned ON, as it may lead to electric shock. In addition, be sure to use the load input termi- nal cover. - Page 30 Align the protrusion on the inside to the concavity of the load input terminal BOTTOM Insert into the hole in the rear panel Fig. 2-12 Attachment of the load input terminal cover on the rear panel 1 Align the top and bottom parts of the terminal cover and screw them in place.
-
Page 31: Connection To The Load Input Terminal On The Front Panel
2.7.3 Connection to the Load Input Terminal on the Front Panel NOTE • The specifications of the PLZ-U are for the load input terminal on the rear panel. The load input terminal on the front panel may not satisfy the specifications. •... - Page 32 2-18 Installation and Preparation PLZ-U...
-
Page 33: Chapter 3 Names And Functions Of Parts
Chapter 3 Names and Functions of Parts This chapter describes the names and functions of parts on the front and rear panels of the frame and load unit. In the explanations, channels refer to load units that are installed in the frame. PLZ-U Names and Functions of Parts 3-1... -
Page 34: Front Panel
Front Panel WARNING • Do not touch the load input terminal while the PLZ-U is turned ON, as it may lead to electric shock. In addition, be sure to use the load input termi- nal cover. • The load input terminals on the front and rear panels are coupled inside the PLZ-U. - Page 35 NOTE • If you press a key while holding down the SHIFT key, the function indicated below the key in blue is enabled. • This manual denotes the operation of pressing a key while holding down the SHIFT key as SHIFT + (notation above the key). [1] POWER The POWER switch.
- Page 36 RANGE Switches the CC/CV range in the respective operation mode. Each time you press the RANGE key, the range switches in the order L, M, and H. You can check the current range with the range indicator (CC/CR RANGE) of the frame or channel. V RANGE Each time you press this key while holding down the SHIFT key (SHIFT + RANGE) when in CV, CC+CV, or CR+CV mode, the CV range switches in the...
- Page 37 [14] A, B, and C keys You can save and recall three preset values A, B, and C for each mode and range on the selected channel. If you press one of these keys while holding down the SHIFT key (SHIFT + A, B, or C), the presets of all the channels can be recalled simultaneously.
- Page 38 [15-4] DUTY/RPT key DUTY Press this key to set the duty cycle of switching mode on the selected channel. Press this key to set the number of program loops on the selected channel. [16] Slew rate, soft start, etc. [16-1] SLEW RATE/S.START key SLEW RATE Press this key to set the slew rate on the selected channel.
- Page 39 STORE Displays the setup memory number in which the current panel settings are to be saved. If you press this key while holding down the SHIFT key (SHIFT + RECALL), this key and the STORE indicator illuminate and the memory number is displayed.
-
Page 40: Load Unit (Channel)
3.1.2 Load Unit (Channel) [8] Measured value display [7] Channel display [9] Unit indicator [6] ABC preset memory [10-1] SW indicator [10-2] SEQ [5] Operation mode [10-3] EXT indicator [10] [10-4] ALM [11] DISP [4] Range indicator [12] INDEP [3] LOAD [13] ENTRY [14] Air inlet (Louver) - Page 41 [5] Operation mode indicator Displays the specified operation mode in green. The actual operation status is indi- cated in red. [6] ABC preset memory indicator When an ABC preset memory is recalled, the corresponding LED illuminates. [7] Channel display Displays the channel number of the load unit. The channel numbers are assigned to the installed slots from the left facing the front panel starting with CH1.
- Page 42 [14] Air inlet (louver) Takes in air to cool the inside of the PLZ-U. A dust filter is furnished on the inside. Clean the dust filter periodically. 3-10 Names and Functions of Parts PLZ-U...
-
Page 43: Rear Panel
Rear Panel WARNING • Do not touch the load input terminal while the PLZ-U is turned ON, as it may lead to electric shock. In addition, be sure to use the load input termi- nal cover. • The load input terminals on the front and rear panels are connected in par- allel inside the PLZ-U. - Page 44 [1] DC INPUT (load input terminal on the rear panel) Terminals used to connect the equipment under test to the PLZ-U. The terminal is connected in parallel with the load input terminal on the front panel. • For the connection procedure, see section 2.7.2, “Connection to the Load Input Terminal on the Rear Panel.”...
-
Page 45: Chapter 4 Basic Operation
Chapter 4 Basic Operation This chapter describes the operating procedure of each operation mode and other basic functions. PLZ-U Basic Operation 4-1... -
Page 46: Panel Control Basics
Panel Control Basics ■ Selecting and setting a channel Use the ENTRY key on the load unit to select a channel. The selected channel is configured on the frame. NOTE • LOAD, INDEP, or DISP keys can also be used to select a channel. ■... -
Page 47: Load On/Off
Load On/Off There is a LOAD key on both the load unit and the frame. When the load is turned on, the LED above and to the left of the key illuminates. If you are repeating the operation of turning on/off the output of the equipment under test when using the PLZ70UA, turn on the output only after the load input ter- minal voltage reaches approximately 0 V after turning off the output. - Page 48 Load On Turning on/off the load on the multiple channels simultaneously If you press the LOAD key of the frame, the load is turned on simultaneously on all the channels which are not set to the independent mode. There may be an offset of about 10 ms for the loads on different channels to turn on.
- Page 49 Functions related to turning on or off of the load ■ Delayed load-on You can set a delay for the load to turn on. The LOAD LED illuminates when the load turns on after the specified delay time elapses. You can also disable this function (0 ms). By factory default, the delay is set to 0 ms.
-
Page 50: Basic Operation
Basic Operation The following three operation modes are available on the PLZ-U. Furthermore, con- stant voltage mode (+CV) can be added to CC and CR modes. • Constant current mode (CC mode and CC+CV mode) • Constant resistance mode (CR mode and CR+CV mode) •... - Page 51 Sets the range. In CC or CR mode, press the RANGE key to set the CC/CR range. Each time you press the RANGE key, the range LED illuminates in the order L (Low), M (Mid), and H (High), and the range is switched. In CV mode, press the V RANGE (SHIFT +RANGE) key to set the CV range.
- Page 52 Even when you follow the procedure specified above, the alarm may occurs, in such case, it may be required to change the voltage setting of CV to prevent the alarm occurance. For details, contact your Kikusui agent or distributor. 4-8 Basic Operation...
-
Page 53: Protection Functions And Alarms
Protection Functions and Alarms When a protection function trips and an alarm is activated, the ALM indicator of the corresponding channel illuminates. At the same time, ALARM STATUS (pin 16) of FRAME CONT connector 1 on the rear panel turns on (open collector output). There are two types of protection functions: those that allow you to set the trip point and those with a fixed trip point. -
Page 54: Alarms
■ Overheat protection (OHP) When abnormal temperature is detected in the internal power unit, the load is turned off. Check whether the air inlet on the front panel and the air outlet on the rear panel are being obstructed. ■ Overvoltage protection (OVP) When a voltage greater than or equal to 110 % of the rated operating voltage is detected, the load is turned off. - Page 55 Bit 6 Bit 5 Bit 4 Bit 3 Bit 2 Bit 1 (32) (16) OHP and OCP: RVP and UVP: Displays 10 Displays 33 Fig. 4-6 Bit assignment of alarm numbers ■ Determining the alarm type from the alarm number total The alarm numbers are determined in order from the largest value.
-
Page 56: Setting The Trip Points
4.4.3 Setting the Trip Points You can set trip points for the OCP, OPP, and UVP. Load unit Frame Fig. 4-7 OCP/OPP and UVP keys ■ Setting the OCP and OPP Select the channel. Press the ENTRY key of the desired channel. Select OCP or OPP. - Page 57 ■ Setting the UVP Select the channel. Select UVP. Press the UVP (SHIFT + LEVEL/STEP) key. The UVP key and a “V” unit LED illuminates. Set the voltage value. While viewing the display, turn the rotary knob to set the value. To disable UVP, turn the rotary knob counterclockwise and select oFF.
- Page 58 4-14 Basic Operation PLZ-U...
-
Page 59: Chapter 5 Application Operation
Chapter 5 Application Operation This chapter describes functions such as ABC preset memories, switching function, and sequence function that are used in actual applications. PLZ-U Application Operation 5-1... -
Page 60: Soft Start
Soft Start The PLZ-U can be set to start up slowly of the input current of the PLZ-U (soft- start) in the constant current (CC) mode when the applying voltage and the turning on the load at the same time, or when the voltage applied with 0 V input of the load input while the load is turned on. -
Page 61: Abc Preset Memories
Select the soft start time. Turn the rotary knob to show the desired soft start time. You can select the soft start time from 0.1 ms, 1 ms, 3 ms, 10 ms, 30 ms, 100 ms, and 300 ms. To change the soft start time of another channel, press the ENTRY key of the desired channel to switch the channel. - Page 62 Save to the memory. Hold down a memory key (A, B, or C) for at least 2 seconds (you will hear a beep sound). The key that you held down on the frame illuminates and the preset val- ues are saved to the selected memory. The key that is illuminated turns off when the setting is changed.
-
Page 63: Switching Function
Switching Function The switching function operates in CC and CR modes. The PLZ-U switches the pre- set value (SET value) and the level value at the specified switching frequency and duty cycle. The switching settings are the switching level, switching frequency, duty cycle, and slew rate. - Page 64 Select the channel. Press the ENTRY key of the desired channel. The channel display of the frame shows the selected channel number, and the settings of the channel can be changed. Select the operation mode and range. Press the CC or CR key. The CC or CR key illuminates.
-
Page 65: Setting The Slew Rate
Setting the Slew Rate The slew rate defines the slope at which the current changes when the current is drastically changed such as in a transient response test. On the PLZ-U, you set the amount of change in the current per unit time according to the CC/CR range. The slew rate setting does not apply to current that flows when the load is turned on. -
Page 66: Elapsed Time Display And Auto Load Off Timer
Elapsed Time Display and Auto Load Off Timer You can achieve two functions that are convenient for the discharge test of batteries by combining the following four functions: elapsed time display, UVP (undervolt- age protection), load-off voltage display, and auto load off timer. Voltage V2: Voltage after the specified time elapses UVP detection voltage... -
Page 67: Sequence Function
Sequence Function Sequence is a function that automatically runs a stored program one step at a time in CC mode or CR mode. By specifying the setting and execution time of each step, various waveform simulations can be executed. The program is independent for each channel. The program is saved even when the power is turned off through the backup function. - Page 68 Channel display Load unit Frame Fig. 5-8 Editing the sequence NOTE • If you change the operation mode or range while editing a sequence, the sequence settings will be cleared. If you plan to use the sequence settings again, save the sequence to the setup memory and recall it when you need it.
-
Page 69: Executing The Sequence
Set the number of program loops. Press the PRT key. Turn the rotary knob to set the number of program loops. You can specify an infinite loop by setting RPT (the number of program loops) to 9999. 10. Exit from sequence mode. Press the SEQ key while holding down the SHIFT key (SHIFT + SW ON). - Page 70 Stopping the sequence Press the LOAD key (turn off the load). Turn off the load. Channel display run and StoP displays Load unit Frame Start or stop Start or stop (a specific channel) (all channels at once) Fig. 5-9 Executing the sequence 5-12 Application Operation PLZ-U...
-
Page 71: Example Sequence
Table 5-1 Sequence Program Creation Table Program name: Example Date: Channel numbers (1 to 5) 1 (PLZ150U) Repeat steps 1 to 8 three times. After repeating the sequence three times, Memo turn off the load and end the sequence. Operation mode... - Page 72 Creating the program Turn off the load. Select the channel. Press the ENTRY key of channel 1. Set the operation mode. Press the CC key to select the operation mode. Sets the range. Press the RANGE key to set the CC/CR range to H. Enter sequence mode.
-
Page 73: Remote Sensing Function
Remote Sensing Function Remote sensing is a function used to compensate for the voltage drop caused by the resistance of the load wire when it cannot be neglected. Execute remote sensing to accurately set the resistance and voltage and measure the voltage and power. Since remote sensing improves the transient characteristics in CR, CV and CP modes, operational stability can be achieved. -
Page 74: Key Lock Function
Key Lock Function You can lock the keys so that settings, memory, and sequence cannot be changed. The table below lists the keys that are operational even in a key locked condition. Table5-1 Keys that are operational in a key locked condition LOAD key (turn the load on/off) Channel DISP key (switch the display) -
Page 75: Configuration Settings
Configuration Settings Table 5-2 indicates the configuration items. Table 5-2 Configuration settings CONFIG Item Relevant Function Selectable Values Number Number of units operating in parallel Section 5.11, “Parallel Operation” 1, 2, 3, 4, or 5 External voltage reference 0, 1, or 2 Section 5.10.2, “CH CONT Connector”... - Page 76 Check that the load is turned off. Check that the LOAD LED of each channel is turned off. If it is on, press the LOAD key to turn the load off. Select the channel. Press the ENTRY key of the desired channel. The ENTRY key of the channel blinks.
- Page 77 ■ Function for turning the load off in the OCP (CONFIG number 3) Selects whether to turn off the load or limit the current when the OCP trips. Selectable Values Description Do not turn the load off (current limit operation) Turn the load off ■...
- Page 78 ■ Powering up with the load turned on (CONFIG number 8) Set whether to turn on/off the load at power on. Selectable Values Description Automatically turn the load on at power on Keep the load turned off at power on ■...
-
Page 79: 5.10 External Control
5.10 External Control There are two methods of external control. One method is by using the FRAME CONT connector of the frame. The other is by using the CH CONT connector of the channel. FRAME CONT connector CH CONT connector Fig. - Page 80 Table5-3 Pin numbers and compatible connectors Pin No. Manufacturer Compatible Connector Note XG5M-2032 or For discrete XG5M-2035 wires XG5S-1001 (2 pcs.) Omron XG4M-2030 For flat XG4T-2004 cables 6200-020-601 Table 5-4 Pin arrangement of connector 1 Pin No. Signal Name Input/Output Function Recall preset memory A of all channels simultaneously Recall preset memory B of all channels simultaneously...
- Page 81 Turning on/off the load on all channels simultaneously Like the LOAD key of the frame, you can turn on/off the load on all channels simul- taneously. To do so, apply external signals across pins 10 and 20 (LOAD ON) and pins 9 and 20 (ENABLE) of the FRAME CONT connector.
- Page 82 Inter-frame control By connecting multiple frames, you can turn the load on/off, recall ABC preset memories or setup memories on other frames from a single frame. When using external frame control, FRAME CONT connector 1 (input signal of Table 5-4) of the first frame is used. When operating from the panel, use the first frame.
-
Page 83: 5.10.2 Ch Cont Connector
5.10.2 CH CONT Connector The CH CONT connector is on each slot. It can be used to turn the load on/off and receive an external voltage reference. It is also equipped with a monitor output for the load input current. The connector is a screwless connector. Table 5-5 indicates the pin arrangement. - Page 84 Precaution when operating under high-speed load simulations When using an external control, do not connect the common terminal of the external device and the terminal of the EUT which connects to the negative polarity of load input terminal of the electronic load. Attach the ferrite core on the connecting wire between the external device and the electronic load.
- Page 85 NOTE • Use external voltage reference of low noise and high stability. • Use twisted or shielded wires for the signal wires. This can prevent disturbance from noise. Ein (V) CH CONT × rated value Setting ≈ 10 (V) EXT REF Approx.
- Page 86 Turning the load on/off You can turn the load on/off on each channel. Apply an external signal across pins 1 and 4 of the CH CONT connector. For turning the load on, the change in the exter- nal voltage (edge) is detected. For turning the load off, the external signal level is detected.
-
Page 87: 5.11 Parallel Operation
Combination of parallel operation and single-unit operation Table 5-6 The number of units in parallel and the capacity Number of Units in Parallel PLZ70UA PLZ150U 30 A / 150 W 60 A / 300 W 45 A / 225 W 90 A / 450 W... - Page 88 Slave Master Equipment under test – Fig. 5-22 Parallel connection (principle diagram) CAUTION • When carrying out parallel operation, be sure to use the load input termi- nals on the rear panel. Do not connect other equipment to the load input terminals on the front panel.
-
Page 89: 5.12 Setup Memories
5.12 Setup Memories The setup memory can save up to four sets of settings indicated below. Saving and recalling are done on all channels simultaneously. ■ Settings that are saved Below are the settings that are saved to the setup memory. •... -
Page 90: 5.13 Factory Default Settings
Select the memory number. Turn the rotary knob to show the number (0 to 3) of the memory to which set- tings are to be saved. To cancel, press the STORE (SHIFT + RECALL) key again. Press the ENTER key. The settings described above are saved to the memory. -
Page 91: Factory Default Settings (General)
■ Resetting the PLZ-U to factory default settings While holding down the SHIFT key, turn on the POWER switch. Keep holding down the SHIFT key until a beep is heard. The power up operation indicated in section 2.6, “Power Up” is exe- cuted, and the settings are reset to factory default. -
Page 92: 5.13.2 Factory Default Settings Of Abc Preset Memories
5.13.2 Factory Default Settings of ABC Preset Memories The factory default settings of ABC preset memories are indicated in Table 5-8. Table 5-8 Factory default settings of ABC preset memories PLZ150U PLZ70UA Operation mode Range 0.000 A 15.000 A 30.000 A 0.000 A... -
Page 93: Chapter 6 Remote Control
Chapter 6 Remote Control This chapter describes the procedure for connecting the interface and the procedure for transmitting commands to the PLZ-U using SCPI commands. PLZ-U Remote Control 6-1... -
Page 94: Overview
Overview In addition to using the front panel, the PLZ-U can be controlled remotely using the following interfaces. • RS-232C interface • GPIB interface The interface is selected from the front panel. The remote interface accepts two formats of commands: IEEE 488.2 common com- mands and SCPI commands. -
Page 95: Using Scpi Commands
Using SCPI Commands 6.3.1 Hierarchy of SCPI Commands SCPI commands are ASCII-based commands designed for test and measurement devices. The command hierarchy is structured around the common root or node, which is the construction block of the SCPI sub system. There are two types of SCPI commands: Set and Query. - Page 96 SCPI command syntax This operation manual denotes SCPI commands using the following format. (Example) Set command: [SOURce:]CURent[:LEVel] [:IMMediate][:AMPLitude] {<current>|MINimum|MAXimum} SCPI commands can be issued using the short form. The short form of an SCPI command is the section of the command written in uppercase. SCPI commands can be sent in the long form or short form.
- Page 97 Unit suffix Below are the default measurement units. • V (voltage) • A (current) • OHM (resistance) • SIE (conductance) • W (wattage) • HR (hour) • MIN (minute) • S (second) • A/US (current/time) • PCT (%) The following optional prefixes are supported. Only US is supported for the time of measurement unit A/US (current/time).
-
Page 98: Parameter Format
6.3.2 Parameter Format The parameter format of SCPI is derived from the program parameter format defined in IEEE 488.2. SCPI parameter format Boolean parameters A Boolean parameter expresses a 1 or 0 condition or an ON or OFF condition. A Boolean parameter can take on four values, 1, 0, ON, or OFF. Below is an example of a set command using a Boolean parameter. - Page 99 Expanded numeric parameters MINimum and MAXimum are available as substitutes for declaring certain values. Set command: [SOURce:]CURRent[:LEVel] {<current>|MINimum|MAXimum} CURR MIN sets the current value of each mode to the minimum value. In addition, MINimum and MAXimum can be used to inquire the minimum and maximum allowed values of most parameters as shown in the following Query com- mands.
-
Page 100: Program Parameters
Below are the definitions of the parameters used in this manual for denoting SCPI commands. conductance A numeric data including MAXimum and MINimum. • Program data Range PLZ150U PLZ70UA Selectable range 20 to 2 2 to 0 10 to 1... - Page 101 A numeric data including MAXimum and MINimum. See the program data of each command. voltage A numeric data including MAXimum and MINimum. • Program data Range PLZ150U PLZ70UA Selectable range 1.5 to 157.5 0 to 157.5 Resolution 10 m...
-
Page 102: Interface Setup
Interface Setup The factory default remote control interface setting is GPIB. 6.4.1 GPIB Control ■ GPIB connection Use a standard IEEE488 cable to connect the PLZ-U to the PC. ■ Setting the GPIB address Check that the load is turned off. Check that the LOAD LED is turned off. -
Page 103: Rs-232C Control
6.4.2 RS-232C Control ■ RS-232C connection Use a standard cross cable (null modem cable) to connect the PLZ-U to the PC. The RS-232C port on the PLZ-U is a standard D-sub 9-pin male connector. Table6-1 RS-232C pins Pin No. Function Not used Receive (RX) Transmit (TX) - Page 104 ■ Transmission/Reception via the RS-232C Control the transmission/reception via the RS-232C using flow control. Transmis- sion/reception may not work correctly through unilateral transmission. RS-232C flow control The transmission/reception on the PLZ-U can be controlled by using Xon/Xoff. DC (device control) codes are used to carry out control. Table 6-2 DC codes Code...
-
Page 105: Scpi Commands
Query command: *IDN? The response to *IDN? is indicated below. Example) For PLZ-50F with ROM version 1.00 Returns KIKUSUI,PLZ-50F,0,1.00. *OPC The PLZ-U does not support asynchronous I/O operation. When the *OPC command is transmitted, the Operation Complete bit (bit 0) of the standard event status register is set. - Page 106 Resolution 1 *RST Resets the device to factory default settings. CONFIG number 1 and 9 to 11 in the configuration settings are not changed. The settings after initialization are as follows: Item PLZ150U PLZ70UA PLZ30F/PLZ50F Current range Voltage range Operation mode CC mode SET value 0.000 A...
- Page 107 CONFIG No. Item PLZ150U PLZ70UA PLZ30F/PLZ50F External voltage reference Function for turning the load off in the OCP Function for turning the load off in the OPP Delayed load-on time setting Last load Polarity of the load on external High active...
- Page 108 *SRE Sets the service request enable register bit or queries the current setting. The service request enable register is used to select the summary messages in the status byte register that will be able to perform service requests. To clear the service request enable register, send *SRE 0. If the register is cleared, service requests cannot be generated by status information.
-
Page 109: Channel Commands
6.5.2 Channel Commands Channel commands select the load unit channels. For the definition of channel num- bers, see section 4.1, “Panel Control Basics.” Selecting a channel NOTE • This command selects the channel to which commands are applied. It does not switch the channel display LED on the frame. -
Page 110: Measurement Commands
Querying the channels that can be used INST:CAT Queries the channel number that can be used. Query command: INSTrument:CATalog? INST:CAT:FULL Queries the channel number and ID that can be used. Query command: INSTrument:CATalog:FULL? Returns the current setting in response to INST:CAT:FULL?. Example) When channels 1 and 3 can be used Returns CH1,1,CH3,3. -
Page 111: Configuration And Operation Commands
6.5.4 Configuration and Operation Commands Setting the operation mode FUNC Sets the operation mode of the PLZ-U. Or, queries the current setting. If you change the operation mode while the load is turned on, the load is turned off. [SOURce:]FUNCtion[:MODE] Set command: {CC|CR|CV|CCCV|CRCV} Query command: [SOURce:]FUNCtion[:MODE]? - Page 112 Sets the amount of current change per unit time. Or, queries the current setting. Set command: [SOURce:]CURRent:SLEW <slew> Query command: [SOURce:]CURRent:SLEW? • Program data <slew> Value Operation mode Range PLZ150U PLZ70UA 0.10 to 2.40 0.05 to 1.20 0.10 to 0.24 0.05 to 0.12 L (fixed) 24 m 12 m 0.10 to 0.24...
- Page 113 Turn off the load when the OCP trips. POW:PROT Sets the overpower protection. Or, queries the current setting. Set command: [SOURce:]POWer:PROTetion[:LEVel] [:OVER] {<value>|MINimum|MAXimum} Query command: [SOURce:]POWer:PROTection[:LEVel] [:OVER]? • Program data PLZ150U PLZ70UA Selectable range 0 to 165.0 0 to 82.5 Resolution 100 m 100 m Unit POW:PROT:ACT Sets whether to turn off the load or limit the power when the OPP trips.
- Page 114 Setting the range COND:RANG Sets the range of CR mode. Or, queries the current setting. Set command: [SOURce:]CONDuctance:RANGe {LOW|MEDium|HIGH} Query command: [SOURce:]CONDuctance:RANGe? CURR:RANG Sets the range of CC mode. Or, queries the current setting. Set command: [SOURce:]CURRent:RANGe {LOW|MEDium|HIGH} Query command: [SOURce:]CURRent:RANGe? VOLT:RANGE Sets the range of CV mode.
- Page 115 Other settings DISP:MET Switches the measured value display of the load unit. Or, queries the current setting. Set command: DISPlay:METer {0|1|2|3|4} Query command: DISPlay:METer? • Program data Value Voltage and current Voltage and power Power and current Elapsed time and alarm (Alarm display is shown only when an alarm occurs) Input voltage when the load turns off FUNC:SST...
-
Page 116: Trigger Commands
6.5.5 Trigger Commands Triggers are event signals that instruct the PLZ-U to change the output. The trigger ring provides a method for controlling the output variation of the PLZ-U and programming multiple PLZ-Us to respond simultaneously. The trigger ring is effective against processes in which the power varies depending on various operations of the device. - Page 117 Power on ABORt, *RST, DCL Idle XXX: TRIG command INIT[:IMM] or INIT: CONT ON Trigger wait Trigger (GET, *TRG, or hardware trigger) Update the setting INIT:CONT? Fig. 6-2 Trigger wait status control using INIT:CONT INP:TRIG/OUTP:TRIG Turns the load on/off using trigger input. Set command: INPut[:STATe]:TRIGgered {OFF|ON|0|1}...
-
Page 118: Switching Function Commands
6.5.6 Switching Function Commands Executes sequentially the multiple load currents that are specified in CC or CR mode. PULS Turns on/off the switching mode. Or, queries the current setting. Set command: [SOURce:]PULSe[:STATe] {OFF|ON|0|1} Query command: [SOURce:]PULSe[:STATe]? • Program data Value OFF(0) Switching mode off ON(1) -
Page 119: Input State Commands
6.5.7 Input State Commands INP/OUTP Turn ON/OFF the load. Or, queries the current setting. When the loads on multiple channels are turned on simultaneously, there may be an offset of about 10 ms for the loads on different channels to turn on. INPut[:STATe][:IMMediate] Set command: {OFF|ON|0|1}... - Page 120 INP:PROT:CLE/OUTP:PROT:CLE Clears the alarm. Set command: INPut:PROTection:CLEar OUTPut:PROTection:CLEar INP:TIM/OUTP:TIM Sets the cutoff time. Or, queries the current setting. Set command: INPut[:STATe]:TIMer[:STATe] {<value>|MINimum|MAXimum} OUTPut[:STATe]:TIMer[:STATe] {<value>|MINimum|MAXimum} Query command: INPut[:STATe]:TIMer[:STATe]? OUTPut[:STATe]:TIMer[:STATe]? • Program data Value 1 to 99999 or 0 (function off) Resolution 1 Unit INP:DEL/OUTP:DEL Sets the delay time until the load is turned on.
- Page 121 Sequence commands Programs a series of steps. For details, see section 5.6, “Sequence Function.” NOTE • If a command includes notations such as {<conductance>|<cur- rent>|<power>|<voltage> the program data corresponding to the selected program mode is selected. Creating a sequence PROG:MEMO Sets the program memo (comment).
- Page 122 PROG:FSP:END Sets the end step of the sequence mode. Set command: PRGram[:SELected]:FSPeed[:STEP]:END <step> Query command: PRGram[:SELected]:FSPeed[:STEP]:END? • Program data <step> Value 1 to 255 Resolution 1 Example) When step 1 to step 5 are looped PROG:FSP:END 6 PROG:FSP:EDIT Edits an existing sequence step. Or, queries the current setting. If the parameter is omitted, the current value is retained.
- Page 123 Deletes the contents of sequence PROG:CLE Deletes the contents of the sequence. Set command: PROGram:CLEar Executing the sequence PROG:STAT Runs or stops the program. When a program is executed simultaneously on multiple channels, there may be an offset of about 10 ms for the program on different channels to be executed. Set command: PROGram[:SELected]:STATe {RUN|STOP} •...
- Page 124 Other commands SYST:CAP? Queries the SCPI instrument class and the basic functions. (DCPSUPPLY WITH (MEASURE&TRIGGER)) Query command: SYSTem:CAPability? SYST:FORM Queries the configuration of the units inserted into the frame. Slot numbers are counted from the left of the frame as slot 1, slot 2, and so on. Query command: SYSTem:FORMation? Returns the current setting in response to SYST:FORM?.
-
Page 125: Status Registers
Status Registers Status registers are standard functions defined in the SCPI and IEEE 488.2. Status registers can be classified into five groups: SCPI standard OPERation status register, QUEStionable status register, PLZ-U-dedicated CSUMmary register, IEEE488.2 standard event register, and status byte register. SCPI registers OPERation (SCPI requirement) - Page 126 QUEStionable Status (SCPI) QUEStionable:INSTrument:ISUMmary<n> QUEStionable:INSTrument INSTrument1 INSTrument2 INSTrument3 INSTrument4 to QUEStionable: INSTrument5 INSTrument INSTrument6 bit <n> INSTrument7 INSTrument8 INSTrument9 INSTrument10 INSTrument11 INSTrument12 OPERation Status (SCPI) INSTrument13 INSTrument14 OPERation:INSTrument:ISUMmary<n> OPERation:INSTrument INSTrument1 INSTrument2 INSTrument3 INSTrument4 to OPERation: INSTrument5 INSTrument INSTrument6 bit <n> INSTrument7 INSTrument8 INSTrument9...
- Page 127 OPERation status register The OPERation status register is a 16-bit register that stores information related to the operation status of the PLZ-U. Of the bits defined by SCPI, only bits 0 and 5 are used. Table 6-3 OPERation status register (STATus:OPERation) Bit Weight Bit Name Description...
- Page 128 STAT:OPER:NTR Sets the negative transition of the OPERation status register, or queries the current setting. Set command: STATus:OPERation:NTRansition <status-enable> Query command: STATus:OPERation:NTRansition? OPERation:INSTrument subregister Table 6-4 OPERation:INSTrument status register (STATus:OPERation:INSTrument) Bit Weight Bit Name Description NOT USED INSTrument1 INSTrument2 INSTrument3 INSTrument4 INSTrument5 INSTrument6...
- Page 129 STAT:OPER:INST:PTR Sets the positive transition of the OPERation:INSTrument subregister, or queries the current setting. Set command: STATus:OPERation:INSTrument :PTRansition <status-enable> Query command: STATus:OPERation:INSTrument :PTRansition? STAT:OPER:INST:NTR Sets the negative transition of the OPERation:INSTrument subregister, or queries the current setting. Set command: STATus:OPERation:INSTrument :NTRansition <status-enable>...
- Page 130 OPERation:INSTrument:ISUMmary<n> subregister Bit <n> subregister of the OPERation:INSTrument subregister. For example, channel 2 (INSTrument2) is OPERation:INSTrument:ISUMmary2. The <n> values that can be used for the PLZ-U are 1 to 5. Table 6-5 OPERation:INSTrument:ISUMmary status register (STATus:OPERation:INSTrument:ISUMmary) Bit Weight Bit Name Description CALibrating The PLZ-U is in calibration (CAL) mode.
- Page 131 STAT:OPER:INST:ISUM:PTR Sets the positive transition of the OPERation:INSTrument:ISUMmary subregister, or queries the current setting. Set command: STATus:OPERation:INSTrument :ISUMmary<n>:PTRansition <status-enable> Query command: STATus:OPERation:INSTrument :ISUMmary<n>:PTRansition? STAT:OPER:INST:ISUM:NTR Sets the negative transition of the OPERation:INSTrument:ISUMmary subregister, or queries the current setting. Set command: STATus:OPERation:INSTrument :ISUMmary<n>:NTRansition <status-enable>...
- Page 132 QUEStionable status register The QUEStionable status register is a 16-bit register that stores information related to the questionable events and status during PLZ-U operation. These register bits may indicate problems with the output of the PLZ-U. Of the bits defined by SCPI, bits 0, 1, 3, and 4 are used. In addition, bits 9, 10, and 11 are used as dedicated bits of the PLZ-U.
- Page 133 STAT:QUES:NTR Sets the negative transition of the QUEStionable status register, or queries the cur- rent setting. Set command: STATus:QUEStionable:NTRansition <status-enable> Query command: STATus:QUEStionable:NTRansition? QUEStionable:INSTrument subregister Table 6-7 QUEStionable:INSTrument status register (STATus:QUEStionable:INSTrument) Bit Weight Bit Name Description NOT USED INSTrument1 INSTrument2 INSTrument3 INSTrument4 INSTrument5...
- Page 134 STAT:QUES:INST:PTR Sets the positive transition of the QUEStionable:INSTrument subregister, or queries the current setting. Set command: STATus:QUEStionable:INSTrument :PTRansition <status-enable> Query command: STATus:QUEStionable:INSTrument :PTRansition? STAT:QUES:INST:NTR Sets the negative transition of the QUEStionable:INSTrument subregister, or queries the current setting. Set command: STATus:QUEStionable:INSTrument :NTRansition <status-enable>...
- Page 135 QUEStionable:INSTrument:ISUMmary<n> subregister Bit <n> subregister of the QUEStionable:INSTrument subregister. For example, channel 2 (INSTrument2) is QUEStionable:INSTru- ment:ISUMmary2. The <n> values that can be used for the PLZ-U are 1 to 5. Table 6-8 QUEStionable:INSTrument:ISUMmary status register (STATus:QUEStionable:INSTrument:ISUMmary) Bit Weight Bit Name Description Over Voltage Over Current...
- Page 136 STAT:QUES:INST:ISUM:PTR Sets the positive transition of the QUEStionable:INSTrument:ISUMmary subregis- ter, or queries the current setting. Set command: STATus:QUEStionable:INSTrument :ISUMmary<n>:PTRansition <status-enable> Query command: STATus:QUEStionable:INSTrument :ISUMmary<n>:PTRansition? STAT:QUES:INST:ISUM:NTR Sets the negative transition of the QUEStionable:INSTrument:ISUMmary subregis- ter, or queries the current setting. Set command: STATus:QUEStionable:INSTrument :ISUMmary<n>:NTRansition <status-enable>...
- Page 137 CSUMmary status register Registers dedicated to the PLZ-U. Bits 0, 1, 2, 3, and 8 are used. Table 6-9 CSUMmary status register (STATus:CSUMmary) Bit Weight Bit Name Description Switched to CC mode. Switched to CV mode. Switched to CR mode. Not Used PRUN PROGram is being executed.
- Page 138 CSUMmary:INSTrument subregister Table 6-10 CSUMmary:INSTrument status register (STATus:CSUMmary:INSTrument) Bit Weight Bit Name Description NOT USED INSTrument1 INSTrument2 INSTrument3 INSTrument4 INSTrument5 INSTrument6 INSTrument7 INSTrument8 INSTrument9 1024 INSTrument10 2048 INSTrument11 4096 INSTrument12 8192 INSTrument13 16384 INSTrument14 32768 NOT USED Always zero STAT:CSUM:INST Queries the event of the CSUMmary:INSTrument subregister.
- Page 139 STAT:CSUM:INST:NTR Sets the negative transition of the CSUMmary:INSTrument subregister, or queries the current setting. Set command: STATus:CSUMmary:INSTrument :NTRansition <status-enable> Query command: STATus:CSUMmary:INSTrument :NTRansition? CSUMmary:INSTrument:ISUMmary<n> subregister Bit <n> subregister of the CSUMmary:INSTrument subregister. For example, channel 2 (INSTrument2) is CSUMmary:INSTrument:ISUMmary2. The <n> values that can be used for the PLZ-U are 1 to 5. Table 6-11 CSUMmary:INSTrument:ISUMmary status register (STATus:CSUMmary:INSTrument:ISUMmary) Bit Weight...
- Page 140 STAT:CSUM:INST:ISUM:PTR Sets the positive transition of the CSUMmary:INSTrument:ISUMmary subregister, or queries the current setting. Set command: STATus:CSUMmary:INSTrument :ISUMmary<n>:PTRansition <status-enable> Query command: STATus:CSUMmary:INSTrument :ISUMmary<n>:PTRansition? STAT:CSUM:INST:ISUM:NTR Sets the negative transition of the CSUMmary:INSTrument:ISUMmary subregister, or queries the current setting. Set command: STATus:CSUMmary:INSTrument :ISUMamry<n>:NTRansition <status-enable>? Query command: STATus:CSUMmary:INSTrument...
- Page 141 Preset status STAT:PRES Specific events are reported at a higher level by constructing status data and using the status reporting system. These events are summarized in the required structures, OPERation status register, and QUEStionable register. The STAT:PRES command only affects the ENABle register and the transition filter register of the status data structure.
-
Page 142: Ieee488.2 Registers
6.6.2 IEEE488.2 Registers Standard event status register The standard event status register bits are set when certain events occur during PLZ- U operation. All bits of the standard event status register are set by the error event queue. The register is defined by the IEEE488.2 standard. IEEE488.2 common commands *ESE, *ESE?, and *ESR? are used to control the register. - Page 143 Status byte register The status byte register stores STB and RQS (MSS) messages as defined by the IEEE488.1 standard. The status byte register can be read using IEEE488.1 serial polling or IEEE488.2 common command *STB?. When serial polling is carried out, bit 6 responds to the request service (RSQ). The status byte value is not changed by serial polling.
- Page 144 6-52 Remote Control PLZ-U...
-
Page 145: Chapter 7 Maintenance
Chapter 7 Maintenance This chapter explains the PLZ-U maintenance. PLZ-U Maintenance 7-1... -
Page 146: Cleaning The Panels
Maintenance Periodic maintenance and inspection are essential to maintain the initial perfor- mance of the PLZ-U over an extended period. WARNING • Be sure to turn off the POWER switch and remove the power cord plug or turn off the switchboard. If you do not, death or injury may result from elec- tric shock. -
Page 147: Inspecting The Power Cord
The electrolytic capacitors, fan motor, and rechargeable battery for memory backup inside the PLZ-U are consumable parts. It is recommended that the PLZ-U be over- hauled every 10000 operating hours along with internal inspection and cleaning. To have your PLZ-U overhauled,, contact your Kikusui agent or distributor. PLZ-U Maintenance 7-3... -
Page 148: Confirming Status Of The Fuse
LED may lights on even the fuse does not blow off. Calibration The PLZ-U is shipped after carrying out appropriate calibrations. We recommend periodic calibration to maintain the performance. For calibration, contact your Kikusui agent or distributor. 7-4 Maintenance PLZ-U... -
Page 149: Malfunctions And Causes
In some cases, the problem can be solved quite easily. If you find an item that corre- sponds to your case, follow the remedy for the item. If the remedy does not solve the problem or if your case does not match any of the items, contact your Kikusui agent. - Page 150 Symptom Check Items Remedy Reference The current does not flow immediately Shorten the delayed load- Section 5.9, “Configu- Is delayed load-on specified? when the load is on time. ration Settings” turned on. Unable to turn on the Is FRAME CONT connector 1 Set FRAME CONT con- Section 5.10.1, load from the FRAME...
- Page 151 Symptom Check Items Remedy Reference Section 5.3, “Switch- Is switching mode enabled? Clear switching mode. ing Function” If the input terminal voltage Is the input terminal voltage greater “Rating” of section 8.1, is less than the minimum than or equal to the minimum volt- “Electrical Specifica- voltage, increase the volt- Unable to supply the...
- Page 152 An alarm occurs. Symptom Check Items Remedy Reference Check the alarm type and Section 4.4, “Protec- An alarm occurs. Check the alarm number. carry out the appropriate tion Functions and remedy. Alarms” Section 2.7.1, “Precau- The UVP trips Is there a large loop in the load Shorten and twist the load tions Concerning Wir- during switching.
-
Page 153: Chapter 8 Specifications
Chapter 8 Specifications This chapter lists the electrical and mechanical specifications of the PLZ-U. PLZ-U Specifications 8-1... -
Page 154: Electrical Specifications
** % of f.s denotes ** % of the rated input voltage, rated input current, or rated input power. • **% of rdg represents denotes ** % of the input voltage, input current, or input power reading. Model PLZ150U PLZ70UA Rating 1.5 V to 150 V 0 V to 150 V Operating voltage (DC) - Page 155 Model PLZ150U PLZ70UA CR mode Operating range Range OPEN to 50 mΩ (0 S to 20 S) OPEN to 100 mΩ (0 S to 10 S) The value inside parentheses OPEN to 500 mΩ (0 S to 2 S) OPEN to 1 Ω (0 S to 1 S) is the conductance.
- Page 156 Model PLZ150U PLZ70UA Switching mode Operation mode CC and CR Selectable frequency range 1 Hz to 20 kHz Duty cycle setting 2 % to 98 %, 0.1 % steps Frequency resolution 1 Hz to less than 1 kHz 1 Hz...
- Page 157 Protection function Overvoltage protection (OVP) Turns off the load at 110 % of the rated voltage Overcurrent protection (OCP) Set the value in the range of 0 % to 110 % of the rated current of H range. Trips at the value or 110% of the rated current of the range, whichever is less.
-
Page 158: General Specifications
Sets panel functions except the POWER switch and key lock and reads measured values Baud rate: 2400, 4800, 9600, or 19200 bps; stop bit: 1; data length: 8 bits; parity: NONE; and flow control: XON/OFF. General Specifications Model PLZ150U PLZ70UA Weight Approx. 2 kg Accessories Rear load input terminal cover 1 pc. - Page 159 Model PLZ30F PLZ50F Rated supply voltage 100 VAC to 240 VAC (90 VAC to 250 V) single phase Rated frequency 50 Hz or 60 Hz (47 Hz to 63 Hz) Power consumption Frame alone 33 VA or less 40 VA or less When load units are 300 VAmax 500 VAmax...
-
Page 160: Dimensions
Dimensions Unit: mm (inch) Fig.8-1 Outline drawing (PLZ-30F) Unit: mm (inch) Fig. 8-2 Outline drawing (PLZ-50F) 8-8 Specifications PLZ-U... -
Page 161: Appendix
However, the specifications are not guaranteed. For the operating areas of each individual model, see appendix A.3, “Operating Area of Each Model.” Operating area where specifications are guaranteed PLZ150U Operating area where (1.5 V input type) specifications are guaranteed Actual operating area... -
Page 162: Basic Operation Modes
Basic Operation Modes The following five operation modes are available on the PLZ-U. 1. Constant current mode (CC mode) 2. Constant resistance mode (CR mode) 3. Constant voltage mode (CV mode) 4. Constant current and constant voltage mode (CC+CV mode) 5. - Page 163 Operating area Constant power line OPP trip point (OPP setting) Logarithmic scale Input current [A] Fig. A-3 Transition of the operating point in CC mode (OPP trip point) Fig. A-3: Operation on segment AB If the voltage of the constant-voltage power supply is set to V1 and the input current (load current) of the PLZ-U is increased, the operating point moves along segment When point B is reached, overpower protection (OPP) trips.
-
Page 164: Operation Of The Cr Mode
A.2.2 Operation of the CR Mode In CR mode, the PLZ-U supplies current proportional to the voltage variation. ■ CR mode operation When the PLZ-U is used in CR mode, the PLZ-U operates as a resistive load as shown in Fig. A-4. When the voltage (V1) of the constant-voltage power supply is varied, the PLZ-U supplies current to meet I=V/R according to the specified resis- tance R. - Page 165 If the function for turning off the load when the OPP trips is on, the load is turned off. If the function for turning off the load when the OPP trips is off (set to limit), the PLZ-U supplies current as a constant power load at point B. Even if you attempt to increase the input current by decreasing the resistance, the current is limited at point B.
-
Page 166: Operation Of The Cv Mode
TableA-3 Action taken when the OCP trips Load-off function Turns off the load (stops the current supply). The PLZ-U no longer operates as a load. Point Load-off function CR mode ends. OCP continues, and the PLZ-U off (limit) supplies current as a constant current load. A.2.3 Operation of the CV Mode In CV mode, the PLZ-U supplies current so that the voltage at the load input end of... - Page 167 We assume that the overcurrent protection (OCP) setting I is greater than current I at point N and denote the voltage of the constant voltage power supply as V . When the voltage of the PLZ-U is equal to V >...
-
Page 168: Operation Of The Cc+Cv Mode
If the function for turning off the load when the OCP trips is on, the load is turned off. If the function for turning off the load when the OCP trips is off (set to limit), the PLZ-U supplies current as a constant current load at point L. Even if you attempt to decrease the voltage, the current is limited at point L. - Page 169 Constant current line (Constant current settings: I , and I Operating area OPP trip point Constant power line (OPP setting) Constant voltage line (Constant voltage setting) Logarithmic scale Input current [A] Fig. A-11 Transition of the operating point in CC+CV mode (OPP trip point) We denote the voltage of the battery as V .
-
Page 170: Operation Of The Cr+Cv Mode
A.2.5 Operation of the CR+CV Mode The PLZ-U allows you to add CV mode to CR mode. ■ CR+CV mode operation When the PLZ-U is used in CR+CV mode, the PLZ-U operates as a constant resis- tance load and a constant voltage load (shunt regulator) as shown in Fig. A-12. When operating as a constant resistance load and the voltage (V ) of the constant- voltage power supply is varied, the PLZ-U supplies current to meet I=V/R accord-... - Page 171 We assume that the overcurrent protection (OCP) setting I is greater than cur- rent I at point N and denote the voltage of the battery as V . In CR mode, if the resistance is decreased (R ) to increase the input current (load cur- →R →R rent), the operating point moves along segment MN (M...
- Page 172 We assume that the overcurrent protection (OCP) setting I is less than the cur- rent produced by the tripping of the overpower protection (OPP) and denote the voltage of the battery as V . In CR mode, if the resistance is decreased ) to increase the input current (load current), the operating point →R →R...
-
Page 173: Operating Area Of Each Model
Operating Area of Each Model A.3.1 Operating Area of the PLZ150U Operating area where specifications are guaranteed Actual operating area Operating area where PLZ150U specifications are guaranteed (1.5 V input type) H range Actual operating area Low voltage area Input current [A]... -
Page 174: Operating Area Of The Plz70Ua
A.3.2 Operating Area of the PLZ70UA PLZ70UA (0 V input type) Operating area where H range specifications are guaranteed Input current [A] PLZ70UA (0 V input type) Operating area where M range specifications are guaranteed 0.01 Input current [A] PLZ70UA (0 V input type) Operating area where specifications are guaranteed... -
Page 175: Sequence Program Creation Table
Sequence Program Creation Table Program name: Date: Channel numbers (1 to 5) Memo Operation mode CC , CR Range (A) RPT (1 to 9999) Last load (OFF/ON) OFF , ON Value Step Number Execution Time Note PLZ-U Appendix A-15... -
Page 176: Scpi Command Reference
Indicates whether the PLZ-U supports the query version of the listed command. • Note 1: 1, 2, and 3 indicate SCPI standard command, command in review, and KIKUSUI original command, respectively. • Note 2: indicates commands that are affected by *RCL, *SAV, and *RST. - Page 177 IEEE 488.2 commands SCPI Command Description Query *CLS Clears the status data structures. *ESE Sets the standard event status enable register bits. *ESR? Queries the standard event status register. Query only *IDN? Queries the identification string. (Manufacturer information) Query only *OPC Causes the device to generate the operation complete message in the standard event status register when all pending selected device operations have been finished.
- Page 178 Configuration and operation commands SCPI Command Description Query Note 1 Note 2 [SOURce:]FUNCtion [:MODE] {CC|CV|CR|CCCV|CRCV} Sets the operation mode of the PLZ-U. :SSTart Sets soft start in CC mode.. {0.1MS|1MS|3MS|10MS|30MS|100MS| 300MS|MINimum|MAXimum} [SOURce:]CONDuctance [:LEVel][:IMMediate] Sets the conductance of CR mode. [:AMPLitude] {<conduc- tance>|MINimum|MAXimum} :RANGe {LOW|MEDium|HIGH} Sets the range of CR mode.
- Page 179 Trigger commands SCPI Command Description Query Note 1 Note 2 ABORt Clears the trigger-wait status and returns to idle. INPut[:STATe]:TRIGgered {OFF|ON} Turns the load on/off using trigger input. OUTPut[:STATe]:TRIGgered {OFF|ON} Turns ON/OFF the trigger input. INITiate [:IMMediate] Transitions to the trigger wait status, but automati- cally returns to idle when a trigger is activated.
- Page 180 Sequence commands SCPI Command Description Query Note 1 Note 2 PROGram:CLEar Initializes the entire program. PROGram[:SELected] :STATe {RUN|STOP} Executes the selected program or changes the operating status. :EXECuting? Queries the state of the program currently run- Query ning. only :MEMO "<string>" Sets the memo of the selected program.
- Page 181 Status commands SCPI Command Description Query Note 1 Note 2 STATus:PRESet Controls the auto power-on clearing of the service request enable register, standard event status enable register, parallel poll enable register, and other event enable registers. STATus:OPERation :CONDition? See Table 6-3, “ OPERation status register (STA- Query Tus:OPERation)”...
- Page 182 Status commands continued STATus:QUEStionable:INSTrument:ISUMmary<n> :CONDition? See Table 6-8, “ QUEStionable:INSTru- Query ment:ISUMmary status register (STATus:QUES- only tionable:INSTrument:ISUMmary)” on page 43. :ENABle <status-enable> [:EVENt]? Query only :NTR :PTR STATus:CSUMmary :CONDition? See Table 6-9, “ CSUMmary status register (STA- Query Tus:CSUMmary)” on page 45. only :ENABle <status-enable>...
-
Page 183: Error Messages
Error Messages A.6.1 Overview Errors, when detected, are placed in the queue. The queue functions as a FIFO. When the queue overflows, the last error in the queue is replaced by Error -350 (queue overflow). When all the errors are read from the queue, 0 (no error) is returned for subsequent error queries. - Page 184 Error Code Error Message Description -140 Character data error This error is generated when parsing a character data element. -150 String data error This error is generated when parsing a string data element. -160 Block data error This error is generated when parsing a block data element. -170 Expression error This error is generated when parsing an expression data element.
- Page 185 Errors specific to the PLZ-U Error Code Error Message Description Operation denied due to ALARM state Operation denied due to PROGRAM running Operation denied due to SWITCH running Operation denied due to INPUT ON Operation denied due to incompatible FUNCTION MODE Operation denied due to incompatible PROGRAM MODE PLZ-U Appendix A-25...
- Page 186 A-26 Appendix PLZ-U...
-
Page 187: Index I
Index Symbols CR mode A-4 CR+CV mode A-10 +CV 3-3 current monitor output 5-28 +S and –S 3-12 CV 3-3 CV mode A-6 Numerics CV/+CV 3-3 0 V type 1-3 DC INPUT 3-8 3-12 A key 3-5 delayed load-on 4-5 ABC preset memories 5-3 dimensions 8-8 ABC preset memory indicator 3-9... - Page 188 IEEE 488.2 OCP 3-6 common commands 6-2 OHP 4-10 status event commands 6-51 operating area of each model A-13 INDEP key 3-9 operating area of PLZ-U A-1 independent mode 3-3 operating humidity range 2-4 installation location 2-4 operating temperature range 2-4 interface setup 6-10 operation mode indicator 3-9 inter-frame control 5-24...
- Page 189 STEP 3-5 step execution time 5-9 rack mount bracket 1-5 step numbers 5-9 rack mounting 1-5 storage humidity range 2-4 RANGE 3-4 storage temperature range 2-4 range indicator 3-4 STORE 3-7 RANGE/V RANGE key 3-3 STORE indicator 3-4 rear panel 3-11 SW indicator 3-4 RECALL 3-6 SW ON 3-5...
- Page 190 I-4 Index PLZ-U...
- Page 192 In either case, please contact your Kikusui agent or distributor. At that time, inform your agent or distributor of the “Part No.” written on the front cover of this manual.
Need help?
Do you have a question about the PLZ150U and is the answer not in the manual?
Questions and answers