Table of Contents
Advertisement
Quick Links
Advertisement
Table of Contents

Summary of Contents for Capital Play CAPITAL PRO MASTER
- Page 1 10ft x 6ft (305cm x 180cm) & 11ft x 8ft (335cm x 245cm) CAPITAL PRO MASTER RECTANGULAR TRAMPOLINES Installation Manual & Safety Instructions Capital Play Ltd. 2/3 Higher Park Farm, Halebourne Lane, Chobham, Surrey, GU24 8SL, UK Tel: 0044 1276 855600. E: sales@capitalplay.co.uk...
-
Page 2: Table Of Contents
Step 4 – Assembling the Enclosure Page 8 Important Information Page 10 Using the Trampoline Page 11 Bounce Skills Page 11 Care & Maintenance Page 12 Safety Certification The Capital Pro Master trampolines conform to the new EN71-14 ‘Trampolines for Domestic Use’ safety standard. -
Page 3: Parts List
PARTS LIST Part A Part B Part C Part D Corner Section Corner Section Corner Section Corner Section Plug - Socket Plug- Socket Plug - Plug Plug - Plug Quantity: 1 Quantity: 1 Quantity: 1 Quantity: 1 Part E Part F Part G Middle Section Socket - Socket Middle Section Plug - Socket... -
Page 4: Step 1: Assembling The Frame
STEP 1: ASSEMBLING THE FRAME Lay out the frame in accordance with below with the spring holes facing upwards. Push all sections together ensuring all sections are fully mated together. Note: on the long sides, the frame will appear to bow outwards – this is by design. When the springs are attached the frame will get pulled inwards, but will always have a slight outwards bow. - Page 5 Your fully inserted leg section should look like this with the socket enclosure on the inside of the frame.
-
Page 6: Step 2: Fitting The Jump Mat
STEP 2: FITTING THE JUMP MAT BASIC INFORMATION: a) Getting the springs the right way round. You attach the more tightly curled end of the springs to the D-rings on the jump mat. You will need to use the Spring Tool (Part K) to b) Attaching the springs attach the Springs (Part J) to the frame. -
Page 7: Step 3: Fitting The Surround Pads
STEP 3: FITTING THE SURROUND PADS Lay the Surround Pads (Part L) on top of the frame. Then, on the underside of the pads, push an elasticated tie through the two eyelets and then wrap around the frame edge and tie off. Repeat for all 16 ties. -
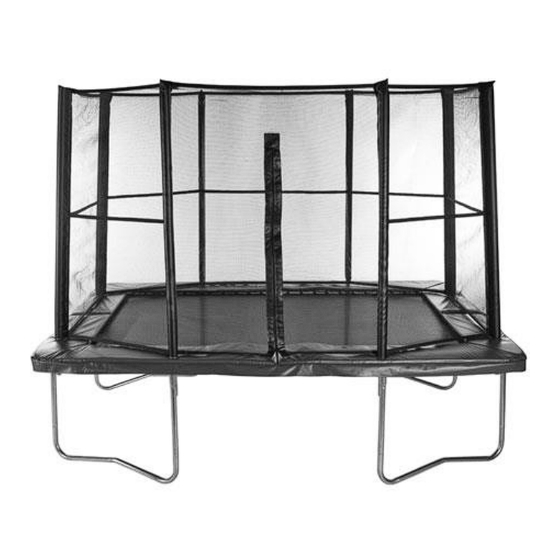
Page 8: Step 4: Assembling The Enclosure
STEP 4: ASSEMBLING THE ENCLOSURE • Take the Sleeved Net & eight Enclosure Poles (Part N) and lay flat on the trampoline mat with the zip entrance facing towards you. • Insert two enclosure poles into the sleeves on either side of the zip in positions 1 and 2 of this diagram. - Page 9 USING THE LADDER AND COVER The Ladder (Part O) is pre-assembled and just hooks over the frame in front of the zip entrance. The Protective Cover (Part P) sits within the enclosure and lays over the jump mat. There are eight eyelets which line up with the eight enclosure poles.
-
Page 10: Important Information
IMPORTANT INFORMATION 1. WARNING! ADULT SUPERVISION AND INSTUCTION IS REQUIRED AT ALL TIMES 2. Make sure the trampoline is placed on a level surface and free of obstacles. 3. Ensure an area within a radius of 2 meters is free of obstacles and objects. 4. -
Page 11: Using The Trampoline
USING YOUR TRAMPOLINE • Inspect the trampoline before each use. Any damaged or worn parts must be replaced. • Make sure there are no children, animals or obstructions underneath the trampoline. • Don’t use when it is wet or windy as this may cause you to fall and injure yourself. •... -
Page 12: Care & Maintenance
• Keep mat in good condition by using a cover. (available to buy from our website). Damage can be caused by water pooling, garden/outdoor debris landing on it, and sparks from nearby bonfires and fireworks displays. For a full range of accessories and replacement parts call Capital Play on 01276 855600 or visit our website: www.capitalplay.co.uk...
Need help?
Do you have a question about the CAPITAL PRO MASTER and is the answer not in the manual?
Questions and answers