Table of Contents
Advertisement
Advertisement
Table of Contents

Related Manuals for Digitax F3 Plus


Summary of Contents for Digitax F3 Plus
- Page 1 Taximeter Technical Manual Programming and Installation...
-
Page 2: About This Manual
• "E-Seal" Electronic Sealing (2ndt section) • F3 Inscriptions • Embedded Printer • Programming Parameters • Flow Charts This document is exclusive property of Digitax Srl. The Digitax Company reserve the right to change the functions and specifications of F1 taximeter without notice. - Page 3 You must install them by yourself following the scheme. You will be PINK responsible for every damage you can cause for the omission of the fuses. Digitax rejects any legal responsability. BLACK Hardware Optional + 12 V...
- Page 4 F3 Pin Out Connectors FOR HIRE STOP TARIFA TRANSDUCER TRANSDUCER POWER SUPPLY POWER SUPPLY PERIPHERALS PERIPHERALS CONNECTOR CONNECTOR CONNECTOR CONNECTOR CONNECTOR CONNECTOR BOTTOM VIEW BOTTOM VIEW LEGEND POWER SUPPLY Connections INPUT BATTERY + 12 VOLTS INPUT PASSENGER DETECT SENSOR INPUT +12 VOLTS CAR LIGHTS INPUT GROUND ( CAR BODY ) 12 VOLTS (ROOF TOP LIGHT) Max 3 A 12 VOLTS POWER OUTPUT (LIGHT 1 ) Max 1 A *...
- Page 5 How to fix the Taximeter DashBoard Screw 3MA 7 x 29.5 mm ALTERNATIVES WAYS TO FIX THE TAXIMETER WITHOUT MODIFING THE DASHBOARD Sealed to the Taximeter Screw 4MA 7 x 26 mm BY A DOUBLE BY A VELCRO STRAP SIDE GLUED TAPE...
- Page 6 How to assemble the Sensor Box SENSOR Screws A Sheathing Screws B Screws B Speedometer Cable Clamps 1) Take out the internal wire from the sheathing. 36 m/m 2) Shorten the sheating 36 m/m Clamps 3) Insert both ends of the sheathing Screws B Screws B in the clamps and tight the 4...
- Page 7 Mechanical Sealing Sealing Screw Sealing bush Sealing Wire Sealing Lead Disk Other way to seal Programming Cover the Programming Cover Sealing Bush Sealing Screw Sealing Disk (Plastic or Lead)
- Page 8 For Hire - Stopped -Hired The Operative Mode The taximeter works with 3 working modes: HIRED FOR HIRE STOPPED In any of these modes it is possible to have different functions actived by pressing one of the 5 taximeter’s buttons: OP - K1 - K2 - K3 - K4 FOR HIRE STOPPED...
- Page 9 The “K Constant” is the number of pulses per Kilometer emitted by a transducer and received by a taximeter. Constant = Pulses/Kilometer The pulses can be emitted by the car’s electronic transducer or, if the car is not provide of it, by the Digitax mechanical one. This constant can be knowed or be tested on road.
- Page 10 Time and Date setting HOW TO SET THE TAXIMETER’S TIME AND DATE Select For Hire position. FOR HIRE STOPPED HIRED N D Press at the same time. The big display will show “Time” for a few seconds. FOR HIRE STOPPED HIRED NIGHT DAY TIME FARE €...
- Page 11 Time Synchro THE F3 TIME CLOCK CAN BE SYNCHRONIZED TO EXACTLY THE 12:00 AM, ONCE EVERY 7 DAYS, BETWEEN THE 11:58 AND 12:02. The Time Synchro works only if the the manual time setting is disabled (Q 269=Yes). When the taximeter clock is between the 11:58 and 12:02, the clock can be synchronized at exactly 12:00 AM by pressing the K1 + K3 keys at the same time.
- Page 12 Diagnostic Self-Test (Check Sum) With this procedure it is possible to: calculate the tariffs check sum print out the tariff program. check the proper operation of both displays How to enter the Self-Test function FOR HIRE STOPPED HIRED N D Select For Hire position.
- Page 13 Statistical Memory How to Read the Locations Memory Content The taximeter records and keeps data in 2 Memory Blocks , each one divided in 45 locations Block 1 allows to read, print or erase its information whenever desired. Block 2 allows to read and print its content but not to erase it.
- Page 14 Statistical Memory How to Print Locations Memory Content The taximeter records and keeps data in 2 Memory Blocks , each one divided in 45 locations The content of both Block1 and Block 2 can be printed out. HOW TO PRINT THE BLOCKS MEMORY INFORMATION Select For Hire position.
- Page 15 Statistical Memory How to Erase the Locations Memory Content The taximeter records and keeps data in 2 Memory Blocks , each one divided in 45 locations The content of both Block1 Block 2 can be erased (if allowed by the setup). ERASING PROCEDURE Select For Hire...
- Page 16 “Trip by Trip” Events Memory Buffer The “Trip by Trip” is a long memory buffer where the taximeter store the events informations (trips, shifts, etc.). It can be able to record and store, depending the buffer version, till 9000 events. It’...
- Page 17 “Trip by Trip” Print Out Format The “Trip by Trip” Memory buffer can record various events in its locations. • Normal Trip Trip with the passenger on board in Hired mode • Black Trip Trip made with the passenger on board but in For Hire mode •...
-
Page 18: General Description
The Tariff General description The taximeter calculates the tariff thanks to the interaction of 429 programmable parameters. They work into a block. The F1 have 63 parameters blocks that can be programmed to generate even the most complex tariff. Two blocks are very particular: Block 0 and the Working Block. Working Block 0 is the StartUp block that loads per default all the... - Page 19 The “ProgDate” “Progdate” is a kind of taximeter programming based on time events. This means that is possible to define a period of time during which a particular action is performed by the taximeter. The F3 meter can be programmed with up to 50 ProgDate records, every one with different activation times or action to be performed.
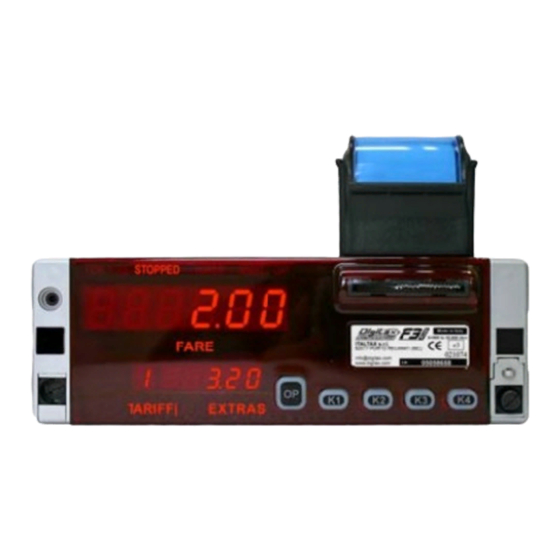
- Page 20 FOR HIRE STOPPED HIRED NGHT 000000 Made in Italy FARE € k=500 to 32.000 i / km ITALTAX, s.r.l. 62017 PORTO RECANATI (MC) 021074 info@digitax.com 05052640 www.digitax.com S.N. 00000 TARIFF EXTRAS € Key Connector Program Key (Black) Memory Key (Blue)
- Page 21 "Tariff-Show" The "Tariff Show" is a viewer function located in a specific menu , which allows the view of the programmed parameters of all tariffs. The "Tariff-Show" reading is included in a multi-menu. This is the procedure to enter on it TAR SH For Hire 3) Select...
- Page 22 "E-Seal"- Electronic Sealing: 1st Section The "E-Seal" is a non-erasable memory spitted in two sections where, in the first section, are recorded the last 99 (FIFO) alterations made on the programming functions. These are shown on the displays or printed, with detailed information of: index nr, event, date, year and hour.
- Page 23 "E-Seal"- Electronic Sealing: 2nd Section To read the second section is necessary to reach the last recorded event (max 99) by scrolling up all the first section by pressing key. At the last recorded event of the first section, the second section can be selected and showed by pressing key.
- Page 24 F3 Inscriptions...
- Page 25 Embedded Printer How to change the Paper Roll Slightly move out both printer holders and pull up the printer paper holder Take out the printer cap to fit the paper roll After having inserted the paper roll put the printer in its housing Paper roll fittings Close the paper holder...
-
Page 26: Programming Parameters
~ Programming Parameters ~ Here follows the complete list of F1 tariff parameters. They are 429 questions to the user. Param. Functions Param. Number Value Index fo displayed tariff This is the number or letter to be displayed on the digit on the left hand-side of the secondary (small) display. The display can show one of the following numbers or letters either in normal mode or in blinking mode (add 16 to the chosen value): DISPLAY "0"... - Page 27 EXTRA-CHARGE N. 3 Percentage or Fixed-Cost of Extra-Charge n.3 in Stopped with K2: this is the percentage or Fixed-Cost of extra-charge number 3 in Stopped that can be applied with 0 -65535 key K2. In order to establish whether this value has to be interpreted as a percentage or as a cost consult Q.30. The cost is given in the local currency with an accuracy cost or of 1.
- Page 28 Percentage or cost in Prog-Date 3 - This is the percentage or the cost that will be applied during the date and time as programmed in Prog-Date 3. The interpretation 0 - 65535 as a percentage or as a cost depends on questions Q.66 to Q.73. In case of percentage consider Q.66 to Q.69, Q.71 and Q.73. Questions Q.70 and Q.72 should be percentage/ answered with: NO.
- Page 29 Insert as fixed cost in Prog-Date 7 - When passing from HIRED to STOPPED in Prog-Date 7 should the parameter of Q.109 be inserted as a fixed cost ? No / Yes Insert as percentage in Prog-Date 7 - When passing from Hired to Stopped in Prog-Date 7 should the parameter of Q.109 be inserted as a percentage? No / Yes Insert as fixed cost in Prog-Date 7 with K1 - Passing from Hired to Stopped in Prog-Date 7 should the parameter of Q.109 be inserted as a fixed cost pressing key No / Yes...
- Page 30 PROG-DATE N. 8 Block-number in Prog-Date 8 -The block number (absolute) to be used during the date and hour programmed in Prog-Date 8. The allowed value goes from 0 (min) to 0 - 62 62 (max). Block-offset in Prog-Date 8: the block offset (relative) to be used during the date and hour programmed in Prog-Date 8. The relative block offset is the number of 0 - 62 blocks to add to the current block number in order to obtain the new block number.
- Page 31 Act. Only Above cross-speed? (if not: Allw.) - Event Counter 2 should be activated only above the cross-speed? If not then it will allways be activated. The allowed No / Yes answer is either: 0 (No: always) or: 1 (Yes: only above). Event Counter is momentarily suspended? - Event Counter 2 should be momentarily suspended? If not then it will be active.
- Page 32 n. 1 gets lost. The alarm-velocity is given in Km/h with an accuracy of 1 Km/h. The allowed value goes from 0 (min) to 255 (max). The value 0 is a special case (default). If 0 is programmed then the alarm speedometer is disabled. ~ F3plus Programming Parameters...
- Page 33 Speedometer velocity-step: this is the step-amount (of velocity) with which the threshold of the speedometer gets decremented or incremented every time key K3 0-255 (dec.) or key K4 (inc.) is pressed. The velocity-step is given in Km/h with an accuracy of 1 Km/h. The allowed value goes from 0 (min) to 255 (max).
- Page 34 LIGHT N. 4 Enable light n. 4 ON in day-time? - Should it be possible for light number 4 to be ON during the day-time? No / Yes The allowed answer is either: 0 (No: disabled) or: 1 (Yes: enabled). Light n.
- Page 35 PRINTER Number of tickets with cash payment: this is the number of tickets that should be printed if the client pays with cash. 0 - 65535 The number of tickets is given in whole numbers. The allowed value goes from 0 (min) to 65535 (max). Number of tickets with corporate credit card: this is the number of tickets that should be printed if the client pays with a corporate credit card.
- Page 36 0 (No: COM1) or: 1 (Yes: COM2). COM2 COM1 protocol is Digitax or custom? - The protocol used for data-transmission on COM1 is the Digitax protocol or a custom protocol? 0= Digitax See also Q.383, Q.384 and Q.386, Q.387. The allowed answer is either: 0 (No: Digitax protocol) or: 1 (Yes: custom protocol).
- Page 37 Maximum packet length for COM 1: what is the maximum length of a data-packet of COM 1? The packet length is given in byte with an accuracy of 1 byte. The 0 - 512 allowed value goes from 1 (min) to 512 (max). Baudrate for COM 2: what is the baudrate (transmission-speed) of COM 2? The baudrate is given in baud with an accuracy of 1 baud.
Need help?
Do you have a question about the F3 Plus and is the answer not in the manual?
Questions and answers
cloc error
A clock error on the Digitax F3 Plus likely means the internal clock is not synchronized correctly. This can happen if the manual time setting is enabled (Q 269 = No), or if the clock was not synchronized to exactly 12:00 AM during the allowed time window (between 11:58 and 12:02). Proper synchronization requires pressing the K1 + K3 keys at the same time during that window.
This answer is automatically generated