Table of Contents
Advertisement
Advertisement
Table of Contents

Subscribe to Our Youtube Channel
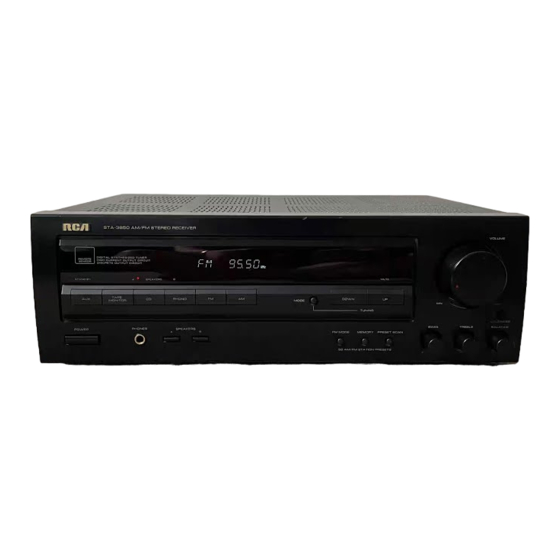
Summary of Contents for RCA Stereo Receiver with Remote Control
- Page 1 200 Watt Stereo Receiver with Remote Control...
-
Page 2: Table Of Contents
CONTENTS Introduction ... 3 The FCC Wants You To Know ... 3 Preparation ... 5 Positioning Speakers ... 5 Connecting Speakers ... 5 Preparing the Speaker Wires ... 5 Connecting Speakers to the A and B Terminals ... 5 Connecting Program Sources ... 6 Connecting a Turntable ... -
Page 3: Introduction
INTRODUCTION Your RCA 200 Watt Stereo Receiver operates as the perfect control center for your audio system. It combines 100 watts-per-channel of clean power with modern styling. It provides connections for one tape deck, a turntable, a CD player, and one other audio source, such as audio from a digital video disk (DVD) player. - Page 4 Water and Moisture — Do not use this product near water (for example, near a bathtub, washbowl, kitchen sink, or laundry tub; in a wet basement; or near a swimming pool). Accessories — Do not place this product on an unstable cart, stand, tripod, bracket, or table.
-
Page 5: Preparation
B SPEAKERS • RCA and other high-quality speakers have color-coded speaker terminals (red for positive polarity and black for negative polarity). Use these color-coded terminals as a guide to help you properly connect the speakers to the receiver. -
Page 6: Connecting Program Sources
3. Connect the ridged or color-coded conductor’ s loose end to the speaker’ s positive (+) terminal. 4. Connect the remaining loose conductor to the speaker’ s negative (–) terminal. CONNECTING PROGRAM SOURCES Note: Use shielded audio cables with phono connectors for all audio connections. -
Page 7: Fm Antennas
You can also use an optional RadioShack shortwave antenna kit, which makes an excellent outdoor AM antenna. Connect the outdoor AM antenna wire to the receiver’ s AM ANTENNA FM Antennas Connect the supplied FM antenna to the terminal as shown then extend it. For better FM reception, you can also use a rabbit-ear TV antenna (for indoor use only) or an outdoor VHF TV antenna. -
Page 8: Installing Batteries
INSTALLING BATTERIES Cautions: • Use only fresh batteries of the required size and recommended type. • Do not mix old and new batteries, different types of batteries (standard, alkaline, or rechargeable), or rechargeable batteries of different capacities. Your remote control requires two AA batteries (not included) for power. -
Page 9: Operation
OPERATION PHONO TAPE MONITOR POWER PHONES Warning: To prevent possible hearing loss, turn before you turn on the receiver or change the program source. After you turn on the receiver or change the program source, adjust to a comfortable listening level. VOLUME You can use the supplied remote control by pointing it at the receiver’s front panel and pressing the desired button(s). -
Page 10: Tuning The Radio
TUNING THE RADIO Your receiver has four types of electronic tuning — manual, automatic, direct, and memory. Note: To listen to stations with weak signals, we recommend manual tuning. Manual and Automatic Tuning 1. Press on the front panel (or on the remote control) to select the desired band. -
Page 11: Adjusting Balance
T T T T u u u u n n n n i i i i n n n n g g g g t t t t o o o o a S a St t t t a a a a t t t t i i i i o o o o n n n n i i i i n n n n M M M M e e e e m m m m o o o o r r r r y y y y 1. -
Page 12: Troubleshooting
TROUBLESHOOTING If the receiver is not working as it should, the following suggestions might help. If you follow the suggestions in this chart and the receiver still does not work properly, contact your local RadioShack store for assistance. Problem Power does not turn on. No sound. -
Page 13: Care
CARE Keep the receiver dry; if it gets wet, wipe it dry immediately. Use and store the receiver only in normal temperature environments. Handle the receiver carefully; do not drop it. Keep the receiver away from dust and dirt, and wipe it with a damp cloth occasionally to keep it looking new. -
Page 14: Specifications
SPECIFICATIONS Amplifier Power Output ... 100 Watts per Channel into 8 Ohms From 40 to 20,000 Hz, With No More than 0.5% Total Harmonic Distortion Measured Pursuant to the Federal Trade Commission’ s Trade Regulation Rule on Amplifier Output Power Claims Input Sensitivity/Impedance: Phono ... - Page 15 NOTES...
- Page 16 Limited Two-Year Warranty This product is warranted by RadioShack against manufacturing defects in material and workman- ship under normal use for two (2) years from the date of purchase from RadioShack company- owned stores and authorized RadioShack franchisees and dealers. EXCEPT AS PROVIDED HEREIN, RadioShack MAKES NO EXPRESS WARRANTIES AND ANY IMPLIED WARRANTIES, INCLUDING THOSE OF MERCHANTABILITY AND FITNESS FOR A PARTICULAR PURPOSE, ARE LIMITED IN DURATION TO THE DURATION OF THE WRITTEN LIMITED WARRANTIES...


Need help?
Do you have a question about the Stereo Receiver with Remote Control and is the answer not in the manual?
Questions and answers