Advertisement
Advertisement
Table of Contents

Summary of Contents for Frankford Umbrellas AURORA
- Page 1 O W N E R S M A N U A L...
- Page 2 EXC LU S IVE U . S . D I S T R I B U T O R...
-
Page 3: General Information
Frankford Umbrellas customer service agent. Some modifications may void the warranty. • Make sure your Aurora is dry and clean prior to storing away for extended periods of time to prevent mold from developing. • Be careful when closing to ensure the canopy does not get caught or “pinched”... -
Page 4: Simple Maintenance Procedures
Silicon spray in the slide car guide tracks will assist operation if required. • Fold acrylic canvas as mentioned in “CLOSING THE AURORA” (Page 8). This will prolong the new look of the canvas and prevent marking caused by “pinching” in the alloy frame. -
Page 5: Fabric Care
FABRIC CARE RECacril Marine Grade Acrylic Fabric Infinity Process is a highly technological finish, providing RECacril with a long lasting protection against mold and mildew, excellent water and oil repellency and protects you from both sun and water. However, the accumulation of dust, pollution particles, foreign organic materials and general dirt can damage this protection, shortening the life of the RECacril, so they should be removed. - Page 6 Casual Care & Cleaning • Brush off dust and dirt with a soft brush. NEVER brush with stiff brushes since this can damage the fabric finish. • Spray the umbrella with clean water. If a hose is used, avoid high pressure.
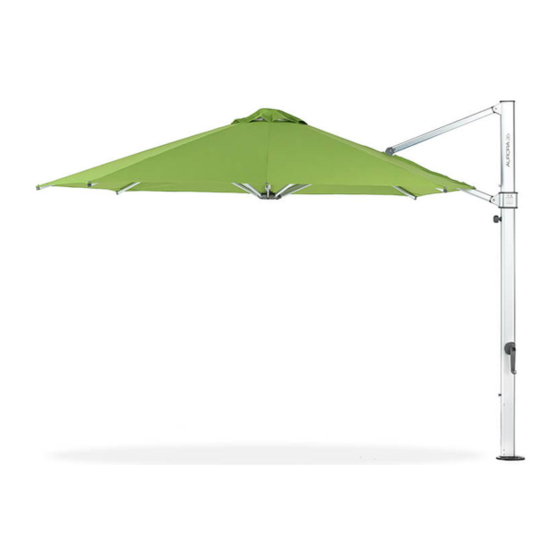
- Page 7 AURORA PARTS IDENTIFICATION NOTE: When the Aurora is closed, the swivel connection is near the top of the mast. When the Aurora is open, the swivel connection is near the top of the mast.
- Page 8 ARMS SMALL END FITTINGS FOR CANOPY SCREW SMALL STROPS (KNURL PIN NOT INCLUDED) CANOPY BUTTONS STRUTS BOTTOM HUB TUBE LOCATOR 3MM STAINLESS STEEL CABLE HUB TUBE TUBE HOLDER TOP HUB TOP HUB PULLEY MAIN ARM LARGE STROP (ALUMINIUM) BARREL BOLTS TOP STAY SLIDER CAR SLIDER CAR TILT KNOB...
- Page 9 OPENING THE AURORA • Remove the strap from the canopy. • Gently spread the canopy arms open with your hand. (Refer Figure A) • Ensure the slider car knob is loose and slider car can move freely (Refer Figure B). Insert the winder handle (26) into the hole on the side of the mast and rotate in a clockwise direction.
- Page 10 CLOSING THE AURORA • Turn the sider car tilt knob (18) counter- clockwise until loose. Rotate the winder handle (26) in an counter-clockwise direction. The canopy will begin to collapse. Continue winding in an counter-clockwise direction until the canopy is mostly closed and the canopy arms are pointing almost vertically down to the ground.
- Page 11 INSTALLING YOUR WIND STABILIZER KIT Your Aurora Cantilever Umbrella comes with a Wind Stabilizer Kit to assist its performance in a wider range of wind conditions. This Stabilizer Kit consists of two (joined) stabilizer bars. NOTE: The Aurora Cantilever Umbrella...
- Page 12 TO ROTATE THE AURORA UMBRELLA There are 16 pre-determined rotation positions in the spigot. These positions are found every 22.5° interval around the spigot base. They are located where indicated with notches on the spigot base. The position holes are under the nylon indexing shield (29) which acts as a dust cover for the holes not in use.
-
Page 13: Installation Procedure
Prior to installing your installation fittings please read the important information below. Your Aurora Cantilever Umbrella can rotate 360° and be locked in 16 different locations. This means that every 22.5° of rotation there is provision to lock the umbrella. In most situations there will be a preferred area over which you will predominantly want shade. - Page 14 | 12...
- Page 15 IN-GROUND INSTALLATION OPTIONS Your umbrella comes with a spigot. Once you have installed the In-Ground Mount according to the instructions below, attach the spigot to the In-Ground using the supplied Allen key and bolts. Once the concrete has fully cured, lift the umbrella on to the top of the spigot.
- Page 16 27.5” 25.5” 27.5” 15.7” | 14...
- Page 17 DECK/CONCRETE INSTALLATION OPTIONS Your umbrella comes with a spigot. Once you have installed the Deck Plate according to the instructions below, attach the spigot to the Deck Plate using the supplied Allen key and bolts. Once the Deck Plate is fully secured, lift the umbrella on to the top of the spigot. This is recommended as a two man operation.
- Page 18 COUNTER SUNK BOLTS 1/4” DECK PANELS DECK PLATE 2” THICK CROSS BEAMS DECK BEARERS 12.4” DIAMETER DECK PLATE M10 CONCRETE SCREW OR DYNA BOLT MINIMUM LENGTH 3” Concrete slab minimum depth 4”. No screw or fixing to be within 6” of closest edge of concrete slab | 16...
- Page 19 Stem through to the threaded holes on the bottom plate. NOTE: The 40G+36G double stack is 335lbs. This is a suggested minimum weight for the Aurora Cantilever Umbrella. 17 |...
- Page 20 SPIGOT retaining plates CONCRETE PAVERS (8) (holds pavers in place) 16” X 16” X 2” 36G-PLATE: 150lbs. 36” Round 40G-PLATE: 185lbs. 40” Round . MINIMUM WEIGHT RECOMMENDED: 335lbs. | 18...
- Page 21 19 |...
-
Page 22: Warranty
Replacement fabric canopy is covered for the time DATE OF PURCHASE OF THE FOLLOWING: remaining in the original warranty and does not Aurora Series, Eclipse Series, Nova Series, Monaco activate a new 7 or 5 year warranty. Series, Greenwich Series, Monterey Collection, and Catalina Collection. - Page 24 Exclusive U.S. Distributor NORTH AMERICAN HEADQUARTERS FRANKFORD UMBRELLAS 110 GAITHER DR. MOUNT LAUREL NEW JERSEY, 08054 (856) 222 4134 www.frankfordumbrellas.com...

Need help?
Do you have a question about the AURORA and is the answer not in the manual?
Questions and answers
How to replace main arm assembly