Table of Contents
Advertisement
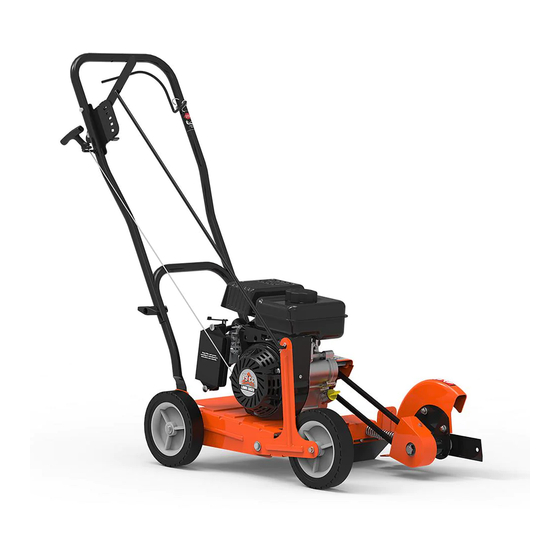
Operator's Manual
LAWN EDGER 79 cc, 4 Cycle
MODEL:YF7302
IMPORTANT: This manual provides complete instructions for safely operating and
maintaining your Edger. Read and save these instructions. Refer to this manual each
time before using your Edger. Keep this manual for future reference.
WARNING:
This product contains one or more chemicals known to the State of California to cause
cancer and birth defects or other reproductive harm. Wash hands after handling.
Advertisement
Table of Contents

Related Manuals for Yard force YF7302


Summary of Contents for Yard force YF7302
- Page 1 Operator’s Manual LAWN EDGER 79 cc, 4 Cycle MODEL:YF7302 IMPORTANT: This manual provides complete instructions for safely operating and maintaining your Edger. Read and save these instructions. Refer to this manual each time before using your Edger. Keep this manual for future reference.
-
Page 2: Table Of Contents
TABLE OF CONTENTS SAfETy DEfINITIONS……………………………………………....…….…..3 IMPORTANT SAfETy INfORMATION………………………....……………5 PRODuCT SPECIfICATIONS……………………………….....……………….9 PARTS & fEATuRES……………………………………………....………….10 ASSEMbly…………………………………………………....………………11 ENGINE PREPARATION………………………………………....…………..13 OPERATION……………………………………………………....…………...15 MAINTENANCE……………………………………………………....……….18 TROublEShOOTING…………………………………………..………………23 WARRANTy…………………………………………………………...………….24 EMISSION CONTROl SySTEM WARRANTy…………………...…………..27... -
Page 3: Safety Definitions
SAFETY DEFiNiTiONS Safety Alert Symbols The following symbols are used on the product and in this manual to alert the operator of potential safety hazards. Read them carefully, and understand their meaning. DANGER! Indicates an imminently hazardous situation which, if not avoided, will result in death or serious injury. - Page 4 Do not use Do NOT touch hot if children or muffler or cylinder. bystanders are These parts are present. extremely hot from opera¬tion and may remain hot for a short time after operation. Rotating parts To reduce risk of fire, can cause serious clean spilled gas and injury.
-
Page 5: Important Safety Information
iMpORTANT SAFETY iNFORMATiON RESpONSiBiLiTY OF OpERATOR Carefully read and follow these safety instructions. failure to do so can result in serious injury. Know your product. Read and understand this manual before use. Compare the illustrations to unit. learn location and function of all controls. Thoroughly understanding the unit before use will result in the best performance and safety. -
Page 6: Operation Safety
• familiarize yourself with all the safety and operating decals on this equipment. WARNiNG! • Thoroughly inspect the area where the edger is to be used and remove all foreign objects. your equipment can propel small objects at high speed causing personal injury or property damage. Stay away from breakable objects, such as house windows, auto glass, greenhouses, etc. -
Page 7: Fuel Safety
operator. WARNiNG! • Do not put hands or feet near or under rotating parts. • Exercise extreme caution when operating on or crossing gravel drives, walks, or roads. Stay alert for hidden hazards or traffic. WARNiNG! • Exercise caution to avoid slipping or falling. Always be sure of your footing;... -
Page 8: Storage Safety
fumes may reach an open flame. STORAGE SAFETY WARNiNG! • Always refer to the operator’s manual instructions for important details if the edger is to be stored for an extended period. • Never store the edger with fuel in the fuel tank inside a building where ignition sources are present such as water heaters, space heaters, clothes dryers, etc. -
Page 9: Product Specifications
CHiLDREN SAFETY WARNiNG! • Tragic accidents can occur if the operator is not alert to the presence of children. Children are often attracted to the edger and the edging activity. • Keep children out of the edging area and under the watchful care of a responsible adult. -
Page 10: Parts & Features
pARTS & FEATURES Start Lever lever on handle which allows the engine to run. When lever is released, engine will stop. Choke Control Restricts the air intake. This allows for an enriched fuel-air mixture which helps to start the engine. Muffler location of engine exhaust. -
Page 11: Assembly
ASSEMBLY Read and follow the assembly instructions. Do not discard any parts or materials until the unit is assembled. References to the right or left side of the edger are from the viewpoint of the operator’s position behind the edger. WARNiNG! Do not operate edger if it is damaged or not completely and correctly assembled. - Page 12 WARNiNG! flameout wires MuST be connected for correct engine operation. failure to connect can result in serious injury. How to Remove Edger from Carton 1. Remove all parts and packaging components. 2. Use a utility knife to cut all 4 vertical edges and lay the side panels flat around the edger.
-
Page 13: Engine Preparation
ENGiNE pREpARATiON Engine Oil CAUTiON! Engine shipped without oil. SAE 10W-30 failure to add oil will result in serious engine damage. A bottle of SAE 30 engine oil is included with your SAE 30 edger. Refer to the chart on the right for alternative TEMP 100°... - Page 14 cutting depth (See figure 7), and check that the frame of the edger is level. 2. Remove the oil fill cap/dipstick and wipe clean with cloth. (See Figure 3) 3. Insert dipstick into fill spout but do NOT screw in. Remove dipstick and check oil level.
-
Page 15: Operation
OpERATiON Before Starting the Engine WARNiNG! Before starting engine, read operator’s manual. Become familiar with location and function of all controls. Know how to stop the engine quickly. WARNiNG! Before starting the engine, check that the flameout wire terminals have been connected. - Page 16 machine.(See figure 6) 3. Always rotate Choke to the Chock RuN / Position, when the engine is cold. (See Warm Start figure 5) NOTE: Not required when re-starting a warm engine. ChOKE / 4. firmly grip the edger handle with your left Cold Start hand, pulling the Start lever against the figure 5...
- Page 17 EDGiNG TipS WARNiNG! Read the Operator’s manual. Know location and functions of all controls. Keep all safety devices and shields in place. Never allow children or uninstructed adults to operate the edger. Keep bystanders away from machine. Keep away from the blade and all rotating parts, which cause injury.
-
Page 18: Maintenance
MAiNTENANCE Maintenance Schedule WARNiNG! before performing any maintenance, turn engine off and remove the wire from the spark plug to prevent accidental starting and serious injury. iMpORTANT: The warranty on this edger does not cover items that have been subjected to operator abuse or negligence. To receive full value from the warranty, the operator must maintain the edger as instructed in this manual, and only use genuine replacement parts. - Page 19 CAUTiON! iMpORTANT NOTES about Maintenance schedule 1. Re-check tightness of all fasteners after first 2 hours of initial use 2. Change engine oil after first 2-8 hours of initial use 3. Change oil every 25 hours if operating under heavy load or in high temperatures 4.
- Page 20 How to Replace the Belt iMpORTANT: Only use a replacement belt from the manufacturer. 1. Disconnect the spark plug wire from the spark plug. 2. Remove the two rear guard bolts to remove the engine pulley cover. (See front Guard figure 9) Screws 3.
-
Page 21: How To Check The Spark Plug
4. Remove the blade. 5. Replace with new blade from the manufacturer by reversing the above steps. Note: Tighten the blade locknut to 35-45 foot-pounds (47-61 N-m) How to Clean the Air Filter A dirty air filter will restrict air intake. Regular maintenance of air cleaner will help improve engine performance and reduce emissions. - Page 22 4. Visually inspect the spark plug for cracks or damage. If cracked, replace spark plug. 5. Clean carbon deposits. If excessive carbon build up, replace spark plug. 6. Check that the gap of the spark plug is 0.024-0.028 in. (0.6-0.7 mm). (See figure 14) 7.
-
Page 23: Troubleshooting
Troubleshooting pROBLEM pOSSiBLE CAUSE(S) SOLUTiON(S) Engine difficult to start 1. Out of fuel 1. Add fresh fuel 2. Start lever is not 2. Pull start lever against handle compressed 3. Rotate Choke lever to “Choke 3. Choke in “Run / / Cold Start”... -
Page 24: Warranty
NOT provided on products purchased from resellers or other retailers. (2) Two-Year Warranty – Engine and Frame The yf7302 Edger has a 2-year limited Warranty on the gas engine(see chart below) and frame from the date of purchase against manufacturer defects for residential use only. - Page 25 If service or a warranty evaluation is requested, yard force will direct you to the nearest authorized service center – or you can ship the product directly to yard force for service. All shipping costs are the responsibility of the consumer.
- Page 26 Limitation of Liability (cont.): SYSTEMS COVERED BY THiS pARTS DESCRipTiON: WARRANTY: fuel Metering System Carburetor assembly (if so equipped) and its internal components; fuel filter (if so equipped), carburetor gaskets, fuel pump (if so equipped) Air Induction System Intake pipe/ manifold, air cleaner Ignition System Spark plug , ignition module / coil Exhaust System...
-
Page 27: Emission Control System Warranty
EMiSSiON CONTROL SYSTEM WARRANTY Your Warranty Rights and Obligations: The California Air Resources board, u.S. EPA and Sumec hardware & Tools Co., ltd.(Sumec) are pleased to explain the Emission Control System Warranty on your new outdoor power equipment engine. California In California, new spark-ignited small off-road equipment engines must be designed, built and equipped to meet the State’s stringent anti-smog standards. -
Page 28: Warranty Coverage
If you have any questions regarding your warranty rights and responsibilities, you should contact Sumec hardware & Tools Co., ltd.(Sumec) customer service representative at 866-902-9690 Monday-friday between 8:30 AM and 5:00 PM Eastern Time or write to daniel.castles@sumec-na.com Warranty Coverage: Sumec warrants that the product engine is free from defects in materials and workmanship which cause such engine to fail to conform with the u.S. - Page 29 Exclusions: failures other than those resulting from defects in material or workmanship are not covered by this Emission Control System Warranty. This Emission Control System Warranty does not extend to emission control systems or parts which are affected or damaged by owner abuse, neglect, improper maintenance, misuse, mis-fueling, improper storage, accident and/or collision, the incorporation of, or any use of, any unapproved, add-on, modified, “gray market”...
- Page 30 (b) Exhaust manifold (c) Catalytic converter (if available) (5) Crankcase breather assembly including (a) breather connection tube (6) fuel tank evaporative emissions control system including: (a) purge valves (b) Carbon canister (c) canister Mounting brackets (d) fuel Cap (e) fuel Tank (7) Miscellaneous items used in above systems including: (a) Switches (b) hoses, belts connectors, and assemblies...
Need help?
Do you have a question about the YF7302 and is the answer not in the manual?
Questions and answers
YF7002 Yard Force edger, Need Part number for Depth control rod #11 on diagram.