Chapters
Table of Contents

Related Manuals for Toro EVOLUTION


Summary of Contents for Toro EVOLUTION
- Page 1 EVOLUTION AG Controller ® User’s Guide EPA WaterSense® Certi ed Certi ed by when used with Smart Connect® ICC-ES 8.5" x 11" Document, printed on 50 lb bond or equivalent, saddle stitched.
-
Page 3: Table Of Contents
Table of Contents Controller Introduction Timing Mechanism - - - - - - - - - - - - - - - - - - - - - - - - - - - - - - - - - - - - - - - 1 Internal Components - - - - - - - - - - - - - - - - - - - - - - - - - - - - - - - - - - - - - - 2 Installation Cabinet Installation/Template - - - - - - - - - - - - - - - - - - - - - - - - - - - - - - - - - - 3... - Page 4 Electronic Compatibility - - - - - - - - - - - - - - - - - - - - - - - - - - - - - - - - - Back Cover Toro Contact Information - - - - - - - - - - - - - - - - - - - - - - - - - - - - - - - - - Back Cover...
-
Page 5: Controller Introduction Timing Mechanism
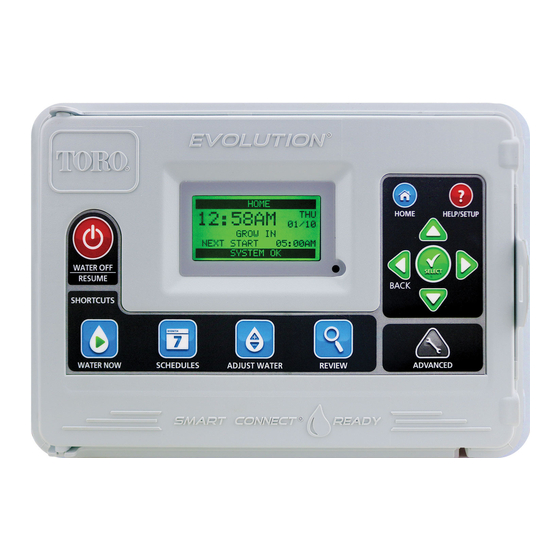
Home Button. Use to display the controller’s activity and alert messages. – Help/Setup Button. Use to access and clear alerts, set the controller’s time and date, locate Toro contact information, as well as modify controller preferences such as the display language and time and date format. -
Page 6: Internal Components
Internal Components Figure 2 – Valves and Sensor Terminals VALVE TEST – Use this terminal to test a valve for proper function. 24VAC – 24 VAC Power Source GND – Power Source Ground SENSOR – Sensor Terminals MV PUMP – Master Valve Terminal COM –... -
Page 7: Installation
Installation... -
Page 8: Power Supply Installation
110 VAC Outdoor Models (US and Canada) – Route power and ground wires from a power source through a conduit Step 1 Figure 7 ® and into the EVOLUTION cabinet. ® Step 2 – Open the EVOLUTION controller and access the internal components. -
Page 9: Battery Installation
Module Removal Figure 11 ® Step 1 – Open the EVOLUTION controller door and control panel to access the internal components. – Hold the module as shown in Figure 11. Press the retaining tab while pulling Step 2 the top of the module away from the cabinet, then lift the module out of the controller. -
Page 10: Valve, Pump Relay And Sensor Installation
Refer to the provided sensor instructions for further installation instructions. ® EVOLUTION is designed to operate with “normally closed” NC sensors. Note: For sensors with “normally open” (NO) and “normally closed” (NC) options, select the NC option. Step 7... -
Page 11: Home Screen Messages
SCHEDULE A/B/C OR AUX ® A is active, EVOLUTION will not display the Schedule “A”, “B” and “C” or AUX. If an displayed to the left of the schedule name, then additional schedules are active and can be viewed by pressing the Down arrow. -
Page 12: Setup Screen
® Upon power up, the initialization screen will display brie y. On initial power up, the EVOLUTION will display the SETUP screen. is SETUP screen is only accessed during initial power up or after a factory reset is performed. Once Setup is completed, press the HOME button at any time to return to the main screen. -
Page 13: Schedule Setup
Schedule Type Selection ® EVOLUTION controller allows for exible watering by giving you three schedule types: Weekday, Interval, and Looping. Weekday is the default scheduling type, and allows you to select individual days of the week to irrigate. Interval scheduling enables you to select the delay between irrigations (e.g. -
Page 14: Schedule Start Setup
® For Weekday and Interval scheduling, the EVOLUTION controller is set with 1 start time set to OFF. A start time must be set for the schedule to become active. Additional Starts can be added with a maximum of four starts per schedule. Once a start is activated, the schedule will activate the rst valve (lowest number). -
Page 15: Valve Runtimes Setup
Valve Runtimes Setup e Valve Runtimes is where you select all the valves that will run in the schedule. By default, all valves are set to OFF. Modify the runtime for each valve as necessary. Deactivate a valve by setting the runtime to OFF. Valve Runtime Setup for Weekday and Interval Schedules Step 1 –... -
Page 16: Using More An One Active Schedule
Using More Than One Active Schedule ® EVOLUTION Controller has the ability to run up to three watering schedules. By default, only one schedule is active. Additional sched- ules can be activated, see Advanced Functions section. Once activated, the additional schedules will appear under the Schedules Menu. -
Page 17: Manually Activate All Valve Test
Press SELECT ® Note: EVOLUTION controller will sequentially water all active valves (valves with runtimes) starting with Valve 1. All active valves will run the speci ed runtime duration. Fertilizer pumps (FP1 and FP2) are not activated during ALL VALVE TEST. -
Page 18: Review
HOME button to return to the main screen. Water Off ® EVOLUTION controller will not run any watering schedules while the WATER OFF screen is displayed. In the Water O screen, there are three options that can be selected. Use the Up or Down arrows to make a selection. -
Page 19: Advanced Schedules And Functions
Advanced Schedules and Functions ® You can access the EVOLUTION controller’s advanced functions by pressing the ADVANCED button and then pressing SELECT button to con rm. In the Advanced Functions, you can activate additional schedules, check and set runtimes and start times to all schedules in one screen, set schedule and valve details, assign sensors to the schedules, perform diagnostics test, check rmware version and reset the controller to factory defaults. -
Page 20: Schedule Starts
Note: disable Schedules. Schedule Details ® EVOLUTION controller has three available watering schedules (A, B and C) and one Auxiliary schedule. Two additional Auxiliary Schedules can be added using the Smart Connect® Accessories. Set Maximum Concurrent Schedules e maximum number of concurrently running schedules is set in Schedule Details. - Page 21 AM/PM. Use the Up or Down arrows to adjust the time. Press SELECT ® to save. EVOLUTION controller will not allow any schedules to activate between the start time and the stop time during restricted days. RESTRICTION TIME START...
- Page 22 Erase Schedule – Reset the selected schedule. e schedule’s status will be set to DISABLED (except for schedule A, it remains ENABLED) and the schedule TYPE set to WEEKDAYS. All other settings within the schedule will be set to OFF. Step 1 –...
- Page 23 Select Device – (AUX2 and AUX3 Only) Wireless Auxiliary function works in conjunction with Smart Connect Wireless module ® Auxiliary Relay (A-EVO-AR). (A-EVO-SC) and EVOLUTION ® AG controller must be equipped In order to communicate with the wireless auxiliary relays, the...
-
Page 24: Programming Fertigation
An irrigation valve can not be designated as a fertilizer pump if it is assigned to a schedule. A valve can be made available by removing it from all schedules. ® e fertilizer program also is where you will set the runtimes for the fertilizer pumps. EVOLUTION can control two fertilizer pumps. Dedicate valves to Fert Pumps Step 1 –... -
Page 25: Smart Connect
® EVOLUTION controller is capable of communicating with Toro approved wireless sensors and devices. In order to wirelessly communicate with these devices, Smart Connect (A-EVO-SC) must be installed in your system. Once a Smart Connect is installed, ® AG controller will automatically synchronize with the device. -
Page 26: Weather Sensor Setup
Weather Sensor Setup ® EVOLUTION controller will stop all scheduled watering if the weather sensor senses rain or freezing temperatures. e weather sensor also adjusts watering accordingly by monitoring air temperature and sunlight radiation, as well as historic weather data of your area for the last 40 years. -
Page 27: Soil Sensor
Soil Sensor Setup ® EVOLUTION controller will stop the scheduled watering if the soil sensor is activated. e Soil Sensor works much like a rain sensor, halting irrigation when it senses an excessive soil moisture level. You can set the level of soil moisture that will trigger the sensor. -
Page 28: Add/Remove Device
Add / Remove Device ® EVOLUTION controller is capable of communicating with Toro approved wireless sensors. ese sensors allows for water saving and ne tuning of your irrigation system. Step 1 – While in the ADVANCED menu, use the Up... -
Page 29: Diagnostics
® AG controller can be updated by downloading the latest controller rmware from Toro’s EVOLUTION website, www.toro.com/evolution-ag. Load the rmware onto a USB drive, then insert it into the controller’s USB port. Load New Firmware Version on USB Drive ® AG controller’s rmware can easily be updated by downloading the latest software from www.toro.com/evolution-ag. -
Page 30: Factory Reset
Step 4 – Use the Up or Down arrows to con rm (Yes) or cancel (No). Press SELECT Contact Toro Access Contact Toro to get the latest contact information. Step 1 – Press HELP/SETUP. – Use the Up or Down arrows to select the Alerts. -
Page 31: Set Time/Date
Load From USB Load from USB function is used to retrieve schedules saved in a USB Flash drive. ® Note: Although many USB ash drives may function well with the EVOLUTION AG controller, the following USB speci cations are recommended: •... -
Page 32: Save To Usb
Save to USB function is also helpful when loading multiple controllers with the same schedule programs. ® Note: Although many USB ash drives may function well with the EVOLUTION AG controller, the following USB speci cations are recommended: • USB Version 2.0 Compliant •... - Page 33 Set Date Format – While in the PREFERENCES menu, use the Up or Down arrows to navigate to DATE FORMAT. Step 1 Press SELECT – Use the Up or Down arrows to select Month/Day/Year (MM/DD/YY) (default) or Day/Month/Year (DD/MM/YY) Step 2 format.
- Page 34 Specifications Cabinet Dimensions: • 11.25” W x 7.75” H x 4.5” D (286 x 197 x 114 mm) Power Specifications: • US and Canada Internal Transformer, Class 2, UL Listed, CSA Certified (or equivalent) Input: 120 VAC, 60 Hz Output: 24 VAC, 60 Hz, 1.25A •...
- Page 35 EPA Water Sense Qualification Criteria EVOLUTION ® AG controller settings and accessories for EPA WaterSense ® program quali cation test: Program 1 Program 2 Program 3 Valve #1 = 6 Min Valve #3 = 9 Min Valve #5 = 21 Min...
-
Page 36: Electronic Compatibility
Tel: +1 (800) 333-8125 or +1 (619) 562-2950 Fax: +1 (800) 892-1822 or +1 (619) 258-9973 toro.com • driptips.toro.com • toro.com/evolution-ag Programming Tech Support: 1-877-345-8676 Tech.Support@toro.com © 2016 e Toro Company • Agriculture Division • www.toro.com Part Number 373-0911 Revision A... - Page 37 Controlador EVOLUTION ® Manual del Usuario Certi cado por WaterSense® de la EPA (Agencia de Protección Ambiental de los EE. UU.) Certi ed by cuando se utiliza con Smart Connect® . ICC-ES...
- Page 39 Tabla de Contenidos Introducción al Controlador Mecanismo de Temporización - - - - - - - - - - - - - - - - - - - - - - - - - - - - - - - - - - 1 Componentes Internos - - - - - - - - - - - - - - - - - - - - - - - - - - - - - - - - - - - - - 2 Con guración Instalación del Gabinete/Plantilla - - - - - - - - - - - - - - - - - - - - - - - - - - - - - - - - 3...
- Page 40 Alertas - - - - - - - - - - - - - - - - - - - - - - - - - - - - - - - - - - - - - - - - - - - - 26 Póngase en Contacto con Toro - - - - - - - - - - - - - - - - - - - - - - - - - - - - - - - - - 26...
-
Page 41: Introducción Al Controlador Mecanismo De Temporización
Gracias por comprar el nuevo y muy galardonado Controlador de Riego EVOLUTION® AG Series, que entrega un control sin precedentes y es muy fácil de usar con su sistema de riego. El EVOLUTION® AG se puede ampliar fácilmente de 4 válvulas a 8, 12 y 16, lo que le da al controlador la capacidad de crecer a medida que crece su sistema de riego. -
Page 42: Componentes Internos
Componentes Internos Figura 2 – Terminales de Válvulas y Sensores PRUEBA DE VÁLVULAS (VALVE TEST) – Utilice esta terminal para poner a prueba una válvula para un funcionamiento adecuado. 24VAC – Fuente de Poder de 24 Voltios de Corriente Alterna (VAC) TIERRA (GND) –... - Page 43 Instalación...
-
Page 44: Instalación Del Suministro De Electricidad
– Aplique energía eléctrica al controlador. Instalación del Módulo de Expansión de Válvulas El controlador EVOLUTION® AG se puede ampliar utilizando los módulos opcionales para 4 válvulas (A-EMOD-4) o 12 válvulas (A- EMOD-12) para agregar más válvulas al sistema. Instalación del Módulo... -
Page 45: Instalación De La Batería
Eliminación del Módulo Figura 11 Paso 1 – Abra la puerta del controlador de EVOLUTION® AG y el panel de control para acceder a los componentes internos. – Mantenga el módulo como se muestra en la Figura 11. Presione la pestaña de Paso 2 retención mientras jala la parte superior del módulo hacia afuera del gabinete,... - Page 46 Valvula 4 o Interruptor de consulte las instrucciones del sensor. la Bomba de Fertilizante 2 EVOLUTION® AG está diseñado para funcionar con sensores NC “normalmente cerrados”. Nota: Para sensores con opciones de “normalmente abiertos” (NO) y “normalmente cerrados” (NC), seleccione la opción Paso 7 –...
-
Page 47: Mensajes De La Pantalla De Inicio
Indica qué programa (A, B o C) o auxiliar está asociado con el estado que se muestra. Si solamente SCHEDULE A/B/C OR AUX está activo el Programa A, EVOLUTION® AG no mostrará el Programa “A”, “B” y “C” o AUX. Si se muestra una a la izquierda del nombre del programa, eso signi ca que están activos programas... - Page 48 TIME 12:01AM Una vez que se enciende, la pantalla de inicialización se mostrará brevemente. Cuando recién se enciende, el EVOLUTION® AG mostrará la pantalla de CONFIGURACIÓN. A esta pantalla de CONFIGURACIÓN se puede acceder solamente durante el encendido inicial o después de que se restablezca de fábrica.
- Page 49 Selección del Tipo de Programa El controlador EVOLUTION® AG permite un riego exible al brindarle tres tipos de programa: Día de la Semana (Weekday), Intervalo (Interval) y Circuito (Looping). El Día de la Semana es el tipo predeterminado de programa, y le permite seleccionar días individuales de la semana para regar.
- Page 50 Configuración del Inicio del Programa Para la programación del Día de la Semana y de Intervalo, el controlador EVOLUTION® AG se establece con 1 tiempo de inicio que está APAGADO. Se debe establecer un tiempo de inicio para que se active el programa. Se pueden agregar Inicios Adicionales con un máximo de cuatro inicios por programa.
- Page 51 Configuración de los Tiempos de Ejecución de la Válvula Los Tiempos de Ejecución de la Válvula son cuando usted selecciona todas las válvulas que se van a ejecutar en el programa. Como predeterminado, todas las válvulas están en APAGADO. Modi que el tiempo de ejecución para cada válvula, según sea necesario. Desactive una válvula al establecer el tiempo de ejecución en APAGADO.
-
Page 52: Utilizar Más De Un Programa Activo
Utilizar Más de Un Programa Activo El Controlador EVOLUTION® AG tiene la capacidad de ejecutar hasta tres programas de riego. Como predeterminado, solamente un programa está activo. Se pueden activar programas adicionales, consulte la sección Funciones Avanzadas. Una vez que se activen, los programas adicionales aparecerán debajo del Menú... -
Page 53: Ajustar El Riego
Presione SELECCIONAR Nota: El controlador EVOLUTION® AG empezará a regar de forma secuencial todas las válvulas activas (válvulas con tiempos de ejecución) empezando por la Válvula 1. El funcionamiento de todas las válvulas activas tendrá una duración del tiempo de ejecución especí... -
Page 54: Revisión
Apagar Riego El Controlador EVOLUTION® AG no ejecutará ningún programa de riego mientras se muestre la pantalla de APAGAR RIEGO (WATER OFF). En la pantalla de Apagar Riego, se pueden elegir tres opciones. Utilice las echas hacia arriba... -
Page 55: Detalles De La Válvula
Tiempos de Ejecución de las Válvulas La función de los Tiempos de Ejecución es donde usted puede asignar cualquiera de las válvulas a cualquiera de los tres programas (A, B y C). Usted puede asignar cualquier válvula a un programa, al ingresar un tiempo de ejecución en la columna correspondiente del programa. Paso 1 –... -
Page 56: Inicio Del Programa
AVANZADO para habilitar o inhabilitar los Programas. Detalles del Programa El controlador EVOLUTION® AG cuenta con tres programas de riego disponibles (A, B y C) y un Programa Auxiliar. Se pueden agregar dos Programas Auxiliares utilizando los Accesorios Smart Connect®. - Page 57 Presione SELECCIONAR para guardar. El controlador EVOLUTION® AG no permitirá que se active ningún programa entre el tiempo de inicio y el tiempo de detención durante los días de restricción. RESTRICTION TIME START...
- Page 58 Eliminar Programa – Reinicie el programa seleccionado. El estado del programa se establecerá como INHABILITADO (excepto por el programa A, que permanece HABILITADO) y el TIPO de programa se establece a DÍAS DE LA SEMANA. Todos los demás ajustes del programa se colocan en APAGADO.
- Page 59 VALVE1 auxiliar, después presione SELECCIONAR Seleccionar Dispositivo – (Solo AUX2 y AUX3) La función del Auxiliar Inalámbrico funciona en AUX 2 conjunto con el módulo inalámbrico Smart Connect (A-EVO-SC) y el Interruptor Auxiliar de EVOLUTION® STATUS ENABLED ACTIVE DAYS (A-EVO-AR). A n de comunicarse con los interruptores auxiliares inalámbricos, el controlador EVOLUTION®...
-
Page 60: Programación De La Fertirrigación
Una válvula de riego no se puede designar como bomba de fertilizante, si esta se asigna a un programa. Se puede disponer de una válvula al eliminarla de todos los programas. También, el programa de fertilizante es el lugar donde usted establecerá los tiempos de ejecución de las bombas de fertilizante. El EVOLUTION® AG puede controlar dos bombas de fertilizante. FERT PUMP DETAILS DEDICATE FERT PUMP Dedicar Válvulas a las Bombas de Fertilizante... -
Page 61: Smart Connect
Configuración de Smart Connect El controlador EVOLUTION® AG tiene la capacidad de comunicarse con los sensores y dispositivos inalámbricos de Toro, y aprobados por esta empresa. Con el n de comunicarse con estos dispositivos, se debe instalar Smart Connect en su sistema. Una vez que se haya instalado, el controlador EVOLUTION®... - Page 62 Configuración del Sensor del clima El controlador EVOLUTION® AG se encargará de detener todo el riego programado si el sensor del clima detecta lluvia o temperaturas de congelación. El sensor del clima también ajusta el riego según corresponda, al monitorear la temperatura del aire y la radiación de la luz solar, así...
- Page 63 Cuando se activa el sensor de lluvia, EVOLUTION® AG hará que los programas dejen de funcionar. Reemplace la marca de selección con un guión para inhabilitar el sensor para ese programa.
-
Page 64: Agregar/Eliminar Dispositivo
Agregar/Eliminar Dispositivo El controlador EVOLUTION® AG tiene la capacidad de comunicarse con los sensores inalámbricos aprobados de Toro. Estos sensores le permiten ahorrar agua y ajustar con precisión su sistema de riego. Paso 1 – En el menú AVANZADO, utilice las echas hacia arriba... -
Page 65: Diagnostico
Cuando se activa, el controlador se encarga de poner a prueba cada una de las válvulas disponibles. El controlador EVOLUTION® AG mostrará guiones (- -) para las válvulas que no se han puesto a prueba. Este mostrará el nivel actual en amperes. Se mostrará... -
Page 66: Restablecer De Fábrica
Batería Baja (Low Battery) - El controlador EVOLUTION® AG no detectó ninguna batería instalada, o la carga de la batería está baja. Una vez que se elimine la alerta de Batería Baja, no se volverá a mostrar a menos que se Restablezca de Fábrica o que la nueva batería instalada baje su carga una vez más. -
Page 67: Establecer Hora/Fecha
• De 1 a 8 GB de Memoria (Entre más pequeña sea la memoria, más rápido funcionará). • Sistema de archivos FAT32 con 1 Partición Lógica. – Conecte su USB en el puerto USB del controlador EVOLUTION® AG, ubicado en la parte posterior del panel de control. Paso 1 Vea la Figura 2 en la página 2. -
Page 68: Guardar En Un Usb
• Sistema de archivos FAT32 con 1 Partición Lógica. Paso 1 – Conecte su USB en el puerto USB del controlador EVOLUTION® AG, ubicado en la parte posterior del panel de control. Vea la Figura 2 en la página 2. - Page 69 Establecer Formato de Fecha Paso 1 – En el menú PREFERENCIAS, utilice las echas hacia arriba o hacia abajo para desplazarse a la opción FORMATO DE FECHA. Presione SELECCIONAR Paso 2 – Utilice las echas hacia arriba o hacia abajo para seleccionar el formato Mes/Día/Año (MM/DD/AA) (predeterminado) o bien, el formato Día/Mes/Año (DD/MM/AA).
- Page 70 Especificaciones Dimensiones del Gabinete • 11.25 pulgadas de ancho x 7.75 pulgadas de alto x 4.5 pulgadas de profundidad (286 x 197 x 114 mm) Especificaciones de Electricidad • EE. UU. y Canadá Transformador Interno, Clase 2, Aprobado por UL y Certificado por CSA (o equivalente) Entrada: 120 Voltios de Corriente Alterna (VAC), 60 Hz Salida: 24 Voltios de Corriente Alterna (VAC), 60 Hz, 1.25A •...
- Page 71 Criterios de Calificación de la Agencia de Protección Ambiental de los EE. UU. (EPA) para el Programa Water Sense® Los ajustes y accesorios del controlador EVOLUTION® AG para la prueba de cali cación del programa WaterSense® de la EPA: Programa 1...
-
Page 72: Compatibilidad Electrónica
Teléfono: 01 (800) 333-8125 o +1 (619) 562-2950 Fax: +1 (800) 892-1822 o +1 (619) 258-9973 toro.com • driptips.toro.com • toro.com/evolution-ag Programar Soporte Técnico: 1-877-345-8676 Tech.Support@toro.com © 2016 e Toro Company • Agriculture Division • www.toro.com Part Number 373-0911 Revision A...
Need help?
Do you have a question about the EVOLUTION and is the answer not in the manual?
Questions and answers
error short detect on toro evolution controller zone 3