
Related Manuals for CUSHCRAFT R6000


Summary of Contents for CUSHCRAFT R6000
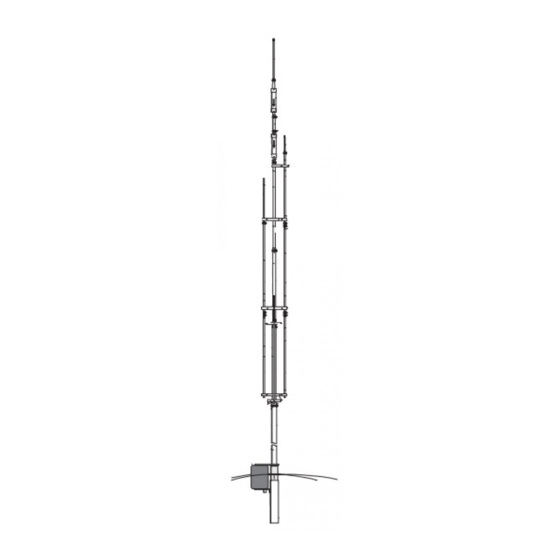
- Page 1 ASSEMBLY AND INSTALLATION INSTRUCTIONS R6000 6, 10, 12, 15, 17, 20 Meters COMMUNICATIONS ANTENNAS 951472 (2/99)
- Page 2 LOCATION Although the R6000 will operate in almost any location, it will perform best if it is mounted vertically and located in the clear away from surrounding objects such as buildings, trees, power lines, towers, guy wires, antennas and metallic objects. The R6000 should not be attached to a ground radial system.
- Page 3 • Try to locate your R6000 as far away from TV antennas and their feedlines as possible. This will help to avoid overloading your television with RF. • If you check the resistance across the coax connector on your R6000 you will find a DC short. This is normal. It does not mean that the RF path is short circuited.
- Page 4 R6000 #1 - ASSEMBLE RADIAL Longer dimension attaches to radial RINGS ring. FIGURE Figures A through D show the steps for radial ring assembly. Refer to the Radial Ring Subassembly Parts List for the parts required in this step. Shorter Slide the two radial rings (74) onto the base assembly (BA).
- Page 5 R6000 #2 - ATTACH MATCHING DISPLAY DESC SIZE 902832 SS RADIAL 49" NETWORK AND RADIALS (124.5 cm) 194748 MN6000 BRACKET Slide upper matching network bracket (48) onto base section (BA). Place it tight against the fiberglass insulator. Insert one 014387...
- Page 6 See Figure F for proper trap placement. Note that trap arrows point DOWN towards the R6000 base. Also note that bottom trap cap has a drain hole for water. There is no drain hole in the top cap. Hold trap CS1 with arrow pointing down and slide bottom tube into section BD 2 inches (5.1 cm).
- Page 7 R6000 DISPLAY DESC SIZE 204727 UPPER PLASTIC CLAMP 204728 LOWER PLASTIC FIGURE CLAMP 204729 ALU CLAMP ASSEMBLY 050053 PLASTIC 1/2” (1.3 cm) 014764 SS MACHINE #8-32 x 2-1/4” SCREW (5.7 cm) 050077 PLASTIC 3/8” (1.0 cm) 014387 SS LOCK #8-32...
-
Page 8: Specifications
Your Mast #5 - FEEDLINE The R6000 is designed for use with 50 Ohm coaxial cable terminated with a PL-259 connector. The shortest length of cable will have the least loss. A connector boot is included for use with your new antenna (figure H). Slide the boot over the cable before attaching your PL-259.
Need help?
Do you have a question about the R6000 and is the answer not in the manual?
Questions and answers