
Related Manuals for SMA SUNNY BOY 5000


Summary of Contents for SMA SUNNY BOY 5000
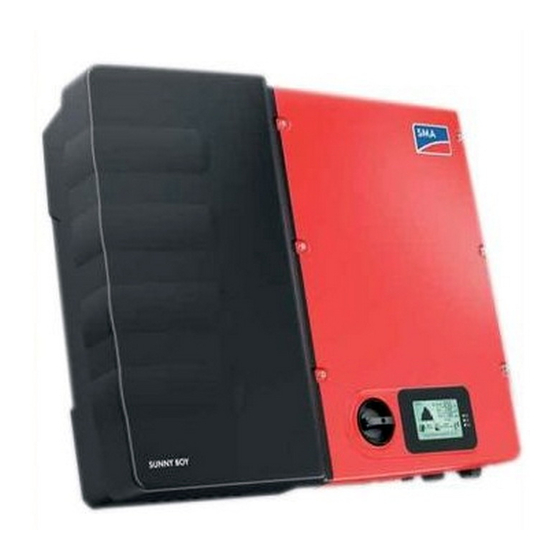
- Page 1 Service Manual SUNNY BOY 3600 / 5000 SMART ENERGY BATTERY PACK SMART ENERGY SB36-50SE-SG-en-10 | Version 1.0 AMERICAN ENGLISH...
- Page 2 The information contained in these documents is property of SMA Solar Technology AG. Any publication, whether in whole or in part, requires prior written approval by SMA Solar Technology AG. Internal reproduction used solely for the purpose of product evaluation or other proper use is allowed and does not require prior approval.
-
Page 3: Table Of Contents
SMA Solar Technology AG Table of Contents Table of Contents Information on this Document ..........Safety..................Skills of Qualified Persons ..............6 Safety Precautions................6 Disconnecting the Inverter from Voltage Sources ......8 Cleaning the Inverter..............11 Troubleshooting ................ 12 LED Signals .................. -
Page 4: Information On This Document
This document is valid for the following device types from firmware version 2.02.17.R: • SB 3600SE-10 (Sunny Boy 3600 Smart Energy) • SB 5000SE-10 (Sunny Boy 5000 Smart Energy) Target Group This document is intended for qualified persons. Only persons with the appropriate skills are allowed to perform the tasks described in this document (see Section 2.1 "Skills of Qualified... - Page 5 SMA Solar Technology AG 1 Information on this Document Symbol Explanation Sections describing activities to be performed by qualified persons only Information that is important for a specific topic or goal, but is not safety-relevant Indicates a requirement for meeting a specific goal...
-
Page 6: Safety
2 Safety SMA Solar Technology AG 2 Safety 2.1 Skills of Qualified Persons The tasks described in this document must only be performed by qualified persons. Qualified persons must have the following skills: • Knowledge of how an inverter works and is operated •... - Page 7 SMA Solar Technology AG 2 Safety Danger to life due to high voltages on the Battery Pack Lethal voltage is present at the pin connector for the power cable. Reaching into the pin connector for the power cable can result in lethal electric shock.
-
Page 8: Disconnecting The Inverter From Voltage Sources
2 Safety SMA Solar Technology AG Risk of burns due to hot enclosure parts Some parts of the enclosure can get hot during operation. • During operation, do not touch any parts other than the enclosure lid of the inverter. - Page 9 SMA Solar Technology AG 2 Safety 7. Grip behind the left-hand side of the protective cover and lever it loose. Then lift the protective cover forwards and off. 8. Hold the Battery Pack by the side handles, and slide it to the left of the wall mounting plate up to the stop.
- Page 10 2 Safety SMA Solar Technology AG 13. Flip the DC contact protection up and press firmly until it snaps into place. 14. Use a current clamp to ensure that no current is present in the DC cables. 15. Unlock and remove all DC connectors. Insert a flat-blade screwdriver or an angled screwdriver (blade width: 3.5 mm) into one of the side slots and pull the DC connectors...
-
Page 11: Cleaning The Inverter
SMA Solar Technology AG 3 Cleaning the Inverter 3 Cleaning the Inverter Damage to the display or the type label due to the use of cleaning agents • If the inverter is dirty, clean the enclosure, the cooling fins, the enclosure lid, the type label, the display and the LEDs using only water and a cloth. -
Page 12: Troubleshooting
4 Troubleshooting SMA Solar Technology AG 4 Troubleshooting 4.1 LED Signals The LEDs indicate the operating state of the inverter. Status Explanation Green LED glowing Operation flashing The requirements for the connection to the utility grid have not been met. -
Page 13: Error Messages
If the grid voltage is permanently within the permissible range and this message is still displayed, contact the SMA Service Line. 202 to 205 Grid fault The utility grid has been disconnected, the AC cable is damaged or the grid voltage at the connection point of the inverter is too low. - Page 14 If the grid voltage is permanently within the permissible range and this message is still displayed, contact the SMA Service Line. 401 to 404 Grid fault The inverter is no longer in grid-parallel operation.
- Page 15 • Ensure that L and N are correctly connected (see inverter manual at www.SMA-Solar.com). 1101 Installation fault > Check connection A second line conductor is connected to N. Corrective measures: • Correct the AC connection (see inverter manual at www.SMA- Solar.com). Service Manual SB36-50SE-SG-en-10...
- Page 16 If the grid voltage is permanently within the permissible range and this message is still displayed, contact the SMA Service Line. 3401 to 3402 DC overvoltage > Disconnect generator Overvoltage at DC input.
- Page 17 SMA Solar Technology AG 4 Troubleshooting Error number Display message, cause and corrective measures 3405 IRE defective > Disconnect the PV array Corrective measures: • Immediately disconnect the inverter from all voltage sources (see Section 2.3, page 8). • Check whether the DC voltage is below the maximum input voltage of the inverter.
- Page 18 • If this message is displayed frequently with medium irradiation, ensure that the PV array is correctly rated. 6001 to 6462 Self diagnosis > Interference of device The cause must be determined by the SMA Service Line. Corrective measures: • Contact the SMA Service Line. 6501 to 6513 Self diagnosis >...
- Page 19 Corrective measures: • Turn the DC load-break switch towards OFF until it snaps into place at position O. • Contact the SMA Service Line and clarify the next steps. 6701 to 6702 Comm. disturbed An error has occurred in the internal communication of the inverter. The inverter continues feeding power into the grid.
- Page 20 Parameters could not be set using the memory card. The inverter contin- ues to feed in. Corrective measures: • Ensure that the parameters are set correctly. • Ensure that you have an SMA Grid Guard code. 7106 Update file defect. Update file on the memory card is defective.
- Page 21 The update was not carried out successfully. Corrective measures: • Restart the update. 7337 Update BMS failed The cause must be determined by the SMA Service Line. Corrective measures: • Contact the SMA Service Line. 7340 Update communication failed The cause must be determined by the SMA Service Line.
- Page 22 • Contact the SMA Service Line. 9303 The service life of the battery is expiring The state of health of the Battery Pack is 70%. Corrective measures: • Replace the Battery Pack with a new one. Contact the SMA Service Line. SB36-50SE-SG-en-10 Service Manual...
- Page 23 Unauthorized battery system The Battery Pack is not suitable for operation with the inverter. Corrective measures: • If the battery has been approved by SMA for operation with the inverter, contact the SMA Service Line. 9306 Deviation in battery voltage The cause must be determined by the SMA Service Line.
- Page 24 The connection between the Battery Pack and the inverter is disrupted. Corrective measures: • Ensure that the power cable and the data cable are properly connected to the Battery Pack (see inverter manual at www.SMA- Solar.com). • Ensure that the plug contacts of the power cable and the data cable are not damaged.
- Page 25 4 Troubleshooting Error number Display message, cause and corrective measures 9315 Battery imbalancing fault The cause must be determined by the SMA Service Line. Corrective measures: • Contact the SMA Service Line. 9334 Battery charging test The function of the Battery Pack is tested. The Battery Pack is charged.
-
Page 26: Checking The Pv System For Ground Faults
5 Checking the PV System for Ground Faults SMA Solar Technology AG 5 Checking the PV System for Ground Faults If the inverter displays the event numbers 3501, 3601 or 3701, there could be a ground fault. The electrical insulation from the PV system to ground is defective or insufficient. - Page 27 SMA Solar Technology AG 5 Checking the PV System for Ground Faults Example: Location of the ground fault The example shows a ground fault between the second and third PV module. 3. If a definite ground fault cannot be measured and the message is still displayed, measure the insulation resistance.
- Page 28 11. Reconnect all other strings to the inverter. 12. Recommission the inverter (see Section 9, page 33). 13. If the inverter still displays an insulation error, contact the SMA Service Line. The PV modules might not be suitable for the inverter in the present quantity.
-
Page 29: Checking The Function Of The Varistors
Hold the varistor with the labeling pointing forward. If there is no conductive connection, the varistor is defective. SMA Solar Technology AG recommends replacing all varistors immediately. • Order new varistors and insertion tools (see Section 11 "Spare Parts", page 38). - Page 30 • Reinsert old varistors and leave them in place until new varistors and insertion tools are available. • If new varistors are available, replace all varistors (see Section 7, page 31). If a conductive connection is present, contact the SMA Service Line. SB36-50SE-SG-en-10 Service Manual...
-
Page 31: Replacing The Varistors
SMA Solar Technology AG 7 Replacing the Varistors 7 Replacing the Varistors Proceed as follows to replace each varistor. Danger to life due to high voltages • Disconnect the inverter from all voltage sources and open the enclosure lid (see Section 2.3, page 8). -
Page 32: Testing The Function Of The Battery Pack
8 Testing the Function of the Battery Pack SMA Solar Technology AG 8 Testing the Function of the Battery Pack You can test the function of the Battery Pack by manually charging and discharging. The sequence for charging and discharging depends on the current state of charge of the Battery Pack. -
Page 33: Recommissioning The Inverter
4. Flip the DC contact protection down until it snaps into place. 5. Connect the inverter and the Battery Pack (see inverter manual at www.SMA-Solar.com). 6. Slide the protective cover across the Battery Pack and push the brackets on the right of the protective cover into the guides on the left of the inverter enclosure. - Page 34 9 Recommissioning the Inverter SMA Solar Technology AG 9. Switch on the circuit breaker. 10. Turn the DC load-break switch towards ON until it snaps into place at position I. ☑ The start-up phase begins. ☑ The green LED is glowing and the display alternates between the firmware version, the serial number or designation of the inverter, the IP address, the subnet mask, the serial number of the Battery Pack, the configured country data set and the display language.
-
Page 35: Decommissioning The Inverter
Risk of injury through lifting or dropping the inverter or Battery Pack The inverter and the Battery Pack are heavy (for weight, see operating manual at www.SMA- Solar.com). There is risk of injury if the inverter or Battery Pack are lifted incorrectly or dropped during transport or when attaching or removing it from the wall. - Page 36 10 Decommissioning the Inverter SMA Solar Technology AG 6. If an additional grounding or equipotential bonding is connected, loosen the cylindrical screw M6x16 and remove the screw, conical spring washer, clamping bracket and grounding conductor. 7. Position the enclosure lid on the enclosure using the six screws and tighten all screws diagonally to each other using an Allen key (AF 5) (torque: 6 Nm ±...
- Page 37 13. If the Battery Pack is not damaged and it is to be disposed of, dispose of it in accordance with the SMA Solar Technology AG regulations. 14. If the Battery Pack is damaged and it is to be disposed of, contact the SMA Service Line and clarify the procedure for its disposal.
-
Page 38: Spare Parts
SMA Solar Technology AG 11 Spare Parts You will find the spare parts for your product in the following overview. If required, these can be ordered from SMA Solar Technology AG or your distributor. Designation Brief description SMA order number... -
Page 39: Contact
SMA Solar Technology AG 12 Contact 12 Contact If you have technical problems concerning our products, contact the SMA Service Line. We need the following information in order to provide you with the necessary assistance: • Inverter device type • Inverter serial number •... - Page 40 Onduleurs : +33 472 09 04 40 Communication : +33 472 09 04 41 Hybrid Energy Solutions Sunny Island : +33 472 09 04 42 Power Plant Solutions Sunny Central : +33 472 09 04 43 India SMA Solar India Pvt. Ltd. +91 22 61713888 Mumbai Italia SMA Italia S.r.l. +39 02 8934-7299 Milano Κύπρος/Kıbrıs Βλέπε Ελλάδα/ Bkz. Ελλάδα (Yunanistan)
- Page 41 +66 2 670 6999 대한민국 SMA Technology Korea Co., Ltd. +82 2 508-8599 서울 中国 SMA Beijing Commercial Company +86 10 5670 1350 Ltd. 北京 +971 2 234-6177 SMA Middle East LLC Middle East LLC Other countries International SMA Service Line Toll free worldwide: 00800 SMA SERVICE (+800 762 7378423) Niestetal Service Manual SB36-50SE-SG-en-10...
- Page 42 SMA Solar Technology www.SMA-Solar.com...
Need help?
Do you have a question about the SUNNY BOY 5000 and is the answer not in the manual?
Questions and answers