
Related Manuals for Lust CDA32.004


Summary of Contents for Lust CDA32.004
- Page 1 CDA3000 Betriebsanleitung Operation Manual Manuel d’utilisation Istruzioni di esercizio Umrichtersystem 750 W - 132 kW Inverter Drive System Système variateur Sistema invertitore...
- Page 2 00 0.0 00 .00 00 00 CDA32.006 it >3 rieb leit e >3 atte rati ntio n to >3 . obs dèm er le CDA32.004 CDA32.008 CDA34.008 CDA34.003 CDA34.014 CDA34.010 CDA34.005 CDA34.024 CDA34.017 CDA34.006 CDA34.032 22...37kW 45...55kW 75...132kW CDA34.045 CDA34.060 CDA34.090...
- Page 3 Dear user, Step Action Comment This Operation Manual will enable you to install and commission the Guide to quick-starting CDA3000 drive system very quickly and easily. Simply follow the step-by-step tables in sections 2/3/4. And away you go! Experience “Plug 'n Play” with the CDA3000.
- Page 4 Documentation the CDA3000 Application Manual. You can order the following documents from us, or download them free of charge from our website at www.lust-tec.de: CDA3000 Operation User Manual Application Manual...
-
Page 5: Safety
1 Safety Measures for The CDA3000 inverter drives are quick and safe to handle. For your own your safety safety and for the safe functioning of your device, please be sure to observe the following points: Read the Operation Manual first! •... - Page 6 Repairs may only be carried out by authorized repair workshops. Unauthorized opening and incorrect intervention could lead to physical injury or material damage. The warranty provided by LUST would thereby be rendered void. Responsibility Electronic devices are fundamentally not fail-safe. The company setting up and/or operating the machine or plant is itself responsible for ensuring that the drive is rendered safe if the device fails.
-
Page 7: Mechanical Installation
2 Mechanical installation Notes for operation ..........2-1 Mounting variants ...........2-1 Wall mounting ............2-2 Cold plate ..............2-4 Push-through heat sink (Dx.x) .......2-7 Notes for Please ensure that ... operation • no damp enters the device • no aggressive or conductive substances are in the immediate vicinity •... -
Page 8: Installation
2 Mechanical installation Wall mounting Step Action Comment Mark out the position of the tapped holes Dimensional drawings/hole on the backing plate. spacing see Table 2.2. Cut a tap for each fixing screw in the The tapping area will provide backing plate. - Page 9 2 Mechanical installation CDA3...,Wx.x Weight [kg] W (width) H (height) D (depth) ∅ 4.8 ∅ 4.8 ∅ 6 ∅ 9 D∅ Screws 4 x M4 4 x M4 4 x M5 4 x M8 E1 (with module) – > 300 >...
- Page 10 2 Mechanical installation Cold plate Step Action Comment Mark out the positions of the tapped Dimensional drawings/hole holes on the backing plate or the cooler. spacing see Table 2.3. Cut a tap for each fixing screw in the The tapping area will provide backing plate.
- Page 11 2 Mechanical installation CDA3...,Cx.x Weight [kg] W (width) H (height) D (depth) – ∅ 4.8 ∅ 5.5 D∅ Screws 4 x M4 6 x M5 E1 (with module) > 300 yyyy 1) Additionally allow enough space at the bottom for the bending radii of the connecting cables. Table 2.3 Dimensional drawings: Cold plate (dimensions in mm) CDA3000 Operation Manual...
- Page 12 Backing plate (unvarnished Ambient Size Power Inverter module steel min. cooling surface temperature 4 kHz 8/16 kHz [K/W] 0.75 kW CDA32.004,Cx.x 48 W 55 W 0.05 650x100mm = 0.065m² 45°C , 40°C 1.1 kW CDA32.006,Cx.x 75 W 82 W 0.05 650x460mm = 0.3m²...
- Page 13 2 Mechanical installation Push-through Step Action Comment heat sink (Dx.x) Mark out the positions of the tapped Dimensional drawings/hole holes and the breakthrough on the spacing see Table 2.6. backing plate. The tapping area will provide Cut a tap for each fixing screw in the you with good, full-area contact.
- Page 14 2 Mechanical installation CM-xxxx UM-xxxx Figure 2.3 Mounting clearances (see Table 2.6) Dimensions of breakthrough W (width) H (height) Table 2.5 Breakthrough for push-through heat sink (dimensions in mm) CDA3000 Operation Manual...
- Page 15 2 Mechanical installation CDA3...,Dx.x Weight [kg] W (width) H (height) D (depth) T1 138, T2 80 T1 138, T2 135 – ∅ 4.8 ∅ 4.8 ∅ 4.8 D∅ Screws 8 x M4 10 x M4 10 x M4 E1 (with module) >...
- Page 16 2 Mechanical installation 2-10 CDA3000 Operation Manual...
-
Page 17: Table Of Contents
3 Installation Overview ..............3-2 Grounding lead connection ........3-3 Motor connection ............3-4 Mains connection ............3-6 DC network ..............3-8 Braking resistor (RB) ..........3-9 Control connections ..........3-10 3.7.1 Choice of terminal assignment ......3-11 3.7.2 Specification of control terminals .......3-12 3.7.3 Terminal assignment 1 ........3-13 3.7.4 Terminal assignment 2 ........3-14 3.7.5... -
Page 18: Overview
3 Installation Overview L1 N L2 L3 H1 H2 H3 The terminal layout for all sizes is presented in Appendix A8. CDA32.xxx CDA34.xxx ϑ Figure 3.1 Overview of connections Explanation Reduces the voltage distortions in the system Line choke 1) 2) Suppresses line-borne interference emission Mains filter Required for repeated braking... -
Page 19: Grounding Lead Connection
3 Installation Grounding lead Note: PE mains connection to connection Step Action DIN VDE 0100 part 540 Ground every inverter module! Mains connection < 10 mm² Connect terminal X1/ in star Grounding lead cross-section min. configuration to the PE rail (main 10 mm²... -
Page 20: Motor Connection
3 Installation Motor Step Action Comment connection Define the wire cross-section Wire cross-section to VDE0100, dependent on the maximum current and part 523, see section 3.4 ambient temperature. “Mains connection”. Wire the motor phases U, V, W by way of Mount shield at both ends to a shielded cable and ground the motor to reduce interference emission. - Page 21 3 Installation Attention: If the inverter is operated as a controller with encoder (FOR motor control method), motor phases U,V and W must never be reversed! If the motor phases are reversed the inverter has no control over the motor. The motor may buck or accelerate in an uncontrolled manner (“race”).
-
Page 22: Mains Connection
3 Installation Mains connection Step Action Comment Define the wire cross-section Wire cross-section to VDE0100, dependent on maximum current and part 523 ambient temperature. Wire the inverter module with the mains Step not applicable for BG1 to filter, max. line length 0.3 m (with BG4;... - Page 23 3 Installation Attention: Danger to life! Never wire or disconnect electrical connec- tions while they are live! Before working on the device discon- nect the power. Wait until the DC-link voltage at terminals X1/ RB+ and L- has fallen to the safety-low voltage before work- ing on the device (approx.
-
Page 24: Dc Network
Wire cross-section Device Max. possible wire Recommended mains Inverter module connected load cross-section of fusing (gL) [kVA] terminals [mm²] CDA32.004 1 x 10 CDA32.006 1 x 16 CDA32.008 1 x 16 CDA34.003 3 x 10 CDA34.005 3 x 10 CDA34.006 3 x 10 CDA34.008... -
Page 25: Braking Resistor (Rb)
3 Installation Braking resistor In regenerative operation, e.g. braking the drive, the motor feeds energy back into the inverter. This increases the voltage in the DC-link. If the (RB) voltage exceeds a threshold value, the internal braking transistor is activated and the regenerated power is converted into heat by way of a braking resistor. -
Page 26: Control Connections
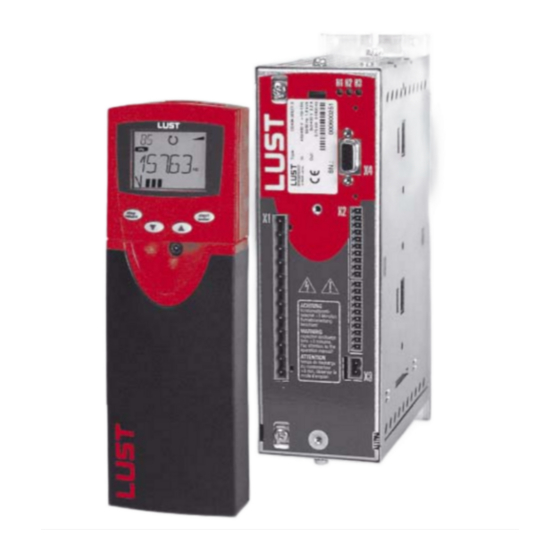
3 Installation Control connections Step Action Comment Check whether your inverter module is Type: CDA32.004,C1.0 fitted ANTRIEBSTECHNIK 1xx.x Software: D- 35633 Lahnau a modified software package C1D1 Data Set: (>V100.x) (standard software = Vx.xx-xx) SN.: 99120442 If this is the case, the control terminal assignment is different. -
Page 27: Choice Of Terminal Assignment
3 Installation 3.7.1 Choice of terminal assignment Selection Continued Typical applications Control method Terminal assignment • Project planning and commissioning are Obtain the terminal Page 4-12 already complete. Serial commissioning assignment from your Commis- project engineer. sioning • Loading of an existing data set. •... -
Page 28: Specification Of Control Terminals
3 Installation 3.7.2 Specification of Des. Specification control = +10 V DC, ±10 V DC, I Analog ISA00 • ISA00: U = (0) 4-20 mA DC, terminals inputs ISA01 switchable by software • ISA01: U = +10 V DC • Tolerance U: ± 1% v. M., I: ±1% of MV •... -
Page 29: Terminal Assignment 1
3 Installation 3.7.3 Terminal Terminal assignment in factory setting assignment 1 Preset solution “Clock drive, quick/slow jog”. Features Parameter • Quick jog/slow jog driving profile with two directions of rotation 152-ASTER = DRV_1 • Output for motor holding brake Des. Function OSD02 Relay contact... - Page 30 3 Installation 3.7.4 Terminal Preset solution “Analog reference and fixed frequency”. assignment 2 Features Parameter • Analog speed input for two directions • Selection of fixed frequencies via 152-ASTER = ROT_6 binary coding of switches S1/S2 • Functionally compatible with VF1000 Des.
- Page 31 3 Installation 3.7.5 Terminal Preset solution “Analog reference + correction, with rotary encoder”. assignment 3 Features Parameter • Analog speed input for two directions with speed correction 152-ASTER = ROT_2 • Encoder evaluation Des. Function OSD02 Relay contact OSD02 for “Ready” +24V message OSD02...
-
Page 32: 3.7.6 Encoder
3 Installation 3.7.6 Encoder Specification of encoder connections: Des. Specification Digital ISD02 • f = 150 kHz limit inputs ISD03 • PLC-compatible (L = < 5 V, H = > 18 V) • Current consumption (encoder) max. 80 mA Connecting •... - Page 33 4 Commissioning 4 Commissioning Choice of commissioning ........4-1 Standard commissioning ........4-2 commissioning ...........4-4 commissioning ........4-6 RIVE ANAGER Direction check .............4-11 Serial commissioning ...........4-12 4.6.1 Serial commissioning with K .....4-12 4.6.2 Serial commissioning with D ..4-14 RIVE ANAGER Operation with K KP200 .......4-15 Operation with D .......4-18...
-
Page 34: Standard Commissioning
4 Commissioning Standard This mode of commissioning is based on the factory setting. commissioning Precondition: • Inverter module is fully connected. • Recommended IEC standard motor (see section A.2) is connected. • Control terminals are wired as per terminal assignment 1, see page 3-13. - Page 35 4 Commissioning Input signals of terminal assignment 1 303-FMAX1 FMAX 592-DECR1 (152-ASTER = DRV_1) 590-ACCR1 270-FFIX1 594-STPR1 f [Hz] 303-FMAX1 FMAX t [s] Figure 4.1 Example of a quick/slow jog driving profile for two directions Output signals of terminal assignment 1 FMAX (152-ASTER = DRV_1) f [Hz]...
-
Page 36: Key Pad
4 Commissioning This mode of commissioning is performed with the K control unit commissioning (accessory order designation: KP200). It enables a number of basic parameters to be adjusted directly. Precondition: • Inverter module is fully connected. • Recommended IEC standard motor (see section A.2) is connected. •... - Page 37 4 Commissioning Note: If the connected IEC standard motor differs by more than two power classes from the rated power output of the inverter module, “D commissioning” with automatic RIVE ANAGER motor identification should be carried out, see section 4.4. The same applies to commissioning of special motors such as reluctance, synchronous or HF motors.
-
Page 38: Drive Manager
4 Commissioning RIVE ANAGER The D as from version 3.0 makes commissioning easier, RIVE ANAGER commissioning especially the adaptation of your drive. It should be used specifically when commissioning with “SFC” or “FOR” mode. The following is an illustration of the commissioning procedure based on the example of the preset solution ROT_2. - Page 39 4 Commissioning 1. Preset solution... In this window you select the terminal assignment required for control of your application. As a check, the terminal diagram and specimen applications are illustrated. For our example please set ROT_2. Different control methods have special advantages depending on the 2.
- Page 40 4 Commissioning By way of the automatic motor identification the characteristic data of IEC 3. Motor data... standard motors and ASM servomotors can be determined. The precondition for problem-free identification is that the rating plate data are present and correctly entered. Note: The data of the motor nominal point (max.
- Page 41 4 Commissioning Set lines per revolution of This setting is only required in “FOR” mode. encoder used 4. Change basic settings... In the last step you can adapt the basic setting of the preset solution to your application. The setting options vary according to the selected preset drive solution (here the example for ROT_2).
- Page 42 4 Commissioning Step Action Note Brake drive by opening start contact. Drive brakes down to standstill. Open ENPO contact. Safely disables power stage. Commissioning is completed. Input signals 303-FMAX1 FMAX 590-ACCR1 592-DECR1 594-STPR1 f [Hz] FMAX 10 V 10 V t [ms] Figure 4.4 Example of a driving profile for two directions with correction reference (R2), 152-ASTER = ROT_2...
-
Page 43: Direction Check
4 Commissioning Direction check Precondition: • Inverter module is fully connected. • The motor planned for the application is correctly connected. • Device set to VFC mode = Voltage Frequency Control (factory setting). • Enter a low reference value, e.g. slow jog. 1. -
Page 44: Serial Commissioning
4 Commissioning Serial Apply this mode of commissioning if you want to put several identical commissioning drives into operation (serial commissioning). The same inverter type and motor must be set for each drive in an identical application. If you already have a complete data set, skip the subsection headed “Save data set to S ”... - Page 45 4 Commissioning Download data set from Step Action Note Presentation to next inverter MART Connect the K to the inverter module of the next drive, insert the S with the desired MART data set and switch on the power. CARD = load/save with Select the CARD menu.
-
Page 46: Rive
Connect your PC to the inverter Use a standard serial cable (9-pin D- Save data set from device to module of the first drive and switch SUB, socket/pin) e.g. LUST accessory file on the power to the inverter. CCD-SUB90x . -
Page 47: Commissioning
4 Commissioning Operation with The K can be plugged directly into the inverter module ( X4). KP200 Overview of K KP200 chipcard to save and MART transfer settings 3-digiti display, e.g. for parameter number Current menu 5-digit display for parameter name and value Acceleration or braking ramp active Bar graph display, 10-character... - Page 48 4 Commissioning Example of parameter setting • The parameters in the PARA menu are grouped into subject areas (PARA menu) according to their functions, in order to provide a clearer overview. • Only the parameters to which the current user level permits access can be changed.
- Page 49 4 Commissioning CARD Read from/write to S MENU MART • In this menu inverter settings can be saved to the S MART transferred to other inverter modules. • In every storage operation all parameters are always saved to the . For read operations, either all parameters or only MART parameters from one subject area (per read operation) can be read-in.
-
Page 50: Manager
4 Commissioning Operation with Precondition: RIVE ANAGER • D user software version V3.0 or higher installed on the RIVE ANAGER H1 H2 H3 RS232 RS232 ACHTUNG Kondensatorent- ladezeit >3 Min. Betriebsanleitung beachten! CCD-SUB90X WARNING capacitor disscharge time >3 minutes. Pay attention to the operation manual! ATTENTION temps de decharge... -
Page 51: Anager
4 Commissioning Parameter list Factory Your (selection) Name Unit Function setting setting Subject area User-defined_11UA Any parameters can be 01-MODE User level of KP200 inserted into this 150-SAVE Save setting in device READY subject area using the (V3.0 or RIVE ANAGER 152 -ASTER Preset terminal assignment... - Page 52 4 Commissioning Factory Your Name Unit Function setting setting Subject area Analog inputs _18IA Settings for analog input ISA00: = Not active 0-10V = Voltage input 0...10 V 180 -FISA0 PM10V = Voltage input -10 V...+10 V 0-20 = Current input 0...20 mA 4-20 = Current input 4...20 mA Subject area Driving sets_60TB...
- Page 53 5 Diagnosis/Fault rectification LEDs ................5-1 Error messages ............5-2 User errors in K operation ......5-3 User errors in S operation .......5-3 MART Errors in power switching ........5-3 Reset ................5-4 LEDs At the top right of the inverter module there are three status LEDs colored red (H1), yellow (H2) and green (H3).
- Page 54 1) For more information refer to CDA3000 Application Manual Table 5.1 Error messages Helpline If you need further assistance, our specialists at the LUST helpline will be glad to help. You can reach us: Mon.-Thur.: 8 a.m. - 4.30 p.m.Tel. ++49 64 41/9 66-180 Fri.:...
- Page 55 5 Diagnosis/Fault rectification User errors in Error Cause Remedy operation ATT1 Parameter cannot be changed at current Select user level 1-MODE higher. user level or is not editable. ATT2 Motor must not be controlled via the CTRL Cancel start signal from a menu.
- Page 56 5 Diagnosis/Fault rectification Reset The reset function is divided into two areas with differing effects. Parameter reset restores to the last value stored in the device. Device reset restores the entire data set to factory setting (delivery defaults). Parameter reset with K If you are in the setup mode of a parameter and press the two cursor keys simultaneously, the parameter you are currently editing will be reset to the last setting stored (= saved with parameter 150-SAVE).
- Page 57 Appendix A Current capacity of inverter modules ....A-2 Technical data ............A-5 Ambient conditions ..........A-8 Project planning notes, Cold plate ......A-9 Project planning notes for multi-motor operation .............. A-10 A.5.1 Engineering note „motor contactor“....A-11 through use of a line choke ......... A-12 UL approbation .............
-
Page 58: Current Capacity Of Inverter Modules
[A] mode mode [kW] [kHz] 0 to 5 Hz [A] > 5 Hz [A] 0.75 CDA32.004,Cx.x CDA32.006,Cx.x 12.8 12.8 12.8 12.8 CDA32.008,Cx.x Peak current for 30 s with inverter module 0.75 to 15 kW Mains voltage 1 x 230 V -20 % +15 %... - Page 59 Inverter modules for 400/460 V systems: Rated Switching Peak current for Peak current for Rated Rec. 4-pole current frequency of intermittent intermittent current I Inverter module standard motor power stage mode mode [kW] at 400V [kHz] 0 to 5 Hz [A] >...
- Page 60 Rated Switching Peak current for Peak current for Rated Rec. 4-pole current frequency of intermittent intermittent current I Inverter module standard motor power stage mode mode [kW] at 400V [kHz] 0 to 5 Hz [A] > 5 Hz [A] at 460V CDA34.072,Wx.x CDA34.090,Wx.x CDA34.110,Wx.x...
-
Page 61: A.2 Technical Data
A.2 Technical data CDA32.004 to CDA34.006 Designation Technical data Output, motor side Recommended rated power 0.75 kW 1.1 kW 1.5 kW 0.75 kW 1.5 kW 2.2 kW with 4-pole Standard motor Voltage 3 x 0 ... 230 V 3 x 0 ... 400/460 V Continuous current (RMS) (I 4.0 A... - Page 62 CDA34.008 to CDA34.060 Designation Technical data Output, motor side Recommended rated power 3.0 kW 4.0 kW 5.5 kW 7.5 kW 11 kW 15 kW 22 kW 30 kW with 4-pole Standard motor Voltage 3 x 0 ... 400/460 V Continuous current (RMS) (I 7.8 A 10 A 14 A...
- Page 63 CDA34.072 to CDA34.250 Designation Technical data Output, motor side Recommended rated power 37 kW 45 kW 55 kW 75 kW 90 kW 110 kW 132 kW with 4-pole Standard motor Voltage 3 x 0 ... 400/460 V Continuous current (RMS) (I 72 A 90 A 110 A...
-
Page 64: Ambient Conditions
A.3 Ambient conditions Characteristic Inverter module -10 ...45 ° C (BG1 ... BG5) in operation 0 ... 40 ° C (BG6 ... BG8) with power reduction to 55 ° C Temperature range in storage -25 ... +55 °C in transit -25 ... -
Page 65: Project Planning Notes, Cold Plate
A.4 Project planning notes, Cold plate Subject Project planning notes • Evenness of contact surface = 0.05 mm Roughness of contact surface = roughness factor 6.3 Thermal connection to • Coat area between inverter module (“cold plate” backing plate) and cooler with heat transfer cooler compound (coat thickness 30-70µ). -
Page 66: Project Planning Notes For Multi-Motor Operation
A.5 Project planning Subject Project planning notes notes for multi- motor operation Current The sum total of the motor currents must be less than the rated output configuration of current of the inverter module Σ inverter module of motor currents, (I ) <... -
Page 67: Engineering Note „Motor Contactor
A.5.1 Engineering note In order to prevent an unexpected starting it is necessary to avoid a dangerous motion at access to the machine according to EN1037 - thus „Motor to provide galvanic separation with a motor contactor in the cable contactor“... -
Page 68: Through Use Of A Line Choke
Example for the digital output OSD01: f [Hz] STR (Start/Stop) e.g. OSD01 (ENMO) power stage TENMO TENMO Attention: A corresponding driver relay has to be used between the digital output and the motor contactor. A.6 through use of a line choke Line chokes are required: •... - Page 69 Mains load (example) Without line choke With line choke Change 4 kW inverter, 4 kW inverter, Without line choke mains impedance mains impedance compared to 0.6 mH 6 mH with line choke 99 % 33 % -67 % Voltage distortion (THD) Mains current amplitude 18.9 A 9.7 A...
-
Page 70: A.7 Ul Approbation
Tightening torque of Device Wire cross-section Mains fuse grounding lead terminals mains/motor terminals as mains/motor terminals 0.5 ... 0.6 Nm CDA32.004 AWG 16 N/M 10 A as mains/motor terminals 0.5 ... 0.6 Nm CDA32.006 AWG 14 N/AWG 16 M 10 A as mains/motor terminals 0.5 ... -
Page 71: Layouts Of All Sizes
Attention: The inverter modules can typically be overloaded with 1.5 x for 60 s (1.8 x I for 30 s). The effective inverter capacity ≤ I utilization (I ) must never be greater than I (rated eff. current). Minimum cross-section of the grounding lead to DIN VDE 0100 Part 540 Cross-section PE mains connection... - Page 72 Terminal Explanation Power connections Control connections Motor PTC connection PC/KP200 connection (RS232 interface) UM-xxx module connection CM-xxx module connection stop start return enter H1 H2 H3 stop start return enter stop start H1 H2 H3 enter return Figure A.2 Layout of CDA3000 inverter module, sizes 6 to 8 A-16 CDA3000 Operation Manual...
- Page 73 Hinweis zur EN 61000-3-2 DE Notes on EN 61000-3-2 EN (rückwirkende Netzbelastung durch Oberwellen) (limits for harmonic current emissions) Unsere Frequenzumrichter und Servo-regler sind im Sinne der Our frequency inverters and servocontrollers are "professional EN61000 "professionelle Geräte", so dass sie bei einer Nennan- devices"...
- Page 74 Lust Antriebstechnik GmbH Gewerbestrasse 5-9 • D-35631 Lahnau Tel. 0 64 41 / 9 66-0 • Fax 0 64 41 / 9 66-137 Internet: http://www.lust-tec.de • e-mail: info@lust-tec.de ID no.: 0840.00B.4-00 • 05/2003 Technische Änderungen vorbehalten. We reserve the right to make technical changes.
Need help?
Do you have a question about the CDA32.004 and is the answer not in the manual?
Questions and answers