Advertisement
Quick Links
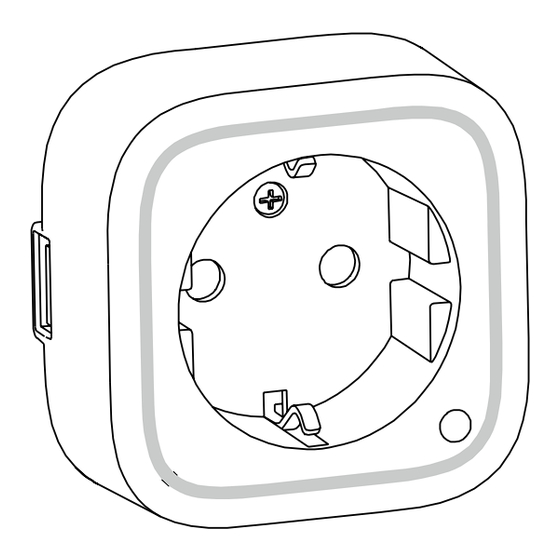
Aeotec by Aeon Labs Smart Dimmer.
Aeotec Smart Dimmer 6 is a low-cost Z-Wave Dimmer
plug-in module specifically used to enable Z-Wave
command and control (on/off/dim) of any incandescent
bulbs, dimmable LED bulbs, halogen bulbs with or
without transformers. It can report immediate wattage
consumption or kWh energy usage over a period of
time. In the event of power failure, non-volatile memory
retains all programmed information relating to the unit's
Smart Dimmer 6
operating status.
Its surface has a Smart RGB LED, which can be used
for indicating the output load status or strength of the
wireless signal. You can configure its indication colour
View the expanded manual:
http://aeotec.com/support
according to your favour.
The Smart Dimmer 6 is a security Z-wave device and
supports Over The Air (OTA) feature for the products
firmware upgrade.
Familiarize yourself with your Smart Dimmer.
Quick start.
1.
Decide on where you want your Smart Dimmer to be
placed and plug it in to a wall outlet. Its RGB LED will
®
Getting your Smart Dimmer up and running is as simple
blink when you press the Action Button on the Smart
as plugging it into a wall socket and linking it to your
Dimmer.
Z-Wave network. The following instructions tell you how
2.
If your Z-Stick is plugged into a gateway or a
to add your Smart Dimmer to your Z-Wave network via
computer, unplug it.
Aeotec by Aeon Labs' Z-Stick or Minimote controller.
3.
Take your Z-Stick to your Smart Dimmer.
If you are using other products as your main Z-Wave
4.
Press the Action Button on your Z-Stick.
controller, such as a Z-Wave gateway, please refer to
5.
Press the Action Button on your Smart Dimmer.
the part of their respective manual that tells you how to
6.
If Smart Dimmer has been successfully added to your
add new devices to your network.
Z-Wave network, its RGB LED will no longer blink.
If the adding was unsuccessful, the red LED will be
solid for 2 seconds and then remain colourful gradient
status, repeat the instructions from step 4.
7.
Press the Action Button on the Z-Stick to take it out of
inclusion mode, and then return it to your gateway or
computer.
If you're using a Minimote:
If you're using a Z-Stick:
1. Decide on where you want your Smart Dimmer to be
placed and plug it in to a wall socket. Its RGB LED will
blink when you press the Action Button on the Smart
Dimmer.
Version LED indication Output (W)
2.
Take your Minimote to your Smart Dimmer.
Green
[0W, 345W)
3.
Press the Include button on your Minimote.
EU
Yellow
[345W, 460W)
4.
Press the Action Button on your Smart Dimmer.
Red
[460W, 575W)
5.
If Smart Dimmer has been successfully added to your
Z-Wave network, its RGB LED will no longer blink.
You can also configure the brightness of RGB LED
If the adding was unsuccessful, the red LED will be
when the Smart Dimmer is in Energy mode, Momentary
solid for 2 seconds and then remain colourful gradient
Indicate mode, or Night Light mode.
status, repeat the instructions from step 4.
6.
Press any button on your Minimote to take it out of
Removing your Smart Dimmer from a Z-Wave
inclusion mode.
network.
With your Smart Dimmer now working as a part of your
Your Smart Dimmer can be removed from your Z-Wave
smart home, you'll be able to configure it from your
network at any time.You'll need to use your Z-Wave
home control software. Please refer to your software's
network's main controller to do this and the following
user guide for precise instructions on configuring Smart
instructions which will tell you how to do this using an
Dimmer to your needs.
Aeotec by Aeon Labs'Z-Stick or Minimote controller.
The colour of RGB LED will change according to the
If you are using other products as your main Z-Wave
output load power level when it is in Energy mode:
controller, please refer to the part of their respective
manuals that tells you how remove devices from your
Version LED indication Output (W)
network.
Green
[0W, 180W)
If you're using a Z-Stick:
US
Yellow
[180W, 240W)
Red
[240W, 300W)
Green
[0W, 345W)
AU
Yellow
[345W, 460W)
Red
[460W, 575W)
1.
If your Z-Stick is plugged into a gateway or a
unsuccessful, the RGB LED will be solid, repeat the
computer, unplug it.
instructions from step 2.
2.
Take your Z-Stick to your Smart Dimmer.
5.
Press any button on your Minimote to take it out of
3.
Press and hold the Action Button on your Z-Stick for 3
removal mode.
seconds and then release it.
4.
Press the Action Button on your Smart Dimmer.
Advanced functions.
5.
If your Smart Dimmer has been successfully
Changing RGB LED mode.
removed from your network, its RGB LED will remain
the colourful gradient status. If the removal was
You can change the mode of how the RGB LED acts
unsuccessful, the RGB LED will be solid, repeat the
through configuring the Smart Dimmer. There are 3
instructions from step 3.
different modes: Energy mode, Momentary indicate
6.
Press the Action Button on the Z-Stick to take it out of
mode, and Night light mode.
removal mode.
Energy mode will allow the LED to follow the state of
the Smart Dimmer, when the dimmer is on, the LED will
If you're using a Minimote:
be on, and while the dimmer is off, the current colour
LED will be off and then the purple LED remains on.
Momentary indicate mode will momentarily turn the LED
on for 5 seconds then turn off after every state change
in the dimmer. Night light mode will allow the LED to be
turned on and off during your selected time of day you
have configured for it.
1.
Take your Minimote to your Smart Dimmer.
Parameter 81 [1 byte dec] is the parameter that will set
2.
Press the Remove Button on your Minimote.
one of the 3 different modes. If you set this configuration
3.
Press the Action Button on your Smart Dimmer.
to:
4.
If your Smart Dimmer has been successfully
(0) Energy Mode
removed from your network, its RGB LED will remain
(1) Momentary Indicate Mode
the colourful gradient status. If the removal was
(2) Night Light Mode
Advertisement

Related Manuals for Aeotec Smart Dimmer 6

Summary of Contents for Aeotec Smart Dimmer 6
- Page 1 Dimmer to your needs. computer. Aeotec by Aeon Labs’Z-Stick or Minimote controller. The Smart Dimmer 6 is a security Z-wave device and Momentary indicate mode will momentarily turn the LED The colour of RGB LED will change according to the...
- Page 2 FCC NOTICE (for USA) that for the Warranty Period (as defined below), the interference by one or more of the following measures: Version:501009900001-X01 www.aeotec.com of any other intellectual property rights arising from or...
- Page 3 Aeon Labs Smart Dimmer 6 Engineering Specifications and Advanced Functions for Developers Aeon Labs Smart Dimmer is a Z-Wave multilevel switch device based on Z-Wave enhanced 232 slave library V6.51.06. Its surface has the Smart RGB LEDs on, which can be used for indicating the output load status, the strength of wireless signal.
-
Page 4: Technical Specifications
COMMAND_CLASS_POWERLEVEL V1 COMMAND_CLASS_CLOCK V1 COMMAND_CLASS_FIRMWARE_UPDATE_MD V2 2. Technical Specifications Model number: ZW099 Operating distance: Up to 300 feet/100 meters outdoors. Input: 120V~, 60Hz. (USA Version) 230V~, 50Hz. (EU, AU, CN Version) 230V~, 60Hz. (BR version) Output: 120V~, 60Hz, Max 2.5A Resistor load. (USA Version) 230V~, 50Hz, Max 2.5A Resistor load. - Page 5 3. Remove Smart Dimmer from a z-wave network: Insert the Smart Dimmer to power socket, The Smart Dimmer LED will be solid. 2. Let the primary controller into remove mode (If you don’t know how to do this, refer to its manual).
- Page 6 RGB indication Status RGB LED Purple color (10%) Output load is turned off. Green Output load is in small wattage range. US version , t he range of load wattage is [0W, 180W) AU version , the range of load wattage is [0W, 345W) EU version ,...
- Page 7 5.3 Association Command Class Smart Dimmer supports 2 association groups and Max 5 nodes for each group. Association Nodes Send Mode Send commands Group Group 1 Single Cast When the state of Smart Dimmer(on/off/dim the load ) is changed: [2,5] 1, Set Configuration parameter 80 to 0 :...
-
Page 8: Parameter Number
5.9 Configuration Set Command Class Command Class = COMMAND_CLASS_CONFIGURATION Command = CONFIGURATION_SET Parameter Number Default Reserved Size Configuration Value 1(MSB) Configuration Value 2 ……… Configuration Value n(LSB) Parameter Number Definitions (8 bit): Parameter Description Default Value Size Number Hex / Decimal 0x03 (3) Current Overload Protection. - Page 9 0x5A (90) Enables/disables parameter 91 and 92 below (1=enabled, 0=disabled). 0x5B (91) The value here represents minimum change in wattage (in 25 (W) terms of wattage) for a REPORT to be sent (Valid values 0- 60000). 0x5C (92) The value here represents minimum change in wattage 5 (%) percent (in terms of percentage) for a REPORT to be sent (Valid values 0-100).
- Page 10 configuration Reserved Reserved Reserved Reserved Auto Auto Auto Auto Value 4(LSB) send send send send Meter Meter Meter Meter REPORT REPOR REPORT REPOR (for T (for (for T (for kWh) at watt) current) voltage at the at the at the group group group...
Need help?
Do you have a question about the Smart Dimmer 6 and is the answer not in the manual?
Questions and answers