Subscribe to Our Youtube Channel
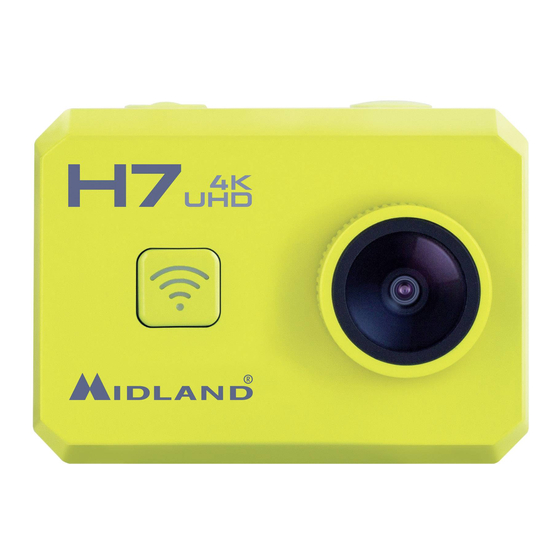
Summary of Contents for Midland H7
- Page 1 User Manual º 4K@10fps 2-inch Wide Angle Waterproof 1.5 Hours Lens up to 30m...
- Page 2 Cautions Do not drop your camera. > Do not place heavy objects on the > camera. Keep the camera away from water > and liquids (unless used in the wa- terproof case). This may cause the camera to malfunction. Recharge the battery via the USB ca- >...
-
Page 3: Key Features
KEY FEATURES Video resolution: 4k@10fps, 2.7k@15fps, 1080p@60fps, 720p@120fps, 720@60fps. Image resolution: 8MP, 12MP (interpolation). Supports Wi-Fi connection, range up to 15 meters. Supports 2.4G Wireless remote control. Underwater 30 meters when bundled with waterproof case. 2” TFT LCD screen. 3.7V/1000mAh built-in Lithium-ion battery. WHAT’S IN THE BOX Camera 3M adhesive (2) -
Page 4: Camera Diagram
CAMERA DIAGRAM Shoot Button Mini HDMI interface Power Button USB interface Wi-Fi Button LED indicator LCD screen Lens Micro SD interface Reset Button... -
Page 5: How To Use Your Camera
Turn off: press and hold the power Button for 2 seconds. Modes Midland H7 has 4 different operative modes: Vid- eo, Slow Motion, Picture and Play back. To switch to different modes you have to press Shoot But- ton for 1,5 seconds:... - Page 6 time appears to be slowed down. It achieved when each film frame is captured at a rate much faster than it will be played back. Press Shoot Button for 1.5 seconds to switch from Video mode to Slow Motion mode. Press Shoot Button once to start recording on Slow Motion mode.
- Page 7 Charging the camera Connect the camera to the PC via USB cable. The red indicator will be on, charging is in process. When the battery is fully charged, the red indica- tor will turn off. It takes around 2.5 hours to fully charge the battery.
-
Page 8: Setting Your Camera
a. Open the waterproof case latch; b. insert the camera properly; c. close the waterproof case buckle. After the use, please carefully clean the case with clean water and dry with a dry cloth. SETTING YOUR CAMERA Video mode setting When the camera is on Video Mode, press the Power Button once (release immediately, if it is held too long, the camera will switch off ), then... - Page 9 Selected “3 Min”: the video will be separated in- > to different files by 3-minutes. Selected “5 Min”: the video will be separated in- > to different files by 5-minutes. For example, if you select “5 Min”, time length, a 20 Minutes video will be separated into 4 Video Clips (5 Minutes each Clip).
- Page 10 photo image quality. Metering: different options to determine the ex- posure. White balance: the default setting is Auto, you can adjust the mode as concrete lighting condition. ISO: to determine how sensitive the camera sen- sor is. Exposure: light exposure, the higher exposure the faster image speed, high exposure suit to dark environment.
- Page 11 Auto power off: select 1,3, 5 min option, the cam- era will be off if no operation after 1, 3, 5 min. Date & Time: the default format is YY/DD/MM. You can set the date and time, time sequence by yourself.
-
Page 12: Remote Control (Optional)
WI-FI SET-UP Note: make sure your camera is full of power be- fore using the Wi-Fi function. a. Download the App “iSport Cam” to your smart- phone or tablet from Google play store or Ap- ple App store; b. turn on the camera, then press the Wi-Fi But- ton to enter into the Wi-Fi mode;... - Page 13 Picture key: Press once to take a single picture. Video key: Press once to start recording a video, press again to stop. Power off key: Press and hold for 4 seconds to turn off the camera. Indicator function: Left indicator: >...
-
Page 14: Connect With Tv
Note: Only need to pair once, afterwords the camera will recognize automatically; Wi–Fi function & remote controller can not be used simultaneously. PC CAMERA (WEBCAM) The Camera can be used as a PC camera (webcam). a. Connect camera and PC via a USB cable; b. -
Page 15: Transferring Files To Pc
d. press and hold Power Button for 2 seconds to turn off the camera. TRANSFERRING FILES TO PC You can transfer captured videos and pictures to PC. a. Connect camera and PC via a USB cable; b. turn the camera on; c. - Page 16 Q: The camera cannot turn on. Why? A: Check if the battery is running flat. If so, charge the battery via USB cable or AC adaptor first. Q: The camera freezes. What should I do? A: Use a pin to press the reset button near to USB interface for 2 seconds, then restart the cam- era.
-
Page 17: Limited Warranty
The warranty does not cover: • The product deterioration by normal use. • Defects caused by misuse with, or connection to, any accessory or software not genuine Midland. - Page 18 Warranty is not enforceable: • If the product has been dismantled, modified or repaired by anyone other than the authorized service centre or if it’s repaired using unautho- rized spare parts. • If the product has been exposed to environ- mental conditions for which it has not been de- signed.
-
Page 19: Specifications
SPECIFICATIONS Video resolution: 4k@10fps, Battery life: about 100min 2.7k@15fps, 1080p@60fps, video without Wi-Fi 720p@120fps Video format: MOV H.264 Still photo resolution: 8 (4K M-JPEG) megapixels (12 megapixels Still Photo format: JPEG interpolated) Screen rotation: Yes 180° Storage type: Micro SD card Interface: USB 2.0 , HDMI up to 32GB (not included) Working temperature:...


Need help?
Do you have a question about the H7 and is the answer not in the manual?
Questions and answers