Table of Contents
Advertisement
Quick Links
Table of Contents. . . . . . . . . . . . . . . . . . . 1
Important Safety Instructions . . . . . . . . . 2
Precautions . . . . . . . . . . . . . . . . . . . . . . . 6
Power Sources . . . . . . . . . . . . . . . . . . . . . 8
Using the Stand . . . . . . . . . . . . . . . . . . . . 8
Location of Controls . . . . . . . . . . . . . . . . 9
Remote Control . . . . . . . . . . . . . . . . . . . 11
• Battery Installation . . . . . . . . . . . . . . . . . 12
Remote Control Transmitter . . . . . . . . . 13
Connection . . . . . . . . . . . . . . . . . . . . . . . 13
• Connecting the Unit to a TV Using the
A/V Cable. . . . . . . . . . . . . . . . . . . . . . . . 13
S-Video Cable . . . . . . . . . . . . . . . . . . . . 14
• Connecting Another Unit to this DVD
Player . . . . . . . . . . . . . . . . . . . . . . . . . . 15
About Discs . . . . . . . . . . . . . . . . . . . . . . 16
Setup Menu. . . . . . . . . . . . . . . . . . . . . . . 18
• General Setup Menu . . . . . . . . . . . . . . . 19
• Audio Setup Menu . . . . . . . . . . . . . . . . . 20
• Video Setup Menu . . . . . . . . . . . . . . . . . 21
• Preference Setup Menu. . . . . . . . . . . . . 21
Basic Operation . . . . . . . . . . . . . . . . . . . 23
• Headphone Jack(s) . . . . . . . . . . . . . . . . 23
• Screen Mode . . . . . . . . . . . . . . . . . . . . . 23
• Volume Control . . . . . . . . . . . . . . . . . . . 23
• Display Button . . . . . . . . . . . . . . . . . . . . 24
DVD Operation . . . . . . . . . . . . . . . . . . . . 25
• Playback of a DVD . . . . . . . . . . . . . . . . 25
• Skip . . . . . . . . . . . . . . . . . . . . . . . . . . . . 27
• Search . . . . . . . . . . . . . . . . . . . . . . . . . . 27
• Slow Motion . . . . . . . . . . . . . . . . . . . . . . 27
• Pause/Frame . . . . . . . . . . . . . . . . . . . . . 27
TABLE OF CONTENTS
• Title/Chapter Search . . . . . . . . . . . . . . . 28
• Title/Time Search. . . . . . . . . . . . . . . . . . 28
• Chapter/Time Search. . . . . . . . . . . . . . . 28
• Bookmark. . . . . . . . . . . . . . . . . . . . . . . . 29
• Repeat Playback . . . . . . . . . . . . . . . . . . 30
• Repeat A-B Playback. . . . . . . . . . . . . . . 30
• Audio Menu . . . . . . . . . . . . . . . . . . . . . . 31
• Subtitle Menu. . . . . . . . . . . . . . . . . . . . . 31
• DVD Menu . . . . . . . . . . . . . . . . . . . . . . . 31
• Title Menu . . . . . . . . . . . . . . . . . . . . . . . 31
• Zoom In/Out. . . . . . . . . . . . . . . . . . . . . . 32
• Angle . . . . . . . . . . . . . . . . . . . . . . . . . . . 32
• Programmed Playback . . . . . . . . . . . . . 33
CD Operation . . . . . . . . . . . . . . . . . . . . . 34
• Playback of a CD. . . . . . . . . . . . . . . . . . 34
• Pause. . . . . . . . . . . . . . . . . . . . . . . . . . . 34
• Random Playback . . . . . . . . . . . . . . . . . 35
• Skip . . . . . . . . . . . . . . . . . . . . . . . . . . . . 35
• Search . . . . . . . . . . . . . . . . . . . . . . . . . . 35
Number Buttons. . . . . . . . . . . . . . . . . . . 36
• Repeat Playback . . . . . . . . . . . . . . . . . . 36
Picture CD Operation . . . . . . . . . . . . . . 37
Troubleshooting Guide . . . . . . . . . . . . . 38
Care and Maintenance. . . . . . . . . . . . . . 40
Specifications. . . . . . . . . . . . . . . . . . . . . 41
1
Advertisement
Table of Contents

Related Manuals for Memorex MVDP0803


Summary of Contents for Memorex MVDP0803
-
Page 1: Table Of Contents
TABLE OF CONTENTS Table of Contents....1 • Title/Chapter Search ....28 Important Safety Instructions . -
Page 2: Important Safety Instructions
IMPORTANT SAFETY INSTRUCTIONS CAUTION RISK OF ELECTRIC SHOCK DO NOT OPEN CAUTION: TO REDUCE THE RISK OF ELECTRIC SHOCK, DO NOT REMOVE COVER (OR BACK). NO USER-SERVICEABLE PARTS INSIDE. REFER SERVICING TO QUALIFIED SERVICE PERSONNEL. (This Caution Marking and Rating Label are located on the upper side of the stand.) DANGEROUS VOLTAGE: The lightning flash with arrowhead symbol within an equilateral triangle is intended to alert the user to the presence of uninsulated dangerous... - Page 3 IMPORTANT SAFETY INSTRUCTIONS WARNING: TO REDUCE THE RISK OF FIRE OR ELECTRIC SHOCK, AND ANNOYING INTERFERENCE, USE THE RECOMMENDED ACCESSORIES ONLY. SURGE PROTECTORS: It is recommended to use a surge protector for AC connection. Lightning and power surges ARE NOT covered under warranty for this product. LASER WARNING: This unit employs a laser.
- Page 4 Now it’s time to consider how you can maximize the fun and excitement your equipment offers. Memorex wants you to get the most out of your equipment by playing it at a safe level. One that lets the sound come through loud and clear without annoying blaring or distortion and, most importantly, without affecting your sensitive hearing.
- Page 5 IMPORTANT SAFETY INSTRUCTIONS 1. Read these Instructions. 2. Keep these Instructions. 3. Heed all Warnings. 4. Follow all instructions. 5. Do not use this apparatus near water. 6. Clean only with a dry cloth. 7. Do not install near any heat sources such as radiators, heat registers, stoves, or other apparatus (including amplifiers) that produce heat.
-
Page 6: Precautions
PRECAUTIONS NOTES ON HANDLING: • When shipping the DVD player, always use the original shipping carton and packing materials. For maximum protection, repack the unit as it was originally packed at the factory. • Do not use volatile liquids, such as insect spray, near the DVD player. Do not leave rubber or plastic products in contact with the DVD player for a long time. -
Page 7: Using The Stand
USING THE STAND Simply rotate the Stand outward to utilize. To put back, rotate it so it is flat against the unit. -
Page 8: Power Sources
POWER SOURCES AC CONNECTION Insert the small end of the AC adapter into the jack on the side of the unit. Insert the other end (with the 2 blades) into a conveniently located AC outlet having 120V AC, 60Hz. To DC 12V IN Jack AC ADAPTER SPECIFICATIONS: DC 12V Z NOTES:... -
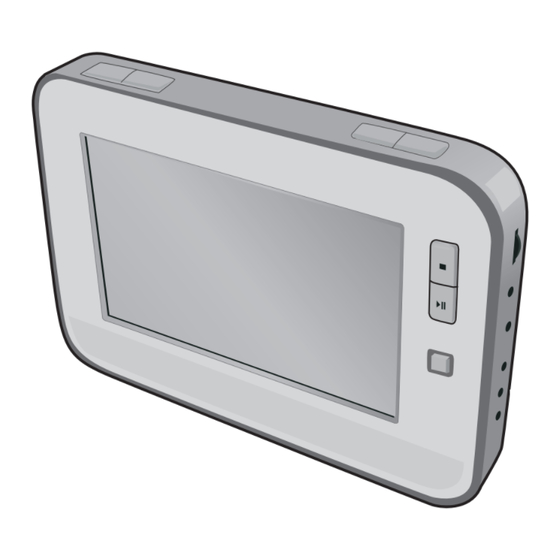
Page 9: Location Of Controls
LOCATION OF CONTROLS FRONT/TOP/RIGHT SIDE 1 2 3 DISPLAY/SCREEN Button 13. Right Speaker MENU/AV IN/OUT Button 14. Remote Sensor SETUP Button 15. Navigation (π,†,√,®)/OK Control Display 16. AV IN Jack (AV CABLE PART NO. Skip o Button 0704-109480-00000*) Skip n Button 17. - Page 10 LOCATION OF CONTROLS (CONTINUED) REAR/LEFT SIDE 1. Open Door Switch 5. DC IN Jack 12V z 2. CD Compartment Door (AC ADAPTER PART NO. 0251-207150-80008*) 3. Power Button 4. Stand *Consumer Replaceable Part (See page 39 to order.)
-
Page 11: Remote Control
REMOTE CONTROL REMOTE SETUP TITLE SLOW ZOOM BOOKMARK CLEAR GOTO DISPLAY MENU PAUSE/ STOP FRAME REPEAT PROG RANDOM AUDIO ANGLE SUBTITLE 1. SLOW Button 18. ZOOM Button 2. TITLE Button 19. CLEAR Button 3. Number Buttons (0-9) 20. GOTO Button 21. -
Page 12: Battery Installation
REMOTE CONTROL (CONTINUED) BATTERY INSTALLATION Insert a pencil, or other pointy object, into the groove on the Battery Compartment to help slide the compartment out. Install a CR2025 battery, paying attention to polarity diagram Battery Compartment (positive side up). Replace the Battery Compartment. BATTERY PRECAUTIONS Follow these precautions when using batteries in this device: 1. -
Page 13: Effective Distance Of The Remote Control Transmitter
REMOTE CONTROL (CONTINUED) EFFECTIVE DISTANCE OF THE REMOTE CONTROL TRANSMITTER NOTES: • When there is an obstacle between the DVD and the transmitter, the transmitter may not operate. • When direct sunlight, an incandescent lamp, fluorescent lamp or any other strong light shines on the Remote Sensor of the DVD, the remote operation may be unstable. -
Page 14: Connecting The Unit To A Tv Using The S-Video Cable
CONNECTION (CONTINUED) CONNECTING THE UNIT TO A TV USING THE S-VIDEO CABLE From AUDIO/ VIDEO OUT NOTES FOR CONNECTING TO A TV: • The TV must have an S-Video IN jack. • Set the TV’s TV/VIDEO button or switch to the S-VIDEO setting. •... -
Page 15: Player
CONNECTION (CONTINUED) CONNECTING ANOTHER UNIT TO THIS DVD PLAYER To Audio/ Video IN NOTES FOR CONNECTING: • When connecting the DVD, refer to the owner’s manuals of the TV and stereo system, as well as this manual. • When connecting the DVD, make sure the power is off and all units are unplugged before making any connections. -
Page 16: About Discs
ABOUT DISCS The region code for this DVD player is listed on the bottom of the player. PLAYABLE DISCS: The following discs can be played back on this DVD player: DISC TYPES: Data on most DVDs is divided into sections called “titles”... - Page 17 ABOUT DISCS (CONTINUED) Notes on Copyright: It is forbidden by law to copy, broadcast, show, broadcast on cable, play in public and rent copyrighted material without permission. DVD video discs are copy protected, and any recordings made from these discs will be distorted. This product incorporates copyright protection technology that is protected by U.S.
-
Page 18: Setup Menu
SETUP MENU The Setup menu lets you customize the DVD player by allowing you to select various language preferences, turn screen saver on and off, adjust what type of television screen you have and more. Use the following instructions to navigate and change the options as described on the upcoming pages. -
Page 19: General Setup Menu
SETUP MENU (CONTINUED) GENERAL SETUP MENU: Press the SETUP button to enter the menu, select GENERAL SETUP using the Navigation (√,®) buttons, then press the PLAY (®)/OK button to select it. Select/change the Setup option as described on page 18. TV DISPLAY TV TYPE -- General Setup Page --... -
Page 20: Audio Setup Menu
SETUP MENU (CONTINUED) CAPTIONS SCREEN SAVER -- General Setup Page -- -- General Setup Page -- TV Display Wide TV Display Wide Ntsc Ntsc TV Type TV Type Angle Mark Angle Mark OSD Lang OSD Lang Captions Captions Screen Saver Screen Saver Last Memory Last Memory... -
Page 21: Video Setup Menu
SETUP MENU (CONTINUED) VIDEO SETUP MENU: Press the SETUP button to enter the menu, select VIDEO SETUP using the Navigation (√,®) buttons, then press the PLAY (®)/OK button to select it. Use the Navigation (π, ) buttons to select one of the Setup options, then press the PLAY (®)/OK button to select it. Use the Navigation (√,®) buttons to change the desired setting, then press the PLAY (®)/OK button to return to the previous setting. - Page 22 SETUP MENU (CONTINUED) DISC MENU DEFAULT -- Preference Page -- -- Preference Page -- Audio Audio Subtitle Subtitle Disc Menu Disc Menu Default Default Select the language the DISC MENU will be Select this option to reset all the preferences in (English, German, French, Spanish or to their original factory settings.
-
Page 23: Basic Operation
BASIC OPERATION IMPORTANT: When “ ” appears while pressing a button, this means that the corresponding function cannot be performed either on the disc inserted, or in the selected mode. SCREEN MODE HEADPHONE JACK(S) For private listening, plug headphones into Press and hold the DISPLAY/SCREEN one or both of the Headphone jacks. -
Page 24: Display Button
OPERATION (CONTINUED) DISPLAY BUTTON CLEAR GOTO CLEAR GOTO DISPLAY MENU DISPLAY MENU PAUSE/ PAUSE/ STOP STOP FRAME FRAME REPEAT PROG RANDOM REPEAT PROG RANDOM AUDIO ANGLE SUBTITLE AUDIO ANGLE SUBTITLE While playing a DVD, press the DISPLAY While playing a CD, press the DISPLAY button to cycle as follows: button to cycle as follows: 1st press:... -
Page 25: Dvd Operation
DVD OPERATION IMPORTANT NOTES: • “ ” will appear on the screen during operation if you try to access a function that is not available on the disc. • Some discs may take a few seconds to load. • If a disc is inserted incorrectly, dirty, damaged, or is not present at all, “NO DISC” will appear in the display. - Page 26 DVD OPERATION (CONTINUED) SETUP SETUP TITLE SLOW ZOOM BOOKMARK TITLE SLOW ZOOM BOOKMARK CLEAR GOTO CLEAR GOTO DISPLAY MENU DISPLAY MENU PAUSE/ STOP FRAME PAUSE/ STOP FRAME REPEAT PROG RANDOM REPEAT PROG RANDOM AUDIO ANGLE SUBTITLE Close the disc tray. After loading, the menu To stop playback, press the Stop button 1;...
-
Page 27: Skip
DVD OPERATION (CONTINUED) SKIP SEARCH TITLE SLOW ZOOM BOOKMARK CLEAR GOTO CLEAR GOTO DISPLAY MENU DISPLAY MENU PAUSE/ PAUSE/ FRAME STOP STOP FRAME REPEAT PROG RANDOM REPEAT PROG RANDOM AUDIO ANGLE SUBTITLE AUDIO ANGLE SUBTITLE Press the Skip n button 1 to advance the During playback, press either the Search ®®... -
Page 28: Title/Chapter Search
DVD OPERATION (CONTINUED) TITLE/CHAPTER SEARCH TITLE/TIME SEARCH Use this feature to directly go to a specific title Use this feature to directly go to a specific title and/or chapter. and/or time. SETUP SETUP TITLE SLOW ZOOM BOOKMARK TITLE SLOW ZOOM BOOKMARK CLEAR GOTO... -
Page 29: Bookmark
DVD OPERATION (CONTINUED) BOOKMARK This unit allows you to bookmark up to 12 sections of a DVD for later viewing as follows: SETUP SETUP TITLE SLOW ZOOM BOOKMARK TITLE SLOW ZOOM BOOKMARK CLEAR GOTO CLEAR GOTO DISPLAY MENU DISPLAY MENU PAUSE/ PAUSE/ STOP... -
Page 30: Repeat Playback
DVD OPERATION (CONTINUED) REPEAT PLAYBACK REPEAT A-B PLAYBACK While playing back a DVD, this unit can While playing back a DVD, this unit can repeatedly playback a chapter or title. repeatedly playback a specific section. CLEAR GOTO CLEAR GOTO DISPLAY MENU DISPLAY MENU... -
Page 31: Audio Menu
DVD OPERATION (CONTINUED) AUDIO MENU SUBTITLE MENU CLEAR GOTO CLEAR GOTO DISPLAY MENU DISPLAY MENU PAUSE/ PAUSE/ FRAME STOP STOP FRAME REPEAT PROG RANDOM REPEAT PROG RANDOM AUDIO ANGLE SUBTITLE AUDIO ANGLE SUBTITLE Press the AUDIO button repeatedly to Press the SUBTITLE button repeatedly to change the audio language. -
Page 32: Zoom In/Out
DVD OPERATION (CONTINUED) ANGLE Some discs may contain scenes which have been shot simultaneously from a number of ZOOM IN/OUT different camera angles. This feature only works on discs with more than one camera The image on the screen can be magnified/ minimized as follows: angle. -
Page 33: Programmed Playback
DVD OPERATION (CONTINUED) PROGRAMMED PLAYBACK The DVD player in this unit has a 20 chapter programmable memory that allows you to program up to 20 chapters on any disc for playback in any desired order. You may program 20 different chapters or you may also program certain chapters to play more than once. -
Page 34: Cd Operation
CD OPERATION PLAYBACK OF A CD Press the Power button to turn the unit on; Slide the Open Door switch downward to the Power button will light. open the unit; “Open” will appear on the screen. Insert a disc with the label side NOTE: To turn this unit off, press the Power facing up on the disc tray. -
Page 35: Random Playback
CD OPERATION (CONTINUED) RANDOM PLAYBACK While in the Stop mode, press the SETUP RANDOM button 1 once, “RANDOM” will TITLE SLOW ZOOM BOOKMARK appear on the screen; press the PLAY (®)/OK button 2 and the unit will randomly CLEAR GOTO playback all the tracks on the CD. -
Page 36: Selecting Tracks Using The Number Buttons
CD OPERATION (CONTINUED) REPEAT PLAYBACK While playing back a disc, this unit can SELECTING TRACKS USING THE repeatedly playback one or all track(s) on NUMBER BUTTONS a disc. CLEAR GOTO SETUP DISPLAY MENU TITLE SLOW ZOOM BOOKMARK PAUSE/ STOP FRAME CLEAR GOTO DISPLAY... -
Page 37: Picture Cd Operation
PICTURE CD OPERATION Press the Power button to turn the unit on; Slide the Open Door switch downward to the Power button will light. open the unit; “Open” will appear on the screen. Insert a disc with the label side NOTE: To turn this unit off, press the Power facing up on the disc tray. -
Page 38: Troubleshooting Guide
TROUBLESHOOTING GUIDE Check the following before requesting service: SYMPTOM POSSIBLE CAUSE POSSIBLE SOLUTION GENERAL No power. Battery is empty. Recharge battery. Power on, but unit not functioning Condensation has formed. Unplug the unit and wait about one to properly. two hours to allow the player to dry. Wrong type of disc inserted. - Page 39 FOR ADDITIONAL SET-UP OR OPERATING ASSISTANCE, PLEASE VISIT OUR WEBSITE AT: WWW.MEMOREX.COM FOR CONSUMER REPLACEABLE PART(S), VERIFY PART NUMBER(S) ON PAGES 9, 10 AND 11, THEN CONTACT OUR PARTS AND ACCESSORIES FULFILLMENT CENTER AT: 1-800-379-8439.
-
Page 40: Care And Maintenance
CARE AND MAINTENANCE Caring for Discs • Treat the disc carefully. Handle the disc only by its edges. Never allow your fingers to come in contact with the shiny, unprinted side of the disc. • Do not attach adhesive tape, stickers, etc. -
Page 41: Specifications
Wavelength........................655nm Laser Power ........................Class 1 Specifications are subject to change without notice. Imation Enterprises, Corp. 1 Imation Way, Oakdale, MN 55128-3414 USA • memorex.com © Imation Corp. Memorex and the Memorex logo are trademarks of Imation Corp. and its affiliates.
Need help?
Do you have a question about the MVDP0803 and is the answer not in the manual?
Questions and answers