
Related Manuals for Aircraft XAircraft X450 Pro

Summary of Contents for Aircraft XAircraft X450 Pro
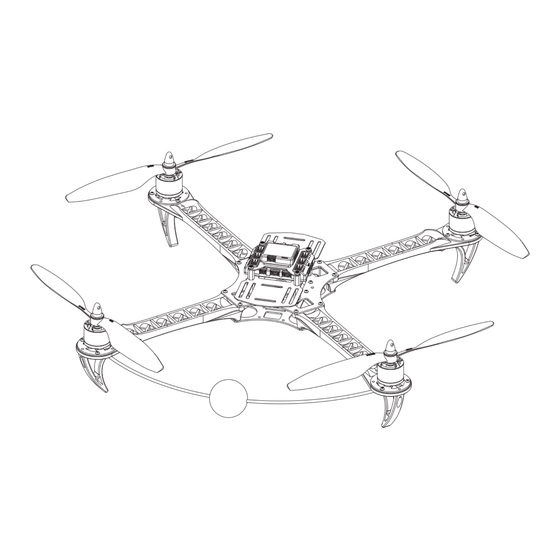
- Page 1 XAircraft X450 Pro 安装说明书 在使用XAircraft X450 Pro之前,请仔细阅读此说明书。 INSTRUCTION MANUAL Read the manual carefully before using XAircraft X450 Pro. 2012-01 V1.2...
-
Page 2: Table Of Contents
目录 Content 产品安装须知 Notice for Assembly 飞行须知 Before Flight 产品特性 Features 产品售后服务 After-Sale Ser vice 机身臂安装 Frame Arm Assembly 机架安装 Frame Assembly 电调安装 ESC Assembly 飞控与AHRS安装 Flight Controller and AHRS Assembly 电路接线示意图 Circuit Wiring 常见接收机接线示意图 Common Receiver Wiring 遥控模式示意图 RC Mode Illustration 航向球安装... -
Page 3: 产品安装须知
产品安装须知 Notice for Assembly 自备遥控及电子设备 Radio transmitter and electronic equipment required for assembly 遥控器 (4通以上) 接收机 (4通以上) 11.1V 3S 1500~5000mAh 锂电池(瞬时放电能力>15C) Transmitter (4-channel or more) Receiver (4-channel or more) 11.1V 3S 1500~5000mAh Li-Po Batter y (Instant discharge capacity>15C) 自备工具 Additional tools required for assembly 六角螺丝刀... -
Page 4: 飞行须知
飞行须知 免责声明 1. 检查螺旋桨是否安装正确和稳固。 1. 请在当地法律法规允许的范围内使用本产品,XAircraft不承担因任何非法 2. 检查接收机连线是否稳固。 使用导致的法律责任。 3. 检查电池扎带是否扎紧;检查电池电量是否充足。 2. 本产品属于遥控航模,请严格遵守航模产品的安全操作规范,XAircraft不 4. 检查接收机是否扎紧。 承担因任何操作和使用控制上导致的任何性能、安全与法律责任。 5. 检查天线是否安装稳固。 3. 航模不是玩具,请在专业人员指导下飞行,并按本说明书安装和使用本产 6. 检查无刷电机与无刷电机调速器连接线是否稳固。 品,XAircraft不对因用户安装、配置、操作等导致的航模事故负责。 另外,如果接收机的安装或电调(ESC)与飞行控制器的连接方式不是 XAircraft出厂默认的方式或更改过遥控器设置和飞行模式,请检查遥控器的各个通 安全注意事项 道的操作和电机的反应是否一致。 X450 Pro在给您带来快乐飞行体验的同时也潜藏着一定的危险。X450 Pro在飞 行时具有一定的飞行速度,且螺旋桨转速高达4000RPM以上,具有极大的破坏力。 飞行控制说明 无论您是初学者还是经验丰富的玩家,安全意识都应该铭记于心! 1. 启动:把遥控器油门杆拉到最低后打开遥控器电源开关,然后接通X450 1. 熟悉飞行环境,远离障碍物及人群,并确认是否存在不安全因素,如高压 Pro的电源。轻微推杆以启动所有电机。 线、汽车、人群等。 2. 停止:油门杆收到最低,约1秒后四旋翼电机停止工作。断开X450 Pro电源 2. -
Page 5: Before Flight
When powering off, you have to cut off the Please fly under safe take-off weight, do not overload the aircraft which can lead aircraft first then the RC powers off. Disorder in the on and off procedure will cause an to danger. -
Page 6: 产品特性
Input: Support a 12-CH receiver at most. Compatible with all the RC devices. It needs at least 4 channels to fly your aircraft. We recommend you to use RC device with 6 channels or more for expansion. Output: Support 12-CH outputs at most. Compatible with XAircraft UltraPWM Hi-Speed ESC and normal ESC. -
Page 7: 产品售后服务
产品售后服务 1. 保修条例 b) 产品的SN,您可以在产品的外包装或本手册封底上找到它。 1) 在正常使用状态下因产品质量引起性能故障时,XAircraft对X450 Pro的电 c) 尽可能详细的故障描述,如当时的环境(天气等)、操作和产品的表现 子电路部分承诺有限的质量保证(下文简称“质保”),质保对象不包括 等。 X450 Pro的机身及其机械部件、电子设备外壳、电路连接线等部分。 d) 您的联系方式。 2) 自 购 买XAircraft产 品 之 日 起 ( 以 购 买 凭 证 为 准 , 下 同 ) 的 三 个 月 为 质 保 2) XAircraft或销售商根据售后服务条款确认服务范围。... -
Page 8: After-Sale Ser Vice
From the time you purchase XAircraft X450 Pro within a year, you only have to pay for the cost of material and shipping. From the time you purchase XAircraft X450 Pro over a year, you have to pay for the cost of check, repairs, material and shipping. -
Page 9: 机身臂安装
机身臂安装 Frame Arm Assembly F4005 机身臂 Frame Arm M4001 ×3 M2.5×6 圆头 内六角 螺丝 M2.5×6 Socket Screw P3001 XAircraft 2215 无刷电机 XAircraft 2215 Brushless Motor F3006 电机固定板 Motor Mounting Plate M4002 ×2 M3×6 圆帽内六角螺丝 M3×6 Socket Screw F4006 起落架 Landing Gear M4001 ×2 M2.5×6 圆头内六角螺丝... -
Page 10: 机架安装
机架安装 Frame Assembly M - M4001 ×16 F1 - F4001 M - M4004 ×4 M2.5×6 圆头内六角螺丝 机身上板 M3×12 尼龙支柱 M2.5×6 Socket Screw Fuselage Upper Plate M3×12 Nylon Pillar M - M4005 ×4 M3 尼龙螺母 M3 Nylon Nut 机身臂装配体 Frame Arm Assembly M - M4001 ×8 F1 - F4002... -
Page 11: 电调安装
电调安装 ESC Assembly E3 - E3007 电调 XAircraft 高速控制无刷电调 XAircraft UltraPWM Brushless ESC 电机线 Motor Line 安装时,注意电机固定板与无刷电机的安装孔 电调电源线 与 3Pin数据线 MOS管朝上 ESC Power Line & 3Pin Signal Cable 距,通过调整固定板的安装位置,使安装样式如 MOSFET Side Up 右图。 Notice the hole distance of motor and motor mounting plate. -
Page 12: 飞控与Ahrs安装
飞控与AHRS安装 Flight Controller and AHRS Assembly M - M4004 ×4 E2 - E1004 M3×8mm 尼龙螺丝 XAircraft AHRS 姿态传感器 M3×8mm Nylon Screw XAircraft AHRS(Attitude and Heading Reference System) F1 - F3004G E2 - E1005 姿态传感器固定板 减震海绵(7×7×4mm) AHRS Mounting Plate Shock Absorber Sponge(7×7×4mm) M - M4004 ×4 E1 -... -
Page 13: 电路接线示意图
电路接线示意图 Circuit Wiring 常见接收机接线示意图在下一页 Common receiver wiring is in the next page. 电调(M5~M8)、云台俯仰舵机,云台横滚舵机、云台快门舵机,指 示器均为自选配件,并不包含在X450 Pro中。 根据 模块 扩展自由设置对应功能。 ESC(M5~M8), Camera Mount Pitch/Yaw/Shutter Ser vo, Pilot Set the function according to Lamp are the option parts, not including in the X450 Pro. the expansion module. -
Page 14: 常见接收机接线示意图
常见接收机接线示意图 Common Receiver Wiring HITEC,FUTABA,天地飞(WFLY)接收机接线示意图 JR,Spektrum 接收机接线示意图 HITEC,FUTABA,WFLY Receiver Wiring JR,Spektrum Receiver Wiring GEAR RUDD 接收机 接收机 ELEV R/C Receiver R/C Receiver AILE THRO 选择飞机类型为固定翼。 选择飞机类型为固定翼。 通道均设为反舵。 关闭所有混控模式。 关闭所有混控模式。 摇杆的微调归中。 摇杆的微调归中。 关闭油门与EXP曲线,等试飞1-2个起落后再根据个人习惯调整油门与EXP曲 关闭油门与EXP曲线,等试飞1-2个起落后再根据个人习惯调整油门与EXP曲 线。如果您的遥控设备没有EXP和油门曲线设置也不必担心,这不是必须的。 线。如果您的遥控设备没有EXP和油门曲线设置也不必担心,这不是必须的。 Choose Fixed Wing type. Choose Fixed Wing type. Shut down mixed control. -
Page 15: 遥控模式示意图
遥控器模式示意图 RC Mode Illustration Mode 1 Mode 2 Mode 3 Mode 4 油门 THRO 前 Front 俯仰 ELEV 前 (Pitch) Front 横滚 AILE 前 (Roll) Front 旋转 RUDD 前 (Yaw) Front... -
Page 16: 航向球安装
航向球安装 Heading Ball Assembly 电池安装 Batter y Installation 弯曲航线连杆时注意不要用力过猛,以免发生危险。 DO NOT OVER-EXERT TO AVOID DAMAGE. F4007 航向球 Heading Ball F4008 航向连杆 Heading Ball Skid F1 - L1010 扎带 Fastener 安装孔 Mounting Hole 电池 Batter y... -
Page 17: 无桨通电测试
无桨通电测试 Power-on Test without Propellers 电路安装完成后,请勿安装螺旋桨,进行X450 Pro无桨通电测试。 1 将遥控器油门收到最小后打开遥控器开关。 2 X450 Pro接通电源。 3 轻推油门。 4 观察四个电机启动是否顺畅,旋转方向是否正确。 a) 如果电机没有启动或启动不畅,则将油门收到最小,断开X450 Pro的电源,检查电路和电机后重新测试,直到正常。 b) 如果旋转方向不正确,则将油门收到最小,断开X450 Pro电源,对调任意两条电机线,直到电机旋转方向都正确。 5 推动各操纵杆,观察电机的转速是否有变化。 6 测试完成,将油门收到最小,断开X450 Pro的电源。 After electronic parts installation, DO NOT install the propellers and follow in steps. 1 Lowest the transmitter throttle then turn on the transmitter. -
Page 18: 螺旋桨安装
螺旋桨安装 Propeller Assembly P3002-A P3002-A / P3002-B 螺旋桨正桨 螺旋桨正桨 / 螺旋桨反桨 Clockwise Blade Clockwise Blade / Counter-Clockwise Blade 螺旋桨印有XAircraft标志面朝上, 并确保螺旋桨旋转时方向正确。 P3003 Make sure the XAircraft Logo side 桨夹 P3002-B up, and check the rotation of Blade Locker 螺旋桨反桨 blades. Counter-Clockwise Blade 螺旋桨必须贴紧电机,以保证四个螺旋... -
Page 19: 地面摇杆测试
If ever y part works fine, and keep the throttle at 20% and tr y to push stick slightly in Pitch, Roll and Yaw(stick value 30%).Feel whether aircraft attempts to move to the corresponding direction. If showing wrong direction to any of Pitch, Roll and Yaw, adjust signal cable connection order of receiver to test again until it becomes normal. -
Page 20: 姿态传感器工作状态测试
Squat and grasp the bottom side of X450 Pro to lift it higher than your head. Apply throttle slowly to 20%. Tr y to bank the aircraft for wards, backwards, left side and right side and feel it whether aircraft has stopped your moving. -
Page 21: 零部件清单
零部件清单 Parts List 袋编号 物料编号 数量 名称 Name Packet Product Code Amount E1001 XAircraft FC1212 飞行控制器 XAircraft FC1212 Flight Controller E1002 3-pin 信号线 3-pin Signal Cable E1003 减震海绵 (10×35×0.5mm) Shock Absorber Sponge (10×30×0.5mm) XAircraft AHRS E1004 XAircrft AHRS姿态传感器 Attitude and Heading Reference System E1005 减震海绵... - Page 22 请妥善保管好标签 广州极客智能技术有限公司 Guangzhou Geek Intelligence Technology CO.,LTD Please keep the product label ser vice@xaircraft.com http://www.xaircraft.com 本说明书最终解释权归XAircraft所有 XAircraft has the final power of interpretation on this manual. MADE IN CHINA...
Need help?
Do you have a question about the XAircraft X450 Pro and is the answer not in the manual?
Questions and answers