Table of Contents

Related Manuals for REI ORION 900


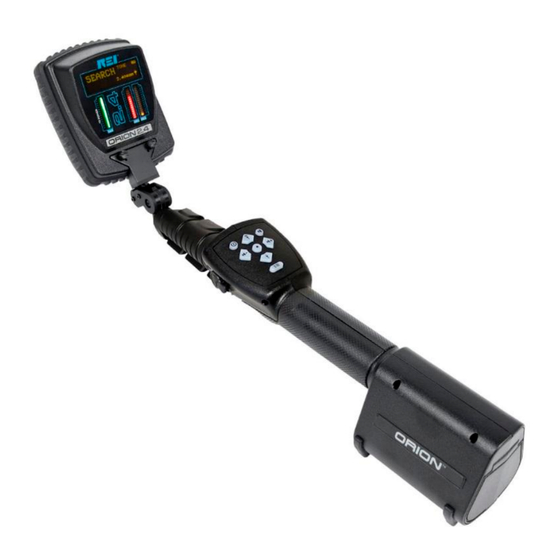
Summary of Contents for REI ORION 900
- Page 1 Non-Linear Junction Detector User Manual Research Electronics International, LLC 455 Security Drive, Cookeville, TN 38506 U.S.A. (800) 824-3190 (US Only) • +1 931-537-6032 www.reiusa.net © Copyright Research Electronics International LLC...
- Page 3 CASE CONTENTS 1. ORION 2.4 GHz Antenna* - 9. Power Cords if purchased 2. ORION 900 MHz Antenna* - 10. 6 ft. USB Cable - if purchased Type A to Mini-B for 3. ORION Handle* - software updates with thumb screws 11.
- Page 4 Non-Linear Junction Detector The ORION is available in different models: ORION 2.4 and ORION 900. Packaging, transmit power, and frequency ranges may vary depending on the model purchased. Antenna(s) Transmit Power FCC and IC* Public Safety & Commercial CE Compliant...
- Page 5 ORION is being used. The ORION 2.4 and ORION 900 FCC comply with part 15 of the FCC Rules. Operation is subject to the following two conditions: (1) This device may not cause harmful interference, and (2) this device must accept any interference received, including interference that may cause undesired operation.
-
Page 6: Table Of Contents
Table of Contents PRECAUTIONS ............................... 8 Equipment Description ..........................9 Overview ..............................9 Keypad ..............................10 SET-UP & BASIC OPERATION ........................11 Battery Usage ............................11 Real Time Clock Battery .......................... 12 Connecting the ORION head ........................13 Procedure ..............................13 Basic ORION Functions .......................... - Page 7 Set Clock .............................. 24 Save/Recall User Settings ........................24 Restore User Settings .......................... 24 Country Setting ........................... 24 Battery Status ............................26 Display REI Information / System IDs ....................26 Specifications .............................. 27 APPENDIX ..............................29 Background Theory ..........................29...
-
Page 8: Precautions
PRECAUTIONS PRECAUTIONS ORION CAUTION: Any changes or modifications not expressly approved by REI could void the user’s authority to operate the equipment. The ORION is for professional use only. The ORION is capable of emitting radio signals. It is the responsibility of the user to practice good safety procedures. In doing so, you should take the following precautions: Do not point the antenna at a person’s eyes or head. -
Page 9: Equipment Description
5. USB CONNECTOR – used for connecting to a PC for software updates 6. SPEAKER – used to monitor audio from the unit 7. POWER INPUT (under battery door) – for connecting AC adapter for charging (only use REI supplied AC Adapter) -
Page 10: Keypad
Keypad 1. POWER – Press to Power on. Press and hold while the unit is on to Power off. A tap of the power button while the unit is on allows for quick selection of the Transmit Power Mode (Auto or Manual) 2. -
Page 11: Set-Up & Basic Operation
SET-UP & BASIC OPERATION The ORION has been designed for quick and easy deployment. Depending on your application, some adjustments to the default setting may need to be made. Battery Usage Lithium-Ion rechargeable batteries have been included with your unit. To insert or switch out a new battery: 1. -
Page 12: Real Time Clock Battery
Note: To keep the battery in good working condition, it should be removed from the ORION for long term storage of 90 days or more. Even when powered off, the operating system of the ORION continues to use a low stand-by current that in some cases could cause a deep discharge and possible damage to the battery, preventing a normal recharge. -
Page 13: Connecting The Orion Head
The ORION is provided with a quick release head for easily removing or connecting the head to the pole/grip handle. The ORION 900 is stored in the case with the head separated from the pole/grip handle. To connect the ORION head to the pole/grip handle: 1. -
Page 14: Basic Orion Functions
Basic ORION Functions Power On/Off To Power on or off the unit: 1. With the unit off, press and release the Power button to turn the unit on. 2. With the unit on, press and hold the Power button to turn the unit off. Operation/Menu Item: Transmit Power Level The Transmit Power Level may need to be adjusted depending on several factors, including the target or detection range. -
Page 15: Volume Level
To adjust the transmit frequency: . The OLED screen will display a frequency 1. With no menu on the screen, press the Set button adjust menu. Press the left or right arrow buttons, or , to adjust the transmit frequency. Note: Even with no menu on screen, if a "SEMICOND"... -
Page 16: Adjusting The Menu Items
Adjusting the Menu Items The ORION can be configured for multiple situations. The majority of settings changes are handled through the menu. To adjust menu items: 1. Press the MENU button. The Main Menu will appear. 2. Press the Left or Right Arrow to begin scrolling through the Main Menu Items. 3. -
Page 17: Quick Access Buttons
Quick Access Buttons POWER Button: Tap – To change the Transmit Power Mode (Manual or Auto), tap the POWER button while the unit is powered on. Select "Manual" or "Auto" from the sub-menu that appears. Press & Hold – To power down the unit, press & hold the POWER button while the unit is powered on AUDIO Button: Tap –... -
Page 18: Tone Alert Type: 3 Rd Only
Alert Type, the search mode audio must be set to "Tone" and the Volume must be up to hear the alert tone. Access: Menu > > > > (press set button) Tone Alert Type: 3 Only Purpose: With the Tone Alert Type set to 3 only, an audible, synthetic tone is heard only when the received 3 harmonic signal level surpasses the set... -
Page 19: Audio: Listen 2 Nd Am
(press set button) Quick Access: Press the Audio button to quickly access the Search Mode Audio Sub- menu Note: This mode is not available on the ORION 900 800 mW model. Audio: Listen 2 Purpose: Provides an alternate audible response. The received 2... -
Page 20: Audio: Listen 3 Rd Fm
(press set button) Quick Access: Press the Audio button to quickly access the Search Mode Audio Sub- menu Note: This mode is not available on the ORION 900 800 mW model. Gain Level Purpose: Sets the level of digital signal processing integration that is used to process the received signals. -
Page 21: Manual Frequency Adjust
Manual Frequency Adjust Purpose: This mode scans and displays the Transmit, 2 Harmonic, & 3 Harmonic spectrums allowing the user to manually select a quiet channel for operation. Menu Access: Menu > > > Press the Set Button ( ) to scan the ambient frequency and manually adjust the frequency or Press the Menu button to set the ORION to Manual Frequency Mode without... -
Page 22: Vibrate Setup
Vibrate Setup Purpose: To enable or disable vibrator/haptic feedback Access: Menu > > > select desired vibrate level Range: Off, Short, Long Speaker: Headphones Only Purpose: To shut the speaker on the ORION off and operate with headphones only. In this configuration, the speaker will remain OFF regardless of whether headphones are plugged in or not. -
Page 23: Display Brightness
Quick Access: Press and hold the set button ( ) to toggle the flashlight on and off Display Brightness Purpose: To adjust the brightness of the OLED character display and LED Bar Graphs. Access: Menu > > > select desired brightness setting Range: Low, Medium, High Keypad Backlight Setup... -
Page 24: Show Clock
Show Clock Purpose: To display the current time and date Access: Menu > > > > (press set button) To exit this screen, press any key Display: Current time and date Set Clock Purpose: To set the current time and date ... -
Page 25: Country Setting
Europe - CE 500 mW 2.447 - 2.453 REI recommends the Europe - CE setting for countries subject to CE regulation. However, prior to EU Radio Equipment Directive (RED) adoption, the following Region/Country settings were included to satisfy R&TTE legislation, and remain in the model. -
Page 26: Battery Status
) again. To exit this screen, press the set button ( Display: Current battery status. Display REI Information / System IDs Purpose: To display general information about REI & the ORION and internal component information. Access: Menu > >... -
Page 27: Specifications
ORION 2.4 Dim: 22.4 in x 3.75 in x 3 in (57 cm x 9 cm x 7.5 cm) ORION 900 Dim: 23 in x 3.75 in x 3 in (58.4 cm x 9 cm x 7.5 cm) Overall Extended Length: 58 in (147 cm) ORION 2.4 Weight w/ Battery: 2.8 lbs (1.3 kg) - Page 28 Note: extended storage at temperatures above 40 C could degrade battery & OLED display performance and life. ORION 900 1.4W & ORION 900 3.2W are CE marked for Public Safety & Security ORION 2.4 3.3W and ORION 900 800 mW are CE marked for commercial availability...
-
Page 29: Appendix
APPENDIX APPENDIX The ORION 2.4, designed and built by the engineers at Research Electronics International, is the latest advancement in Non-Linear Junction Evaluation. The ORION 2.4 can be used to locate electronic devices whether in furniture, walls, ceiling fixtures or elsewhere. The ORION 2.4 detects semiconductor junctions, to alert in the presence of electronics. - Page 30 APPENDIX Typical Diode Voltage Curve 2.00 1.50 1.00 0.50 0.00 -0.50 -0.50 0.00 0.50 1.00 1.50 2.00 Voltage (V) If we approximate Eq. 1 near the origin using Taylor Series, Eq. 2 For small signals across the diodes terminals, we can reduce this to the first three terms, Eq.
- Page 31 APPENDIX The junctions in electronic devices and those in false junctions are quite different. The junctions in electronic devices are well defined, but those created by false junctions are not as well defined or as clean a physical junction. Imagine two perfect cubes joined—this would be a junction found in electronic devices.
- Page 32 APPENDIX This level of regularity in the junction results in differences in the harmonic signals. When the ORION 2.4 radiates a signal that is returned by the junction in electronics, it results in a strong 2 harmonic signal and a weak 3 harmonic.
Need help?
Do you have a question about the ORION 900 and is the answer not in the manual?
Questions and answers