Table of Contents
Advertisement
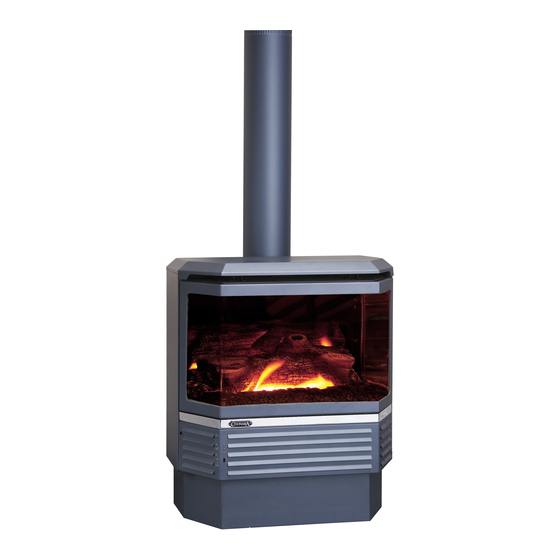
Coonara "Grange"
One of the world's most powerful efficient gas
log space heaters
CUSTOMER OPERATING INFORMATION
&
INSTALLATION INSTRUCTIONS
Serial Number of Heater
Model:
: ____________
________________
Grange Gas Heaters
ARE AUSTRALIAN OWNED & MANUFACTURED
BY
SHAMIC SHEETMETAL
SHAMIC SHEETMETAL
SHAMIC SHEETMETAL
SHAMIC SHEETMETAL
(AUST.) PTY. LTD.
PO BOX 8, KILSYTH, VIC. 3137
PH: 03 9737 5300 FAX: 03 9761 6455
https://shamic.com
1
Revised: 01/09/2016
13/02/17
Advertisement
Table of Contents

Related Manuals for Coonara Grange


Summary of Contents for Coonara Grange
-
Page 1: Installation Instructions
CUSTOMER OPERATING INFORMATION & INSTALLATION INSTRUCTIONS Serial Number of Heater Model: : ____________ ________________ Grange Gas Heaters ARE AUSTRALIAN OWNED & MANUFACTURED SHAMIC SHEETMETAL SHAMIC SHEETMETAL SHAMIC SHEETMETAL SHAMIC SHEETMETAL (AUST.) PTY. LTD. PO BOX 8, KILSYTH, VIC. 3137 PH: 03 9737 5300 FAX: 03 9761 6455 https://shamic.com... - Page 2 WARNING THE FOLLOWING INSTRUCTIONS MUST BE CARRIED OUT OR WARRANTY BECOMES VOID. Heater must be installed by a Coonara authorised technician. List is available on www.shamic.com You must obtain a license number from the installer. Heater must be placed on a flat level surface. Inbuilt models must be placed on 6mm AC sheeting, to prevent unit from rattling.
-
Page 3: Table Of Contents
CONTENTS PRODUCT FEATURES…………………………………………………4 SAFETY PRECAUTIONS………………………………………………5 CUSTOMER OPERATING INSTRUCTIONS………………………...6 SAFETY FEATURES……………………………………………………7-8 INSTALLATION INSTRUCTIONS……………………………………9-21 DIMENSIONS……………………….…………………………………...21-23 PRESSURE ADJUSTMENTS……………..……….…………………...24 WIRING DIAGRAM…………………………………………………….25 LOG SET………………………………………………………………….26 WARRANTY & CARE OF APPLIANCE …………………………..27-29 TROUBLE SHOOTING GUIDE .………………………………………30 WARRANTY FORM & CONTACT DETAILS…………………….…33 PLEASE STORE THIS MANUAL IN A SAFE PLACE FOR FUTURE REFERENCE Revised: 01/09/2016 13/02/17... -
Page 4: Product Features
Cut out Pressure 90 Pa Electrical Connection Standard Flex. 2 Mt. 3 Pin Plug Coonara “Grange” Freestanding and Inbuilt Gas Log Space Heaters Zero Clearance to Combustible Materials 5.1 Star Energy Rate Manual or remote operated controls. Optional thermostat Electronic ignition. -
Page 5: Safety Precautions
SAFETY PRECAUTIONS DO NOT – OPERATE THIS APPLIANCE BEFORE READING THIS INSTRUCTION MANUAL. DO NOT – PLACE ARTICLES ON OR AGAINST THIS APPLIANCE. DO NOT – STORE CHEMICALS, FLAMMABLE MATERIALS OR SPRAY AEROSOLS NEAR THIS APPLIANCE DO NOT – OPERATE WITH PANELS, COVERS OR GUARDS REMOVED FROM THIS APPLIANCE. -
Page 6: Customer Operating Instructions
Customer Operating Instructions The Coonara Grange Gas log space Heater has been designed for a simple and efficient operation to provide you with a higher heat output than most other heaters in the market. The dual operation system (manual or remote controlled) and the optional heat transfer kit... -
Page 7: Safety Features
NOTE: In the event the electricity supply cord is damaged, it must be replaced with the original Coonara part obtainable from your authorised dealer. SAFETY FEATURES: Automatic Pre-purge: Before heater ignition this operation is done to evacuate any remains of gas or flue products from inside the firebox that could be the cause of a mishap. - Page 8 For your own convenience please record the following information in the space provided: Purchased from: Name………………………………………………………………………… Address……………………………………………………………………… Phone No…………………………………..Date of purchase:…….……… Serial No of appliance:………………………………………………………….. To be completed by the installer: Name……………………………………………..Licence No…………………….. Address…………………………………………………………………………….. Phone No……………………………………. Installation Date………………… WARNING Heater must be checked for scratches or dents prior to installation. Once the Heater is installed scratches or dents are NOT covered by warranty.
-
Page 9: Installation Instructions
* ONLY TO BE CARRIED OUT BY AN AUTHORISED PERSON! The Grange inbuilt Heater is a zero clearance appliance and can be optionally installed in a false fireplace or wall cavity made of combustible materials such as wood or chipboard. - Page 10 3. Fix flue terminal securely to top of flue cavity and seal to prevent water entry. Seal with Hi temperature waterproof silicon sealant prior to cementing to chimney top, pop rivet circular flange to the collector box. (Chimney installation only). Grange Inbuilt Flue Installation Collector box...
- Page 11 NOTE: AIR INTAKE RESTRICTOR PLATE MUST BE REMOVED FOR FLUE LENGTHS OF MORE THAN 1 METER. Rear vent Flue Installation 1. Determine the exact location for the heater. 2. Mark the exact location for the wall penetration a. Determine that you will not be cutting through any vertical wall studs. b.
- Page 12 heater goes to high. If you wish to go to low, press bottom button. If the heater does not stay alight, switch off, by top button and start again. This may have to be done 2 – 3 times, until unit is purged. 8.
- Page 13 INSTALL INTO A STUD WALL CAVITY 1. Mark the exact location of where the heater is to be located with an outline 750mm wide by 650mm high 2. Check that location for the flue terminal conforms to the requirements of AS/NZS5601 Location of a Flue Terminal.
- Page 14 REAR VIEW HORIZONTAL THROUGH WALL Heater Mantle Piece EXISTING FIREPLACE OR ROOF PENETRATION Balanced Flue Gas Cowl WITH SHAMIC VERTICAL FLUE KIT Revised: 01/09/2016 13/02/17...
- Page 15 Revised: 01/09/2016 13/02/17...
- Page 16 CONSOLE INSTALL WITH EXPOSED OPTIONAL PICTURED WITH VERTICAL FLUE PIPE FLUE BOX COVER Flue cover box F lue cover box (optional) (optional) Revised: 01/09/2016 13/02/17...
- Page 17 FALSE FIREPLACE ON CONCRETE SLAB AND WALL PENETRATION WITH SHAMIC HORIZONTAL FLUE KIT SHOWING OPTIONAL AIR TRANSFER SYSTEM 6mm Cement Sheeting required for floor installation. Revised: 01/09/2016 13/02/17...
- Page 18 FALSE FIREPLACE ON STUMP FLOOR AND WALL PENETRATION WITH SHAMIC HORIZONTAL FLUE KIT SHOWING OPTIONAL AIR TRANSFER SYSTEM Revised: 01/09/2016 13/02/17...
- Page 19 INTERNAL WALL - UNDER FLOOR INSTALL WITH HORIZONTAL FLUE Revised: 01/09/2016 13/02/17...
- Page 20 REAR FLUE INSTALLATION WITH OPTIONAL OFFSET FLUE BOX Revised: 01/09/2016 13/02/17...
- Page 21 DIMENSIONS OF APPLIANCE INBUILT MODEL Revised: 01/09/2016 13/02/17...
-
Page 22: Dimensions
20mm FASCIA DEPTH FIRE BOX DIMENSIONS WIDTH: 720mm HEIGHT: 585mm DEPTH FROM REAR OF 20mm FASCIA: 200mm Freestanding Heaters - Power cord is at rear (as pictured). Inbuilt Heaters - Power cord in on left hand side front of heater CONSOLE DIMENSIONS Revised: 01/09/2016 13/02/17... - Page 23 FREESTANDING MODEL Overall height on the freestanding model is 770mm. Revised: 01/09/2016 13/02/17...
-
Page 24: Pressure Adjustments
PRESSURE ADJUSTMENT Your Coonara Grange Heater has been fully factory pre-set and adjusted and does not need to be re-adjusted during installation. But there will be some situations where some service has to be done and gas pressure may need to be re-adjusted as per the following instructions:... -
Page 25: Wiring Diagram
WIRING DIAGRAM PRESSURE SWITCH Revised: 01/09/2016 13/02/17... -
Page 26: Log Set
COONARA GRANGE LOG SET LOCATION DETAILS REAR LOG CROSS LOG FRONT LEFT TWIG FRONT RIGHT TWIG FRONT LOG 1. Place the rear log on top rear burner plate as shown 2. Place front log on the front section of the burner 3. -
Page 27: Warranty & Care Of Appliance
(2) years from date of purchase, excluding door glass. 3) If this Coonara heater is found to be defective in material or workmanship Shamic will repair or replace such defects in the Coonara heater at Shamic’s option in accordance with Coonara’s warranty policy during the period on this warranty. - Page 28 This warranty extends only to the original consumer purchaser, who has purchased the heater from an authorised Coonara dealer. b) This warranty does not apply to, and Coonara assumes no responsibility for any damages that result due to installation or operation of the heater not in accordance with both the installation and operation instructions furnished with the unit.
- Page 29 CARE OF YOUR GRANGE GAS HEATER This appliance requires minimal maintenance, however, it is recommended that a qualified person make a full service and check annually. The Bottom fascia air grill should be removed by unscrewing the two screws and the fan vacuumed annually.
-
Page 30: Trouble Shooting Guide
ROUBLE SHOOTING UIDE PROBLEM POSSIBLE CAUSE REMEDY Appliance fails to No gas supply or pressure insufficient. Ensure gas supply connected, purged, and pressure ignite. appropriate. Ensure unit plugged in and switch is on, check No electrical supply. supply fuse. Check supply. Active, neutral, & earth must be correctly orientated and connected. - Page 31 DIMENSIONS Grange Freestanding Grange Inbuilt Overall height - 770 mm Overall height - 740 mm Overall Width - 685 mm Overall width - 860 mm Overall Depth - 395 mm Overall depth - 430 mm Packed Weight - 84 kg...
- Page 32 Revised: 01/09/2016 13/02/17...
- Page 33 DETACH AND RETURN BY MAIL NAME _______________________________________________________________ ADDRESS____________________________________________________________ CITY/STATE/POSTCODE_______________________________________________ PURCHASED AT (Dealer name & address) ______________________________________________________________________ DATE PURCHASED____________________ MODEL ______________________ SERIAL NO ______________ WHERE DID YOU HEAR ABOUT GRANGE GAS HEATERS? RADIO, TELEVISION, NEWSPAPER, FROM DEALER, OTHER – PLEASE SPECIFY: ____________________________________________________________________________ Revised: 01/09/2016 13/02/17...
Need help?
Do you have a question about the Grange and is the answer not in the manual?
Questions and answers