Table of Contents
Advertisement
Quick Links
Advertisement
Table of Contents

Related Manuals for Watts Industries BT DP-01


Summary of Contents for Watts Industries BT DP-01
- Page 1 BT DP-01...
- Page 3 USER GUIDE Digital programmable Thermostat 4-41 GUIDE D’UTILISATION Thermostat digital programmable 42-87 Bedienungsanleitung Programmierbarer digitaler Funkthermostat 88-130 GUÍA DE USUARIO Termostato digital programable 132-172 GUIA DO UTILIZADOR Termostato programável digital 174-215 HANDLEIDING Digitale programmeerbare Thermostaat 216-253...
- Page 4 IMPORTANT! Before starting work the installer should carefully read this Installation & Operation Manual, and make sure all instructions contained therein are understood and observed. - The thermostat should be mounted, operated and maintained by specially trained personnel only. Personnel in the course of training are only allowed to handle the product under the supervision of an experienced fitter.
- Page 5 APPLICATION - The thermostats of the “BT” series are developed to control and manage all type of heating installations. - The controllers have been designed for use in residential rooms, office spaces and industrial facilities. Verify that the installation complies with existing regulations before operation to ensure proper use of the installation.
- Page 6 Table of content Presentation . Fehler! Textmarke nicht definiert. Keyboard..Fehler! Textmarke nicht definiert. Display & LEDFehler! Textmarke nicht definiert. First InstallationFehler! Textmarke nicht definiert. Batteries installationFehler! Textmarke nicht definiert. Time and Date adjustmentFehler! Textmarke nicht definiert. Starting..Fehler! Textmarke nicht definiert. Working mode definitionFehler! Textmarke nicht definiert.
- Page 7 Holiday modeFehler! Textmarke nicht definiert. Timer mode Fehler! Textmarke nicht definiert. Special functionFehler! Textmarke nicht definiert. Keyboards lock Function Fehler! Textmarke nicht definiert. Information . Fehler! Textmarke nicht definiert. Parameter’s menuFehler! Textmarke nicht definiert. Technical characteristicsFehler! Textmarke nicht definiert. Troubleshooting & SolutionFehler! Textmarke nicht definiert.
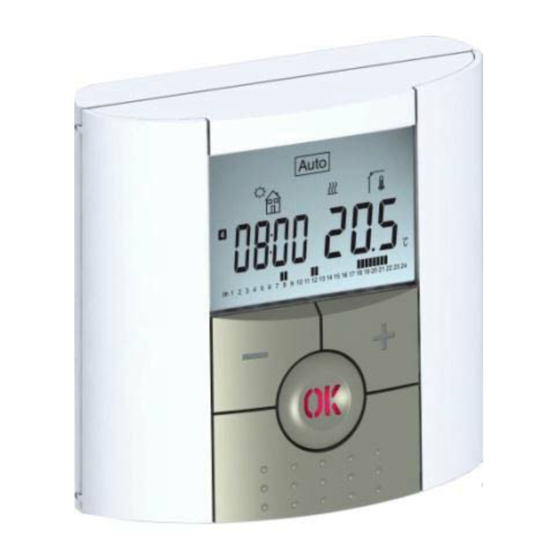
- Page 8 Presentation Electronic programmable thermostat with LCD display specially designed to control different type of heating systems.
- Page 9 It will be your best partner to optimize your energy consumption and increase your comfort. - Modern design with soft touch material. - Wiring & Installation simplified. - “Easy program creation” function. - Weekly programmable by step of 30min. - Temporary override function. - Anti freeze function.
- Page 10 Keyboard Minus Key (-) Plus Key (+) Validation Key (OK) Status LED Left Navigation key (◄) Right navigation key (►) Escape key ( Edition key ( )
- Page 11 Display & LED Red Fix (when backlight is lit up): Heating demand Green flash: your validation is required Red flash: Error on sensor or batteries...
- Page 12 Current day of the week Operating mode menu (active mode is framed). Program number or parameter number if “4” is displayed. Installation Parameter menu. Type of sensor used and temperature displayed. Regulation => Internal or external ambient sensor. Regulation => Floor sensor. Regulation =>...
- Page 13 10. Temporary override function activated, or “ITCS” function if blinking. 11. Time or parameter title if “4” is displayed. 12. Program of the current day (the current time bar blinks) 13. Pictogram for program creation, program state in normal operating mode. 14.
- Page 14 First Installation This section will guide you to set up your thermostat for the first time. Batteries installation - Open the two side’s covers and Insert the 2 AAA Alkaline supplied batteries (or remove the small protection sticker if the batteries are already installed in the compartment) - Close the two side’s covers.
- Page 15 List order of the time and date adjustments: Time and day: Adjustment of the hours, Adjustment of the minutes Adjustment of the day (1 = Monday) Date: Adjustment of the day number Adjustment of the month number (01 to 12) Adjustment of the year (Century) Adjustment of the year Then the message “Save”...
- Page 16 Starting The thermostat is now ready to works. The default working mode will be automatic with a standard built-in program “P1”. Monday to Friday 20°C 18°C 07:00 09:00 17:00 23:00 Saturday & Sunday 20°C 18°C 08:00 23:00...
- Page 17 Note: You can customise your program as you want, See the next part “Working mode definition” chapter “Program” for more explanation. Program followed Curent stage of the program Curent time At any time, when the backlight is extinct, press the (OK) key to lit-up the backlight, and then press another time the (OK) key to show the current setting temperature...
- Page 18 Working mode definition How to change the working mode? - Open the small center cover to have access to the navigation keys (◄) or (►). - You can now press theses keys to display the working mode line. Move the frame cursor on the desired working mode and press (OK) to enter in the operating mode you have chosen.
- Page 19 Manual mode Comfort Manual working mode, the comfort setting temperature will be followed all the time. By pressing (-) or (+) keys, the comfort setting temperature starts to blink and can be adjusted. Manual mode, Reduced Manual working mode, the reduced setting temperature will be followed all the time.
- Page 20 - At any time, when display is off, press on the (Ok) key to display a few seconds the current temperature and time. - To restart your installation, use the navigation keys (◄) or (►). Automatic mode In this mode the thermostat will follow the chosen program (Built-in or customized) according to the actual time and the Comfort and Reduced setting temperatures.
- Page 21 Program mode Program followed Current day Program of the day When you enter in the Program mode, the first operation is to chose the program number with (-) or (+) keys. You can choose between a built-in program P1 to P9 or a user program U1 to U4.
- Page 22 If you chose a Built-in program P1 to P9, You can only see and chose the program. Morning, Evening & Weekend Morning, Midday, Evening & Weekend Day & Weekend Evening & Weekend Morning, Evening (Bathroom) Morning, afternoon & Weekend 7H – 19H (Office) 8H –...
- Page 23 If you chose a user program U1 to U4, As above you can choose the program, see it, but you can also customise it. Default setting: U1, U2, U3, U4 = Comfort all week - Press on the edition key ( ) to customise a user program.
- Page 24 Middle step of the day ( Comfort temp.) The comeback hour will need to be adjusted Last step of the day ( Reduced temp.) The sleeping hour need to be adjusted - The program step is 30 minutes - Each time a value or icon blinks you are invited to make a choice with (-) or (+) keys, once the choice is made press the (OK) key to jump to the following step.
- Page 25 Now you are invited to adjust the hour of the first step of the program with (-) or (+), Press (OK) to validate and go to the following step.
- Page 26 Now you are invited to choose the type of the next step of the program (blinking icons), 2 choices will be possible: choice is to choose the sleep icon. (End of the day) choice is to choose the leaving icon, to add one step to the program during the day.
- Page 27 When step hour is set press (OK) to jump to the next step. You will be directly invited to adjust with (-) or (+) the hour of the comeback step. Press (OK) to validate and go to the following step.
- Page 28 You are again invited to choose the type of the next step of the program (blinking icons), 2 choices will be possible: choice is to choose the sleep icons. (End of the day) choice is to choose the leaving icons, to add another step to the program during the day.
- Page 29 Press (OK) to validate and finish the edition of the first day. Now you can choose to copy the program day just created to subsequent days. Change the choice “Yes” or “no” with (-) or (+) and validate your choice with (OK). - If you select “no”, you will be invited to create a program for Tuesday (repeat the previous method to built it.)
- Page 30 on Wednesday... up to the last day of the week (7 Sunday). When you press (OK) on the last day (7 Sunday) you will be invited to “SAVE” your program. Then the message “Save” and blinking green LED appears: Press (OK) key to save your program and return to AUTO operating mode following your user program.
- Page 31 Holiday mode The Holiday mode allows you to set the anti-freeze temperature for a selected number of days - You can adjust, the duration in day “d” with (-) or (+), press (OK) to start. (Adjustable 1 to 99 days) - The anti-freeze setting temperature is fixed and can be adjusted in the parameter menu number 06 ‘HG’, see chapter 6.
- Page 32 Timer mode The Timer mode allows you to adjust, the temperature and the duration for a special time. This function can be used when you stay at home for several days, or if you want to override the program for some time (reception...) - You can first adjust, the duration in hours “H”...
- Page 33 Special function Keyboards lock Function Use this function to prevent all change of your settings (In a child room, public area…) - To activate the Key lock function, first press maintain the escape key ( ) and then press simultaneously on the edition key ( ). - The “...
- Page 34 - The current setting temperature followed by the thermostat. - The ambient temperature - If external sensor is connected: The Floor temperature if it is used as floor sensor. The outside temperature if it used as outside sensor. If Parameter “SenS” is set on “Air”, the external sensor will be used as an outside temperature sensor...
- Page 35 Parameter’s menu Your thermostat has a parameter’s menu, in order to enter in this menu, press and maintain the edition key ( ) during 5sec. Then parameter menu will appear and first parameter screen will be displayed: Now you can select a parameter which must be adjusted with the navigation keys (◄) or (►), once the parameter chosen, toggle the value with the (OK) key, modify it with (-) or (+) and confirm your...
- Page 36 N° Default value & other possibilities dEG: Unit of the temperatures displayed °C Celsius °F Fahrenheit __:__ Selection of the Time clock unit 24H (24:00) 12H (12:00 AM /PM) dst: Daylight Summer time change Summer<->Winter YES automatic change according to date. no daylight summer time automatic change.
- Page 37 to confirm. The message “Yes” should be displayed; the value will be stored in the internal memory. If you need to erase a calibration press on the escape key ( The old value will be erased and the message “no” will be displayed.
- Page 38 hour programmed following your weekly program. This automatic control system works in the following way: When you start your thermostat for the first time, it will measure the time taken by your installation to reach the set temperature. The thermostat will re-measure this time at each program change to compensate external temperature change &...
- Page 39 return to normal operation. Technical characteristics Measured temperature 0.1°C precision Environmental: Operating temperature: 0°C - 40°C Shipping and storage temperature: -10°C to +50°C Setting temperature range Comfort, Reduced 5°C to 35°C by 0,5°C step Holiday (Antifreeze) 10°C (adjustable) Timer 5°C to 35°C Proportional Band (PWM Regulation characteristics 2°C for 10min cycle) or...
- Page 40 Optional External sensor 10k ohms at 25°C Displayed in the user Software version menu. EN 60730-1 : 2003 Norms and homologation: EN 61000-6-1 : 2002 EN 61000-6-3 : 2004 Your thermostat has been EN 61000-4-2 : 2001 designed in conformity with the following standards or other Low voltage 2006/95/CE normative documents:...
- Page 41 Batteries - Check the batteries orientation. Problem - Check the capacity of the batteries My BT DP-01 Led, blinks in Red The logo blinks (ambient sensor) - Contact your installer or seller. Problem on sensors The logo blinks (Floor sensor) - Check the connection of the sensor.
- Page 42 My BT DP-01 seems work correctly but the heating doesn’t work correctly - Check the connections. - Check the power supply of the Output heating element. - Contact your installer. My BT DP-01 seems work correctly but the temperature in the room was never in accordance with the program.
- Page 43 Annexes (Built-in Program description) 0 1 2 3 4 5 6 7 8 9 10 111213141516 17 1819 20212223 0 1 2 3 4 5 6 7 8 9 10 111213141516 17 1819 20212223 0 1 2 3 4 5 6 7 8 9 10 111213141516 17 1819 20212223 0 1 2 3 4 5 6 7 8 9 10 111213141516 17 1819 20212223 0 1 2 3 4 5 6 7 8 9 10 111213141516 17 1819 20212223 0 1 2 3 4 5 6 7 8 9 10 111213141516 17 1819 20212223...
- Page 44 0 1 2 3 4 5 6 7 8 9 10 111213141516 17 1819 20212223 0 1 2 3 4 5 6 7 8 9 10 111213141516 17 1819 20212223 0 1 2 3 4 5 6 7 8 9 10 111213141516 17 1819 20212223 0 1 2 3 4 5 6 7 8 9 10 111213141516 17 1819 20212223 0 1 2 3 4 5 6 7 8 9 10 111213141516 17 1819 20212223 0 1 2 3 4 5 6 7 8 9 10 111213141516 17 1819 20212223...
- Page 45 0 1 2 3 4 5 6 7 8 9 10 111213141516 17 1819 20212223 0 1 2 3 4 5 6 7 8 9 10 111213141516 17 1819 20212223 0 1 2 3 4 5 6 7 8 9 10 111213141516 17 1819 20212223 0 1 2 3 4 5 6 7 8 9 10 111213141516 17 1819 20212223 0 1 2 3 4 5 6 7 8 9 10 111213141516 17 1819 20212223 0 1 2 3 4 5 6 7 8 9 10 111213141516 17 1819 20212223...
- Page 46 0 1 2 3 4 5 6 7 8 9 10 111213141516 17 1819 20212223 0 1 2 3 4 5 6 7 8 9 10 111213141516 17 1819 20212223 0 1 2 3 4 5 6 7 8 9 10 111213141516 17 1819 20212223 0 1 2 3 4 5 6 7 8 9 10 111213141516 17 1819 20212223 0 1 2 3 4 5 6 7 8 9 10 111213141516 17 1819 20212223 0 1 2 3 4 5 6 7 8 9 10 111213141516 17 1819 20212223...
- Page 47 0 1 2 3 4 5 6 7 8 9 10 111213141516 17 1819 20212223 0 1 2 3 4 5 6 7 8 9 10 111213141516 17 1819 20212223 0 1 2 3 4 5 6 7 8 9 10 111213141516 17 1819 20212223 0 1 2 3 4 5 6 7 8 9 10 111213141516 17 1819 20212223 0 1 2 3 4 5 6 7 8 9 10 111213141516 17 1819 20212223 0 1 2 3 4 5 6 7 8 9 10 111213141516 17 1819 20212223...
- Page 48 0 1 2 3 4 5 6 7 8 9 10 111213141516 17 1819 20212223 0 1 2 3 4 5 6 7 8 9 10 111213141516 17 1819 20212223 0 1 2 3 4 5 6 7 8 9 10 111213141516 17 1819 20212223 0 1 2 3 4 5 6 7 8 9 10 111213141516 17 1819 20212223 0 1 2 3 4 5 6 7 8 9 10 111213141516 17 1819 20212223 0 1 2 3 4 5 6 7 8 9 10 111213141516 17 1819 20212223...
- Page 49 0 1 2 3 4 5 6 7 8 9 10 111213141516 17 1819 20212223 0 1 2 3 4 5 6 7 8 9 10 111213141516 17 1819 20212223 0 1 2 3 4 5 6 7 8 9 10 111213141516 17 1819 20212223 0 1 2 3 4 5 6 7 8 9 10 111213141516 17 1819 20212223 0 1 2 3 4 5 6 7 8 9 10 111213141516 17 1819 20212223 0 1 2 3 4 5 6 7 8 9 10 111213141516 17 1819 20212223...
- Page 50 0 1 2 3 4 5 6 7 8 9 10 111213141516 17 1819 20212223 0 1 2 3 4 5 6 7 8 9 10 111213141516 17 1819 20212223 0 1 2 3 4 5 6 7 8 9 10 111213141516 17 1819 20212223 0 1 2 3 4 5 6 7 8 9 10 111213141516 17 1819 20212223 0 1 2 3 4 5 6 7 8 9 10 111213141516 17 1819 20212223 0 1 2 3 4 5 6 7 8 9 10 111213141516 17 1819 20212223...
- Page 51 0 1 2 3 4 5 6 7 8 9 10 111213141516 17 1819 20212223 0 1 2 3 4 5 6 7 8 9 10 111213141516 17 1819 20212223 0 1 2 3 4 5 6 7 8 9 10 111213141516 17 1819 20212223 0 1 2 3 4 5 6 7 8 9 10 111213141516 17 1819 20212223 0 1 2 3 4 5 6 7 8 9 10 111213141516 17 1819 20212223 0 1 2 3 4 5 6 7 8 9 10 111213141516 17 1819 20212223...
- Page 52 Installation Installation Installation Instalación Installazione installatie instalação Asennus Installation Installasjon t°C ~1,20M Volt free connection Min 20cm Max 1mm² 2 wires NTC 10k (25°C) 60mm 83mm 27mm PPLIMP09460Aa...
- Page 54 PPLIMP12569Aa rev : 5/01/2012...
- Page 55 How to accede it on the “DP” version Press 10 sec on the In order to enter in the menu, select and valid the OFF mode ( ), then press on the escape key during 10 seconds, the following display with the first parameter must be appears: - Once you entered in the menu, go to the parameter which you want change by using the keys (◄) or (►).
- Page 56 “ FLR ” Floor sensor regulation “ FL.L ” “ AIR ” Air regulation with floor REGU --- Selection of the sensor used for the regulation. Internal ambient limitation possibilities sensor (see parameters 26&27) “ amb ” External ambient sensor AirS --- “...
Need help?
Do you have a question about the BT DP-01 and is the answer not in the manual?
Questions and answers