
Related Manuals for Allmand 185 CFM


Summary of Contents for Allmand 185 CFM
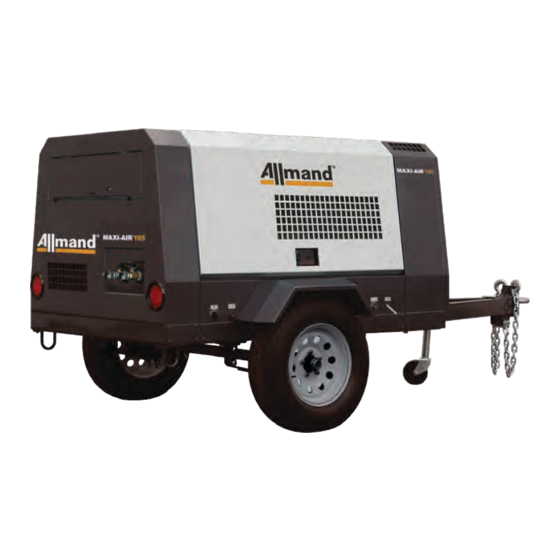
- Page 1 185 CFM Towable Compressor Operator’s Manual Copyright © 2016 Allmand Bros., Inc. 111075USCN Holdrege, NE, USA. All rights reserved. Rev (A)
- Page 2 Customer Service by phone at (800) 562-1373, or on the Internet at allmand.com. Knowing the model number of your Allmand Air Compressor will make it easy to order maintenance or repair parts either online or from your local dealer. The model number is generally a number stamped into metal or on a sticker directly on your product.
-
Page 3: Table Of Contents
Table of Contents Operator Safety..... . . 4 Features and Controls ....9 Transporting and Set-Up . -
Page 4: Operator Safety
Rotating Propelling Lighting or serious injury. Stop machine, close service valve, Parts Parts Apparatus and discharge remaining pressure before removing piping or hose. • Use proper tools when connecting or disconnecting piping or hose. ALLMAND.COM... - Page 5 WARNING Operation with WARNING When operating machine, do compressed air supply port opened is prohibited: not wear: • Do not operate machine with service valves and/ • Loose clothes or relief valve open, unless piping and/or hose is • Clothes with unbuttoned sleeves connected.
- Page 6 Opening coolant water drain valve cap: • Stop engine and let coolant water sufficiently cool down before draining. • If drain valve is opened before coolant water is cooled enough, hot water could jet out, resulting in death or serious injury. ALLMAND.COM...
- Page 7 Safety Decals and Locations The following safety decals are attached to the machine. Keep them clean at all times. If they are damaged or missing, contact your authorized dealer for replacements. Part numbers are indicated on the lower right corner of the label.
- Page 8 ALLMAND.COM...
-
Page 9: Features And Controls
Features and Controls Read this Operator’s Manual and safety rules before operating your towable compressor. Compare the illustrations with your towable compressor, to familiarize yourself with the locations of various controls and adjustments. Save this manual for future reference. A B C A - Pressure Control Valve —... - Page 10 E - Solenoid Valve — Reduces load at start-up. K - Radiator Drain Valve — Drains engine coolant. F - Compressor Oil Filter — Filters impurities from compressor oil. L - DPF (Diesel Particulate Filter) — Removes harmful components contained in exhaust gas. ALLMAND.COM...
- Page 11 Instrument Panel Each display of the operation panel is illustrated as follows. Read and fully understand the explanations and be sure to operate safely. A - Monitor Change / Error Code Switch — When B - Auto Idle Switch — The switch is used for this switch is pushed while lamp is blinking, minimizing fuel consumption at no-load operation.
-
Page 12: Transporting And Set-Up
• Be sure to keep hands and fingers away from any part of the coupling device when coupling or uncoupling a drawing device to a draw bar. • Make sure to drive the towing vehicle safely. ALLMAND.COM... -
Page 13: Operation
Operation Use the chart to select the best viscosity for the outdoor temperature range expected. If you have any problems operating your towable compressor, please contact your authorized dealer. WARNING POISONOUS GAS HAZARD. Engine exhaust contains carbon monoxide, a poisonous gas that could kill you in minutes. You CANNOT smell it, see it, or taste it. - Page 14 Level must be kept above LOW mark. 2. If there is a little or no coolant in the reserve tank, remove the radiator cap and check the coolant level. Supply coolant to the radiator and also the reserve tank, if necessary. See Maintenance. HIGH ALLMAND.COM...
- Page 15 Checking / Adding Fuel Draining the Fuel Tank 1. Open the drain valve (B) fitted under the fuel tank Fuel must meet these requirements: (A). Drain the condensate from the tank. • Do not use such diesel fuel having higher sulfur 2.
- Page 16 • When the door has to be opened, be careful not to touch portions that are rotating or very hot. Careless contact could result in serious injury. • Pull the handle forward to open the door. • Be sure to close the door tightly so that it latches securely. ALLMAND.COM...
-
Page 17: Starting The Compressor
Starting the Compressor 4. When the glow lamp goes out, turn the starter switch to START position. NOTICE Be sure to let unit warm up after starting for • Perform starter switch operation within 15 smooth operation of the engine and the compressor. seconds. - Page 18 • Battery should always be fully charged. * 36 to 58 psi control ( 2.5 to 4bar) • Follow the designated regulations to dispose of (AUTO IDLE) LLC (Antifreeze). * Values may vary slightly depending on the operating conditions and other factors. ALLMAND.COM...
- Page 19 Capacity Control Device Step Response Compressed air flows into unloader chamber (A) because solenoid valve for purge control Start SV1 is opened at start-up. The pressure in chamber (A) rises soon to close unloader valve (A) fully and accordingly it can reduce the load at start-up. After starting, SV1 is closed after automatic unloaded operation, and the air volume which is sent to chamber (A) increases and decreases according to the rise and drop Load Operation...
- Page 20 Next, when the pressure for load down to the purge releasing pressure owing to the increase of air consumption, the solenoid valve operation gets Lamp goes on. “OFF” and it is transferred to normal operation. In this stage, the lamp “AUTO IDLE” goes on. ALLMAND.COM...
- Page 21 Stopping the Compressor Active (Automatic) Regeneration • Operation under light load application or no load 1. Close the service valve completely and operate requires active regeneration, because engine the machine about 5 minutes, until it cools down. exhaust temperature is not high enough to burn soot 2.
- Page 22 4. Engine speed gradually increases up to accumulate and it could damage DPF due to abnormal approximately 2,220 min -1 . burning, and it could cause a fire. NOTICE Do not stop engine during manual (forced) regeneration operation, except for unavoidable conditions. ALLMAND.COM...
-
Page 23: Maintenance
Maintenance Engine Maintenance Schedule Refer to engine operation manual for inspection and Regular maintenance of the compressor and engine maintenance of engine. will improve the performance and extend the life of the Undercarriage Maintenance Schedule compressor. See any qualified dealer for service. Compressor Maintenance Schedule Every 300 Hours or 3 Months Follow the hourly or calendar intervals, whichever... -
Page 24: Replacement Parts
O-Ring 3 21221 04800 O-Ring 4 21221 04900 O-Ring 1 03402 15075 O-Ring 2 03402 25032 Pressure Control Valve Spring 3 22144 07700 Piston 4 35303 03300 Solenoid Valve For Starting Unloader / Purge 46811 30000 Belt Yanmar 129612-42350 ALLMAND.COM... - Page 25 Maintenance Items Change Engine Oil WARNING Engine oil is very hot and highly pressurized during or just after operation. Hot oil could blow out of the tank and can cause serious injury. NOTICE Never supply more engine oil than specified level. Excessive engine oil could cause engine damage.
- Page 26 2. Remove and clean filter element (C). If damaged or heavily soiled, replace. (For part numbers, see Replacement Parts.) 3. Clean interior of case (E). 4. Install filter element into case, then install cap, securing with latch. ALLMAND.COM...
- Page 27 4. Start engine and allow to run for a minute or two, then replenish oil to fill any shortage. Repeat this procedure for 1 to 2 times to check if oil level has reached appropriate level. Be careful not to overfill the oil.
- Page 28 Be sure O-ring (I) is properly seated in cap. 2. Dispose of old filter element (H), replacing with new. 3. Clean interior of case (J). 4. Install filter element into case, then install cap, securing with latch. INSTALL REMOVE ALLMAND.COM...
- Page 29 Change Fuel Filter Clean Inside Of Radiator For filter part number, see Replacement Parts. Contact your authorized dealer. 1. Remove old filter (G) using a filter wrench. Grease Trailer Hub Bearing 2. Apply a light coating of oil on filter seal (H). Contact your authorized dealer.
- Page 30 For part numbers, see Replacement Parts. When reassembling, apply sufficient grease to O-ring Slot/O-ring and sliding surface. Use CALTEX MULTIFAK EP1 grease or equivalent. Grease of poor quality will deteriorate the material. Supply grease to O-ring (A, B, C, D) after replacement. ALLMAND.COM...
-
Page 31: Storage
Check Pressure Control Valve Check Wheel Lug Nuts / Tire Pressure Close stop valve and fully open service valve while Check tightness of wheel lug nuts (B). Tighten to 80 machine is running. Make sure discharge pressure lb-ft (108 Nm). gauge shows between 49 and 68 psi (3.4 and 4.7 bar). -
Page 32: Troubleshooting
Lamp goes on when engine oil pressure drops below 7.3 Eng. Oil Troubleshooting Pressure psi (0.5 bar) Chart Discharge Air Air temperature sensor at outlet of compressor air end Temp Sensor disconnected Disconnection Coolant Temp Sensor Coolant temperature sensor disconnected Disconnection ALLMAND.COM... -
Page 33: Troubleshooting Chart
Troubleshooting Chart Problem Cause Correction 1. Check battery; charge or replace Low starter revolution speed 1. Battery low or dead as needed 1. Fuel filter clogging 1. Clean / replace 2. Fuel pre-filter clogging 2. Clean / replace Starter rotates but engine does not 3. - Page 34 7 ~ 60 to purge mode operation Load factor for transfer to 5 ~ 30 purge mode operation High-speed side correction min -1 0 ~ 200 (Full load rotational speed) Low-speed side min -1 correction 0 ~ 200 (Unload rotational speed) ALLMAND.COM...
- Page 35 Data Adjustment Procedure...
-
Page 36: Specifications
Specifications Model 185 CFM Type Single-stage oil cooled, screw type compressor cfm (m 3 /min) Free Air Delivery 185 (5.2) Working Pressure psi (bar) 100 (6.9) Compressor Lubricating System Forced lubrication by compressed pressure Driving System Direct driving with gear coupling... - Page 38 ALLMAND.COM...
-
Page 39: Wiring Diagram
Wiring Diagram... -
Page 40: Piping Diagram
Piping Diagram Air Piping - Compressor Oil Piping ALLMAND.COM... - Page 41 Air Piping - Compressor Oil Piping...
-
Page 42: Operation Log
° ° ° ALLMAND.COM... -
Page 44: Noise Emission
The Manufacturer reserves the right to make changes or add improvements without notice and without incurring any obligation to make such changes or add such improvements to products sold previously. The Purchaser is urged to include the above provisions in any agreement for any resale of this compressor. ALLMAND.COM... - Page 45 Noise Emission Control Maintenance Log COMPRESSOR MODEL __________________________ SERIAL NO. ___________________________________ USER UNIT NO. ________________________________ UNIT IDENTIFICATION DEALER OR DISTRIBUTOR FROM WHOM PURCHASED: Engine Make & Model: ________________ __________________________________ Serial No.: _________________________ __________________________________ Purchaser or Owner: _________________ __________________________________ Address: __________________________ Date Purchased: ____________________ The Noise Control Act of 1972 (86 Stat.
- Page 46 Equipment emission increase. and Engine Manufacturer’s Operator and Maintenance Manuals. E. Enclosure Panels Enclosure panels should also be inspected at 100 hour operational intervals. All panels that are warped, punctured, torn, or otherwise ALLMAND.COM...
- Page 47 Maintenance Record For Noise Emission Control Item Hourmeter Maint / Inspect Location Work Done Description Of Work Reading Date City / State By (Name)
Need help?
Do you have a question about the 185 CFM and is the answer not in the manual?
Questions and answers