Asus RT-AC56U User Manual
Dual band wireless-ac1200 gigabit router
Hide thumbs
Also See for RT-AC56U:
- User manual (131 pages) ,
- Quick start manual (3 pages) ,
- User manual (30 pages)
Table of Contents
Advertisement
User Guide
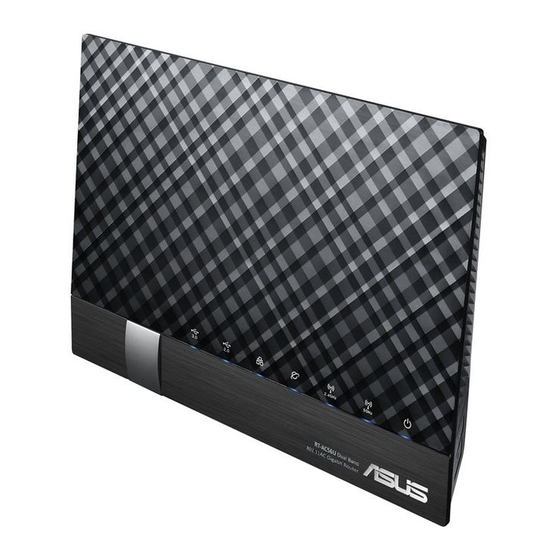
RT-AC56U
Dual Band Wireless-AC1200 Gigabit Router
The ultra-thin and stylish RT-AC56U features a 2.4GHz and 5GHz dual bands for
an unmatched concurrent wireless HD streaming; SMB server, UPnP AV server,
and FTP server for 24/7 file sharing; a capability to handle 300,000 sessions;
and the ASUS Green Network Technology, which provides up to 70% power-
saving solution.
Advertisement
Table of Contents

Subscribe to Our Youtube Channel
Related Manuals for Asus RT-AC56U


Summary of Contents for Asus RT-AC56U
-
Page 1: User Guide
RT-AC56U Dual Band Wireless-AC1200 Gigabit Router The ultra-thin and stylish RT-AC56U features a 2.4GHz and 5GHz dual bands for an unmatched concurrent wireless HD streaming; SMB server, UPnP AV server, and FTP server for 24/7 file sharing; a capability to handle 300,000 sessions;... - Page 2 Product warranty or service will not be extended if: (1) the product is repaired, modified or altered, unless such repair, modification of alteration is authorized in writing by ASUS; or (2) the serial number of the product is defaced or missing.
-
Page 3: Table Of Contents
Table of contents Getting to know your wireless router Welcome! ..................6 Package contents .................6 Your wireless router ..............7 Positioning your router ..............9 Mounting to the stand ..............10 Setup Requirements ..............11 Router Setup ................12 1.6.1 Wired connection ..............12 1.6.2 Wireless connection .............13 Getting started Logging into the Web GUI ............. - Page 4 Table of contents Using AiCloud ................44 3.6.1 Cloud Disk ................45 3.6.2 Smart Access ................47 3.6.3 Smart Sync ................48 Configuring the Advanced Settings Wireless ..................49 4.1.1 General ..................49 4.1.2 WPS ....................52 4.1.3 Bridge ..................54 4.1.4 Wireless MAC Filter ...............56 4.1.5 RADIUS Setting ..............57 4.1.6 Professional ................58 LAN ....................
- Page 5 Utilities Device Discovery ............... 86 Firmware Restoration .............. 87 Setting up your printer server ..........88 5.3.1 ASUS EZ Printer Sharing .............88 5.3.2 Using LPR to Share Printer ..........92 Download Master ..............97 5.4.1 Configuring Bit Torrent download settings ....98 5.4.2 NZB settings ................99...
-
Page 6: Getting To Know Your Wireless Router
Manual, utility software Stand NOTES: • If any of the items are damaged or missing, contact ASUS for technical inquiries and support, Refer to the ASUS Support Hotline list at the back of this user manual. • Keep the original packaging material in case you would need future... -
Page 7: Your Wireless Router
1.3 Your wireless router USB 3.0 / 2.0 LED Off: No power or no physical connection. On: Has physical connection to USB 3.0 / 2.0 devices. LAN LED Off: No power or no physical connection. On: Has physical connection to a local area network (LAN). WAN LED Off: No power or no physical connection. -
Page 8: Power Button
Power LED Off: No power. On: Device is ready. Flashing slow: Rescue mode Flashing quick: WPS is processing. WPS button This button launches the WPS Wizard. WI-FI On/Off button Press this button to turn on /off the Wi-Fi connection LAN 1 ~ 4 ports Connect network cables into these ports to establish LAN connection. -
Page 9: Positioning Your Router
• Always update to the latest firmware. Visit the ASUS website at http://www.asus.com to get the latest firmware updates. • To ensure the best wireless signal, orient the three detachable antennas as shown in the drawing below. -
Page 10: Setup Requirements
1.5 Setup Requirements To set up your wireless network, you need a computer that meets the following system requirements: • Ethernet RJ-45 (LAN) port (10Base-T/100Base-TX/ 1000BaseTX) • IEEE 802.11a/b/g/n/ac wireless capability • An installed TCP/IP service • Web browser such as Internet Explorer, Firefox, Safari, or Google Chrome NOTES: •... -
Page 11: Router Setup
Use a wired connection when setting up your wireless router to avoid possible setup problems. • Before setting up your ASUS wireless router, do the following: • If you are replacing an existing router, disconnect it from your network. • Disconnect the cables/wires from your existing modem setup. If your modem has a backup battery, remove it as well. -
Page 12: Wireless Connection
4. Insert your modem’s AC adapter to the DC-IN port and plug it to a power outlet. 1.6.2 Wireless connection RT-AC56U To set up your wireless router via wireless connection: 1. Insert your wireless router’s AC adapter to the DC-IN port and plug it to a power outlet. - Page 13 3. Insert your modem’s AC adapter to the DC-IN port and plug it to a power outlet. 4. Install an IEEE 802.11a/b/g/n/ac WLAN adapter on your computer. NOTES: • For details on connecting to a wireless network, refer to the WLAN adapter’s user manual.
-
Page 14: Getting Started
Getting started 2.1 Logging into the Web GUI Your ASUS Wireless Router comes with an intuitive web graphical user interface (GUI) that allows you to easily configure its various features through a web browser such as Internet Explorer, Firefox, Safari, or Google Chrome. -
Page 15: Quick Internet Setup (Qis) With Auto-Detection
2.2 Quick Internet Setup (QIS) with Auto- detection The Quick Internet Setup (QIS) function guides you in quickly setting up your Internet connection. NOTE: When setting the Internet connection for the first time, press the Reset button on your wireless router to reset it to its factory default settings. - Page 16 2. The wireless router automatically detects if your ISP connection type is Dynamic IP, PPPoE, PPTP, L2TP, and Static IP. Key in the necessary information for your ISP connection type. IMPORTANT! Obtain the necessary information from your ISP about the Internet connection type. for Automatic IP (DHCP) for PPPoE, PPTP, and L2TP...
- Page 17 for Static IP NOTES: • The auto-detection of your ISP connection type takes place when you configure the wireless router for the first time or when your wireless router is reset to its default settings. If QIS failed to detect your Internet connection type, click Skip to •...
- Page 18 4. Your Internet and wireless settings are displayed. Click Next to continue. 5. Read the wireless network connection tutorial. When done, click Finish.
-
Page 19: Connecting To Your Wireless Network
2.3 Connecting to your wireless network After setting up your wireless router via QIS, you can connect your computer or other smart devices to your wireless network. To connect to your network: 1. On your computer, click the network icon in the notification area to display the available wireless networks. -
Page 20: Configuring The General Settings
Configuring the General settings 3.1 Using the Network Map Network Map allows you to configure your network’s security settings, manage your network clients, and monitor your USB device. -
Page 21: Setting Up The Wireless Security Settings
3.1.1 Setting up the wireless security settings To protect your wireless network from unauthorized access, you need to configure its security settings. To set up the wireless security settings: 1. From the navigation panel, go to General > Network Map. 2. -
Page 22: Managing Your Network Clients
4. From the Security Level dropdown list, select the encryption method for your wireless network. IMPORTANT! The IEEE 802.11n/ac standard prohibits using High Throughput with WEP or WPA-TKIP as the unicast cipher. If you use these encryption methods, your data rate will drop to IEEE 802.11g 54Mbps connection. -
Page 23: Monitoring Your Usb Device
3.1.3 Monitoring your USB device The ASUS Wireless Router provides two USB 2.0 ports for connecting USB devices or USB printer to allow you to share files and printer with clients in your network. NOTES: • To use this feature, you need to plug a USB storage device, such as a USB hard disk or USB flash drive, to the USB 2.0 port on the rear... - Page 24 IMPORTANT! You first need to create a share account and its permission /access rights to allow other network clients to access the USB device via an FTP site/third-party FTP client utility, Servers Center, Samba, or AiCloud. For more details, refer to the section 3.5.Using the USB Application and 3.6 Using AiCloud in this user manual.
- Page 25 Safely removing the USB disk IMPORTANT: Incorrect removal of the USB disk may cause data corruption. To safely remove the USB disk: 1. From the navigation panel, go to General > Network Map. > Eject USB disk. When 2. In the upper right corner, click the USB disk is ejected successfully, the USB status shows Unmounted.
-
Page 26: Creating A Guest Network
The Guest Network provides temporary visitors with Internet connectivity via access to separate SSIDs or networks without providing access to your private network. NOTE: RT-AC56U supports up to six SSIDs (three 2.4GHz and three 5GHz SSIDs). To create a guest network: 1. - Page 27 4. To configure additional options, click Modify. 5. Click Yes on the Enable Guest Network screen. 6. Assign a wireless name for your temporary network on the Network Name (SSID) field. 7. Select an Authentication Method. 8. Select an Encryption method. 9.
-
Page 28: Using The Traffic Manager
3.3 Using the Traffic Manager 3.3.1 Managing QoS (Quality of Service) Bandwidth Quality of Service (QoS) allows you to set the bandwidth priority and manage network traffic. To set up bandwidth priority: 1. From the navigation panel, go to General > Traffic Manager > QoS tab. - Page 29 4. On the user-defined QoS rules page, there are four default online service types – web surf, HTTPS and file transfers. Select your preferred service, fill in the Source IP or MAC, Destination Port, Protocol, Transferred and Priority, then click Apply. The information will be configured in the QoS rules screen.
- Page 30 5. On the User-defined Priority page, you can prioritize the network applications or devices into five levels from the user- defined QoS rules’ dropdown list. Based on priority level, you can use the following methods to send data packets: • Change the order of upstream network packets that are sent to the Internet.
Need help?
Do you have a question about the RT-AC56U and is the answer not in the manual?
Questions and answers