Table of Contents
Advertisement
Advertisement
Table of Contents

Related Manuals for Hitachi 32VZC5200


Summary of Contents for Hitachi 32VZC5200
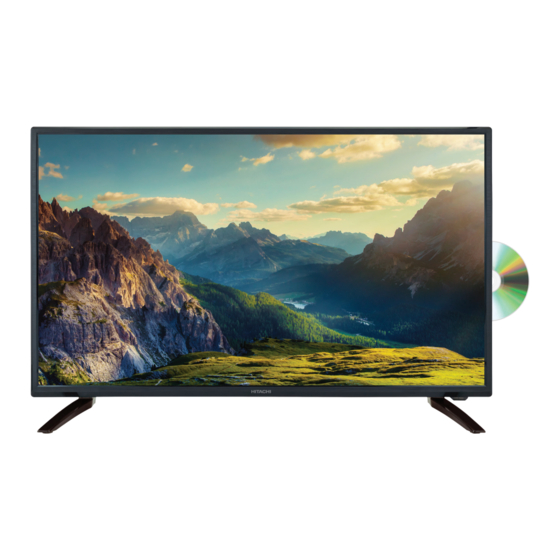
- Page 1 32” HD LED LCD TV/DVD COMBO OWNER’S GUIDE For Model: 32VZC5200...
- Page 3 Welcome Congratulations on choosing to buy a HITACHI product. All products brought to you by HITACHI are manufactured to the highest standards of performance and safety and, as part of our philosophy of customer service and satisfaction, are backed by our comprehensive 2 Year Warranty.
-
Page 4: Table Of Contents
Contents Welcome Remote Control Important Safety Instructions Installation Controls and Connections Getting Started Basic Operations Electronic Program Guide (EPG) Recording Menu Settings DVD Mode USB Multimedia Playback FAQs Other Useful Information After Sales Support Telephone: 1300 886 649 Email: info@tempo.org... -
Page 5: Remote Control
Remote Control POWER: Set the unit in standby mode; press it again to switch it on. GOTO: Jump to a different chapter of the DVD. ANGLE: View DVD playback from different angles, if the DVD has this feature. REPEAT: Repeat a different chapter/ title or the entire DVD. - Page 6 Remote Control (Cont.) Return to the previous channel. 23 DISPLAY: Display information of the current program. 24 CH+/-: Press to play the next or previous channel; press repeatedly to scan through the channels. 25 MUTE: Mute the sound. Press again or press V+ to restore the sound.
-
Page 7: Using The Remote Control
Remote Control (Cont.) Using the Remote Control Fig 1 Inserting Batteries Install the batteries as illustrated in Fig 1, right. Push • Open the cover at the back of the remote control unit completely. Open • Insert two AAA size batteries according to the polarity markings (+ / -) inside the compartment. - Page 8 Remote Control (Cont.) Using the Remote Control To use the remote control, point it towards the remote sensor at the front of the television. The remote control has a range of up to Remote Control approximately six metres (6m) from the TV at an Sensor Sensor angle of up to 30 degrees each to the right and...
-
Page 9: Important Safety Instructions
Important Safety Instructions Read this manual thoroughly before first use and keep it in a safe place for future reference, along with purchase receipt and carton. The safety precautions enclosed herein reduce the risk of fire, electric shock and injury when correctly adhered to. Follow all instructions and take notice of all the warnings. - Page 10 Important Safety Instructions (Cont.) Electrical Safety and Cord Handling • Voltage: Before installing this TV set, make sure your outlet voltage corresponds to the voltage stated on the TV’s rating label. • Protect from moisture: To reduce the risk of fire or electric shock, do not expose this TV to rain or moisture;...
- Page 11 Important Safety Instructions (Cont.) Installation • Follow instructions: Only install this TV set in accordance with these instructions. • Location: This TV is designed for indoor, fixed location use only. It must not be used in portable or mobile applications as vibration or excessive forces may damage the unit.
- Page 12 Important Safety Instructions (Cont.) Usage Conditions and Restrictions • Adjustments: Follow the instructions in this manual when installing and adjusting the TV set. Only adjust those controls that are covered in this manual, as improper adjustment of other controls may result in damage. •...
- Page 13 Important Safety Instructions (Cont.) • Repair: If the TV requires repair, contact the after sales support line; never disassemble or modify the TV or attempt to service it yourself. • Service: Refer all servicing to qualified service personnel. Servicing is required when the TV has been damaged in any way, such as when the power supply cord or plug is damaged, liquid has been spilled or objects have fallen into the TV, when the TV has been exposed to rain or moisture, does not operate normally, or has been...
-
Page 14: Installation
Installation Unpacking and Preparing the TV Remove the TV carefully from its packaging, be careful not to apply any pressure to the front of the LCD screen. Some accessory items may be located in cut-out sections of the internal packaging, so make sure you check the entire packaging to not miss any items. - Page 15 Installation (Cont.) Assembling the Base Stands If you want to use the TV standing on appropriate furniture, first find a suitable location where you can attach the TV base stands to the body of the TV. You will need to arrange a soft cloth that is large enough to cover the entire front panel of the TV (for protection of the LCD screen), as well as a screwdriver to attach the base stands.
- Page 16 Installation (Cont.) Wall-Mounting the TV IMPORTANT! • Make sure the TV is unplugged from the power supply before mounting it to a wall or taking it off the wall mount. • We recommend you contact a professional for assistance when wall-mounting the TV.
-
Page 17: Controls And Connections
Controls and Connections Front and Side Button Controls Front View Side View LED LCD Display screen IR (infra-red) Sensor for remote control. Power Indicator: In standby mode the indicator light is red; when switching on the unit the indicator light will illuminate blue. VOL + / - : Decrease/increase the volume level or move left/right. - Page 18 Controls and Connections (Cont.) Back Panel Connections 1 POWER: Power Input 2 EARPHONES output 3 YPBPR input (Component): supports both SD (Standard Definition) and HD (High Definition) picture quality. 4 PC AUDIO input 5 PC (VGA) input: Connect to a PC or other device with a VGA interface. 6 OPTICAL output: Connect the unit with amplifier or other audio decoding devices for optical audio signal output.
- Page 19 Controls and Connections (Cont.) IMPORTANT! • Ensure all cables are disconnected from the main unit before connecting the TV to an AC power source. • Read through the instructions before connecting the TV to other equipment. Connecting to an AC Power Source Main Unit To power outlet...
- Page 20 Controls and Connections (Cont.) Earphone Connection Earphone cable (not included) USB Connection USB device (not included) Composite Video (CVBS) Connection For a non high-definition connection, use the AV Cable composite Audio L/R (white/ (included) red) and CVBS (yellow) cable to connect the unit with other devices.
-
Page 21: Hdmi Connection
Controls and Connections (Cont.) HDMI Connection Use an HDMI cable to connect the unit with other devices to receive high-definition multimedia signal. PC / VGA Connection Audio cable (not included) VGA Cable (not included) Use VGA and Audio cables to connect the unit with a PC and use this product as a monitor. - Page 22 Controls and Connections (Cont.) Optical Connection Use a optical cable (not included) to connect the unit with amplifier or other audio decoding device for optical audio signal output. Component (YPbPr) Connection YPbPr Cable (Not included) Audio L/R of AV Cable (Included) External Video / Media Player After Sales Support...
-
Page 23: Getting Started
Getting Started Getting Started Once you have connected your TV antenna and other AV playback equipment (ie. CD player, amplifier, Blu-ray player) to the appropriate input sockets on the back of the TV, you will need to be comfortable with selecting several basic operations before setting up your TV using the Menu system. -
Page 24: Basic Operations
Basic Operations Selecting an Input Source • Press the SOURCE button on the remote control (or on the lower side of the back panel) to display the input source list. • Use the navigation buttons to select the desired input source, then press OK to confirm your selection from the following options: DTV, ATV, AV, YPbPr, HDMI 1/2/3, PC, USB (MEDIA). -
Page 25: Favourites List
Basic Operations (Cont.) Favourites List • While viewing a channel, press the FAV button on the remote control to enter the Favourites List menu. the favourite • Use the buttons to select category and the buttons to select the channel. Then press OK to watch it. •... -
Page 26: Electronic Program Guide (Epg)
Electronic Program Guide (EPG) EPG stands for Electronic Program Guide. It is supplied by the program providers and offers information about the programs to be broadcast. You can access it in digital (DTV) mode by pressing the EPG button on the remote control. •... - Page 27 Recording One-Touch Recording (in DTV mode only) IMPORTANT! Before you can record with this TV set (including time-shift recording), you must have inserted a FAT32 formatted USB storage device into the USB port. First, insert your USB memory device into the USB port. When Watching a Program in DTV Mode: •...
- Page 28 Recording (Cont.) Time-Shift Recording and Playback (in DTV mode only) IMPORTANT! Before you can record with this TV set (including time-shift recording), you must have inserted a FAT32 formatted USB storage device into the USB port. The Time-Shift function allows you to pause the live TV signal, then resume playback at your convenience.
- Page 29 Recording (Cont.) Important Notes When using the USB/Media function, remember the following important points: • We strongly recommend you back up all data in the USB storage device to another storage device so you do not risk losing any data in case of an unexpected device failure or accident.
-
Page 30: Menu Navigation
Menu Settings This TV set contains different settings menus where you can program your preferred settings. Once you have programmed any settings, the unit will retain them in its memory until you change them, even when switching the unit to standby mode. This means you can always operate the system under the same conditions. - Page 31 Menu Settings (Cont.) Channel Scanning • Press the MENU button on your remote control to display the main menu. • Use the buttons to select the Channel menu, then press to enter. • Use the buttons to select the desired submenu and, with the highlighted menu selected, press or to enter it.
- Page 32 Menu Settings (Cont.) Channel Edit • Using the buttons, select “Channel Edit”, then press OK to enter. • If you want to delete, skip or move a channel, use the buttons to select the channel, and then: • Press the RED button on the remote control to delete the highlighted channel.
- Page 33 Menu Settings (Cont.) Picture Menu (DTV & ATV Mode) • Press the MENU button on your remote control to display the main menu. buttons to select the Picture menu, then press OK to enter. • Use the • Use the buttons to select the desired submenu.
- Page 34 Menu Settings (Cont.) • Press the button on your remote control to display the main menu. • Use the buttons to select the Sound menu, then press to enter. • Use the buttons to select the desired submenu. • Use the buttons to select from Standard, Music, Personal, Movie.
- Page 35 Menu Settings (Cont.) • Press the button on your remote control to display the main menu. • Use the buttons to select the Lock System menu, the default password is “0000”. • Use the buttons to select the desired submenu. •...
- Page 36 Menu Settings (Cont.) Hotel Mode • Press the button to enter. • Press the buttons to select the desired item. • Press the buttons to adjust the value. • Press OK or to enter the submenu. • Press the MENU button to return to the previous page. Active Hotel Mode: Turn on/off Hotel Mode.
- Page 37 Menu Settings (Cont.) Setup Menu (DTV & ATV mode) • Press the MENU button on your remote control to display the main menu. • Use the buttons to select the Setup menu, then use the buttons to select the desired submenu. OSD Language: Use this item to select the desired on-screen display language.
- Page 38 Menu Settings (Cont.) • Auto Sleep: This item is used to select the desired Auto Sleep (standby) duration. Available options: Off, 3/4/5 hours. • Time Zone: This item is used to select your desired time zone. • Time: Press OK or to enter.
- Page 39 Menu Settings (Cont.) PVR Settings File Manager • Use the buttons to select a recorded file. • Press the RED button on the remote control to play the highlighted file from the beginning. • Press the GREEN button to delete the highlighted file. •...
- Page 40 Menu Settings (Cont.) PC Settings • Connect a personal computer to this unit and power on both the computer and this unit. • Press the SOURCE button on the back panel, or on the remote control, to select PC input source. •...
-
Page 41: Dvd Mode
DVD Mode Press the SOURCE button on the back panel, or on the remote control, to switch the unit to DVD mode. Basic DVD Movie Playback • Before placing a disc into the disc compartment, make sure there is no disc inside. Hold the disc without touching either of its surfaces, position it with the readable (mirror) side facing towards you, then the disc will automatically enter into the disc compartment;... - Page 42 DVD Mode (Cont.) Fast Forward/Fast Backward • During playback, press the buttons to fast backward/forward. • Press button to resume normal play. Pause/Play • During playback, press the button to pause playback, press it again to resume normal playback. Viewing From Different Angles Some DVDs may contain scenes which have been shot simultaneously from a number of different angles.
- Page 43 DVD Mode (Cont.) Repeat Play • Press the REPEAT button during playback, it will repeat play one chapter or one title (for DVD disc), or repeat play the track (for VCD/CD). A-B Repeat Play This button lets you repeat sections between two specific points (A-B repeat). •...
- Page 44 DVD Mode (Cont.) Media File Playback Music File Playback • Insert a disc which contains music files and after a few seconds, the screen will show all the folders on the disc. • Use the / / buttons to select the folder you want to play, then press OK to confirm.
- Page 45 DVD Mode (Cont.) Movie File Playback (movie files stored on a data CD) • Insert a disc which contains movie files and after a few seconds, the screen will show all the folders on the disc. • Use the / / buttons to select the folder you want to play, then press the OK button to confirm.
- Page 46 DVD Mode (Cont.) JPEG File Playback • Insert a picture CD which contains JPEG picture files and after a few seconds, the screen will show all the folders on the disc. • Use the / / buttons to select the folder you want to play, then press OK to confirm.
-
Page 47: Video Cd Playback
DVD Mode (Cont.) Video CD Playback When playing a VCD 2.0 with playback control (PBC), the player will show the VCD version. • Press the number buttons to select a corresponding track. Example: To play track 9, press 0 and 9, several seconds later, it will automatically switch to track 9. -
Page 48: Dvd Menus
DVD Mode (Cont.) DVD Menus The DVD player function of this TV set contains different settings menus where you can program your preferred settings. Once you have programmed any settings, the unit will retain them in its memory until you change them, even when switching the unit to standby mode. - Page 49 DVD Mode (Cont.) Audio Setup Page Downmix: Use this item to select the desired audio output mode. Available options: LT/RT: Left/Right mix mode Stereo mode. Preference Setup Page TV Type: Select the TV system. Audio: Use this item to select the desired audio language, if your disc contains multiple audio languages.
- Page 50 USB Multimedia Playback Multimedia Playback • First, insert a USB memory device into one of the USB ports. • Press the SOURCE button on the back panel or the remote control to switch the unit to USB mode. (Alternatively, press the MEDIA button on the remote control to enter USB mode directly.) •...
- Page 51 USB Multimedia Playback (Cont.) Music • Press the buttons to select Music in the main menu, then press to enter it. Music files can only be played in this menu category. • Use the buttons to select the desired folder or file, then press to open the folder or start playing the file.
- Page 52 USB Multimedia Playback (Cont.) Text • Press the buttons to select Movie in the main menu, then press OK to enter it. Music files can only be played in this menu category. • Use the buttons to select the desired folder or file, then press OK to open the folder or start playing the file.
- Page 53 FAQs If you experience any problems with your TV, check the list below and take any necessary steps before calling for service. If none of the solutions help you solve the problem, turn the power off and contact the after sales support line for advice. Problem Solution General Problems with the TV Set...
- Page 54 FAQs Problem Solution Problems relating to the built-in DVD player No subtitles are • Subtitles appear only with discs that contain them. displayed. Check whether your DVD has subtitles. • Make sure to select Subtitles ON in the settings, otherwise they will not be displayed. Audio soundtrack and/or •...
-
Page 55: Technical Specifications
Other Useful Information Technical Specifications Display Device 32" (81.28cm) HD LED LCD TV Resolution 1366 x 768 Luminance 220 cd/m2 Contrast Ratio 1400 : 1 Aspect Ratio 16:9 Viewing Angle 176 (H) / 176 (V) Movie: AVI, MPEG, MPEG-4, TS, MKV, Music: MP3, WAV, AAC USB Multimedia Playback... - Page 56 Other Useful Information (Cont.) Responsible Disposal Packaging: The packaging of your TV has been selected from environmentally friendly materials and can usually be recycled. Please ensure these are disposed of correctly. Plastic wrapping can be a suffocation hazard for babies and young children, please ensure all packaging materials are out of reach and are safely disposed of.
- Page 57 This page has been left blank intentionally. After Sales Support Telephone: 1300 886 649 Email: info@tempo.org...
- Page 58 This page has been left blank intentionally. After Sales Support Telephone: 1300 886 649 Email: info@tempo.org...
- Page 59 This page has been left blank intentionally. After Sales Support Telephone: 1300 886 649 Email: info@tempo.org...
Need help?
Do you have a question about the 32VZC5200 and is the answer not in the manual?
Questions and answers