Advertisement
Advertisement
Table of Contents

Related Manuals for HSAJET MiniTouch MTHP4

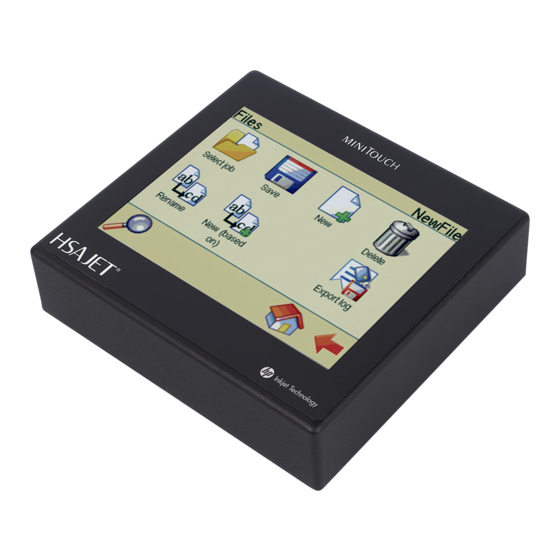
Summary of Contents for HSAJET MiniTouch MTHP4
- Page 1 Installation Manual MiniTouch MTHP4 Version 1.9 © 2010 HSA SYSTEMS...
-
Page 2: Table Of Contents
MTHP4 Installation manual Table of Contents Safety instructions Installation environment Dimensions Unpack the equipment Connect the MiniTouch Multiple Heads Mechanical Setup Test your hardware Support © 2010 HSA SYSTEMS... -
Page 3: Safety Instructions
Safety instructions Safety instructions The MTHP4 is a controller unit for inkjet printing. Only use this device for the intended use. Do not subject the controller to strong shocks or vibrations. Install the MTHP4 in the recommended installation environment only. Only use the MTHP4 with f-type print heads from HP. -
Page 4: Installation Environment
MTHP4 Installation manual Installation environment Environment Condition Installation Area Indoors Ambient Temperature 10 - 40 degrees C Humidity 95 % RH or less and free of condensation Surrounding Area Install in an area free from: oil mist and dust metal shavings, oil, water or other foreign materials radioactive materials combustible materials... -
Page 5: Dimensions
Installation environment Dimensions Below are the dimensions of the controller. All measurements are in mm. © 2010 HSA SYSTEMS... -
Page 6: Unpack The Equipment
MTHP4 Installation manual Unpack the equipment If you have ordered a MiniTouch MT-HP4, you will receive the following parts. Controller unit Cable (15 pin sub-d m-m) Power supply 2 pcs 9 pin subd connectors Menu overview Touch screen pen USB key ©... - Page 7 2+1+1 pens 2+2 pens 3+1 pens Cable (25 pin sub-d m-f) The following parts are optional Distributor box for HSAJet F-type printheads (hp) MT-HP4 bracket kit for F-type print heads (side low) Bridge for Hp-printheads w/2 slides Head mount for HP-print head (for bridge) Sensor mount for bridge ©...
- Page 8 MTHP4 Installation manual Encoder mount for bridge and encoder bracket Telescope unit Encoder Encoder wheel Photo Sensor, fibre optic and transmitter Sensor mount for base Ink Cartridge R + K Mount © 2010 HSA SYSTEMS...
-
Page 9: Connect The Minitouch
Unpack the equipment Connect the MiniTouch Insert pen into stall and lock it 1. Connect the stall to printer. 3. Connect the controller to the power supply. 5. Connect the start censor to I/O. Optional equipment 6. Connect the encoder to enc. 7. -
Page 10: Multiple Heads
MTHP4 Installation manual Multiple Heads With the MiniTouch MT-HP4 you can print with more than one head but not with no more than 4 pens. This means you can print with the following combinations of heads: 1. 4 pcs 1-pen heads. 2. -
Page 11: Mechanical Setup
Mechanical Setup Mechanical Setup Install controller near conveyor The controller must be installed at close proximity to the conveyor where it will be used. The controller and the stall must be connected with a cable no longer than 5 m. Place Head on conveyor Install the head on the conveyor so that the "sole"... -
Page 12: Test Your Hardware
MTHP4 Installation manual Position the wheel so it is completely parallel with the conveyor. Make sure the wheel is perfectly round. The standard is an encoder with 5000 PPR (Pulse per round) and a wheel circumference of 200mm. b. Encoder with shaft. Encoder directly connected to the shaft of the conveyor. - Page 13 Test your hardware This screen displays the different types of hardware connected to the controller. If you use a negative sensor, the light bulb Start Switch will be on. Activate the sensor. If the light in the bulb goes off, the sensor is properly installed.
- Page 14 MTHP4 Installation manual This screen provides an overview of all the pens installed on your system. Hold a piece of paper under the head and press one of the pens in the menu. If each pen leaves an ink mark on your paper, the head is properly installed.
-
Page 15: Support
Test your hardware Support For product support, please contact HSA SYSTEMS Customer Service department HSA SYSTEMS CUSTOMER SERVICE DEPARTMENT Phone: +45 6610 3401 Email: techsupport@hsasystems.com © 2010 HSA SYSTEMS...
Need help?
Do you have a question about the MiniTouch MTHP4 and is the answer not in the manual?
Questions and answers
It is possible to refill this printer cartridge?
The provided information does not state whether the HSAJET MiniTouch MTHP4 printer cartridge can be refilled. Therefore, it cannot be determined.
This answer is automatically generated