Advertisement
Table of Contents
Handson Technology
User Guide
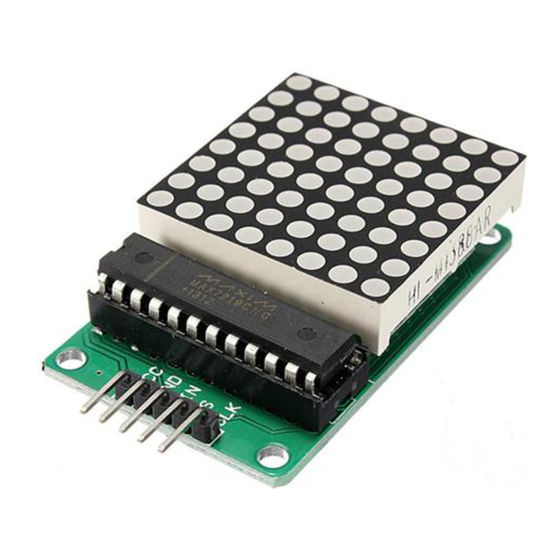
MAX7218 8x8 Dot Matrix Display Module
This is 8x8 (row by column 64x LED) dot matrix LED displays module based on MAX7219
IC. The displays are designed so that they can be mounted in a horizontal chain and can also
be expanded in a vertical plane allowing versatile displays panel to be built. A convenient 3-
wire serial interface connects to all common controller board like Arduino or Raspberry.
Individual dot may be addressed and updated without rewriting the entire display. This
module can be daisy chain to form a display panel for scrolling message board.
SKU:
DSP-1172
Brief Data:
Matrix Size: 8x8 ( 64-Dots)
Display Size: 1.3".
Display Color: Red.
Interface: 3-Wires Serial Interface.
Daisy chain for multiple modules.
Operating voltage: 4.5 ~ 5V.
Module size: 5 x 3.2 x 1.5cm (L x W x H).
Mounting Hole: M3.
1
www.handsontec.com
Advertisement
Table of Contents

Related Manuals for Handson Technology MAX7218

Summary of Contents for Handson Technology MAX7218
- Page 1 Handson Technology User Guide MAX7218 8x8 Dot Matrix Display Module This is 8x8 (row by column 64x LED) dot matrix LED displays module based on MAX7219 IC. The displays are designed so that they can be mounted in a horizontal chain and can also be expanded in a vertical plane allowing versatile displays panel to be built.
- Page 2 MAX7291 Module Matrix Connection: Arduino Connection Examples: Now let’s connect the 8×8 LED Matrix module to the Arduino Board. Here’s the circuit schematic: www.handsontec.com...
- Page 3 Connecting Table: Arduino MAX7219 Module Once we wire up the modules we are ready to take a look at the Arduino code of the first example. We will use the MaxMatrix library which can be downloaded from GitHub. Copy and paste the below sketch to Arduino IDE and upload to Arduino Uno board: 8x8 LED Matrix MAX7219 Example 01 Based on the following library: GitHub | riyas-org/max7219...
- Page 4 B00111100 char smile03[] = {8, 8, B00111100, B01000010, B10100101, B10010001, B10010001, B10100101, B01000010, B00111100 void setup() { m.init(); // MAX7219 initialization m.setIntensity(8); // initial led matrix intensity, 0-15 void loop() { // Seting the LEDs On or Off at x,y or row,column position m.setDot(6,2,true);...
- Page 5 Next let’s take a look at the scrolling text example and see what’s different. Copy and paste the below sketch to Arduino IDE and upload to Arduino Uno board: 8x8 LED Matrix MAX7219 Scrolling Text Example Based on the following library: GitHub | riyas-org/max7219 https://github.com/riyas-org/max7219 #include <MaxMatrix.h>...
- Page 6 = 5; // CS pin of MAX7219 module maxInUse = 2; MaxMatrix m(DIN, CS, CLK, maxInUse); byte buffer[10]; char text[]= "Handson Technology "; // Scrolling text void setup() { m.init(); // module initialize m.setIntensity(15); // dot matix intensity 0-15 void loop() { printStringWithShift(text, 100);...
- Page 7 // Display=the extracted characters with scrolling void printCharWithShift(char shift_speed) { < 32) return; -= 32; memcpy_P(buffer, * c, 7); m.writeSprite(32, 0, buffer); m.setColumn(32 + buffer[0], 0); (int = 0; < buffer[0] + 1; i++) delay(shift_speed); m.shiftLeft(false, false); // Extract the characters from the text string void printStringWithShift(char* s, shift_speed) {...
Need help?
Do you have a question about the MAX7218 and is the answer not in the manual?
Questions and answers