Table of Contents
Advertisement
Quick Links
Read all instructions BEFORE
assembly and USE of product.
KEEP INSTRUCTIONS FOR
FUTURE USE.
Lea todas las instrucciones ANTES
de armar y USAR este producto.
CONSERVE LAS INSTRUCCIONES
PARA USO FUTURO.
Lire les instructions AVANT ď
assembler et ď UTILISER le produit.
GARDER CES INSTRUCTIONS
POUR S'Y RÉFÉRER AU BESOIN.
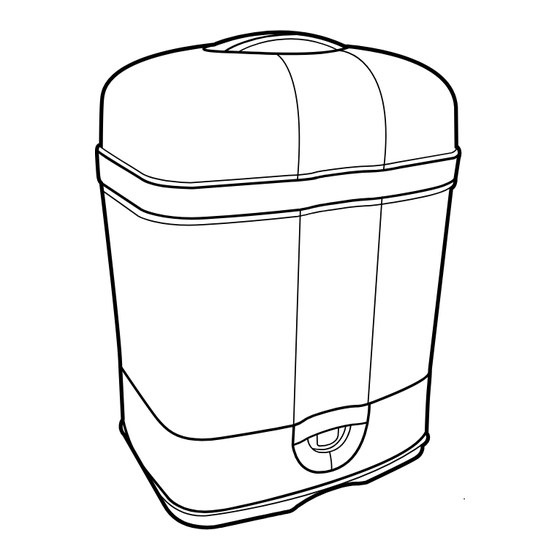
3 in 1 Steam Sterilizer
Esterilizador de vapor 3 en 1
Stérilisateur à vapeur 3-en-1
Owner's Manual
Manual del propietario
Manuel du propriétaire
©2018 Artsana USA, INC. 02/27
www.chiccousa.com
IS0129ESF_04
Advertisement
Table of Contents

Related Manuals for Chicco 06782U


Summary of Contents for Chicco 06782U
- Page 1 Read all instructions BEFORE assembly and USE of product. KEEP INSTRUCTIONS FOR FUTURE USE. Lea todas las instrucciones ANTES de armar y USAR este producto. CONSERVE LAS INSTRUCCIONES PARA USO FUTURO. Lire les instructions AVANT ď assembler et ď UTILISER le produit. GARDER CES INSTRUCTIONS POUR S'Y RÉFÉRER AU BESOIN.
-
Page 2: Conservez Ces Directives
• The use of accessory the vent. attachments is not • Do NOT cover the vent. recommended by Chicco and • Do NOT place Sterilizer under may cause injuries or damage. any object that could be • Do NOT use with any bottle or SAVE THESE INSTRUCTIONS damaged by the steam. - Page 3 • NO coloque el esterilizador bajo submerged. • Chicco no recomienda el uso de outlet, reverse the plug. If it ningún objeto que pueda dañarse accesorios ya que pueden causar still does not fit, contact a con el vapor.
-
Page 4: Danger De Brûlure
• L’utilisation d’accessoires n’est pas endommagé par la vapeur. aparato antes de enchufar el malfuncionamiento del aparato recommandée par Chicco, car cela • Ne JAMAIS retirer le couvercle cable en el tomacorriente. o si se ha caído o dañado de risque de causer des blessures ou des pendant l’utilisation. - Page 5 MISE EN GARDE Parts List Lista de piezas Lors de l’utilisation de cet appareil électrique, on doit Liste des pièces toujours respecter certaines précautions de sécurité élémentaires, dont les consignes suivantes : A. Sterilizer Lid ATTENTION A. Tapa del esterilizador •...
- Page 6 Full Size Electric Mode Full Size Electric Mode Modo eléctrico de tamaño completo Modo eléctrico de tamaño completo Mode électrique pleine grandeur Mode électrique pleine grandeur 2. Measure 2/3 cup = 5 oz /150ml of water in a separate container, and pour directly into the Electric Base reservoir.
- Page 7 Full Size Electric Mode Full Size Electric Mode Modo eléctrico de tamaño completo Modo eléctrico de tamaño completo Mode électrique pleine grandeur Mode électrique pleine grandeur 3. Always clean and rinse the bottles 4. Plug the Sterilizer into an electrical before placing them in the Sterilizer.
- Page 8 Full Size Electric Mode Full Size Electric Mode Modo eléctrico de tamaño completo Modo eléctrico de tamaño completo Mode électrique pleine grandeur Mode électrique pleine grandeur ADVERTENCIA MISE EN GARDE WARNING 6. When the sanitation cycle is Never use COMPACTeco Nunca utilice el ciclo Ne jamais utiliser le cycle completed the red light on the Power...
- Page 9 COMPACTeco Electric Mode COMPACTeco Electric Mode Modo eléctrico COMPACTeco Modo eléctrico COMPACTeco Mode électrique COMPACTeco Mode électrique COMPACTeco 8. Measure 2/3 cup = 5 oz /150ml of water in a separate container, and pour directly into the Electric Base reservoir. Place the Upper Rack back onto the Electric Base.
- Page 10 COMPACTeco Electric Mode COMPACTeco Electric Mode Modo eléctrico COMPACTeco Modo eléctrico COMPACTeco Mode électrique COMPACTeco Mode électrique COMPACTeco 9. Always clean and rinse the bottles 10. Plug the Sterilizer into an before placing them in the Sterilizer. electrical outlet. Power on the appliance by pressing the ON/OFF Place the Sterilizer Lid back onto switch on the back of the Base.
- Page 11 COMPACTeco Electric Mode COMPACTeco Electric Mode Modo eléctrico COMPACTeco Modo eléctrico COMPACTeco Mode électrique COMPACTeco Mode électrique COMPACTeco 11. Press the "COMPACTeco" button. 12. When the sanitation cycle is The "COMPACTeco" button will turn completed the red light on the Power white.
- Page 12 WARNING: ADVERTENCIA: For your child's safety read all Para la seguridad de su hijo lea todas instructions. las instrucciones BURN HAZARD RIESGO DE QUEMADURA • For glass feeding bottles - • Use el esterilizador SÓLO con To avoid risk of burns: Para evitar el riesgo de sufrir make sure glass bottles are productos que sean aptos para...
- Page 13 MISE EN GARDE Microwave Mode Modo horno microondas Pour assurer la sécurité de votre enfant, Mode micro-ondes prière de lire toutes les directives DANGER DE BRÛLURE Pour éviter le risque de brûlure : • Utiliser UNIQUEMENT avec • Les pièces sont très chaudes des produits qui vont au après l’assainissement.
- Page 14 Microwave Mode Microwave Mode Modo horno microondas Modo horno microondas Mode micro-ondes Mode micro-ondes 14. Measure 1/3 cup = 3 oz /80ml 15. Place the Upper Rack back onto of water in a separate container, and the Microwave Base. pour directly into the Microwave Base reservoir.
- Page 15 Microwave Mode Microwave Mode Modo horno microondas Modo horno microondas Mode micro-ondes Mode micro-ondes 17. When the sanitation cycle is 16. Put the Sterilizer Lid back onto completed remove from microwave the Sterilizer. Make sure it is fitted using heat resistant gloves. correctly.
-
Page 16: Eliminación Del Sarro
Care and Maintenance Nettoyage et Entretien CLEANING NETTOYAGE Make sure the Sterilizer is unplugged and the power cord is disconnected before S’assurer que le cordon du stérilisateur est débranché de l’appareil et de la prise cleaning. Clean Sterilizer regularly. After each use allow to cool down completely, murale avant le nettoyage. -
Page 17: Troubleshooting And Repair
Solución de problemas y reparación Trouble Shooting and Repair PROBLEM POSSIBLE CAUSE SOLUTION PROBLEMA CAUSA POSIBLE SOLUCIÓN There is no power. Check that there is power in the electrical No hay corriente. The Sterilizer does Verifique que haya corriente en el El esterilizador no not turn ON. -
Page 18: Dépannage Et Réparation
Dépannage et réparation For More Information Más información PROBLÈME CAUSE POSSIBLE SOLUTION Pour plus d’information Il est hors tension. Vérifier s’il y a du courant dans la prise Le stérilisateur électrique murale. ne se met pas en marche. For USA customers : L’interrupteur «... - Page 19 Renseignements techniques Reference / Referencia / Référence: 00007391000070 Electrical Ratings: / Eléctricas: / Caractéristiques électriques: 120Vac 60Hz 600W Model / Modelo / Modèle: 06782U Made In China / Hecho en China / Fabriqué en Chine 120V - 60Hz 400W = WARNING! = WARNING! Hot Steam.
- Page 20 Never Stop Growing ™ www.chiccousa.com...
Need help?
Do you have a question about the 06782U and is the answer not in the manual?
Questions and answers