
Subscribe to Our Youtube Channel
Related Manuals for Muller Elektronik TRACK Guide II


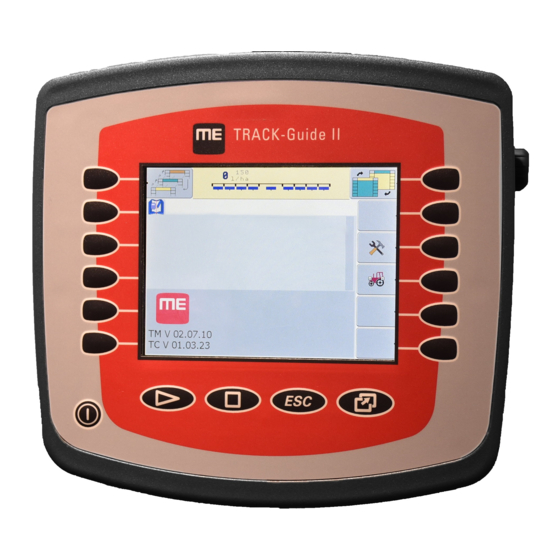
Summary of Contents for Muller Elektronik TRACK Guide II
- Page 1 Installation and operating instructions TRACK-Guide II Version: V7.20141016 30302710-02-EN Read and follow these operating instructions. Keep these operating instructions in a safe place for later reference.
- Page 2 Company details Document Installation and operating instructions Product: TRACK-Guide II Document number: 30302710-02-EN From software version: 04.10.04 Original language: German Copyright © Müller-Elektronik GmbH & Co.KG Franz-Kleine-Straße 18 33154 Salzkotten Germany Phone: ++49 (0) 5258 / 9834 - 0 Fax: ++49 (0) 5258 / 9834 - 90 Email: info@mueller-elektronik.de Homepage: http://www.mueller-elektronik.de...
-
Page 3: Table Of Contents
Contents Contents For your safety Basic safety instructions Layout and meaning of warnings User requirements Intended use EC declaration of conformity About these Operating Instructions Target group of these Operating Instructions Layout of operating instructions Layout of references Product description Performance description Scope of delivery Information on the nameplate... - Page 4 Contents Opening applications in the selection menu Display layout in the selection menu Opening applications Segmentation of the display Configuring the terminal in the Service application Controls in the Service application Icons in the Service application Changing the language Basic settings GPS receiver 7.5.1 Activating the GPS receiver...
- Page 5 Contents 8.2.1 Calibrating the speed sensor 8.2.2 Configuring a working position sensor 8.2.3 Entering the position of the GPS Receiver For machines fitted with an ISOBUS job computer Activating vehicle profiles ISOBUS-TC task processing Using ISOBUS-TC Adjusting how you use ISOBUS-TC Configuring the list of connections Serial Interface application 10.1...
-
Page 6: For Your Safety
For your safety Basic safety instructions For your safety Basic safety instructions Please read the following safety instructions carefully before using the product for the first time. ▪ Do not operate the terminal while driving in road traffic. Come to a standstill in order to use the unit. -
Page 7: User Requirements
For your safety User requirements CAUTION This signal word identifies low-risk hazards, which could potentially cause minor or moderate physical injury or damage to property, if not avoided. NOTICE This signal word identifies actions which could lead to operational malfunctions if performed incorrectly. -
Page 8: About These Operating Instructions
About these Operating Instructions Target group of these Operating Instructions About these Operating Instructions Target group of these Operating Instructions These Operating Instructions are intended for personnel entrusted with installing and operating the terminal. Layout of operating instructions The operating instructions explain step by step how you can perform certain operations with the product. -
Page 9: Product Description
Product description Performance description Product description Performance description Hardware The terminal is available in two hardware versions: ▪ With GSM modem and with camera connections – Complete functionality: – It is the prerequisite for work with the farmpilot portal; – On the rear side you can find two camera connections and one connection for the GSM antenna. -
Page 10: Scope Of Delivery
Product description Scope of delivery Scope of delivery The following items are included in delivery: ▪ Terminal ▪ Installation and Operating Instructions ▪ Operating instructions for the TRACK-Leader application - as a separate document. ▪ Bracket for mounting the terminal ▪... -
Page 11: Mounting And Installation
Mounting and installation Mounting the terminal in the tractor cab Mounting and installation Mount the terminal and all additional components in the following order: 1. Mount the terminal in the tractor cab. [➙ 11] 2. Connect the terminal to the voltage supply (port A). [➙ 13] 3. -
Page 12: Terminal Ports
Mounting and installation Mounting the terminal in the tractor cab 4.1.1 Terminal ports Rear of the terminal. Version with a GSM modem and camera connections GSM antenna port Port for analog camera Only for terminals with a GSM modem Only for terminals with a GSM modem installed. -
Page 13: Connecting The Terminal To Voltage Supply
Mounting and installation Connecting the terminal to voltage supply NOTICE Electromagnetic waves Damage to the terminal ◦ Glue the GSM antenna from the inside onto a window pane so that its emissions are directed outward. Never glue the unit to the terminal or other electronic components. ... -
Page 14: Sim Card
Mounting and installation SIM card – In certain versions, you will also require the D-Sub <-> CPC connector cable, item no. 30322541 When there is more than one terminal in the tractor cab, you may need to change certain settings in order to enable two-way communication. -
Page 15: Connecting The Iso Printer To The Terminal
Mounting and installation Connecting the ISO printer to the terminal ⇨ Card holder will be unlatched: 4. Raise the card holder. The card holder can be raised on the right hand side where the casing is rounded. The card holder is held in place by hinges on the other side. 5. -
Page 16: Connecting The Me Lightbar To The Terminal
Mounting and installation Connecting the ME LightBar to the terminal 9-pin Sub-D plug for connection to ISOBUS Plug for connection to ISO printer socket ISO printer Connector for connection to the terminal ISO printer socket CAN-Bus connection When you connect a GPS receiver to the terminal, you must activate [➙ 55] and configure it. Connecting the ME LightBar to the terminal The ME LightBar is a parallel guidance display made by Müller-Elektronik, which can be mounted near the windshield. -
Page 17: Connecting The Gps Receiver To The Terminal
Mounting and installation Connecting the GPS Receiver to the terminal You can find a list of on-board integrated display/controllers that we have tested here: ▪ Transfer target rates via LH5000 [➙ 69] ▪ Switching sections and transferring target rates via ASD [➙ 70] For other on-board integrated display/controllers and for on-board integrated display/controllers with other software versions, this function may not work at all or different from how it is described in these instructions. -
Page 18: Connecting Sensors To The Terminal
Mounting and installation Connecting sensors to the terminal Data bits Parity Stop bits Flow control none CAUTION Damage to the equipment caused by short circuit Pin 4 of port C is live. The voltage depends on the operating voltage of the terminal and is used to supply the DGPS Receiver from Müller Elektronik. -
Page 19: Connecting The Camera To The Terminal
Mounting and installation Connecting the camera to the terminal Adapter cable by hardware version Hardware ver- Adapter cable Connection Item num- sion of the terminal From 3.0.0 3-pole plug Adapter cable, 9-pole bushing to 3- 31302499 pole From 1.4.1 3-pole plug Adapter cable, 9-pole socket to 3-pole 31302497 You can also connect the terminal to the signal socket. - Page 20 Mounting and installation Connecting the camera to the terminal Connection to the terminal Camera Cable for connection to the voltage supply. Camera plug GND (blue) - Earth Socket for connection to the camera plug +12V (brown) - 12V voltage Procedure 1.
-
Page 21: Basic Control Principles
Basic control principles Getting to grips with the controls Basic control principles Getting to grips with the controls Terminal controls Rotary knob Keys Function keys Controls Rotary knob The rotary knob is located in the top right hand corner of the terminal. Control with the rotary knob may vary slightly between the different applications. -
Page 22: Initial Start-Up
Basic control principles Initial start-up Has no function Has no function Exit screen Cancel input Hide warning messages and alerts Open the "Selection menu" application Exit the "Selection menu" application Initial start-up Procedure This is how you start the terminal for the first time: ... -
Page 23: Configuration Sequence
Basic control principles Configuration sequence ⇨ The following screen will appear: ⇨ You have opened the "Service" application. 7. Configuring the terminal in the Service application [➙ 30] Configuration sequence Depending on the terminal that you have and which apps are activated, you will need to configure the terminal and its accessories in different points. -
Page 24: Restarting The Terminal
Basic control principles Restarting the terminal CAUTION Danger of pressing the function keys without care When pressing function keys, components of the connected machine can be moved or activated. As a result, people can be injured and property damaged. Before pressing a function key: ◦... -
Page 25: Inputting Data
Basic control principles Inputting data Inputting data All data must be entered on the data input screen. Data input screen Controls Below the characters, you will find 5 icons which will assist you when entering the data. Delete characters Move cursor to the left Move cursor to the right Confirm and finish input. - Page 26 Basic control principles Using two terminals Parameter Chapter Run as auxiliary terminal Setting the purpose of the terminal [➙ 46] Login as ISOBUS-UT Setting the purpose of the terminal [➙ 46] Connection with ISOBUS- Configuring the parameters for a vehicle profile [➙ 57] List of connections Configuring the list of connections [➙...
-
Page 27: Opening Applications In The Selection Menu
Opening applications in the selection menu Display layout in the selection menu Opening applications in the selection menu In the selection menu you can choose which application you wish to view on the display. You can open the selection menu at any time. This will not close the application currently running. Controls Open the selection menu Press again –... -
Page 28: Segmentation Of The Display
Opening applications in the selection menu Segmentation of the display Procedure ⇨ The function icon of the selected application is marked with a dot on the left hand side: - Set which application is to be displayed in the header of the split display. 2. - Page 29 Opening applications in the selection menu Segmentation of the display Function icon Function Swap applications between the header section and the main section of the display. 30302710-02-EN V7.20141016...
-
Page 30: Configuring The Terminal In The Service Application
Configuring the terminal in the Service application Controls in the Service application Configuring the terminal in the Service application In the "Service" application you can configure the terminal and activate the connected farm equipment. Once you have launched the "Service" application, you will be shown the following screen: Start screen of the "Service"... -
Page 31: Icons In The Service Application
Configuring the terminal in the Service application Icons in the Service application Function icon Meaning Only appears if… Delete file (red) Selected object can be deleted Configure GPS receiver GPS receiver is activated Configuring farmpilot farmpilot portal is activated Open the Diagnostics screen Diagnostics is activated Retrieve default values. -
Page 32: Basic Settings
Configuring the terminal in the Service application Basic settings ⇨ The following screen will appear: ⇨ The following screen will appear: - Click on "Service". The texts on this screen may appear in a foreign language. - Click on "Terminal-Einstellungen“ ("Display settings"). - Click on "Sprache"... -
Page 33: Gps Receiver
Configuring the terminal in the Service application GPS receiver Procedure 1. Switch to the "Display settings" screen: ⇨ The following screen will appear: | Service | Display settings - Change the desired parameter. List of parameters Parameter Sub-parameter Meaning Brightness Adjusting brightness for day mode Night Adjusting brightness for night mode... -
Page 34: Activating The Gps Receiver
Configuring the terminal in the Service application GPS receiver 7.5.1 Activating the GPS receiver In order to enable the GPS receiver, you must first select the driver for the connected receiver. A driver is a small program that controls connected device. The drivers for the devices supplied by Müller-Elektronik are pre-installed on the terminal. -
Page 35: Configuring The Gps Receiver
Configuring the terminal in the Service application GPS receiver ⇨ The installed drivers will appear. 3. Click on "GPS". ⇨ The icon will appear next to the active driver. 4. Mark the line with the correct driver. 5. Click on the selected line. ⇨... -
Page 36: Parameters For The Gps Receiver
Configuring the terminal in the Service application GPS receiver The driver of the ME Lightbar "LightBar" is deactivated. Otherwise the DGPS receiver cannot be configured. 1. Switch to the "GPS" screen: ⇨ The following screen appears: | Service | ⇨... - Page 37 Configuring the terminal in the Service application GPS receiver ▪ Name of the satellite. Which satellites are shown here is dependent on the driver and correction signal that you have activated. Steering This parameter activates the "Automatic steering" assistance function in the GPS receiver. If you want to connect your existing GPS receiver to a steering job computer, you have to configure the "Steering"...
-
Page 38: Rtk License For Smart-6L
Configuring the terminal in the Service application Configuring the "GPS TILT-Module" terrain compensation Format of correction signal for the SMART-6L DGPS/Glonass receiver. Only appears when "RTK radio" or "RTK GSM" correction signals have been selected. Potential values: ▪ RTCM V3 ▪... -
Page 39: Activating An External Lightbar
Configuring the terminal in the Service application Activating an external LightBar 6. Position the tractor on a ground surface that is known to be level. ⇨ The position of the tilt module on level ground is being calibrated. 7. Click on the line "Null point calibration". ⇨... -
Page 40: Operating The Camera
Configuring the terminal in the Service application Camera ⇨ The following screen will appear: 2. Click on "Camera". 3. Click on the "Camera" driver. ⇨ The following icon will appear next to the driver ⇨ The following function icon will appear in the start screen of the "Service" application: - Restart the terminal. -
Page 41: Configuring The Joystick Button Allocations
Configuring the terminal in the Service application Configuring the joystick button allocations You can press the function keys even if the camera is set to full screen mode. Procedure You have connected and activated the camera. 1. Switch to the "Camera" screen: ⇨... - Page 42 Configuring the terminal in the Service application Configuring the joystick button allocations LED colour (position of the side-switch on the Multi-function grip version multi-function grip) Button to which a function is assigned Multi-function grip software version Other buttons Function icon Meaning Version information Deletes all assignments...
-
Page 43: Adjusting The Brightness For Day Or Night Mode
Configuring the terminal in the Service application Adjusting the brightness for day or night mode ⇨ The following screen will appear: ⇨ The content of the screen will depend on the software of the connected joystick. 3. Select the button to which you want to assign the selected function. This is only an example. - Exit the screen. -
Page 44: Enabling And Disabling Applications
Configuring the terminal in the Service application Enabling and disabling applications – Activate day mode. ⇨ The brightness of the display will be adjusted immediately. – Activate night mode. 7.11 Enabling and disabling applications In the "Service" application you can activate and deactivate other applications that are installed on the terminal. -
Page 45: Activating Licenses For Full Versions Of The Software
Configuring the terminal in the Service application Activating licenses for full versions of the software ⇨ The icon preceding the name of the plugin indicates whether the plugin is activated or - Click on the desired plugin. deactivated. ⇨ The following notification will appear: - Exit screen. -
Page 46: Setting The Purpose Of The Terminal
Configuring the terminal in the Service application Setting the purpose of the terminal ⇨ The following screen will appear: 3. Enter the activation number in the "Key" field. You will receive the activation number on purchasing a software license. 4. Confirm ⇨... -
Page 47: Deleting Pools
Configuring the terminal in the Service application Deleting pools Procedure 1. Switch to the "Files" screen: ⇨ The following screen will appear: | Service | Files ⇨ The "Screencopy" and "Taskdata" folders will appear. 2. Click on "USB". ⇨ If these folders fail to appear, it is because you did not create them on the USB flash drive. ⇨... -
Page 48: Activating The "Diagnostics" Function
Configuring the terminal in the Service application Activating the "Diagnostics" function ⇨ The contents of the folder will be displayed. The names of the folders are the ISO IDs of the applications whose temporary data they store. 4. Select the desired file. ⇨... -
Page 49: Diagnostics
Configuring the terminal in the Service application Screenshots 7.16.1 Diagnostics The screen "Diagnostics" contains a variety of information that is primarily important to Customer Services. Customer Services can use this screen to determine which versions of the hardware and software are installed on your terminal. This will speed up the diagnostic process if errors arise. 7.17 Screenshots A screenshot is a photo of the screen being displayed. -
Page 50: Can-Trace Settings
Configuring the terminal in the Service application CAN-Trace settings ⇨ While the screenshot is being captured, the icon of a photo camera will be displayed in the centre of the display: ⇨ When the camera icon disappears, the screenshot has been created. ⇨... -
Page 51: Configuring Farmpilot
Configuring the terminal in the Service application Configuring farmpilot 11. If you specified USB as the storage location, verify that the file "StartupTrace.txt" exists on the USB flash drive: 12. If this file is missing, you must run the CAN-Trace function again. 13. -
Page 52: Configuring The Connection With Farmpilot
Configuring the terminal in the Service application Configuring farmpilot ⇨ The following screen will appear: 2. Click on "farmpilot". 3. Click on the "farmpilot" driver. ⇨ The following icon will appear next to the driver ⇨ The following function icon will appear in the start screen of the "Service" application: - Restart the terminal. -
Page 53: Configuring The Gprs Connection Manually
Configuring the terminal in the Service application Configuring farmpilot Username User name for farmpilot. Password Password for farmpilot. Provider Opens a screen where the GPRS connection can be configured. With most mobile phone providers, this configuration occurs automatically. If the access data for the GPRS connection differ with your provider, you can configure the connection manually. -
Page 54: Sending Diagnostic Data To The Portal
Configuring the terminal in the Service application Configuring farmpilot IP addresses of the first and second DNS servers Number Dialling code for the modem. Cannot be altered. Username User name for the GPRS connection. Password Password for the GPRS connection. Controls Function icon Function... -
Page 55: Activating The Iso Printer
Configuring the terminal in the Service application Activating the ISO printer ⇨ The following notification will appear: ⇨ The data are being uploaded to the portal. “DeviceidentData transfer“ ⇨ The data have been uploaded to the portal. 3. Wait until the "Sending DeviceIdentData" notification disappears. 4. -
Page 56: Tractor-Ecu Application
Tractor-ECU application Activating the ISO printer Tractor-ECU application The Tractor-ECU application is used to compile all of the information of the vehicle on which the terminal is mounted. Tractor-ECU can transfer this information to other apps (e.g. the position of the GPS receiver to TRACK-Leader or SECTION-Control) or to a connected ISOBUS job computer (GPS signal as a speed source). -
Page 57: Add A Vehicle Profile
Tractor-ECU application Add a vehicle profile Add a vehicle profile List of vehicle profiles Activated vehicle profile (the icon is marked in Information on the marked vehicle profile green) List of all available vehicle profiles Cursor Function Meaning icon Add a vehicle profile Vehicle profile cannot be deleted Delete the vehicle profile Return... - Page 58 Tractor-ECU application Configuring the parameters for a vehicle profile List of parameters Cursor Function Meaning Only appears if… icon Switch to the "Settings" screen Input the position of the GPS receiver [➙ 63]. Activate the vehicle profile The selected vehicle profile is not activated.
- Page 59 Tractor-ECU application Configuring the parameters for a vehicle profile This can be done in two ways: ▪ A sensor is connected to the terminal via the serial interface (port B). (e.g.: Operating position sensor, all sensors which can be connected via the 7-pin signal socket). The parameters for the sensors connected in this way do not have the suffix "via CAN".
- Page 60 Tractor-ECU application Configuring the parameters for a vehicle profile A working position sensor, is located on the front hitch or on the implement mounted on the front hitch. It is connected to the terminal via connector B. The working position sensor must be configured [➙...
-
Page 61: Calibrating The Speed Sensor
Tractor-ECU application Configuring the parameters for a vehicle profile Working width This value is transmitted to the ISOBUS-TC application to calculate the processed area. This parameter primarily enables you to document processed areas for non-ISOBUS implements if you are working in TRACK-Leader without an ISOBUS job computer, and if you also use the ISOBUS-TC App simultaneously with ISO-XML tasks. -
Page 62: Configuring A Working Position Sensor
Tractor-ECU application Configuring the parameters for a vehicle profile 5. When determining using the 100m method: The action sequence is shown on the terminal For manual input: - Enter the desired value. ⇨ You have calibrated the speed sensor. - Return to the vehicle profile. 8.2.2 Configuring a working position sensor If a working position sensor is connected to the terminal via connector B, you must tell the terminal... -
Page 63: Entering The Position Of The Gps Receiver
Tractor-ECU application Configuring the parameters for a vehicle profile 6. Select whether you want to invert the signal. Inversion only makes sense when you have selected "digital" or "ME-sensor Y". 7. If you have selected "digital" or "ME-sensor Y": - Return to the vehicle profile. If you have selected ”analog“: Move the hitch to the height at which the working position starts. -
Page 64: For Machines Fitted With An Isobus Job Computer
Tractor-ECU application Configuring the parameters for a vehicle profile ⇨ The following screen will appear: 5. Measuring the position of the GPS receiver. You will find out how to do this in the following subchapters. 6. Input the measured distances in the "Offset X" and "Offset Y" fields. ⇨... -
Page 65: Activating Vehicle Profiles
Tractor-ECU application Activating vehicle profiles The jobcomputer of the farm equipment in use is connected to the terminal In the jobcomputer the geometry of the farm equipment is configured. 1. Measure the distance between the attachment point of the attached or trailed implement and the GPS receiver. -
Page 66: Isobus-Tc Task Processing
ISOBUS-TC task processing Using ISOBUS-TC ISOBUS-TC task processing Using ISOBUS-TC The ISOBUS-TC application is an application from Mueller-Electronics which establishes an interface between the ISOBUS job computer, the TRACK-Leader application and the FMIS (Farm Management Information System) on the ISOBUS terminal. With ISOBUS-TC, you can: ▪... -
Page 67: Configuring The List Of Connections
ISOBUS-TC task processing Configuring the list of connections ⇨ The following screen will appear: ⇨ The mode will change with each click. - Select and click on the "Work with ISO-XML?" line. 3. Set the desired mode. ⇨ The set mode will be activated after restart. - Restart the terminal. - Page 68 ISOBUS-TC task processing Configuring the list of connections 1. Open the ISOBUS-TC application. ⇨ The following screen will appear: – Open the screen with the list of connection. ⇨ A list will appear with all of the equipment connected to the ISOBUS. The connectors appear between the equipment.
-
Page 69: Serial Interface Application
Serial Interface application Transfer target rates via LH5000 Serial Interface application The "Serial Interface" application is used to enable communication between the terminal and a non- ISOBUS compatible on-board computer. This interface enables you to use all of the applications together with the GPS signal and the on- board computers, in order to: ▪... -
Page 70: Switching Sections And Transferring Target Rates Via Asd
Serial Interface application Switching sections and transferring target rates via ASD 9. "Implement type" -> Select the implement with which you are working. 10. "Baud rate" -> normally "9600". The baud rate is dependent on the on-board computer. - Activate the machine profile. - Press and confirm in order to save the machine profile. - Page 71 Serial Interface application Switching sections and transferring target rates via ASD You can use the ASD protocol to transfer target rates to a prescription map or to switch sections. The degree to which you can use these functions will depend on the on-board computer. In order to be able to perform transfers using the ASD protocol, you will need to activate the "ASD- Protocol"...
- Page 72 Serial Interface application Switching sections and transferring target rates via ASD right, enter a positive value, and for a shift to the left, enter a negative value. 12. "Working Width" - The working width set in the on-board integrated display/controller. 13.
-
Page 73: File Server Application
File Server application File Server application The File Server application is used to define a save location on the terminal. This save location can be used by all ISOBUS implements which do not have their own USB interface. This enables the updating of certain ISOBUS job computers, and also the possibility of saving, for example protocols or error messages. -
Page 74: Maintenance And Servicing
Maintenance and servicing Servicing and cleaning the terminal Maintenance and servicing NOTICE This product does not contain any components which require maintenance or repair! Never unscrew the casing! 12.1 Servicing and cleaning the terminal ▪ Press the keys with your fingertips. Avoid using your finger nails. ▪... -
Page 75: Checking The Software Version
Maintenance and servicing Checking the software version ▪ When attaching the antenna, pay attention to proper installation, including a sound ground connection between the antenna and the vehicle's ground wire. For information on wiring and installation as well as the maximum allowable current consumption, please also refer to the installation guide provided by the machine manufacturer. -
Page 76: Pin Assignment Of Port A
Maintenance and servicing Technical specifications Parameter Value devices. Display VGA TFT color display; display size (diagonal): 14.5 cm ; resolution: 640 x 480 pixels Processor 32-bit ARM920T up to 400 MHz 64 MB SDRAM Boot USB 128 MB Internal clock Buffered by capacitor, keeps the time for 2 weeks without an external power supply. -
Page 77: Pin Assignment Of Port B
Maintenance and servicing Technical specifications is compliant with TBC_Pwr in ISO 11783. When the terminal is switched on, this pin is under voltage (supply voltage minus approx. 1.2V). 12.5.3 Pin assignment of port B The pin assignment of port B is dependent on the hardware version of the terminal. Terminals with hardware versions from 3.0.0 9-pin. -
Page 78: Pin Assignment Of Port C
Maintenance and servicing Technical specifications 12.5.4 Pin assignment of port C Port C is an RS232 interface CAUTION Damage to the equipment caused by short circuit Pin 4 of port C is live. The voltage depends on the operating voltage of the terminal and is used to supply the DGPS Receiver from Müller Elektronik. -
Page 79: Pin Assignment Of Camera Ports 1 And 2
Maintenance and servicing Technical specifications When connected to a 24 V battery, the terminal will transfer approx. 23.3 V to the connected equipment. The use of a GPS Receiver only requires the signals RxD and TxD as well as GND. 12.5.5 Pin assignment of camera ports 1 and 2 Ports 1 and 2 are used to connect an analogue camera. -
Page 80: Notes
Notes Notes 30302710-02-EN V7.20141016...
Need help?
Do you have a question about the TRACK Guide II and is the answer not in the manual?
Questions and answers
renseignement